AWS node
An AWS node lets you interact with AWS services directly from your flow. Use it to retrieve data, create or modify resources, and perform actions across AWS services. The output of one node becomes the input for the next, allowing you to define a sequence of actions and operations.
From the flow editor, use the node's menu (⋮) to Edit, Duplicate, Disable or Enable the step, or Delete the node. See Manage nodes.
Find an action
When adding an AWS node to a flow, select AWS as the provider and then find an action by searching or browsing within AWS services. In addition, a template node allows you to add a pre-built group of actions to the current flow.
Configure an action
Selecting an action node will open a side panel with three tabs for configuration:
-
Parameters: This tab shows the service and action you've chosen and the option to change. You also configure approval settings on this tab. The parameters available vary with service and action. For field types and how to reference values from previous nodes (including a whole list or map), see Node parameters.
-
Permissions: This tab helps you verify whether you have the required permissions to perform the action and provides instructions if you don't. See also APIs in CloudFlow.
Require approval
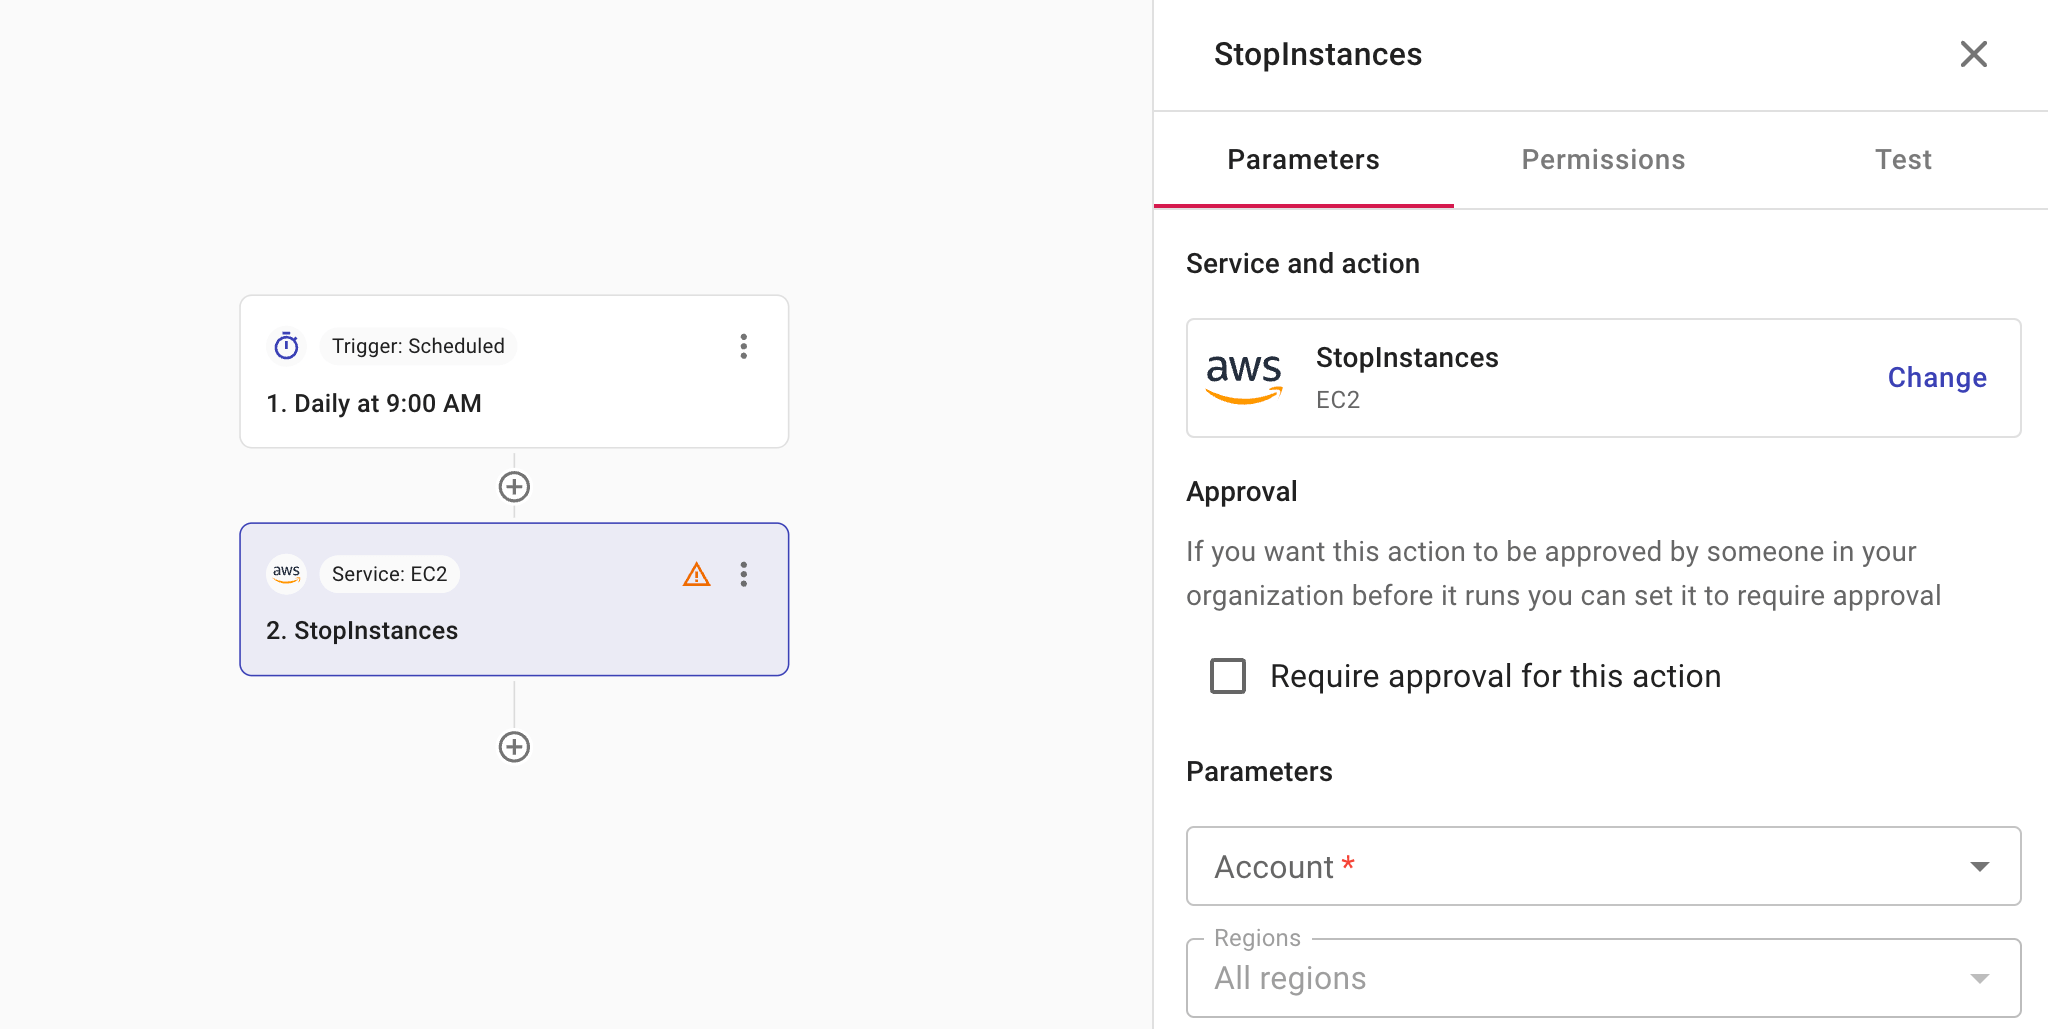
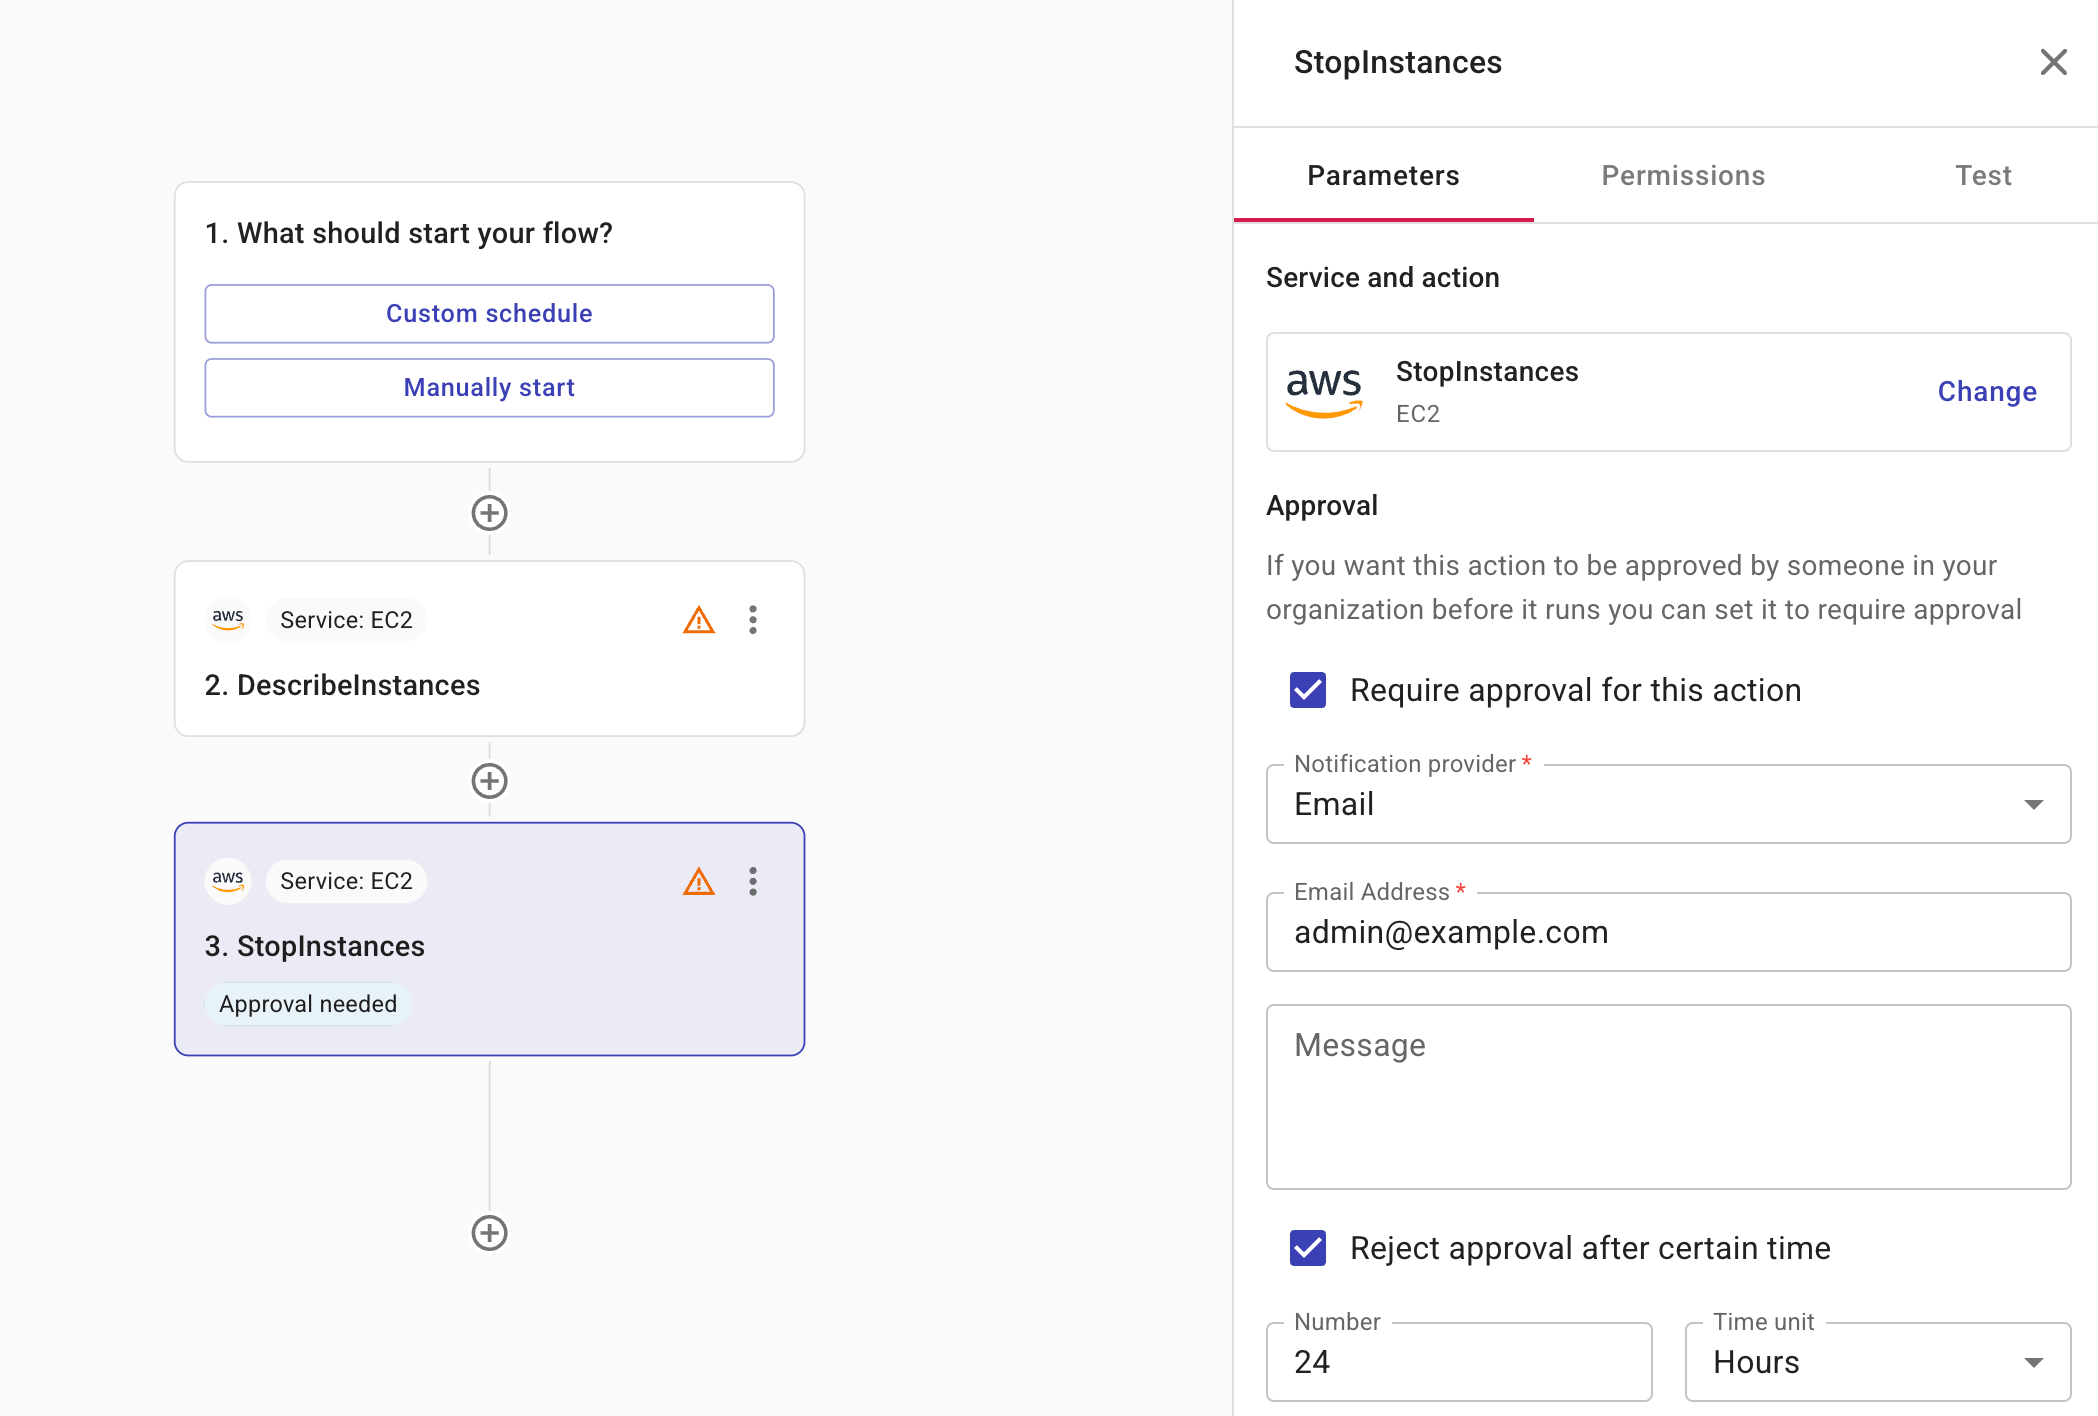
If an action should be approved before its execution, select Require approval for this action on the Permissions tab.
-
Notification provider: Specifies whether to notify the approver via Slack or email. For the former, you should have created a shared Slack channel with DoiT.
-
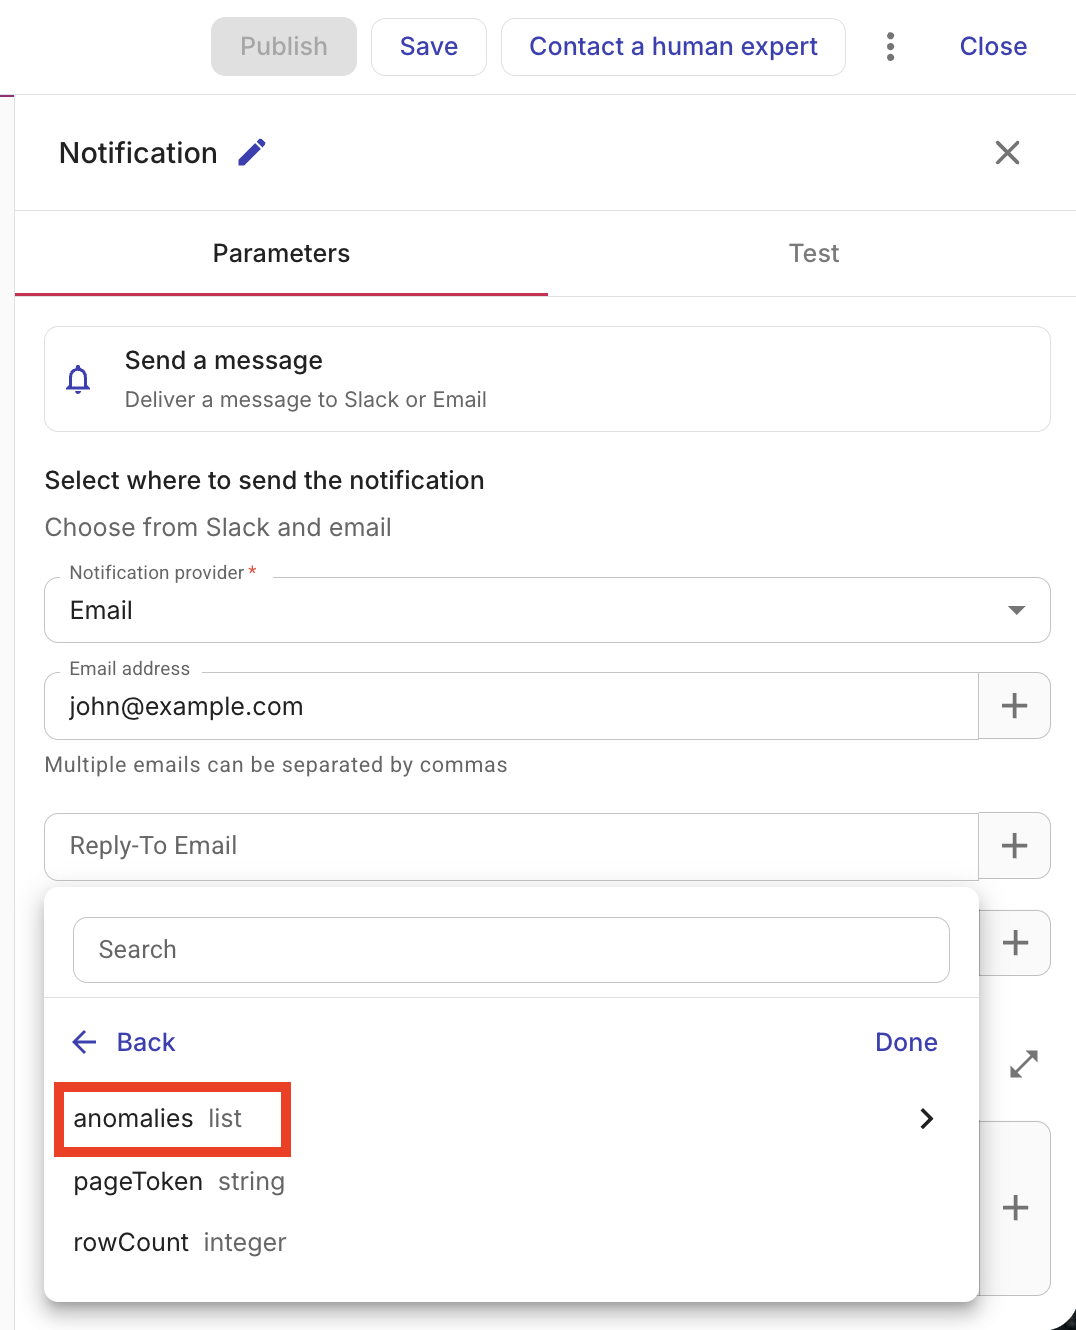
Message (optional): A message for the approver. You can add fields from previous nodes to your message. When the message is created, the data from the field is displayed in the message. This is useful because it provides recipients with the details they need to make a decision without having to navigate to the system and manually search for the relevant information. An array of fields are displayed as a comma-separated list. For example,
Instance ID: i-123,i-466. -
Reject approval after certain time (optional): Limits for how long the action will wait for an approval. Possible time units are Hours, Days, Weeks, and Months. For example, you can set that an approver must approve/reject the action within 24 hours. If the approver takes no action before the specified time period expires, the action is automatically rejected.
Add a waiter
A waiter ensures that an AWS action in a flow is complete before the flow proceeds to the next step. Many AWS operations are asynchronous: the API call returns before the resource reaches its final state. A waiter polls until that state is reached, so you can rely on the result in later nodes. This is useful when you create or change resources and need them ready before the next step, for example, waiting for an EC2 instance to be in running state before attaching a volume or sending a notification.
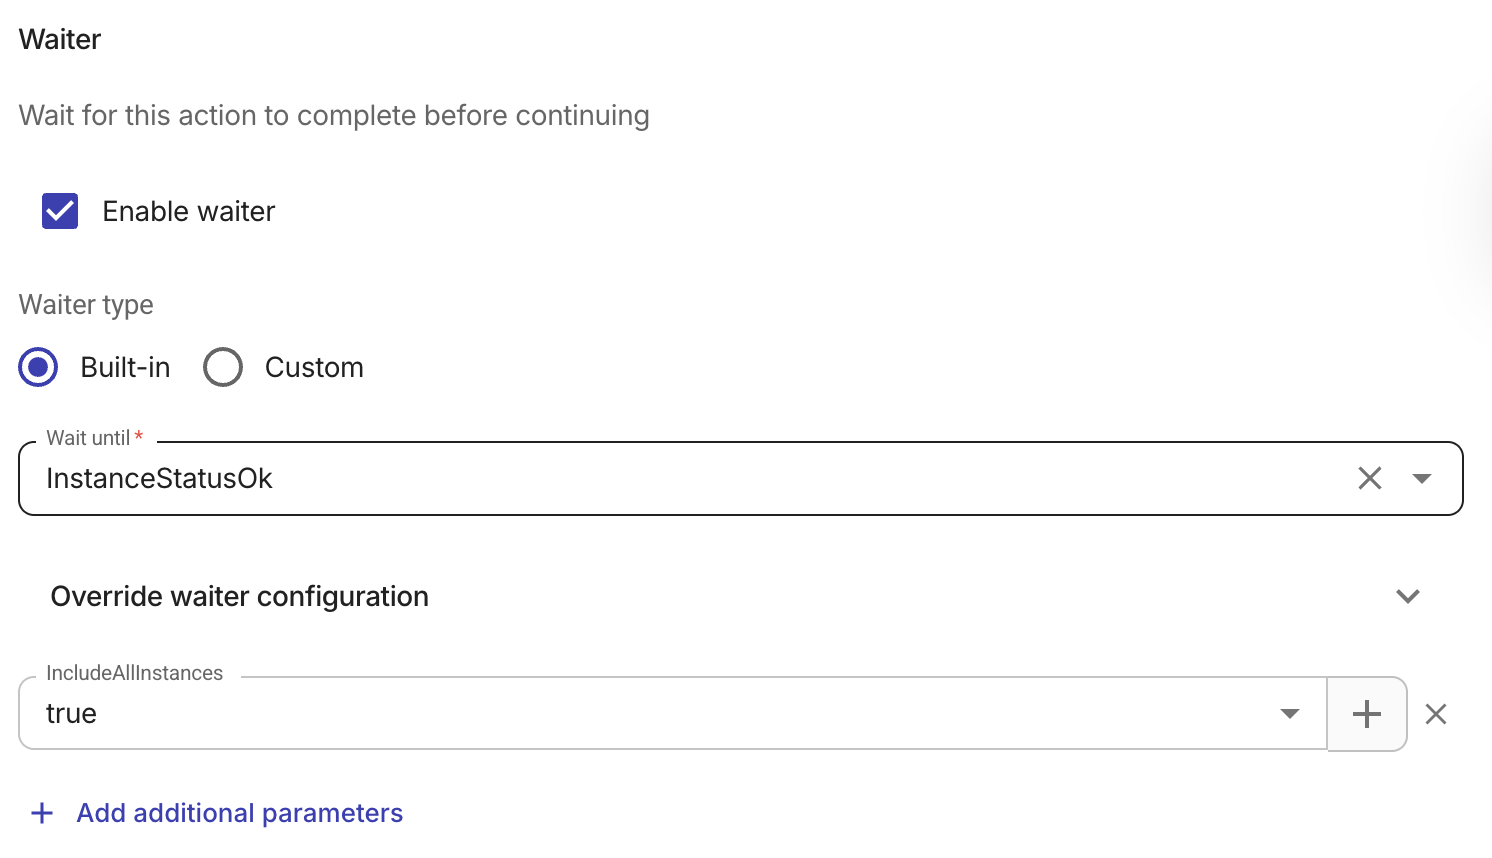
If an action requires a waiter, select Enable waiter. After enabling the waiter, choose a Waiter type.
-
Built-in: Use a predefined waiter provided by the AWS service. Built-in waiters are available for many common actions and handle polling logic automatically. If no built-in waiters exist for the selected action, this option is unavailable and the waiter type defaults to Custom.
-
Custom: Define your own polling condition using a JMESPath expression. Use this when no built-in waiter exists for your action, or when you need to wait for a specific condition that the built-in waiters don't cover. Custom waiters are not available for create and generate actions. This is because a custom waiter works by re-running the same action on each poll until your JMESPath condition is met. As create and generate calls are not idempotent, repeating them could create duplicate resources or cause other unwanted side effects. For those operations, use a built-in waiter when the action supports one, or perform the create/generate once and use a separate read or describe action with a custom waiter.
Built-in waiter
-
Wait until: Choose the waiter for this action. The dropdown lists only waiters that apply to the current AWS service and action (for example, InstanceRunning for EC2 RunInstances).
-
(Optional) Parameters: The waiter needs to know which resource to poll (for example, which EC2 instance or which S3 bucket). In this section you supply those values. You can reference fields from the current action's output or from earlier nodes in the flow — for example, an instance ID returned by RunInstances or a bucket name from a previous step.
-
(Optional) Override waiter configuration: Adjust how long and how often the waiter polls:
-
Max wait time: Maximum time (in seconds) to wait before failing. The default is 20 minutes.
-
Min delay / Max delay: Minimum and maximum seconds between poll attempts. Tuning these can speed up waiters for fast operations or reduce load for slow ones.
-
-
(Optional) + Add additional parameters: Add one or more parameters and set each value by entering it manually or by inserting a field from the current action or an earlier node using the + button. You might add parameters when the waiter must know exactly which resource to check. For example, for an InstanceRunning waiter you can add an InstanceId parameter and reference the instance ID from the RunInstances output above so the flow waits for that specific instance before continuing.
TipFor more detail on these options, see WaiterConfiguration in the AWS SDK documentation.
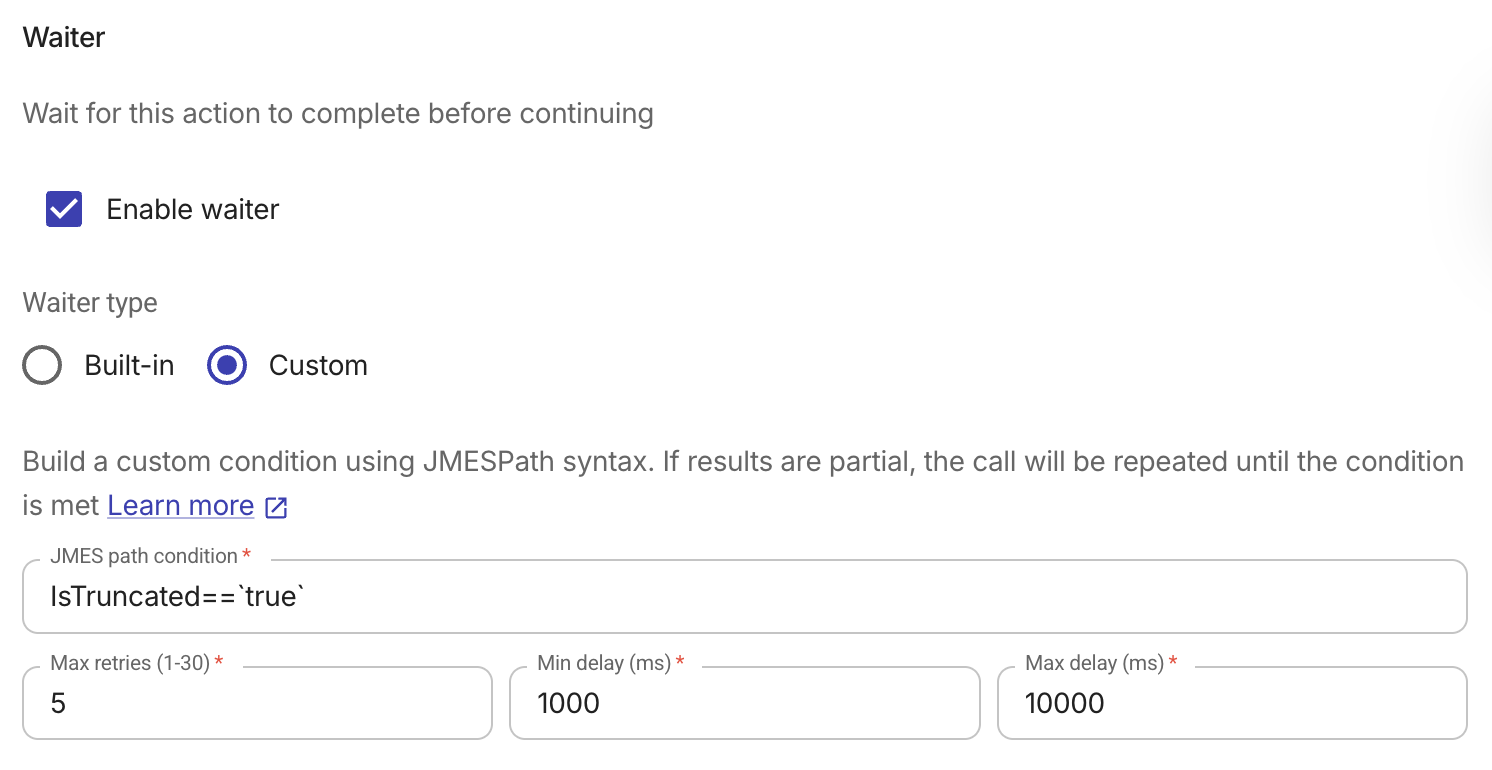
Custom waiter
A custom waiter lets you define your own polling condition when no built-in waiter is available or when you need to check for a specific state.
Custom waiters are not available for create and generate actions. This is because a custom waiter works by re-running the same action on each poll until your JMESPath condition is met. As create and generate calls are not idempotent, repeating them could create duplicate resources or cause other unwanted side effects. For those operations, use a built-in waiter when the action supports one, or perform the create/generate once and use a separate read or describe action with a custom waiter.
For example, when creating a new EC2 instance, it is best to use a two-step process to ensure your flow runs smoothly. First, use one node to create the instance. Then, add a second node to check its status. For example, to avoid accidentally creating duplicate servers while waiting for one to start:
-
Create the instance: Use a RunInstances node to launch your instance. Do not add a custom waiter here. This node should only run once to place the order.
-
Check the status: Add a DescribeInstances node immediately after. Use the Instance ID from the first node to tell this node exactly which server to look at. Enable a custom waiter on this second node. Set it to check for your required status, for example,
running.
By keeping these steps separate, you can tell the second node to wait and periodically check on the instance until it reaches the running state. This prevents the system from accidentally trying to create a second instance while it waits for the first one to wake up. Once the second node confirms the instance is ready, your flow will automatically move on to the next task.
-
JMESPath condition: Define a condition using JMESPath syntax. The expression is evaluated against the action result and must return a boolean. If the condition is not yet met, the action is called again after a delay; this repeats until the condition is met or max retries is reached. For example,
status == 'RUNNING'waits until a resource reports that status. -
Max retries (1–30): Maximum number of times the action is re-executed before failing. The default is 5.
-
Min delay (ms) / Max delay (ms): Delay between attempts uses exponential backoff between these bounds. Min delay default is 1000 ms; max delay default is 10000 ms.
Waiter example
A typical pattern is to create a resource with an AWS action, wait until it is ready, then continue with another action or notification:
-
Trigger: For example, a schedule or manual trigger.
-
AWS node: Run an action that creates or modifies a resource (for example, EC2 RunInstances, S3 CreateBucket). Enable a waiter and choose the appropriate Wait until value (for example, InstanceRunning, BucketExists).
-
Next nodes: Use the node output in a Notification node, another AWS action (for example, attach a volume using the instance ID), or a Branch node to make decisions based on the result.
Without a waiter, the next node might run while the resource is still pending and fail or behave incorrectly. With a waiter, the flow continues only after the resource reaches the desired state.
Test
Select Test to test the node.