AWS ノード
AWS ノードを使用すると、フローから直接 AWS サービスと連携できます。データの取得、リソースの作成・変更、複数の AWS サービスにまたがるアクションの実行に利用します。1 つのノードの出力は次のノードの入力となり、一連のアクションとオペレーションを定義できます。
フローエディタでは、ノードのメニュー (⋮) から、そのステップを Edit、Duplicate、Disable または Enable したり、ノードを Delete できます。詳しくは ノードの管理 を参照してください。
アクションを探す
フローに AWS ノードを追加する際、プロバイダとして AWS を選択し、検索または AWS サービス内を参照してアクションを探してください。�加えて、テンプレートノードを使用すると、あらかじめ構成されたアクションのグループを現在のフローに追加できます。
アクションを設定する
アクションノードを選択すると、設定用の 3 つのタブを持つサイドパネルが開きます。
-
Parameters: このタブには、選択したサービスとアクション、およびそれを変更するオプションが表示されます。このタブで承認設定も構成します。利用可能なパラメータはサービスとアクションによって異なります。フィールドタイプや、前のノードの値 (一覧やマップ全体を含む) を参照する方法については、ノードパラメータを参照してください。
-
Permissions: このタブでは、そのアクションを実行するために必要な権限を保持しているかどうかを確認でき、保持していない場合の手順を提示します。CloudFlow の API も参照してください。
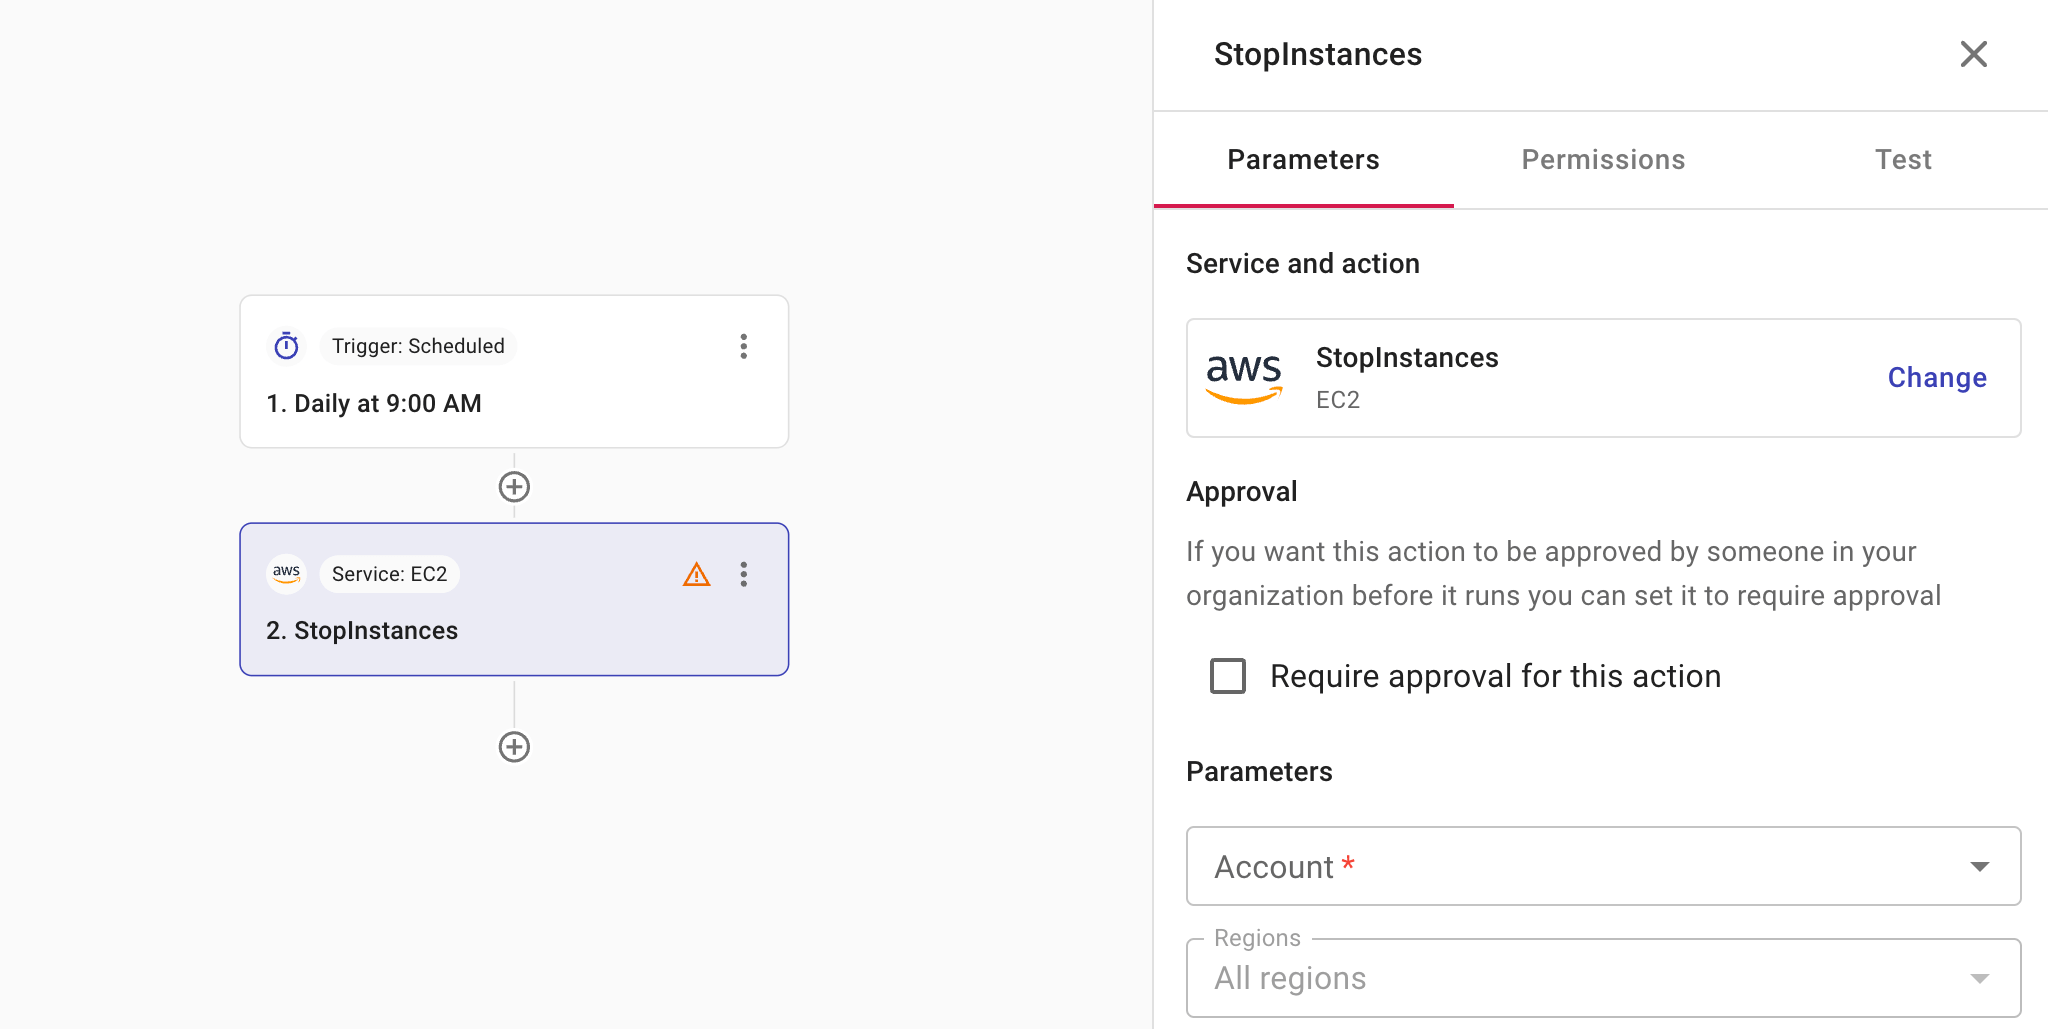
承認を必須にする
アクションを実行する前に承認が必要な場合は、Permissions タブで Require approval for this action を選択してください。
-
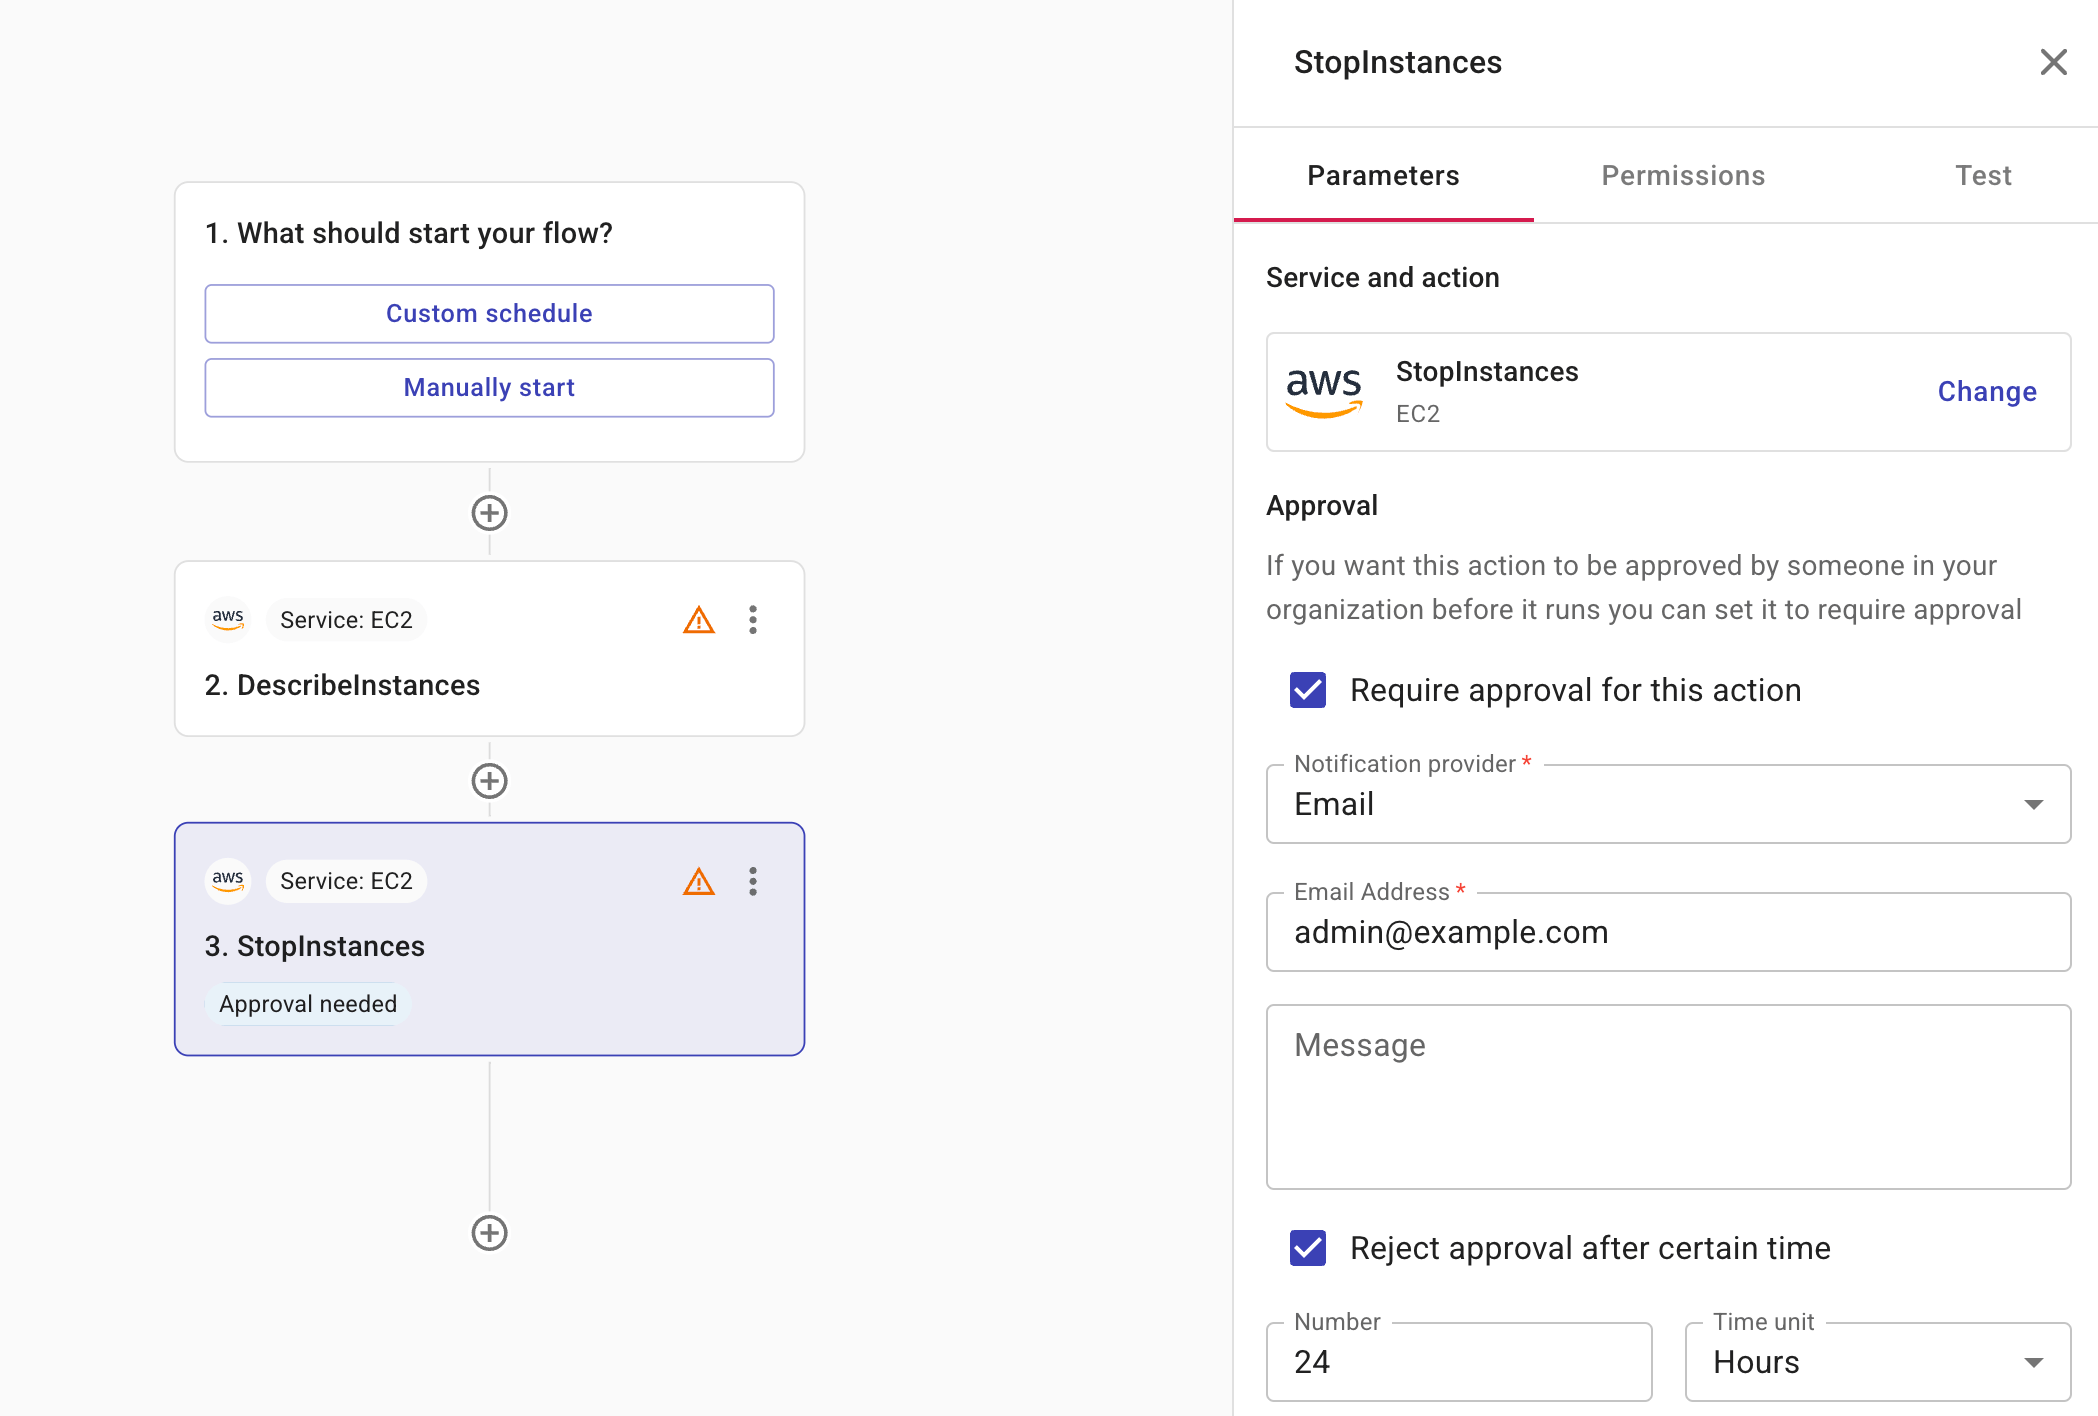
Notification provider: 承認者への通知方法として Slack またはメールを指定します。Slack を選択する場合は、事前に DoiT との共有 Slack チャンネルを作成しておく必要があります。
-
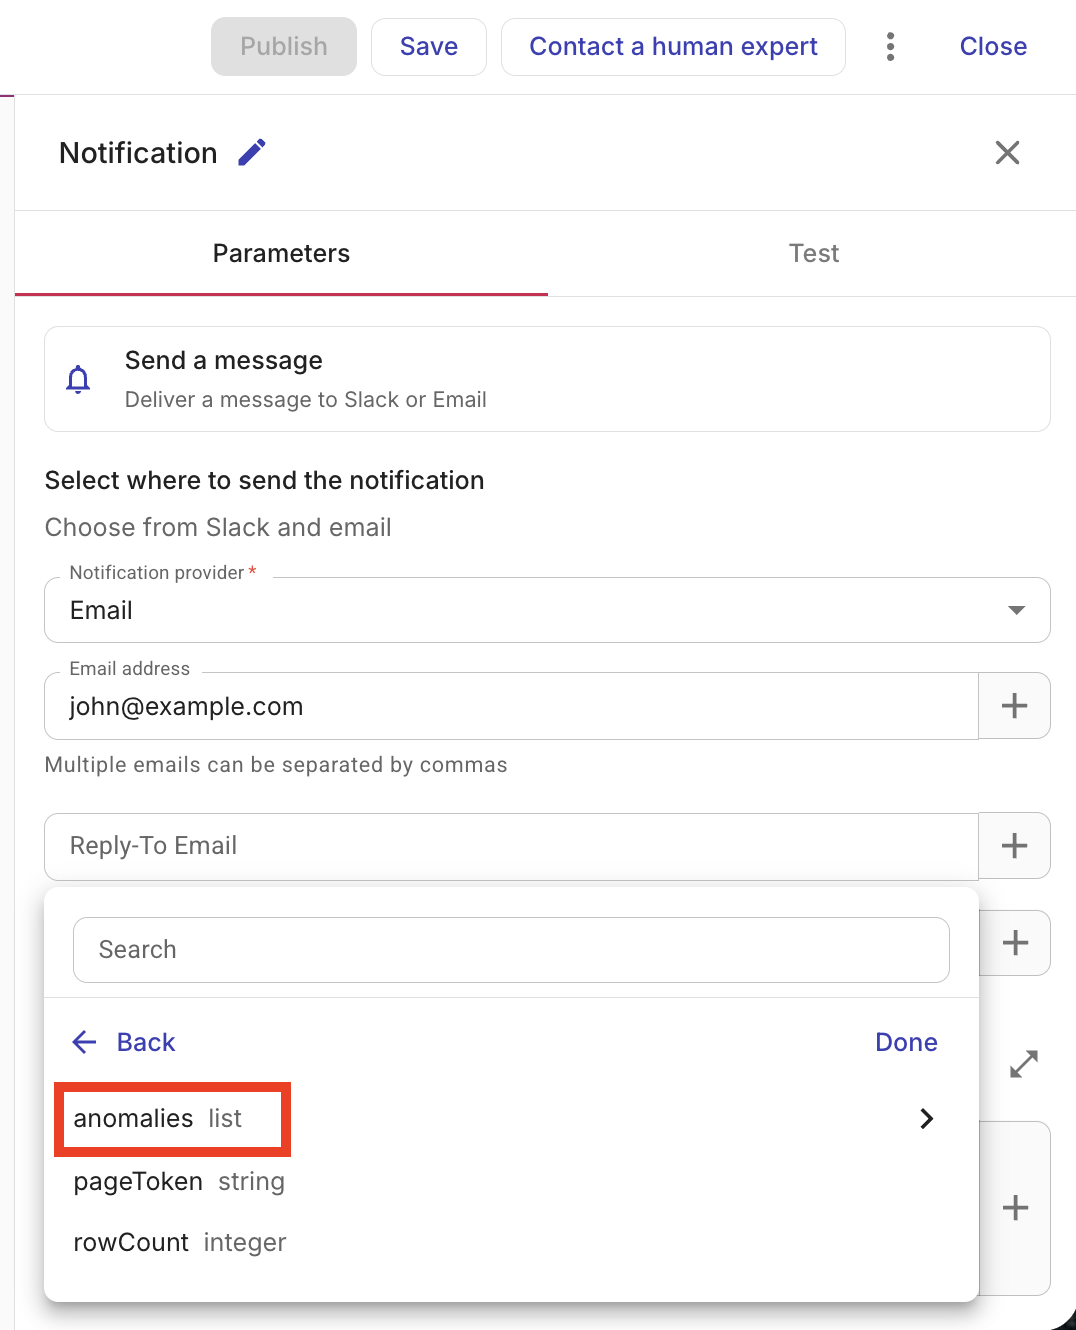
Message (任意): 承認者へのメッセージです。メッセージには、前のノードのフィールドを追加できます。メッセージが作成されると、そのフィールドのデータがメッセージ内に表示されます。これにより、受信者はシステムに移動して手作業で情報を検索することなく、意思決定に必要な詳細を確認できて便利です。フィールドの配列はカンマ区切りのリストとして表示されます。例:
Instance ID: i-123,i-466 -
Reject approval after certain time (任意): アクションが承認を待機する時間の上限です。利用可能な時間単位は Hours、Days、Weeks、Months です。例えば、承認者が 24 時間以内にアクションを承認または拒否する必要があるように設定できます。指定した期間が経過するまでに承認者が何も行わない場合、そのアクションは自動的に拒否されます。
Waiter を追加する
Waiter は、フローが次のステップに進む前に、フロー内の AWS アクションが完了していることを保証します。多くの AWS オペレーションは非同期であり、API コールは、リソースが最終状態に到達する前に戻ります。Waiter はその状態に到達するまでポーリングを行うため、後続ノードで結果に依存できます。これは、リソースを作成または変更し、次のステップの前にそれらを利用可能な状態にする必要がある場合に便利です。例えば、ボリュームのアタッチや通知送信の前に、EC2 インスタンスが running 状態になるまで待機する場合などです。
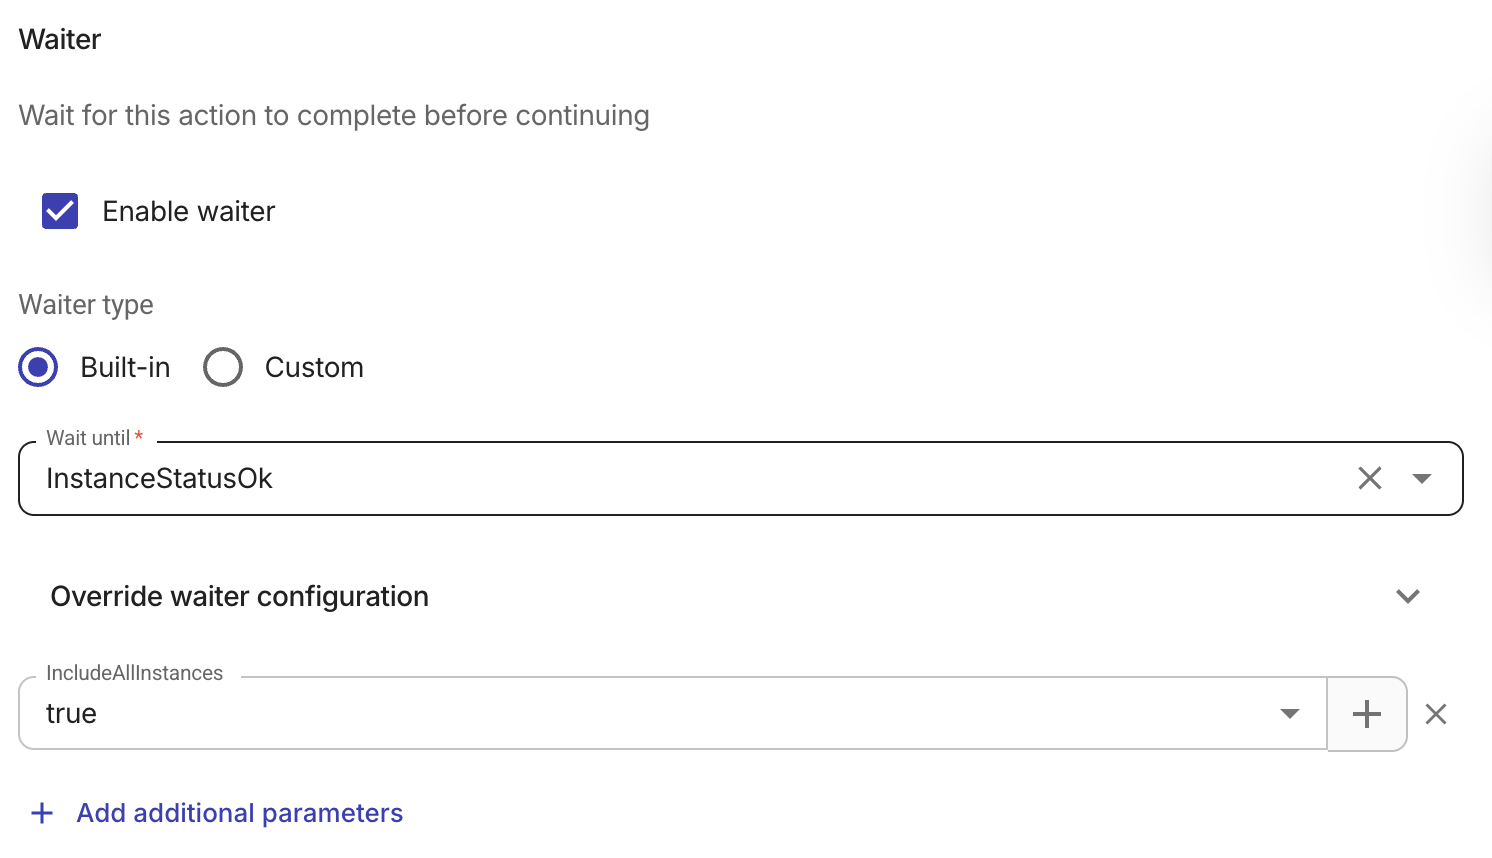
アクションに Waiter が必要な場合は、Enable waiter を選択してください。Waiter を有効化したら、Waiter type を選択します。
-
Built-in: AWS サービスが提供するあらかじめ定義された Waiter を使用します。組み込み Waiter は多くの一般的なアクションで利用でき、ポーリングロジックを自動的に処理します。選択したアクションに対して利用可能な組み込み Waiter が存在しない場合、このオプションは利用できず、Waiter type は自動的に Custom になります。
-
Custom: JMESPath 式を使用して独自のポーリング条件を定義します。アクション用の組み込み Waiter が存在しない場合や、組み込み Waiter ではカバーされない特定の条件を待機する必要がある場合に使用します。Custom Waiter は create および generate アクションには利用できません。これは、Custom Waiter が、JMESPath 条件が満たされるまで、各ポーリングで同じアクションを再実行することで動作するためです。create および generate コールは冪等ではないため、繰り返し実行すると重複したリソースが作成されたり、その他の望ましくない副作用が発生する可能性があります。このようなオペレーションでは、アクションがサポートしている場合は組み込み Waiter を使用するか、create/generate を 1 回だけ実行し、Custom Waiter を使用する別の read または describe アクションを利用してください。
Built-in Waiter
-
Wait until: このアクション用の Waiter を�選択します。ドロップダウンには、現在の AWS サービスとアクションに適用できる Waiter のみが表示されます (例: EC2 RunInstances に対する InstanceRunning など)。
-
(任意) Parameters: Waiter がどのリソースをポーリングするか (どの EC2 インスタンスか、どの S3 バケットかなど) を指定する必要があります。このセクションでその値を入力します。現在のアクションの出力やフロー内の前のノードのフィールドを参照できます。例えば、RunInstances によって返されたインスタンス ID や、前のステップのバケット名などです。
-
(任意) Override waiter configuration: Waiter がポーリングする時間と頻度を調整します。
-
Max wait time: 失敗と見なすまでの最大待機時間 (秒)。デフォルトは 20 分です。
-
Min delay / Max delay: ポーリング試行間の最小および最大秒数です。これらを調整することで、処理が速いオペレーション向けには Waiter を高速化し、処理が遅いオペレーション向けには負荷を軽減できます。
-
-
(任意) + Add additional parameters: 1 つ以上のパラメータを追加し、それぞれの値を手動で入力するか、+ ボタンを使用して現在のアクションまたは前のノードのフィールドを挿入して設定します。Waiter がチェック対象のリソースを正確に知る必要がある場合にパラメータを追加することがあります。例えば、InstanceRunning Waiter の場合、InstanceId パラメータを追加し、上記の RunInstances の出力からインスタンス ID を参照することで、その特定のインスタンスが起動するまでフローが待機するようにできます。
ヒントこれらのオプションの詳細については、AWS SDK ドキュメントの WaiterConfiguration を参照してください。
Custom Waiter
Custom Waiter を使用すると、組み込み Waiter が利用できない場合や、特定の状態を確認する必要がある場合に、独自のポーリング条件を定義できます。
Custom Waiter は create および generate アクションには利用できません。これは、Custom Waiter が、JMESPath 条件が満たされるまで、各ポーリングで同じアクションを再実行することで動作するため�です。create および generate コールは冪等ではないため、繰り返し実行すると重複したリソースが作成されたり、その他の望ましくない副作用が発生する可能性があります。このようなオペレーションでは、アクションがサポートしている場合は組み込み Waiter を使用するか、create/generate を 1 回だけ実行し、Custom Waiter を使用する別の read または describe アクションを利用してください。
例えば、新しい EC2 インスタンスを作成する場合、フローを円滑に実行するには 2 段階のプロセスを使用するのが最適です。まず 1 つ目のノードでインスタンスを作成します。次に、2 つ目のノードを追加してステータスを確認します。例えば、1 台のインスタンスの起動を待っている間に誤って重複するサーバーを作成してしまうことを防ぐためです。
-
インスタンスを作成する: RunInstances ノードを使用してインスタンスを起動します。ここでは Custom Waiter を追加しないでください。このノードは注文を 1 回だけ行うために実行します。
-
ステータスを確認する: 直後に DescribeInstances ノードを追加します。1 つ目のノードの Instance ID を使用して、このノードにどのサーバーを参照すべきかを正確に伝えます。2 つ目のノードで Custom Waiter を有効にし、例えば
runningなど、必要なステータスをチェックするように設定します。
これらのステップを分けておくことで、2 つ目のノードに対し、インスタンスが running 状態になるまで待機し、定期的に確認するよう指示できます。これにより、1 台目のインスタンスが起動するのを待っている間に、誤って 2 台目のイ��ンスタンスを作成しようとしてしまうことを防げます。2 つ目のノードがインスタンスの準備完了を確認すると、フローは自動的に次のタスクに進みます。

-
JMESPath condition: JMESPath 構文を使用して条件を定義します。式はアクション結果に対して評価され、boolean を返す必要があります。条件がまだ満たされていない場合は、遅延後にアクションが再度呼び出されます。これは条件が満たされるか、最大リトライ回数に達するまで繰り返されます。例えば、
status == 'RUNNING'は、リソースがそのステータスを報告するまで待機します。 -
Max retries (1–30): 失敗と見なす前にアクションを再実行する最大回数です。デフォルトは 5 です。
-
Min delay (ms) / Max delay (ms): 試行間の遅延は、これらの範囲内で指数バックオフを使用します。Min delay のデフォルトは 1000 ms、Max delay のデフォルトは 10000 ms です。
ウェイターの例
一般的なパターンとして、AWS アクションでリソースを作成し、そのリソースが準備完了になるまで待機してから、別のアクションまたは通知を続けます。
-
Trigger: 例として、schedule または manual trigger。
-
AWS ノード: リソースを作成または変更するアクションを実行します(例: EC2 RunInstances、S3 CreateBucket)。ウェイターを有効にし、適切な Wait until(〜まで待機) の値を選択します(例: InstanceRunning、BucketExists)。
-
次のノード: ノードの出力を Notification ノード、別の AWS アクション(例: インスタンス ID を使用してボリュームを添付)、または結果に基づき判断を行うための Branch ノード で使用します。
ウェイターを使用しない場合、次のノードはリソースがまだ保留中の状態で実行され、失敗したり、正しく動作しなかったりする可能性があります。ウェイターを使用すると、リソースが希望する状態に到達した後にのみフローが続行されます。
テスト
ノードをテストするには、Test を選択してください。