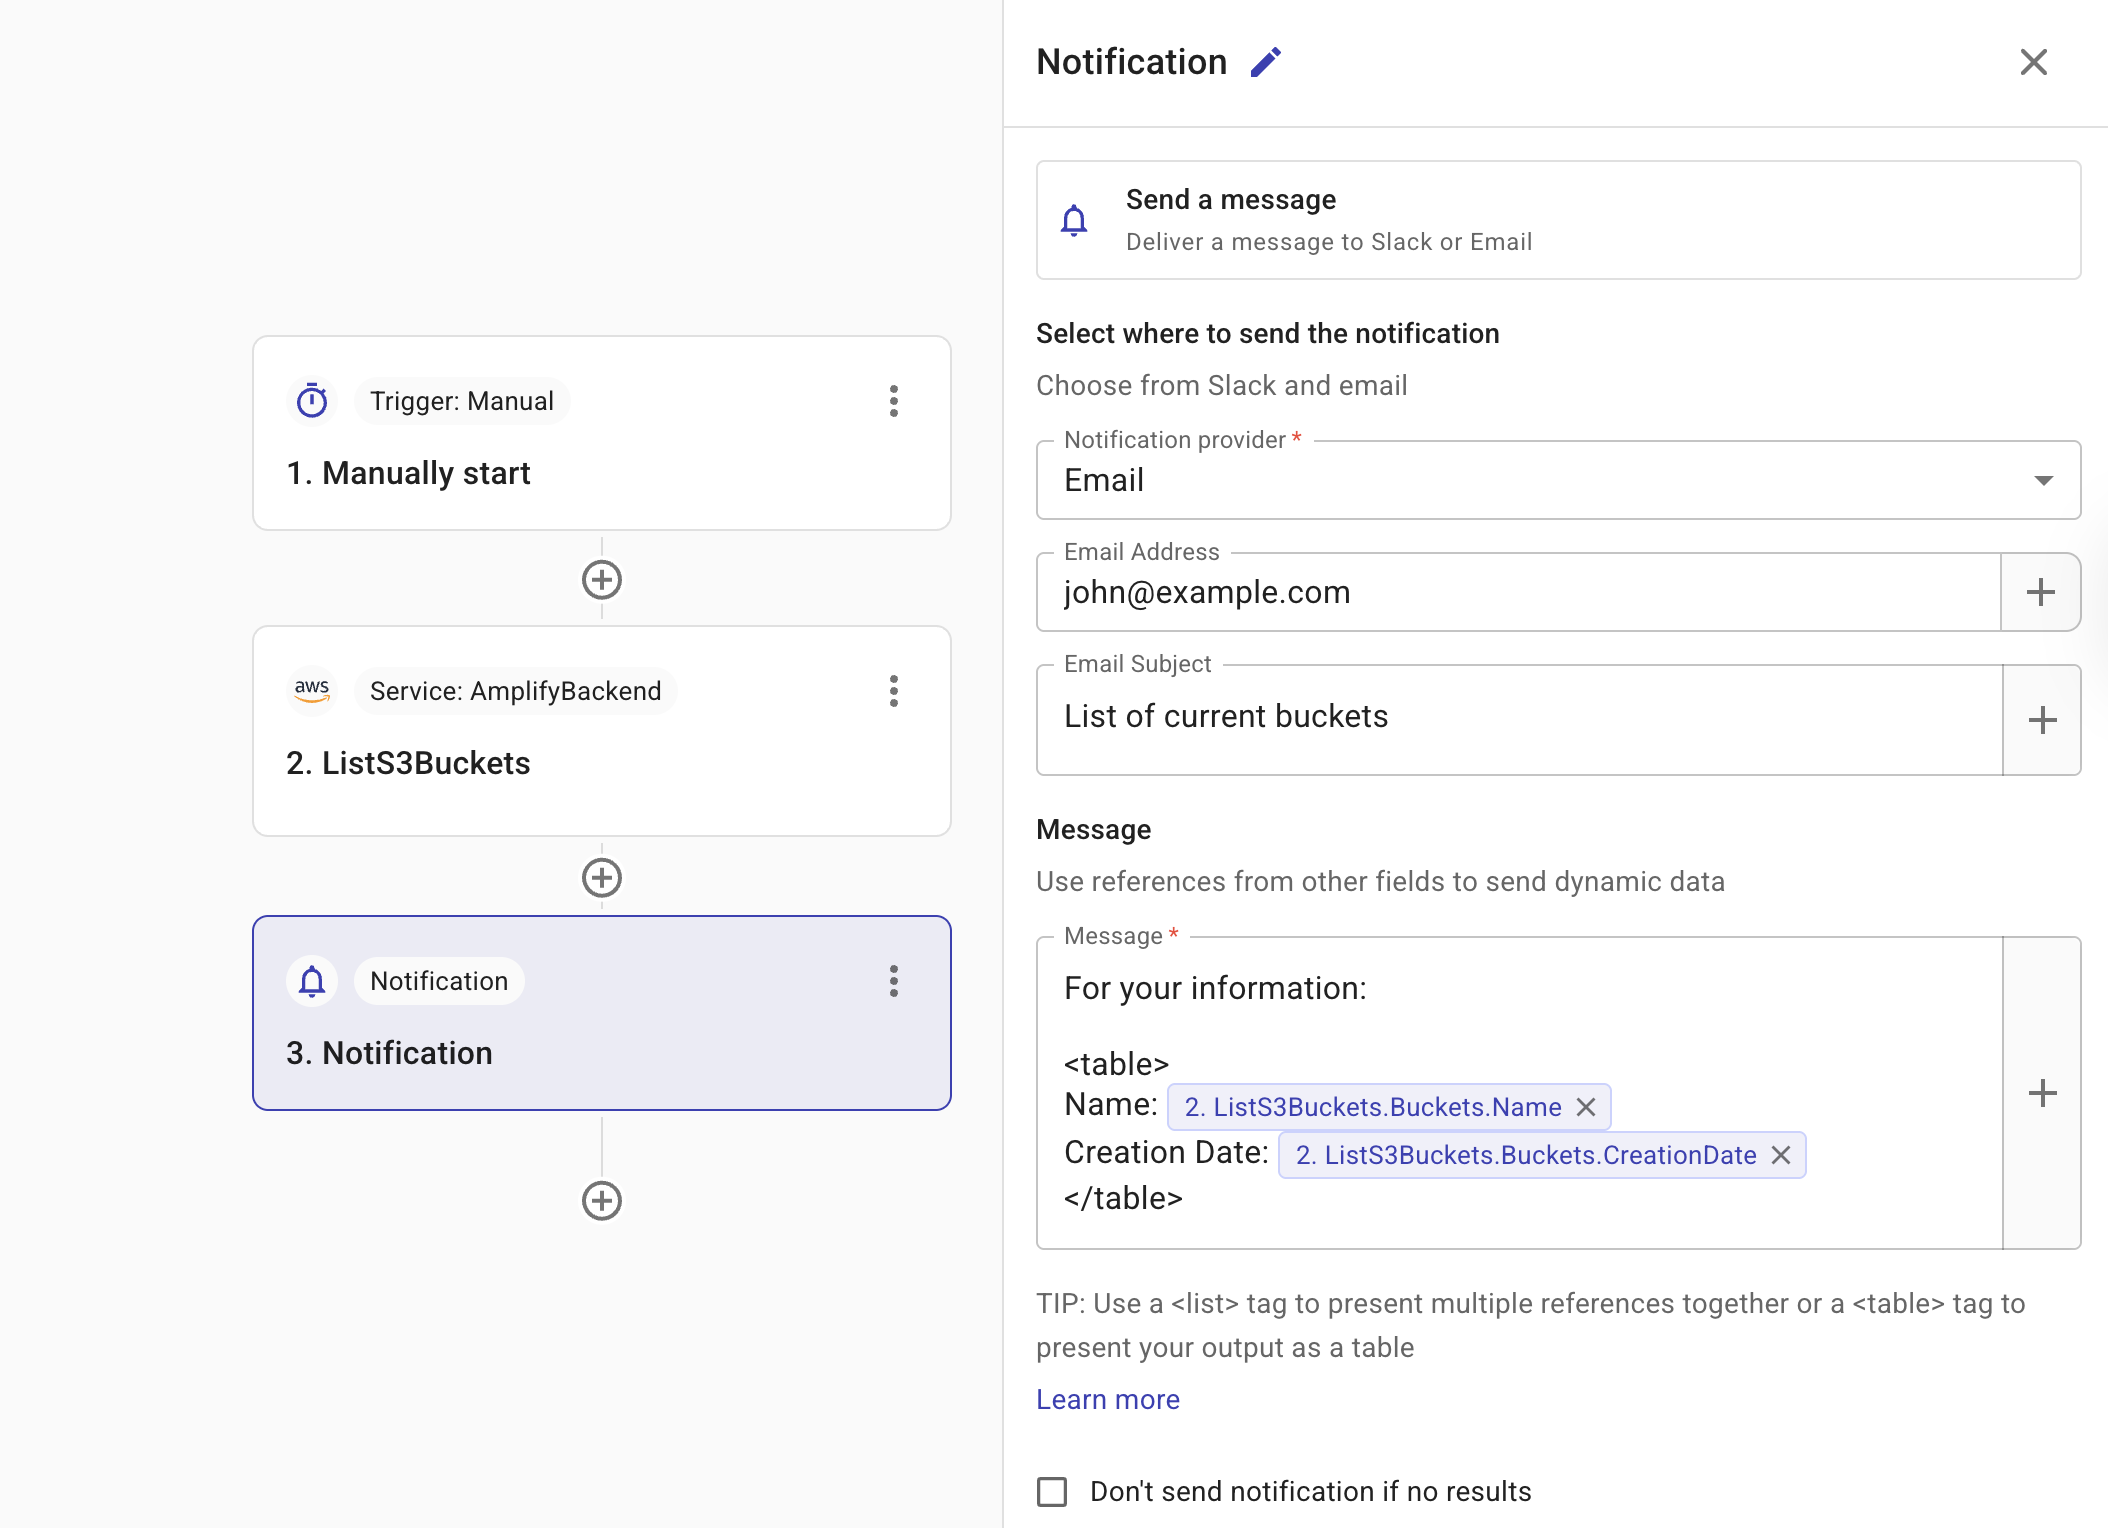
Notification node
A notification node is used to compose and send the data from previous nodes in your flow to email or Slack. For example, you may have a flow that retrieves a list of active cost anomalies. You can add a notification node to send the list to the relevant stakeholders, enabling efficient identification and faster resolution. Furthermore, you may have a flow used solely for sharing information. This is useful for sending both on-demand or scheduled information, outside the context of a specific action or event. For example, a daily flow that sends a summary of key performance indicators to the leadership team or a scheduled flow that reminds team members of an approaching deadline.
Configure provider-specific fields
Once you select a notification provider, the relevant configuration fields appear.
Slack
To notify the approver via Slack, you must create a shared Slack channel with DoiT. In Slack channel, select the Slack channel that needs to be notified.
Email
To notify an approver via email, configure the following fields:
-
Email Address: The Email address of the intended recipient. By default, the Email Address is automatically prefilled with your own email address.
-
Email Subject: A short description of the email. Select the plus icon (+) to search for the fields you want to add to the subject.
Configure the Message field
You must configure the message that you want to send to your approvers.
Select the plus icon (+) to search for fields from previous nodes to add to your message. When the message is created, the data from the field is displayed in the message. This is useful because it provides recipients with the details they need to make decisions without having to navigate to the system and manually search for the relevant information.
You can present the output as:
-
An array of fields. An array of fields is displayed as a comma-separated list. For example,
Instance ID: i-123,i-466. -
A button.
-
An image.
-
A link.
-
A list.
-
A table.
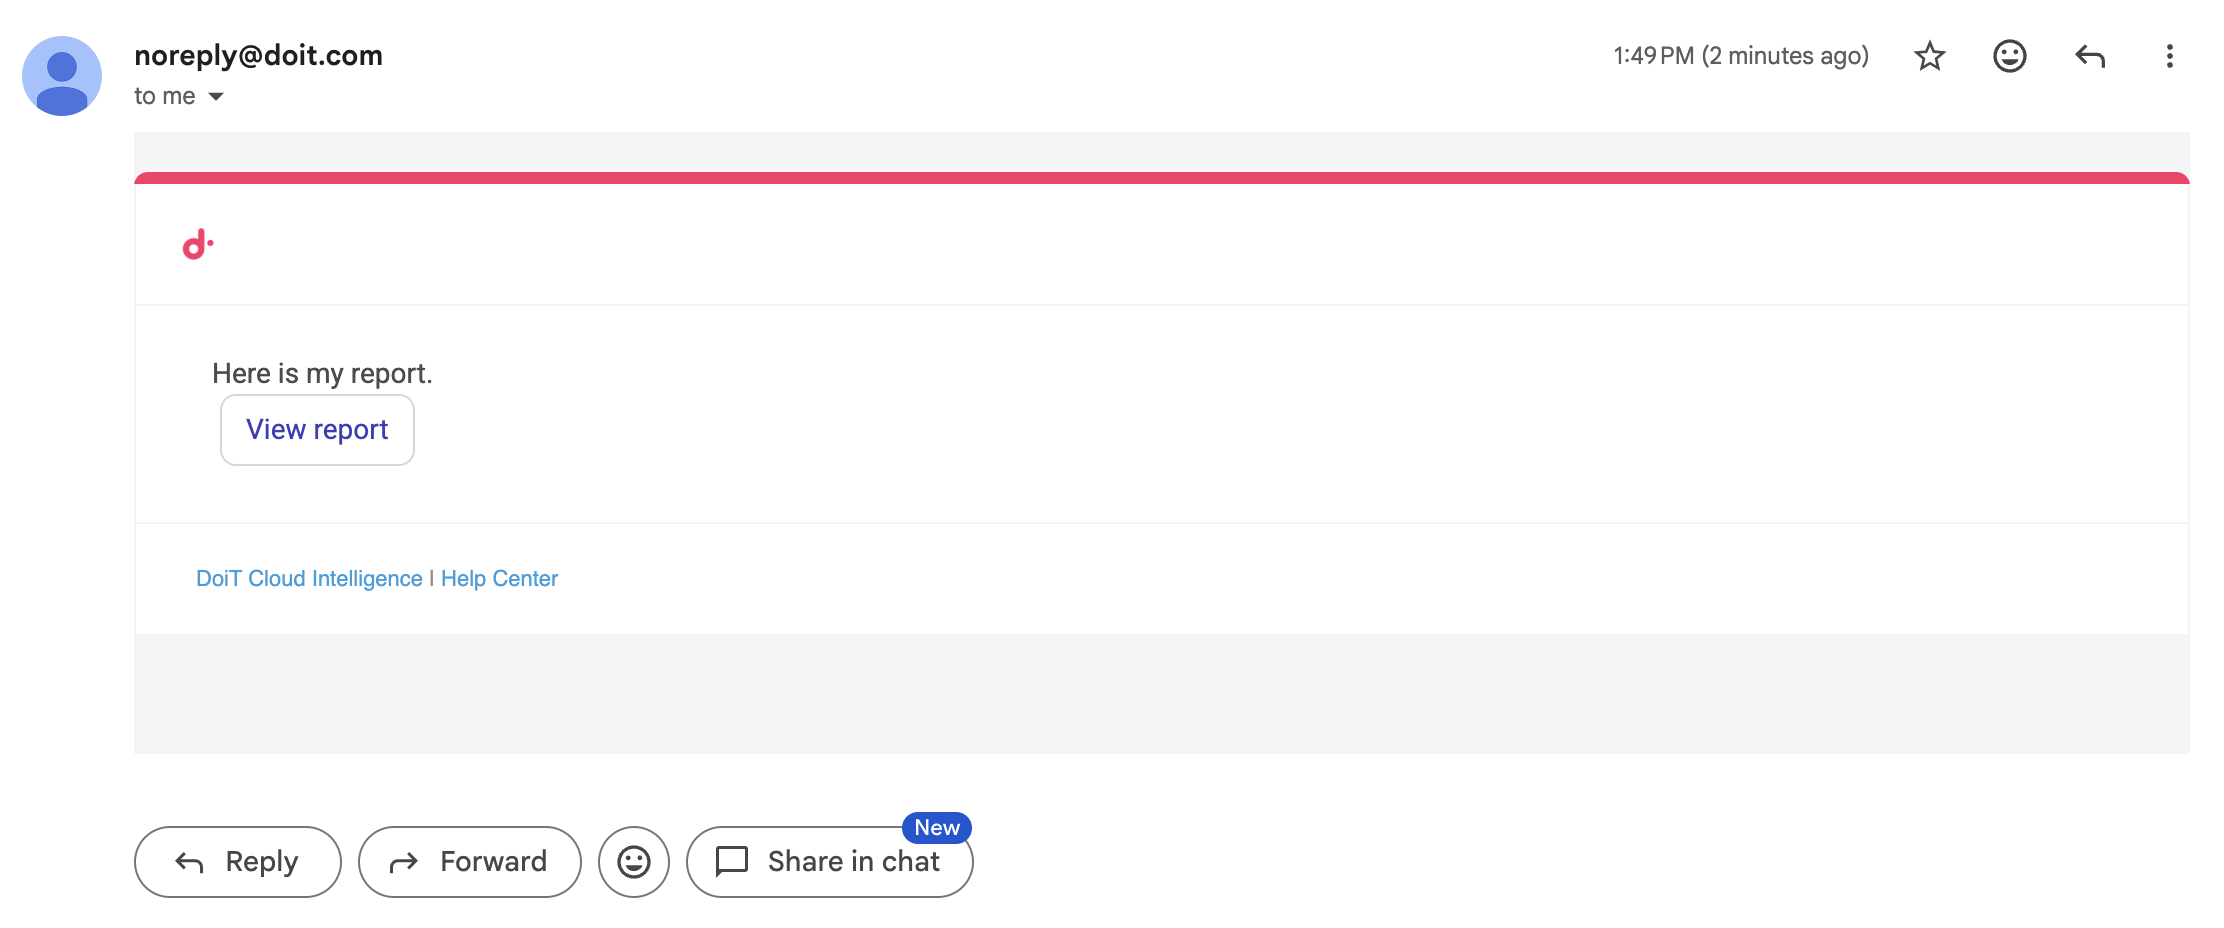
<button> tag
Use the CloudFlow custom <button> tag to render a clickable button within your notification message.
-
Buttons render inline at the tag's location.
-
Buttons cannot be nested within another
<image>,<list>, or<table>tag. -
The schema for a button is
buttonname: valuewherevaluemust be a valid URL starting withhttporhttpsURL. Ensure the notification recipient has the necessary permissions to view the content.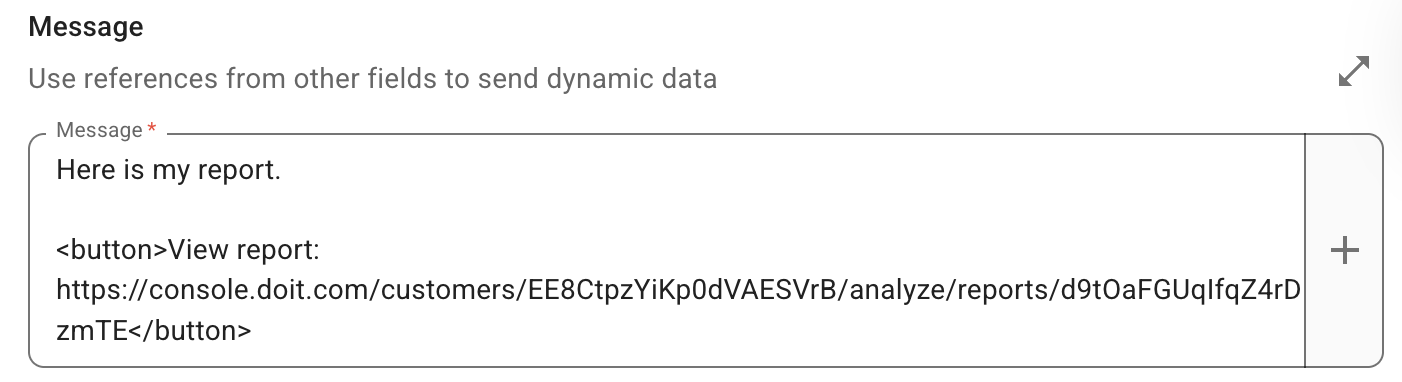
Below is an example of the output.
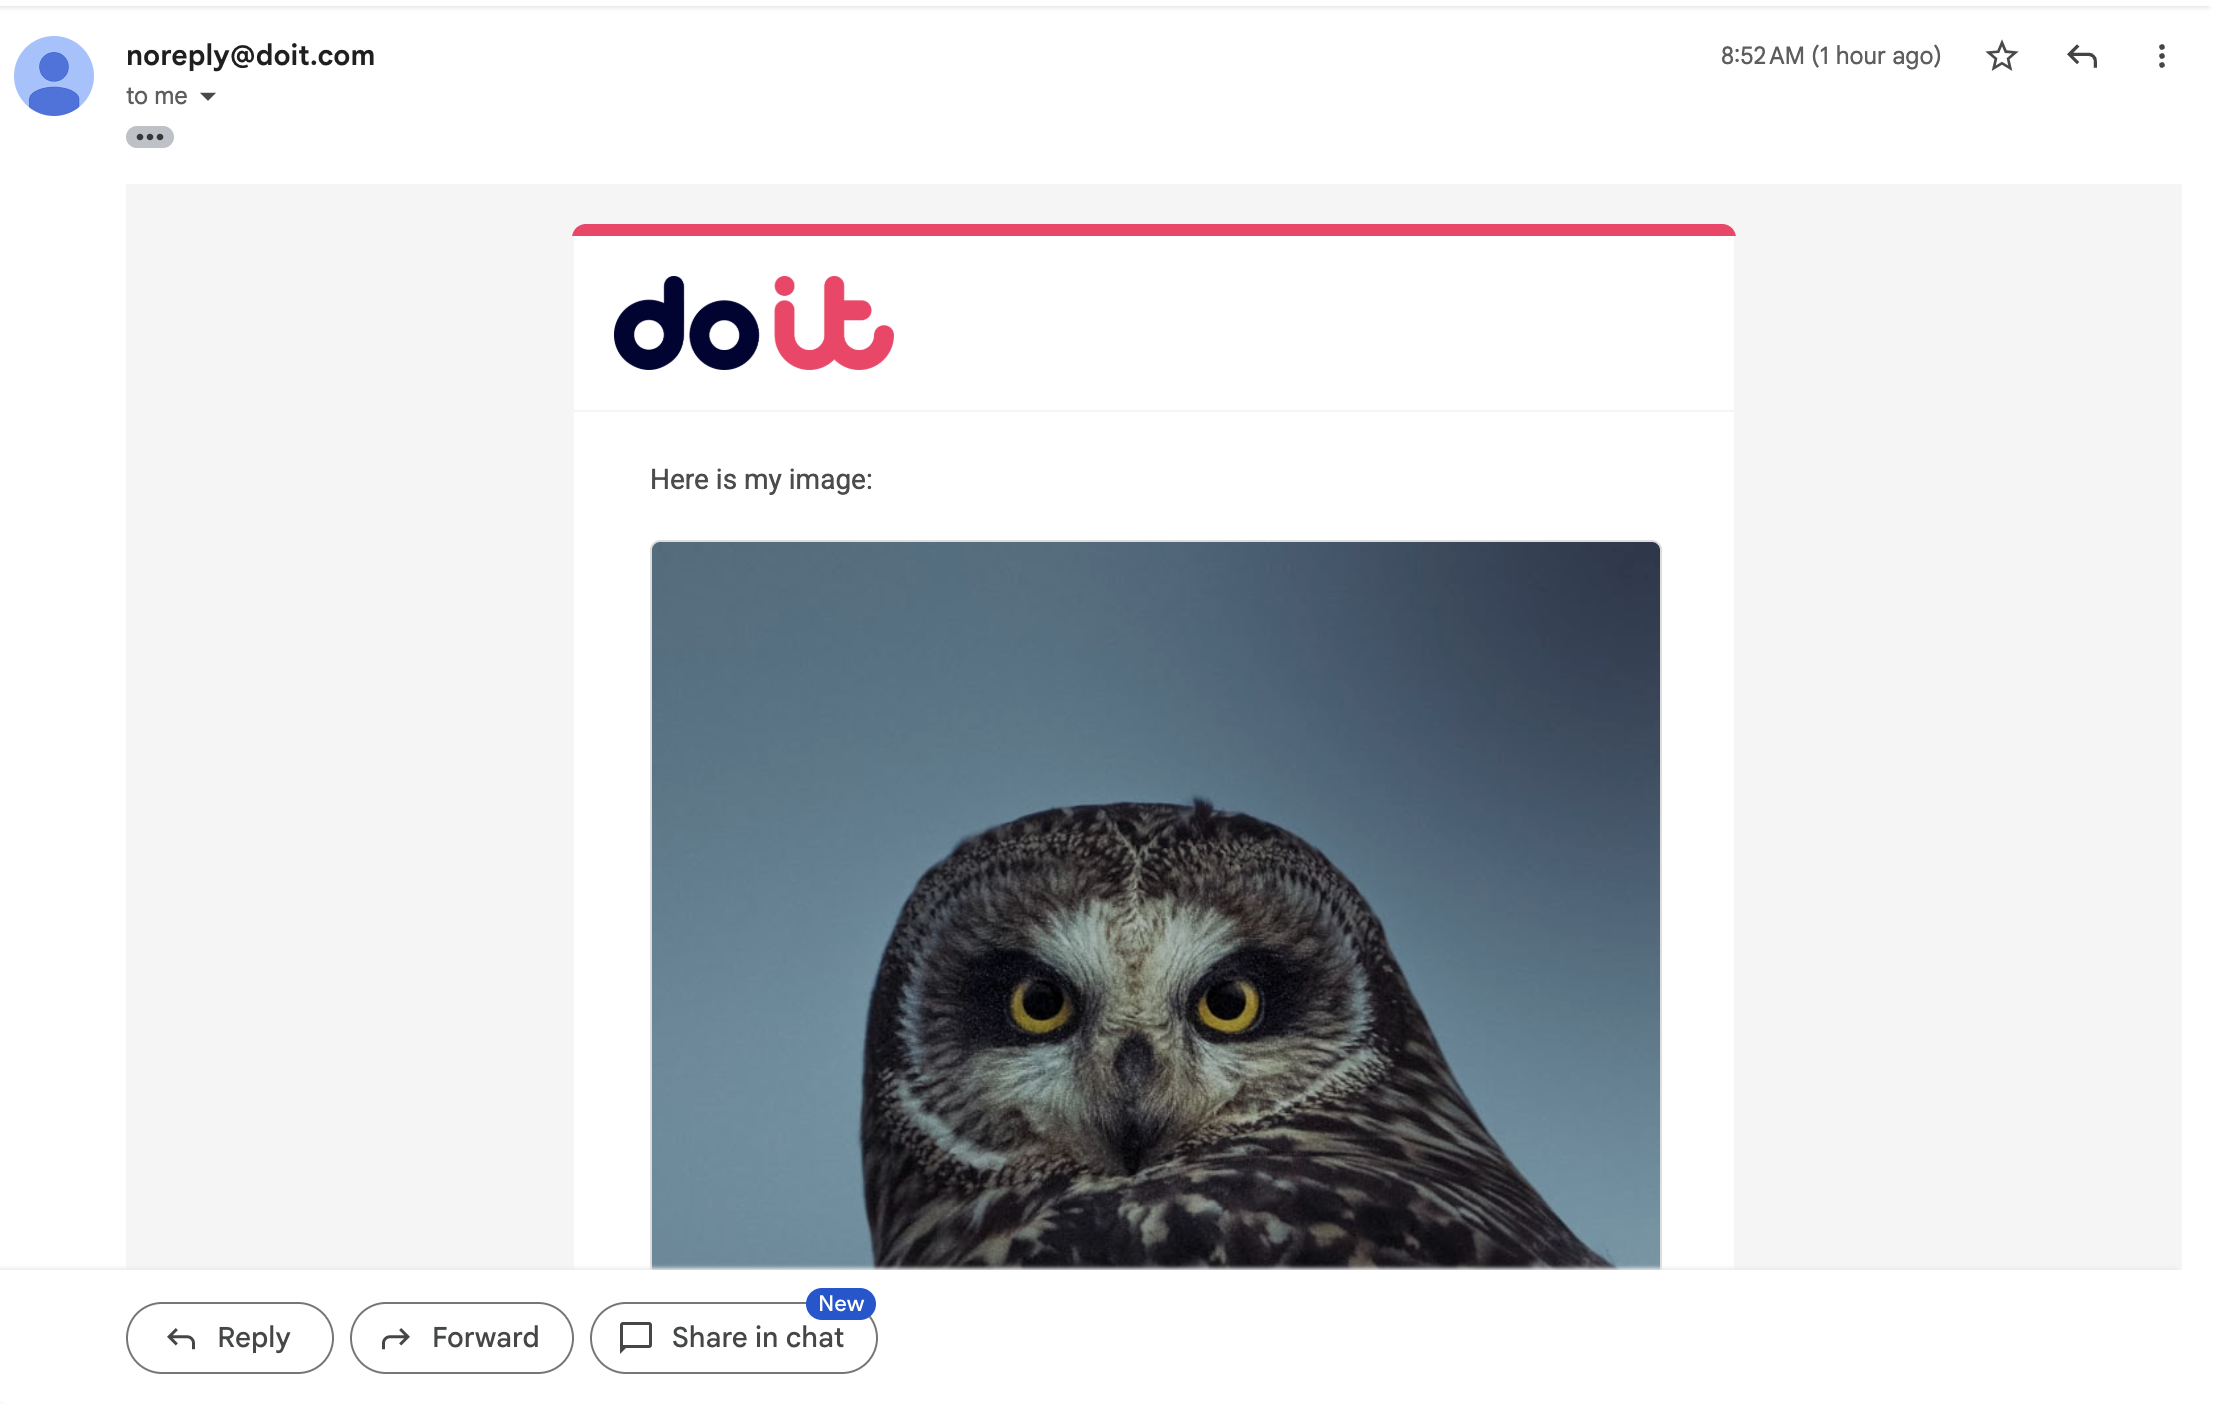
<image> tag
Use the CloudFlow custom <image> tag to add an image to your notification message.
-
Images render inline at the tag's location.
-
The
<image>tag works by referencing a hosted image via anhttporhttpsURL. It does not embed the image file directly in the message. Since the image is not embedded, the URL must be publicly accessible. -
You can specify a
widthfor the image within the schema. Enter a numeric value, for example,600. The width is applied in pixels. Ifwidthis provided, theheightis automatically set toautoto preserve the aspect ratio. -
You can specify alternative text for an image using
alt. -
Images cannot be nested within another
<image>,<list>, or<table>tag. -
The schema for an image is:
<image width="600" alt="Monthly cloud spend chart">https://.../chart.png</image>.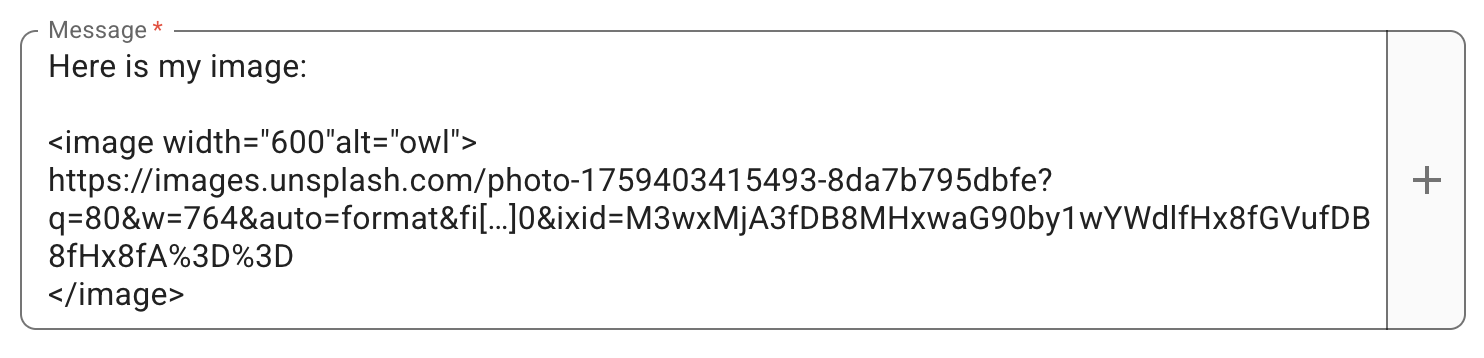
Below is an example of the output.
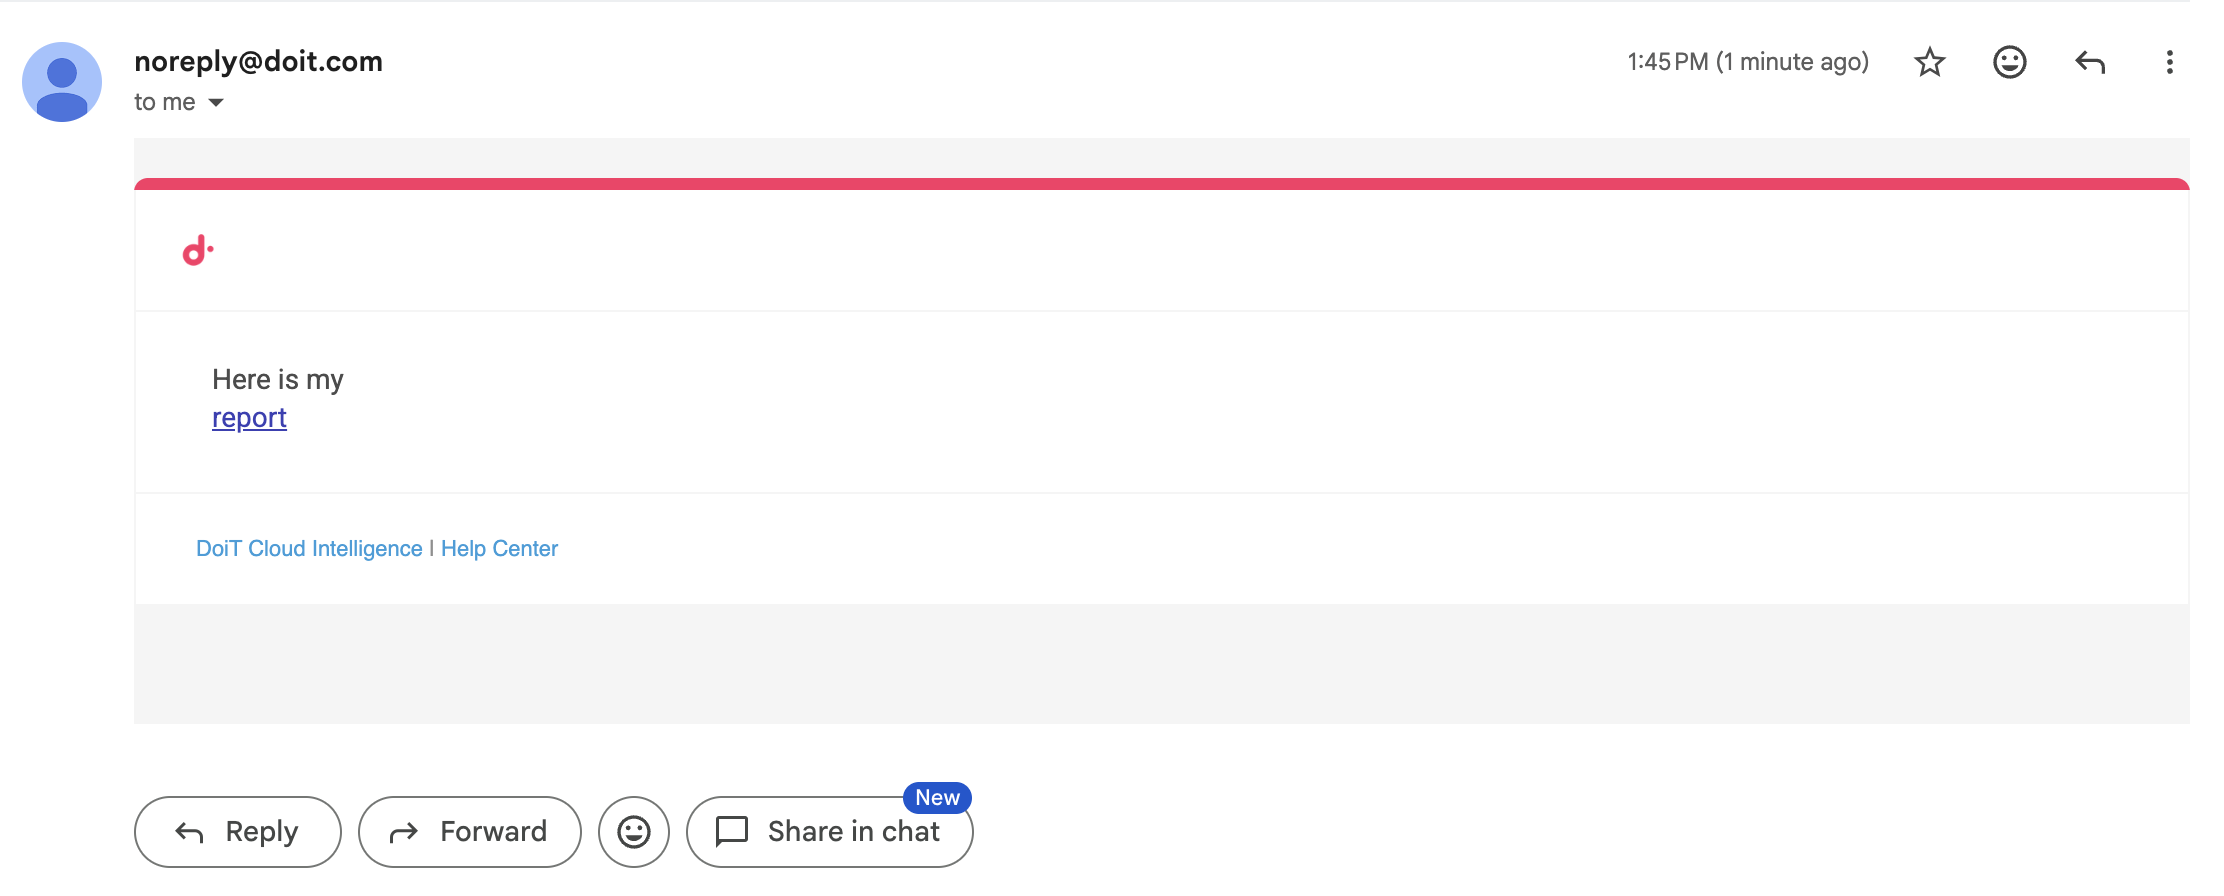
<link> tag
Use the CloudFlow custom <link> tag to render hyperlinked text within the notification message.
-
Links render inline at the tag's location.
-
Links cannot be nested within another
<image>,<list>, or<table>tag. -
The schema for a link is
linktext: valuewherevaluemust be a valid URL starting withhttporhttps. Ensure the notification recipient has the necessary permissions to view the content.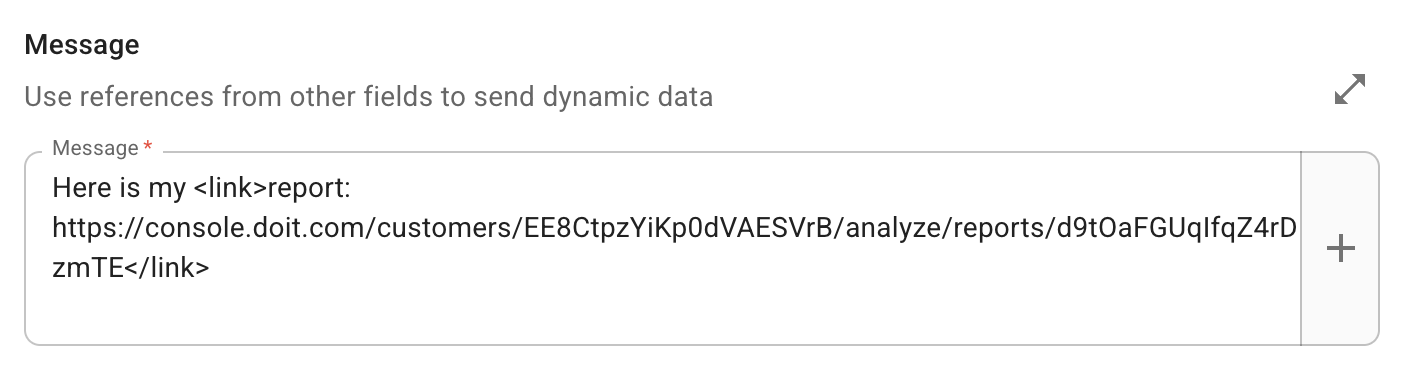
Below is an example of the output.
<list> tag
Use the CloudFlow custom <list> tag to present output as a list of items.
-
A
<list>tag can be nested within other<list>tags. -
A
<list>tag does not require a specific syntax.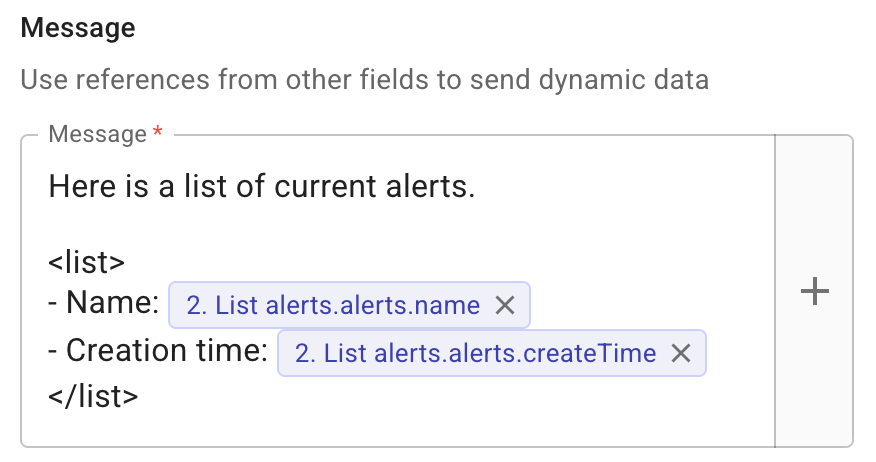
Below is an example of the output.
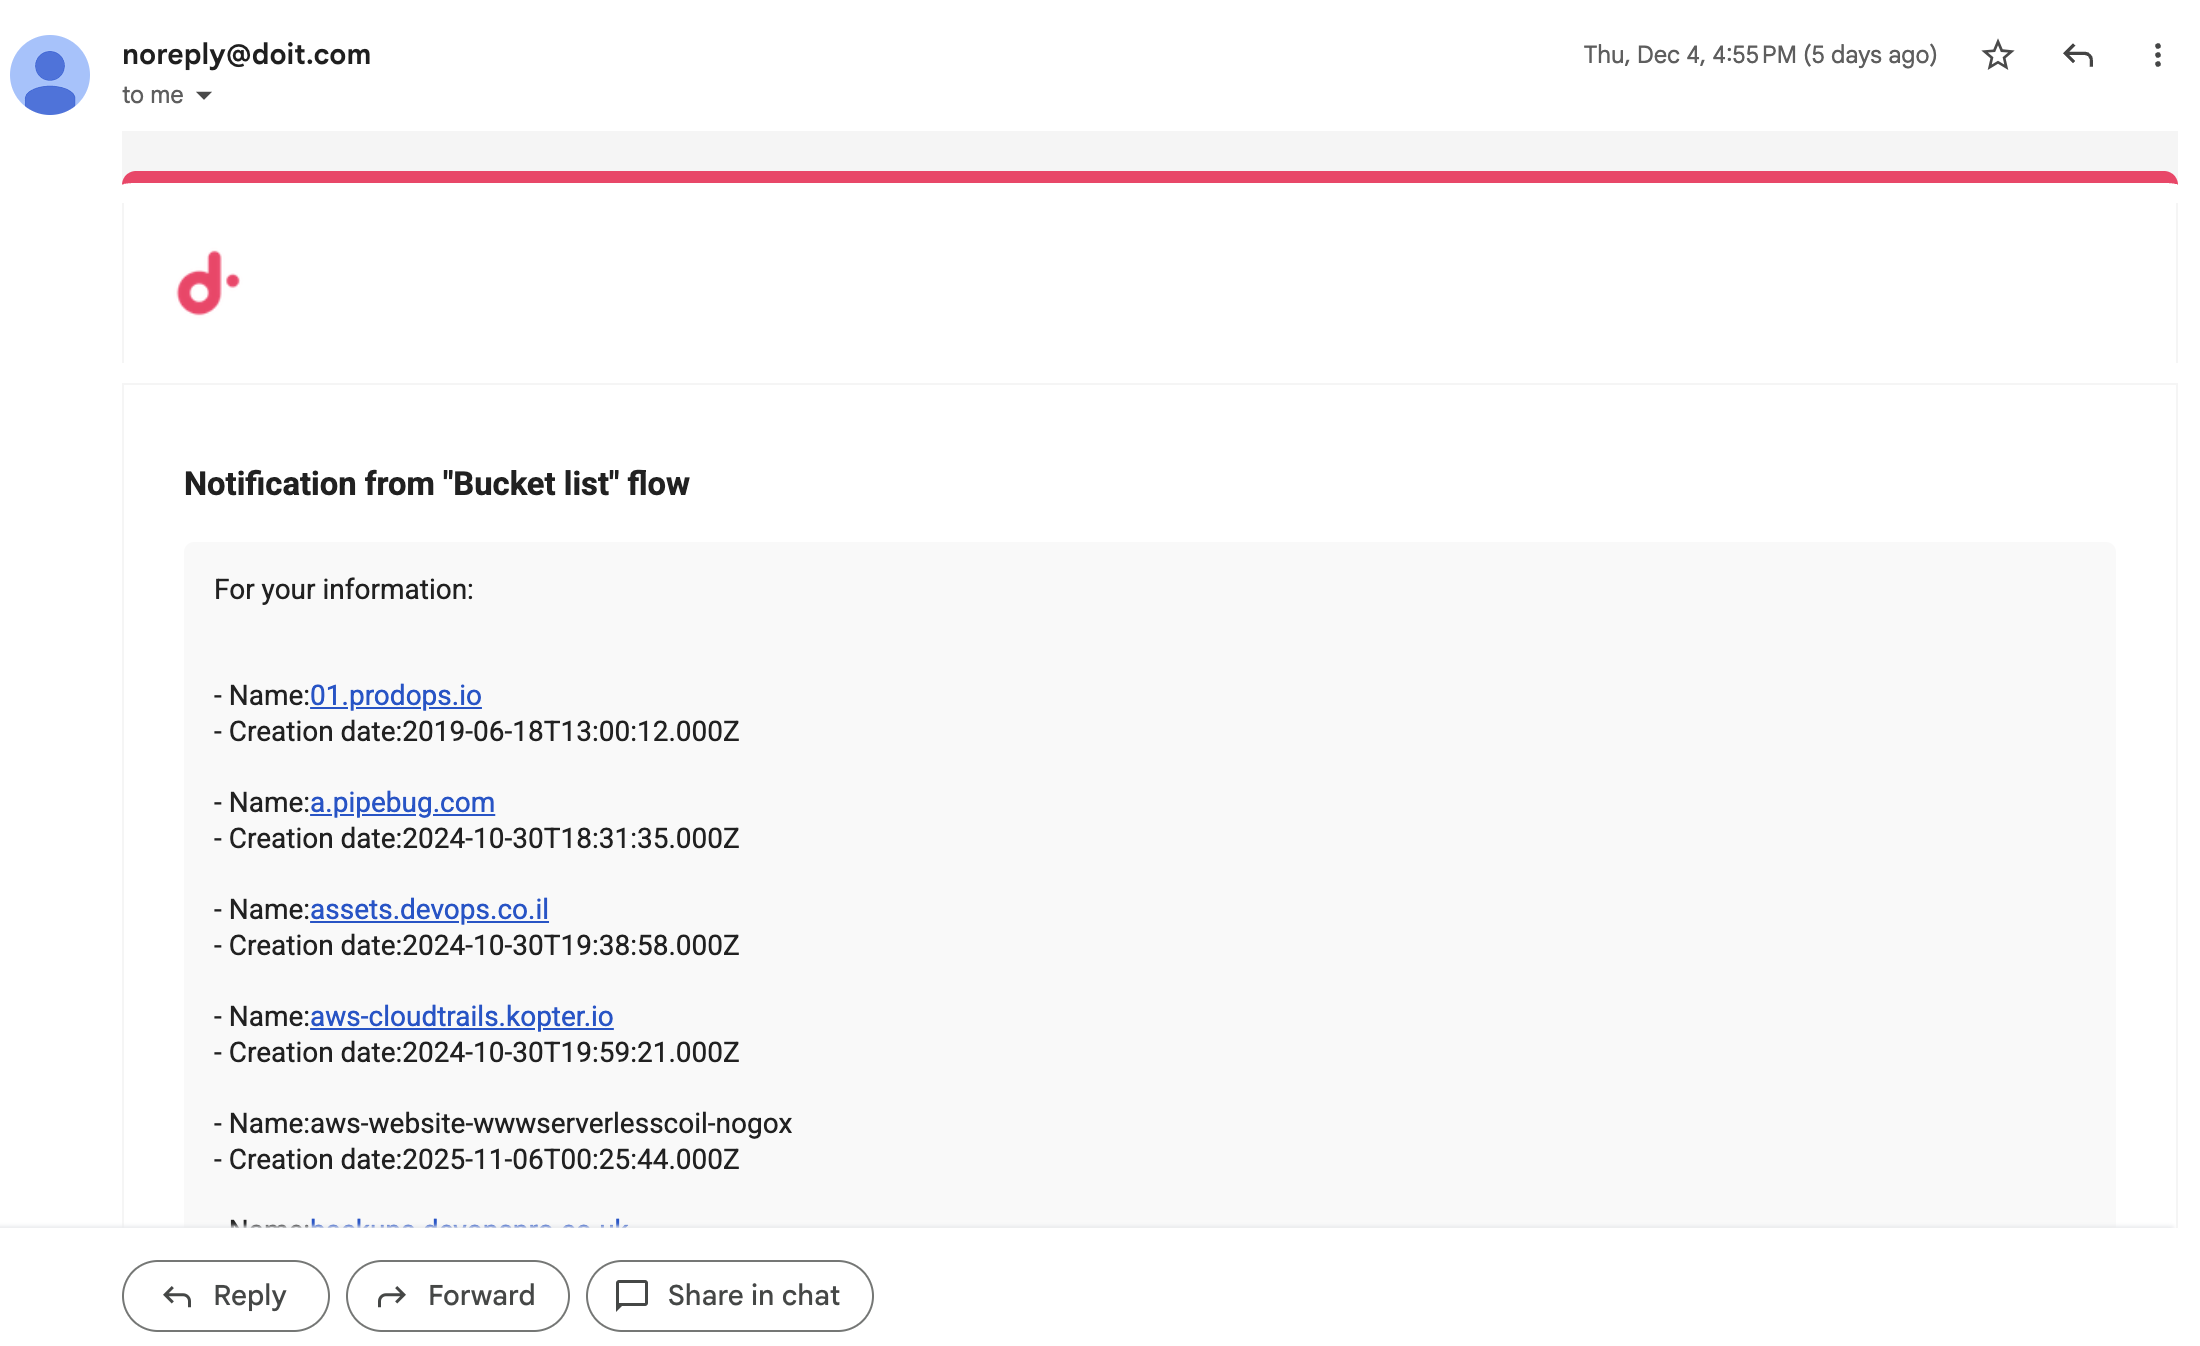
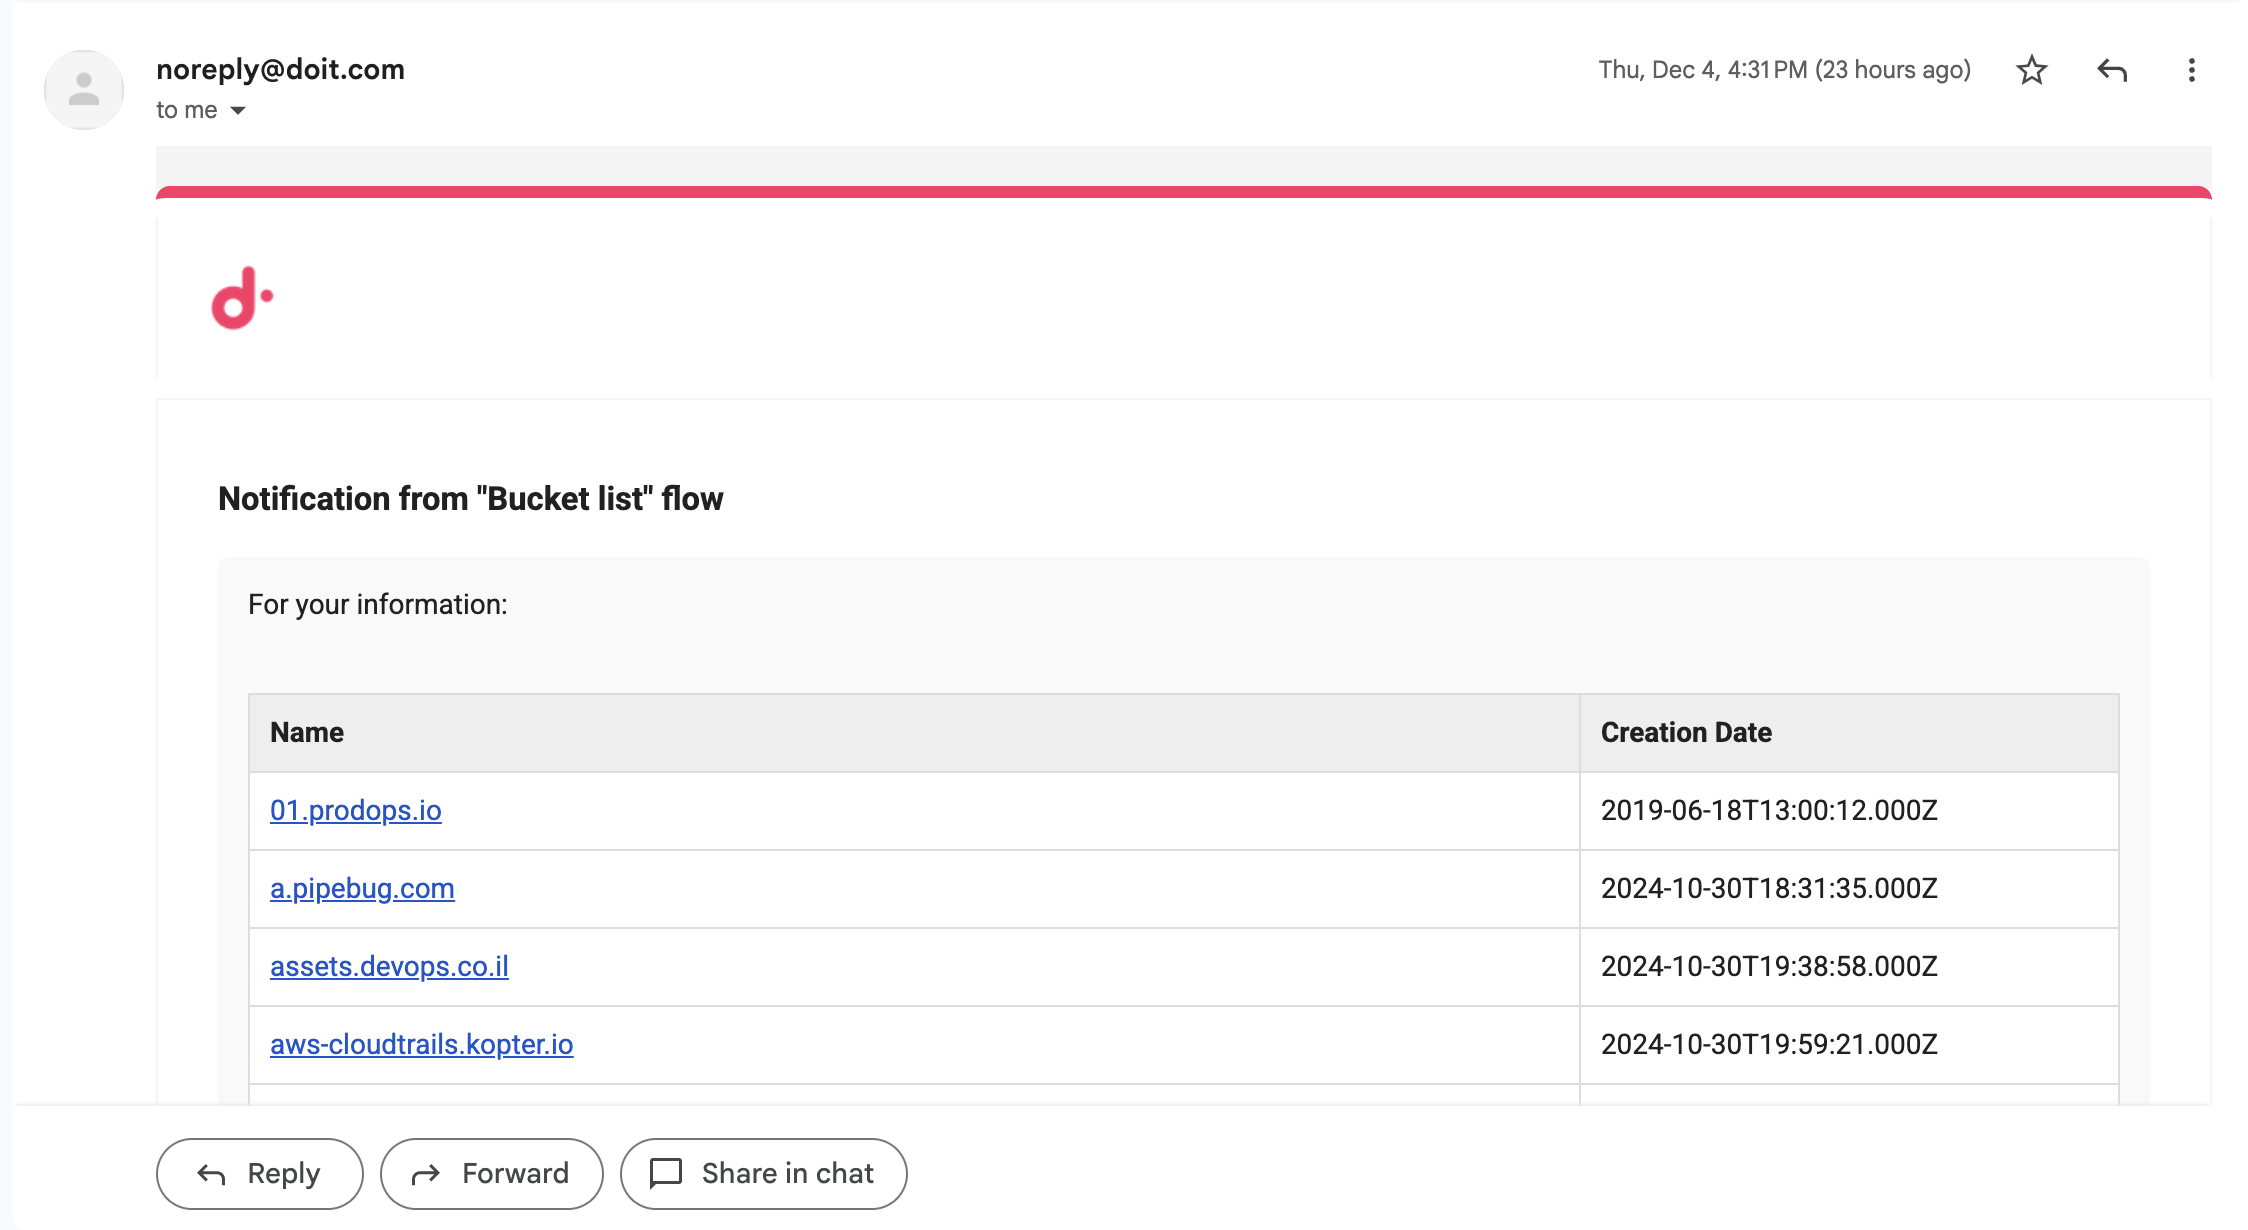
<table> tag
Use the CloudFlow custom <table> tag to format output as a table.
-
A
<table>tag cannot be nested within another<list>or<table>tag. -
Each line within a
<table>tag represents a column. -
The schema for a column is
ColumnName: valuewherevaluecan be static text, one or more referenced fields from a previous node, or a combination of both.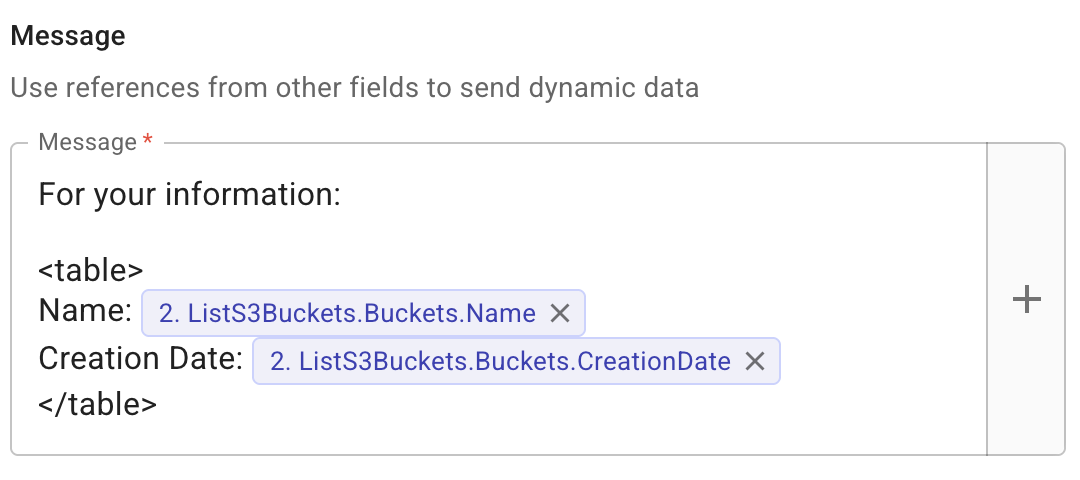
Below is an example of the output.
Format values in notifications
You can format referenced values in your notification messages for readability. Wrap an expression in {{ }} using a formatting function.
For example, instead of displaying a raw byte count like 5487072355, you can display it as 5.5 GB:
{{ bytes(2. Code.message.disks.financials.bytesProcessed, 1) }}
Available functions
format()
Formats numbers, percentages, and dates using Excel-style patterns.
| Expression | Input | Output |
|---|---|---|
format(val, "#,##0.00") | 1234567.89 | 1,234,567.89 |
format(val, "#,##0") | 1234567 | 1,234,567 |
format(val, "$#,##0") | 1234 | $1,234 |
format(val, "0.0%") | 0.856 | 85.6% |
format(val, "0%") | 0.856 | 86% |
format(val, "yyyy-mm-dd") | 2026-02-12T10:30:00Z | 2026-02-12 |
format(val, "yyyy-mm-dd hh:mm") | 2026-02-12T10:30:00Z | 2026-02-12 10:30 |
bytes()
Converts numeric values to human-readable byte units (B, KB, MB, GB, TB, PB). The optional second argument controls decimal precision (default: 2).
| Expression | Input | Output |
|---|---|---|
bytes(val) | 5487072355 | 5.49 GB |
bytes(val, 1) | 5487072355 | 5.5 GB |
bytes(val, 0) | 5487072355 | 5 GB |
date()
Converts between timestamps and date strings. Accepts Unix timestamps (seconds or milliseconds) and ISO 8601 / RFC 3339 strings. Without a pattern, returns an ISO 8601 string.
| Expression | Input | Output |
|---|---|---|
date(val) | 1707753600 | 2024-02-12T16:00:00.000Z |
date(val, "yyyy-mm-dd") | 1707753600 | 2024-02-12 |
date(val, "yyyy-mm-dd hh:mm") | 1707753600000 | 2024-02-12 16:00 |
date(val, "unix") | 2024-02-12T16:00:00Z | 1707753600 |
date(val, "unixms") | 2024-02-12T16:00:00Z | 1707753600000 |
The function detects the input type automatically:
-
10-digit numbers are treated as Unix seconds
-
13-digit numbers are treated as Unix milliseconds
-
Strings are parsed as ISO 8601 / RFC 3339 dates
upper() / lower()
Converts text to uppercase or lowercase.
| Expression | Input | Output |
|---|---|---|
upper(val) | hello | HELLO |
lower(val) | HELLO | hello |
Inline math
You can use arithmetic expressions directly in {{ }}:
| Expression | Input (val) | Output |
|---|---|---|
val * 5 | 100 | 500 |
val + 10 | 50 | 60 |
Arrays
When a referenced field contains multiple values (an array), each value is formatted individually and displayed as a comma-separated list.
For example, if a field returns three byte values:
{{ bytes(2. Code.message.disks.financials.bytesProcessed, 1) }}
Output: 5.5 GB, 997.5 MB, 4.1 GB
This works with all formatting functions, including format(), bytes(), and date().
Notes
-
If a value cannot be formatted (for example, applying
bytes()to a text string), the original value is displayed unchanged. -
If one expression fails, the rest of the message still renders normally.
-
Formatting functions work in plain text messages, tables, and lists.
Notification settings
You can configure the following notification settings:
-
Select Don't send notifications if no results to ensure notifications are sent only when results are found, preventing unnecessary messages.
-
Select Include link to this flow in notification if you want to include a clickable URL to the flow within the message. This allows your team members to open the flow directly in CloudFlow.
Test
Select Test to test the node.