Google Workspace licenses auto-increase, billing profile, and tags
Auto-increase for Google Workspace ensures that you always have licenses available as your team scales.
Required permission
-
Assets Manager
-
You must have access to the billing profile under which the domain is managed.
Enable licenses auto-increase
To enable license auto-increase for Google Workspace subscriptions:
-
Sign in to the DoiT console, select Data ingestion and integrations > Integrations from the top navigation mega menu.
-
On the Google Workspace integration card, select Manage.
-
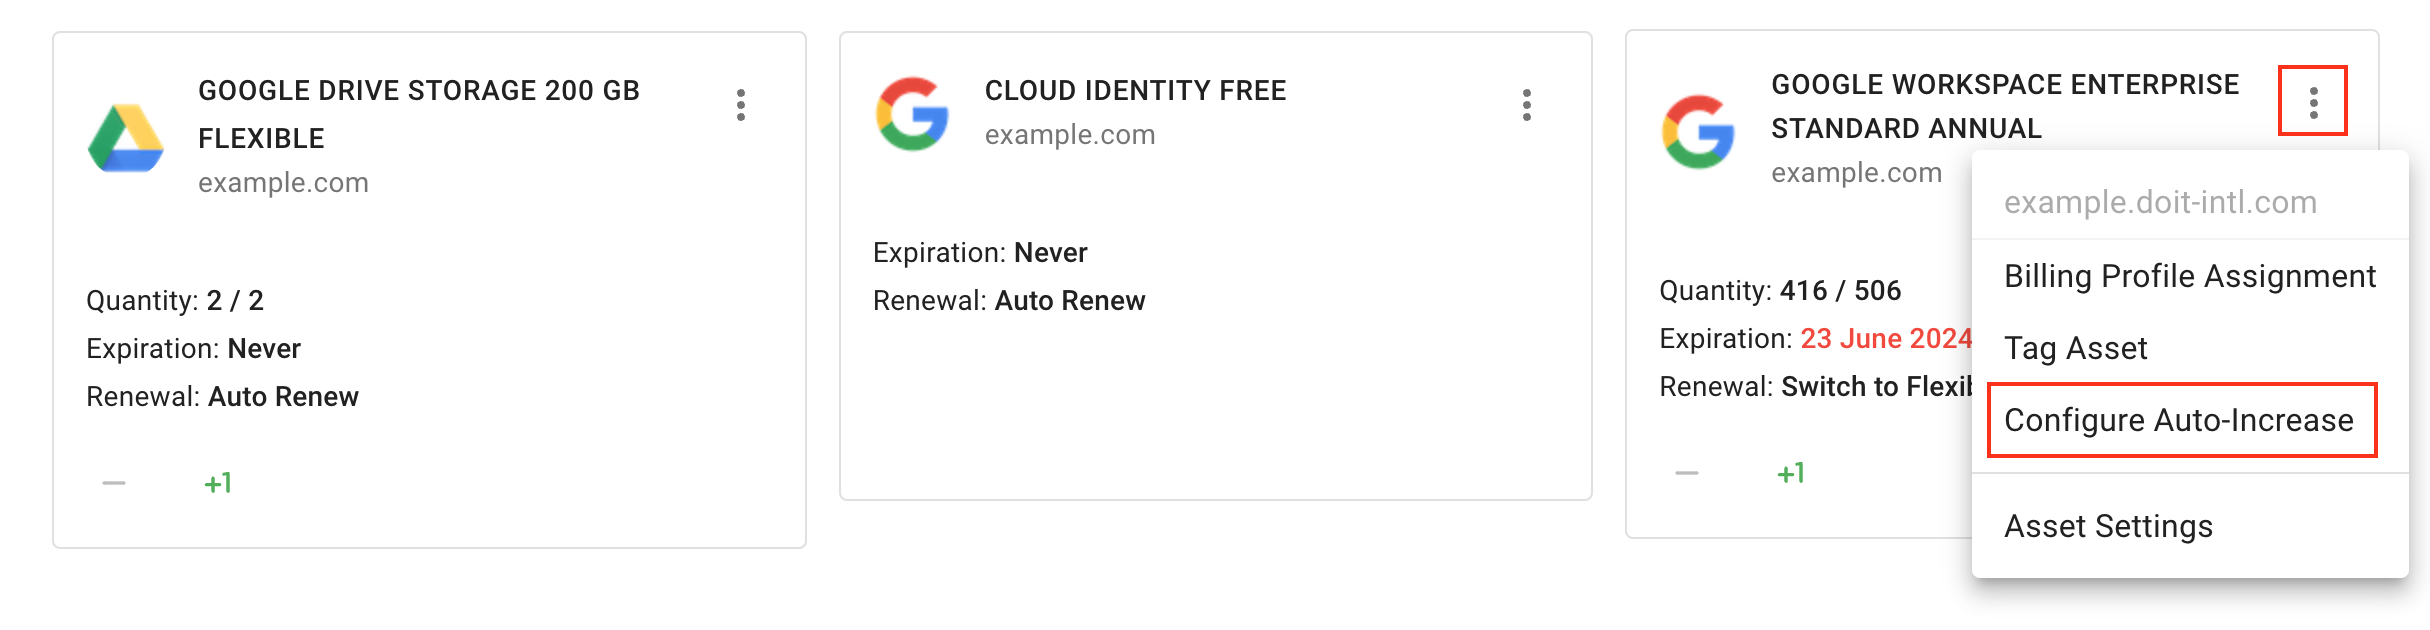
Locate the subscription of interest, select the kebab menu (⋮) in the upper-right corner of the card, and then choose Configure Auto-Increase.
-
Use the toggle button to enable auto-increase for the selected subscription.
-
Specify the minimum amount of licenses you want to keep available at all times.
-
Save your changes.
First-time enablement
If all the licenses have already been assigned when you enable auto-increase for the first time, you must make changes in your license assignment for auto-increase to work properly.
For example, suppose you have a subscription with the license quantity shown as 15/15. You enabled auto-increase and set the minimum amount of available licenses to 1. To trigger the first run of the auto-increase flow, you need to add or remove licenses in the DoiT console or in your Google Admin console. The DoiT Platform will take over afterward.
Assign a billing profile
Each Billing profile receives its own monthly invoices. You can assign assets to different billing profiles to manage how the entities (for example, products, environments, teams) in your organization are billed.
To assign an asset to a billing profile, you must have Assets Manager and Billing Profile Admin permissions:
-
Select the kebab menu (⋮) in the upper-right corner of the asset card, and then select Billing Profile Assignment.
-
Select the target billing profile from the drop-down list.
-
Save your changes.