Create and edit recipes
This page explains the options when creating and editing a recipe. You can also duplicate an existing recipe, customize the copy, and then save as a new recipe, or build a recipe with the AI assistant using a natural language prompt.
If you are new to Composer, start with Understanding recipes or Tutorial: Your first recipe. Duplicating an existing recipe is often faster than building from a blank canvas.
Start building
To create a recipe from scratch:
-
Navigate to the Composer dashboard.
-
Select Create recipe to open the Recipe builder with a blank canvas.
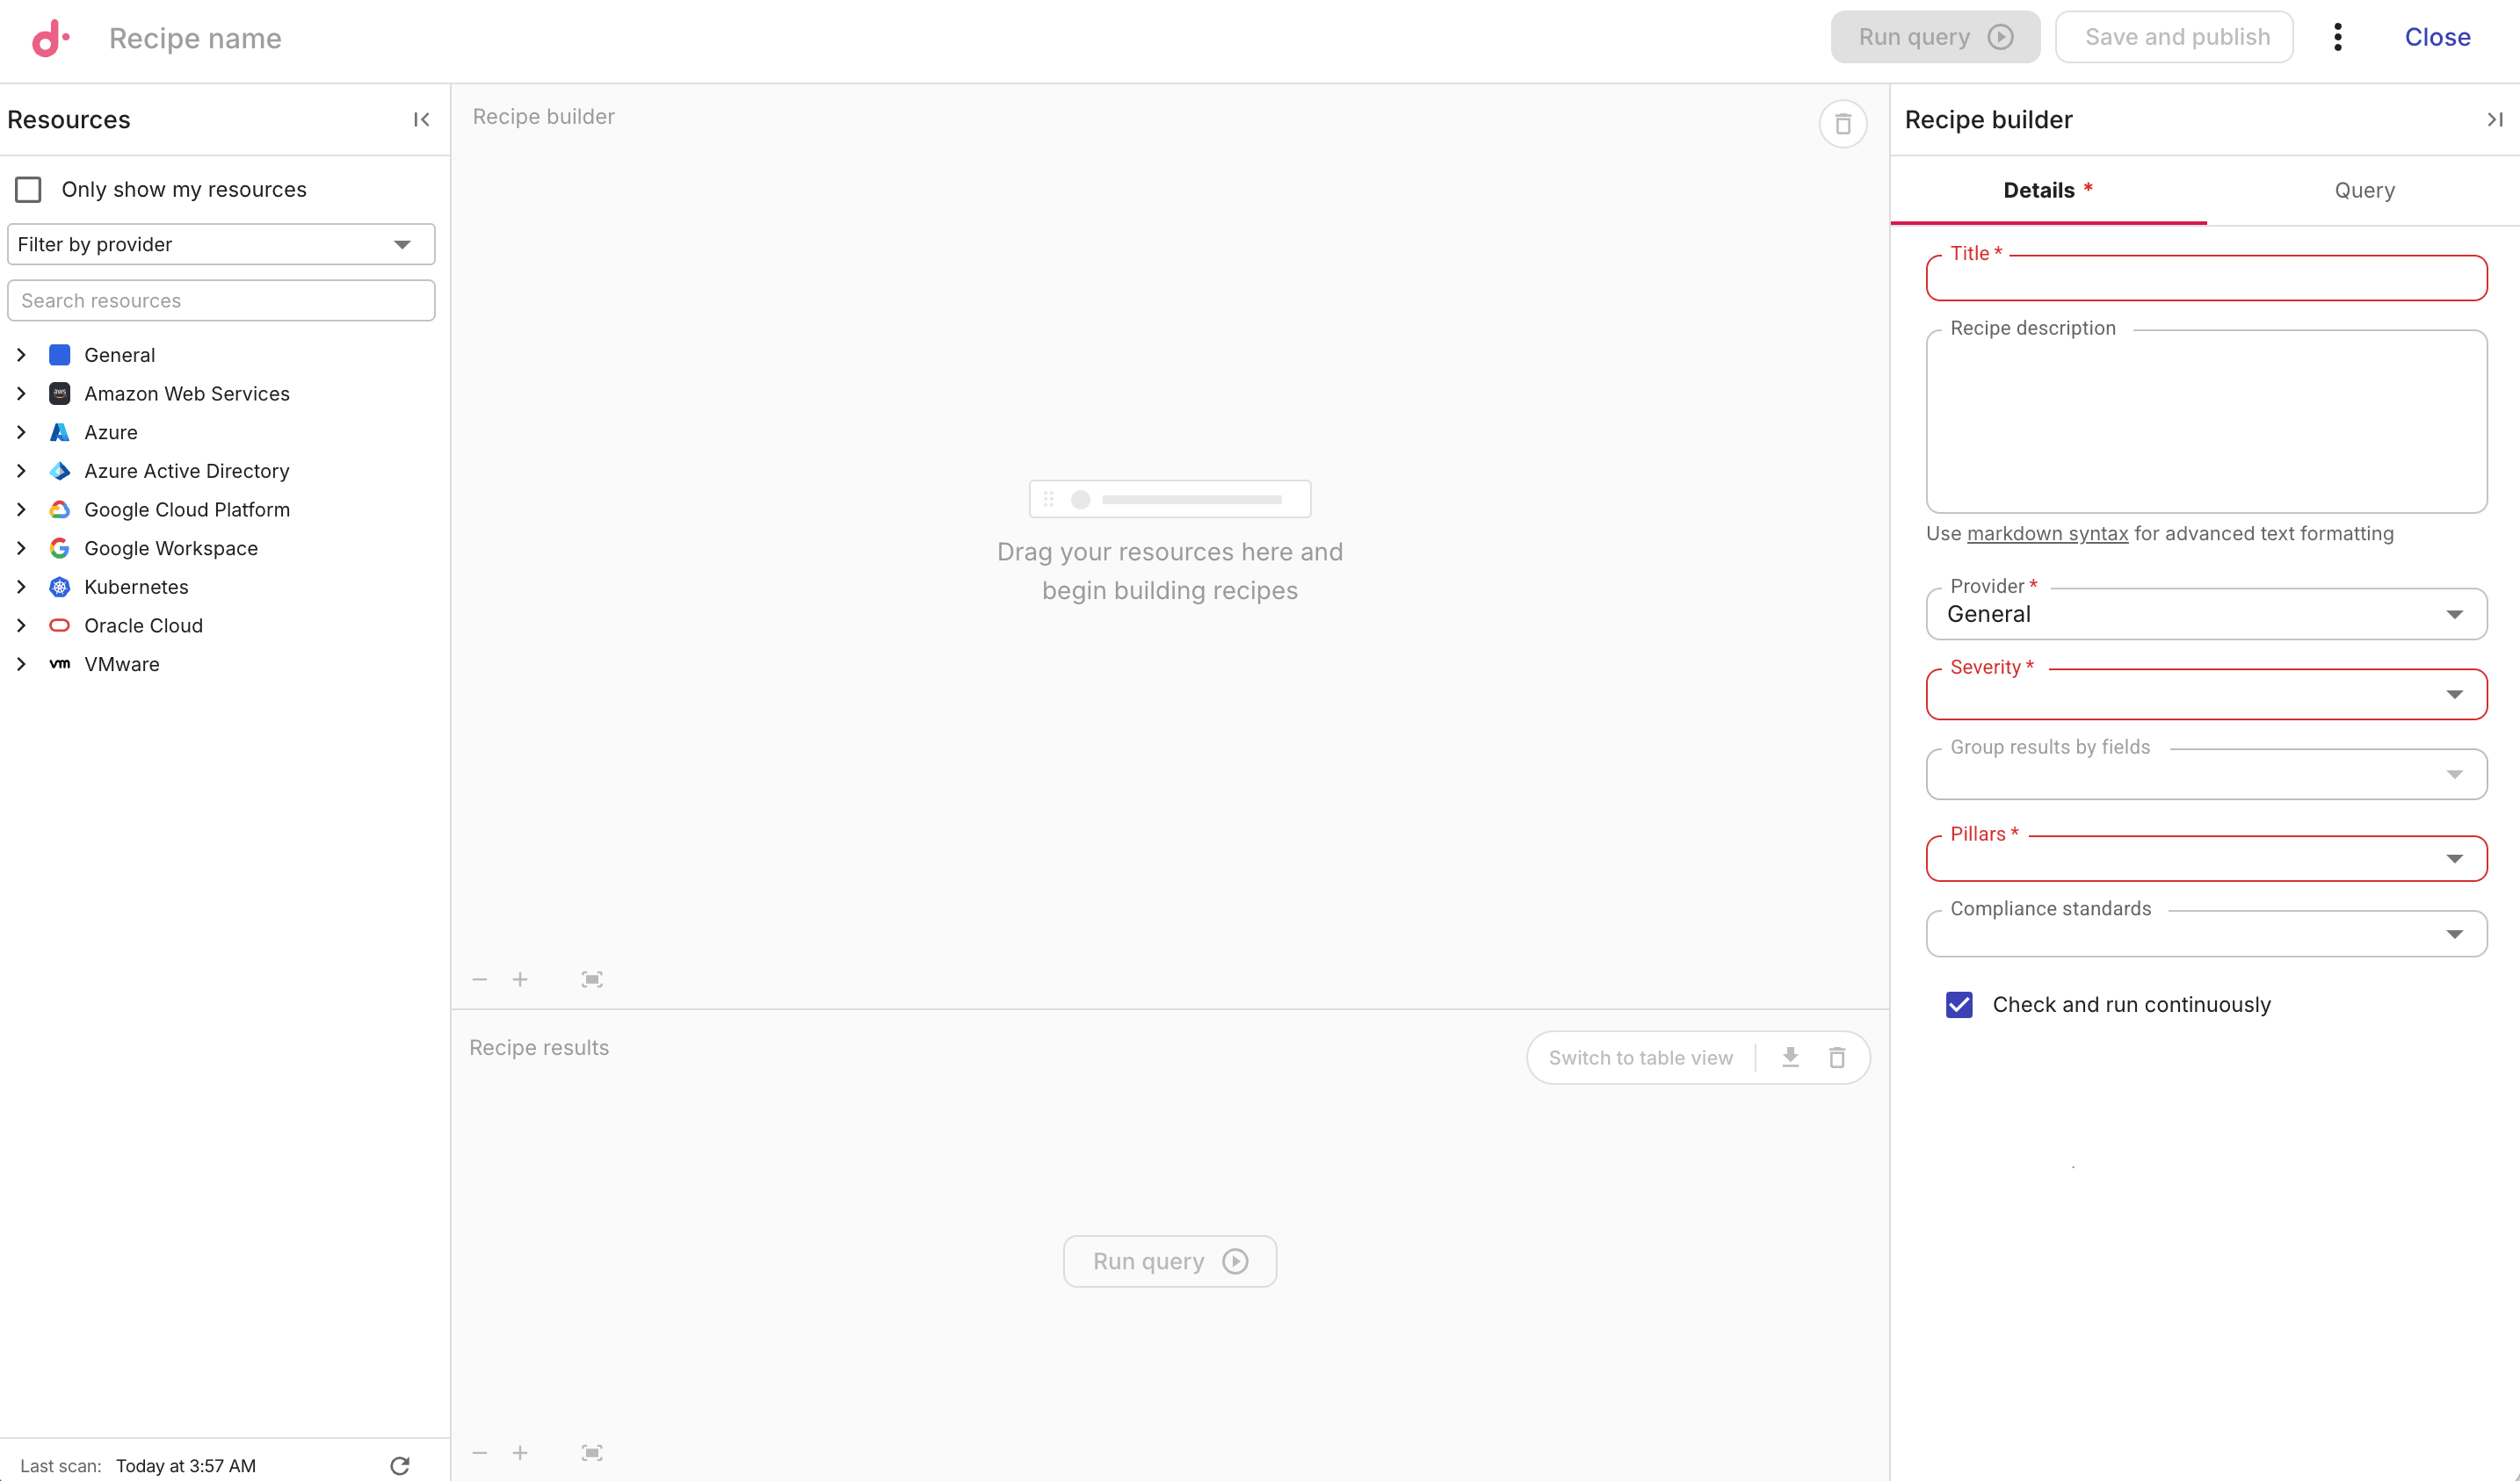
Step 1: Enter basic information
-
In the Recipe builder side panel, configure the basic information of the recipe on the Details tab.
-
Title: Name of the recipe. We recommend a resource-first pattern that states the condition or missing control, for example,
EBS volumes with no attached instance,EC2 instances with CPU utilization below 5% for 14 days, orRoot user without MFA enabled, rather than an action such asRemove unused EBS volumes. When several risks share one check, name the resource and summarize the issue type (for example,EC2 instances with multiple critical security misconfigurations). -
(Optional) Description: Descriptive information. Supports Markdown syntax for advanced formatting.
-
Provider: The service provider. This field is set to
Generalby default. -
Severity: The severity level of insights generated by the present recipe. Supported values:
Critical,High,Medium,Low. -
Pillars: The category of insights generated by the present recipe. You can select more than one. Supported values:
Cost,Operations,Performance,Security. For when to use each pillar, see Pillars. -
Group results by fields: After you add resources to the canvas, choose which resource the insight should be issued against when the query matches. Select the canvas resource that represents the finding (for example, the EBS volume), not a related helper resource, unless that is intentional.
-
(Optional) Cost function: To use this field, first select
Costin the Pillars field. Choose a cost function that matches the intended remediation so savings are classified correctly. Overlapping Cost recipes that match the same resources can inflate savings totals. Supported values:-
N/A: Select when the recipe does not target a specific cost savings function. -
Resource deletion: Use when savings come from deleting unused or unnecessary resources. -
Extended support: Use when savings come from avoiding provider extended-support charges, for example by upgrading a resource to a more recent version. This cost function only applies to the following resource types:- AWS: EKS Cluster, RDS Instance, ElastiCache Cluster, DocumentDB Instance, OpenSearch Domain
- Google Cloud: GKE Cluster, Cloud SQL Instance
- Azure: AKS Cluster, Azure Database for MySQL flexible server, Azure Database for PostgreSQL flexible server
-
Resource rightsizing: Use when savings come from changing a resource's size, capacity, or configuration. -
Resource migration: Use when savings come from moving a resource or workload to a different resource type, service, or architecture.
-
-
(Optional) Compliance standards: Choose one or more standards from the dropdown. For example, SOC2, HIPAA, GDPR.
-
Check and run continuously: Select this checkbox if you want the recipe to run continuously.
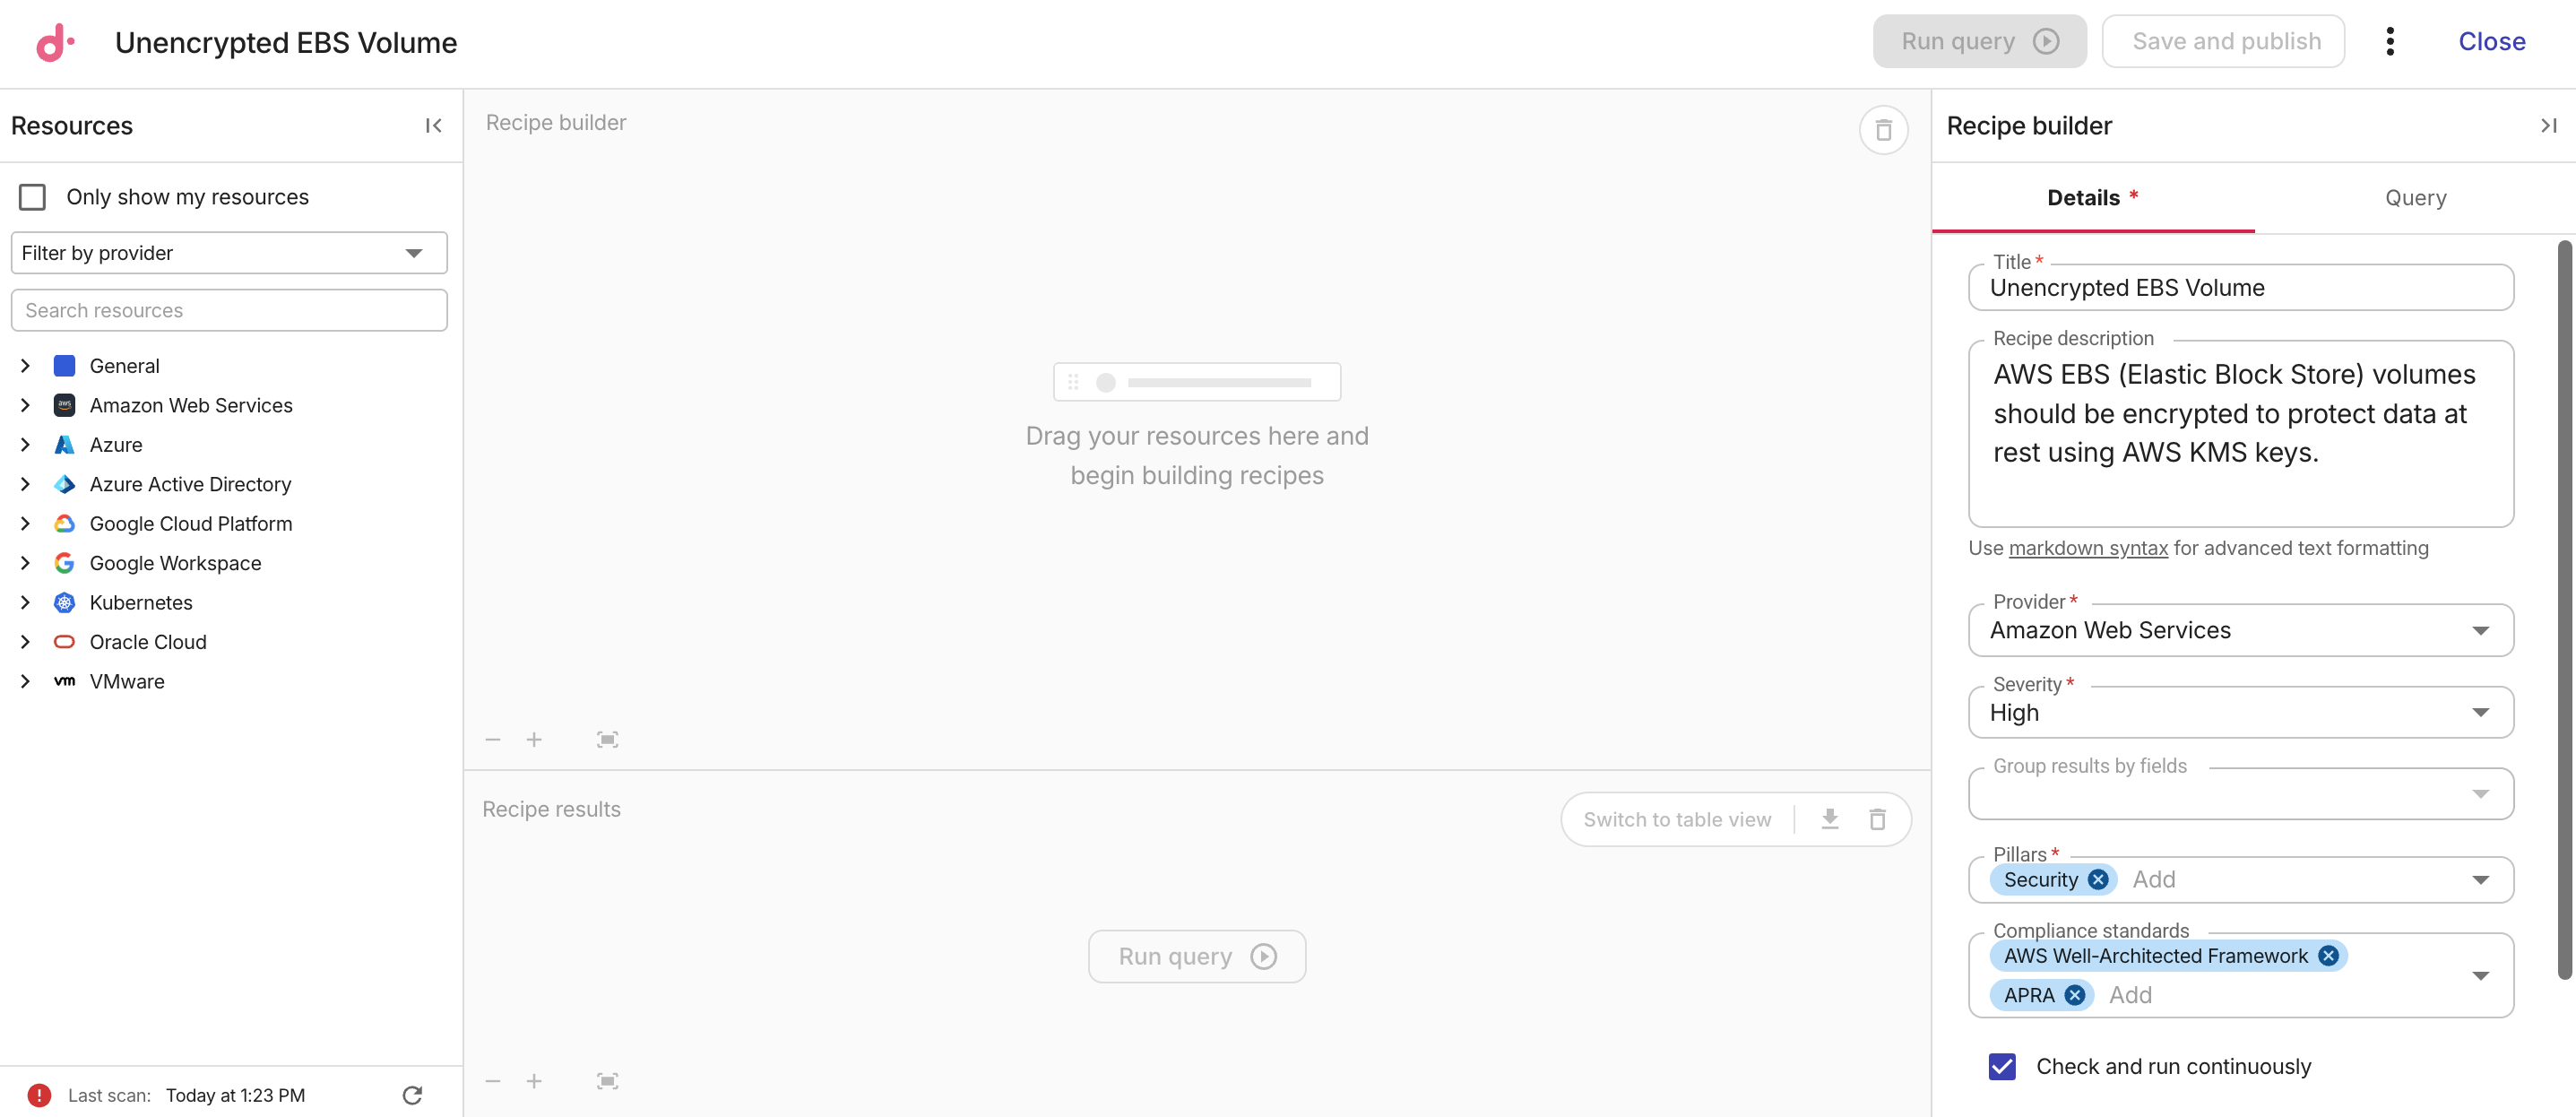
Below is the basic configuration of an example recipe.
-
Step 2: Add resources
-
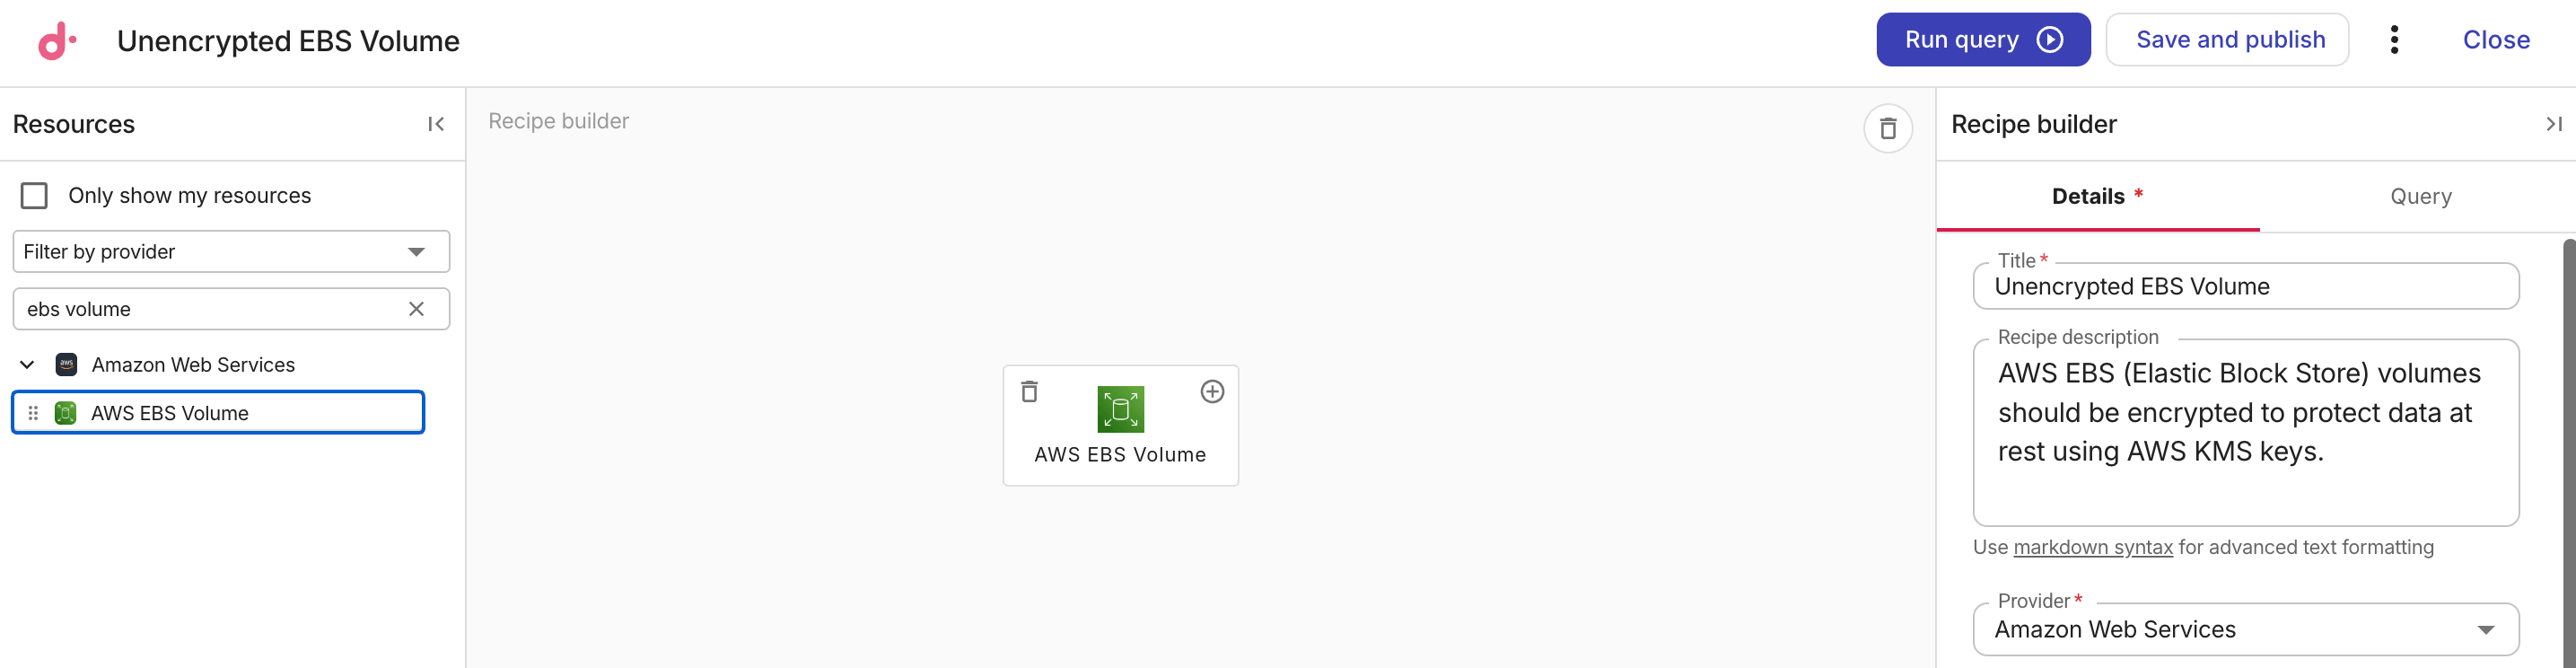
Search for a target resource in the Resources side panel, and then drag the resource to the Recipe builder canvas.
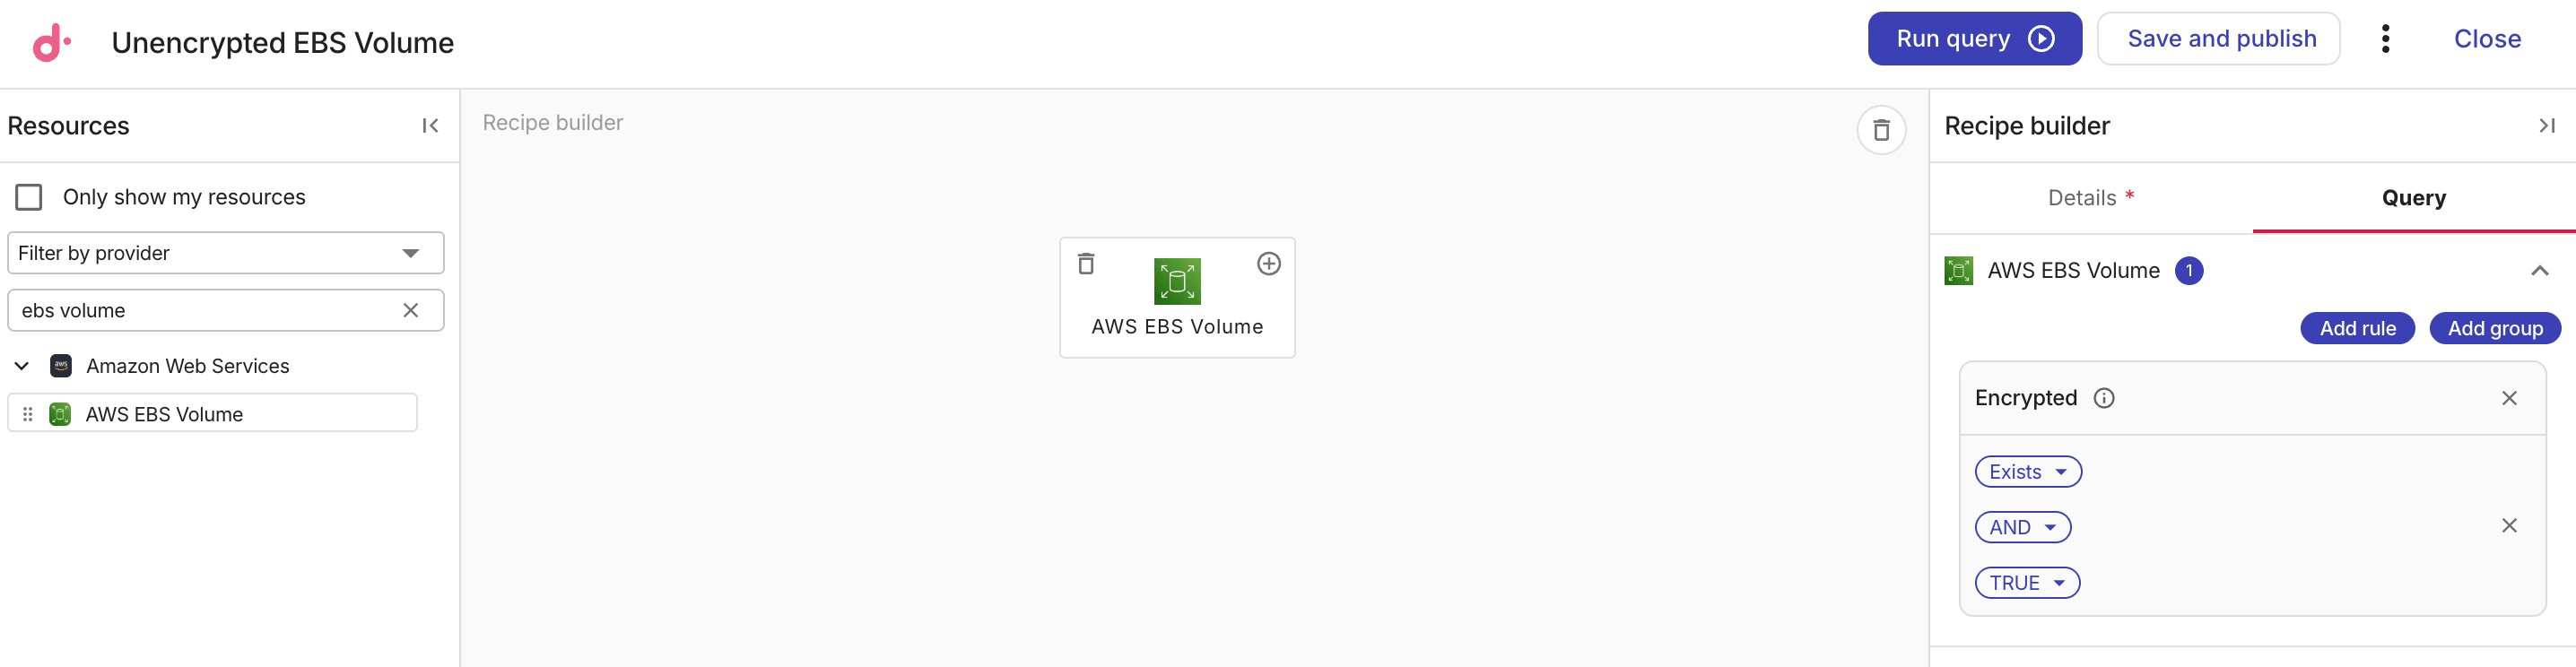
The example screenshot below shows the canvas with the AWS EBS volume resource.
-
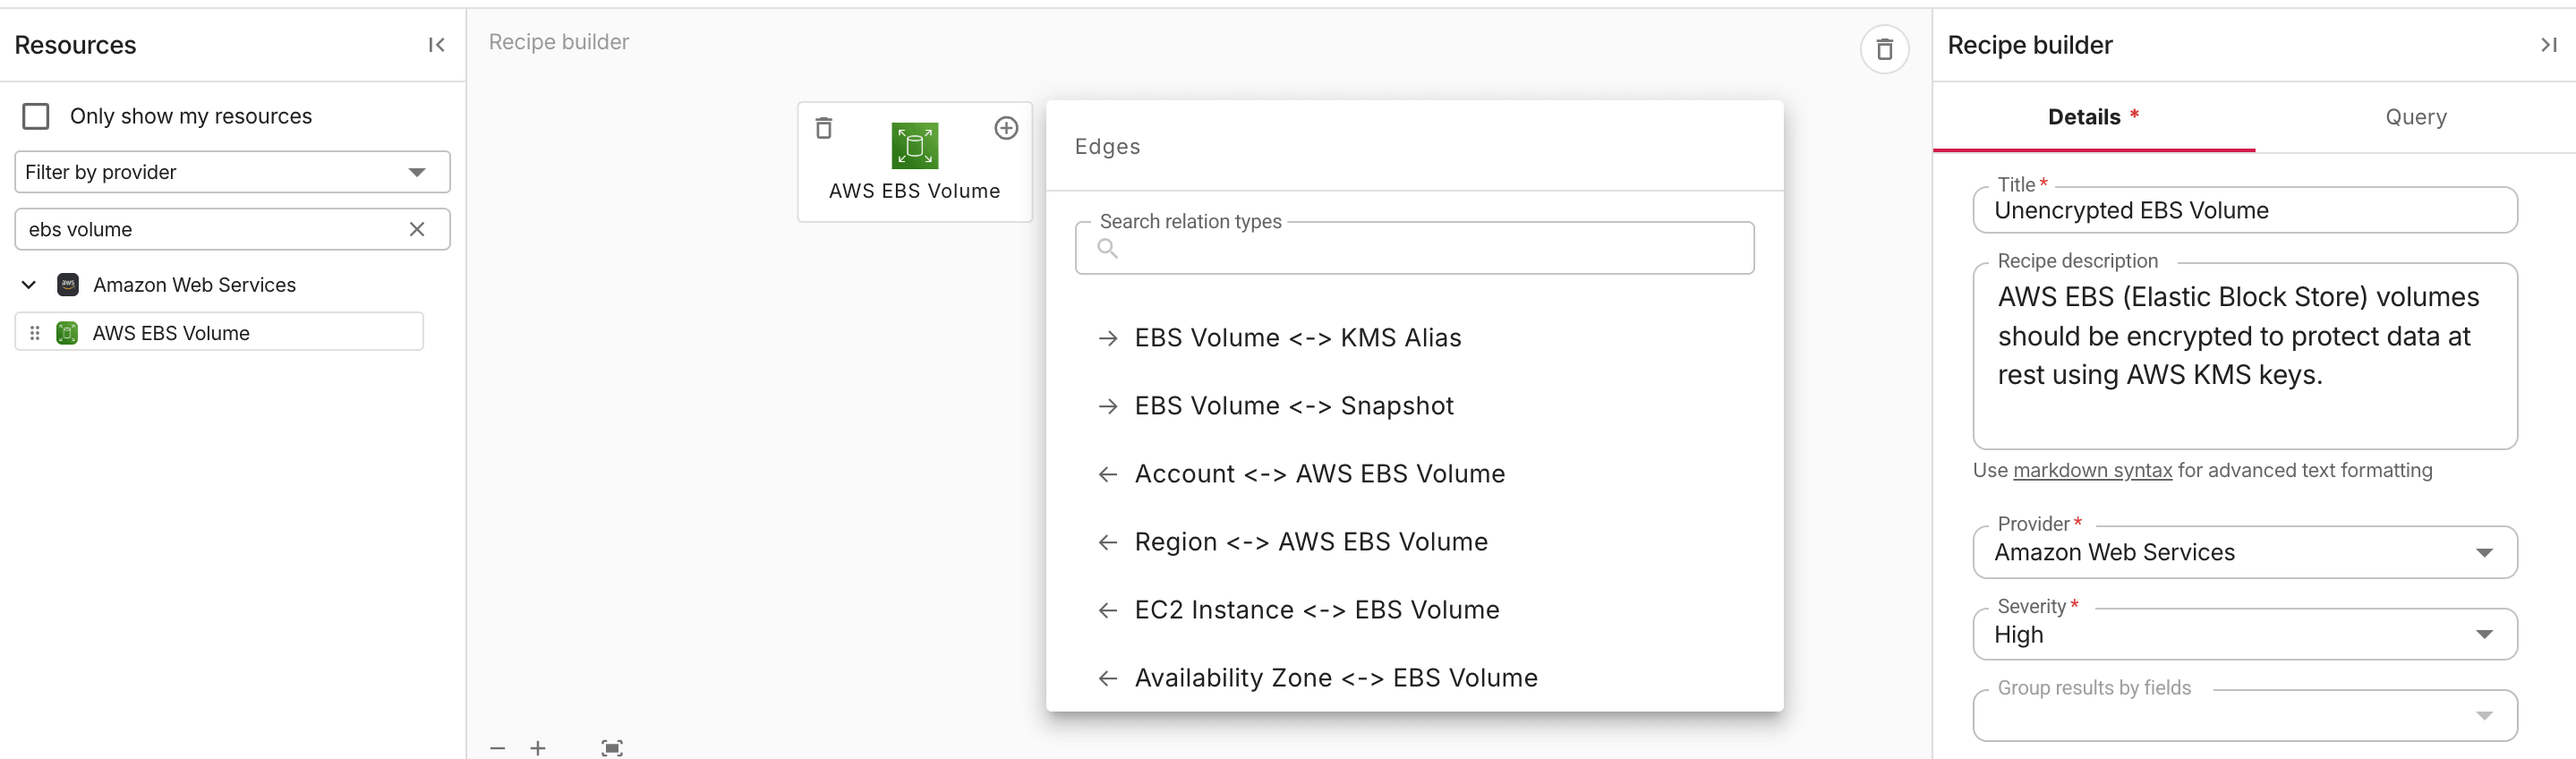
(Optional) To add a related resouce, select the Add icon (+) on the resource card, and the select a relation type to add.
Step 3: Create a query
-
In the Recipe builder side panel, select the Query tab.

-
Select Add rule to add a single rule.
If you need to have several rules in a single group, select Add group and then select Add rule in the group.
-
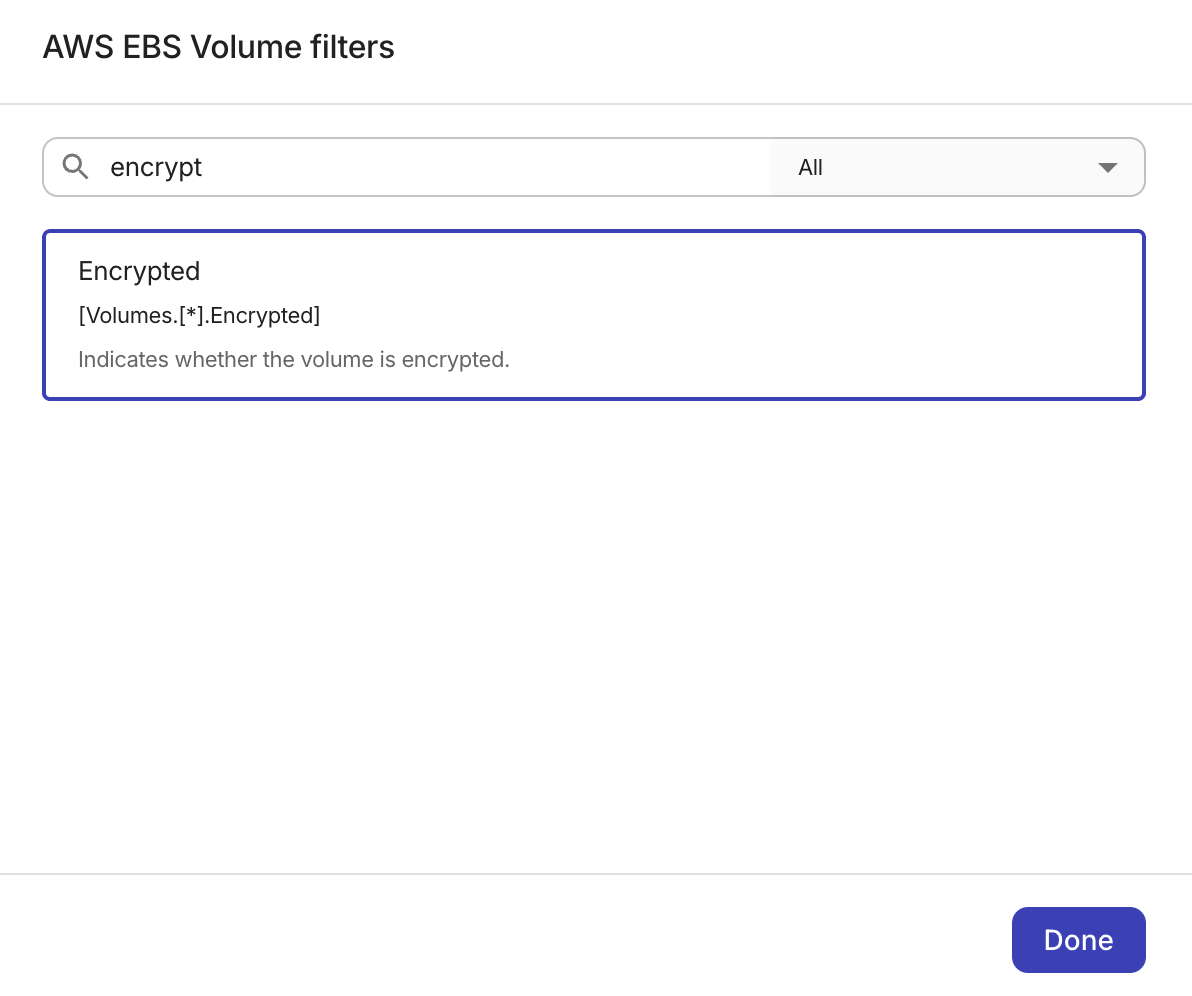
In the filters dialog, search for the rules to add. You can select an option from the list to narrow down the scope, searching by Properties, Events, Cost, Metrics, Tags, Group by, IAM, or All.
-
Select Done. The new rule is added to the side panel, under the corresponding resource. You can adjust the rule using the dropdown of each component.
-
Select Run Query to test the new recipe. Run query does not publish the recipe. See Draft and published.
Step 4: Add remediation details (optional)
-
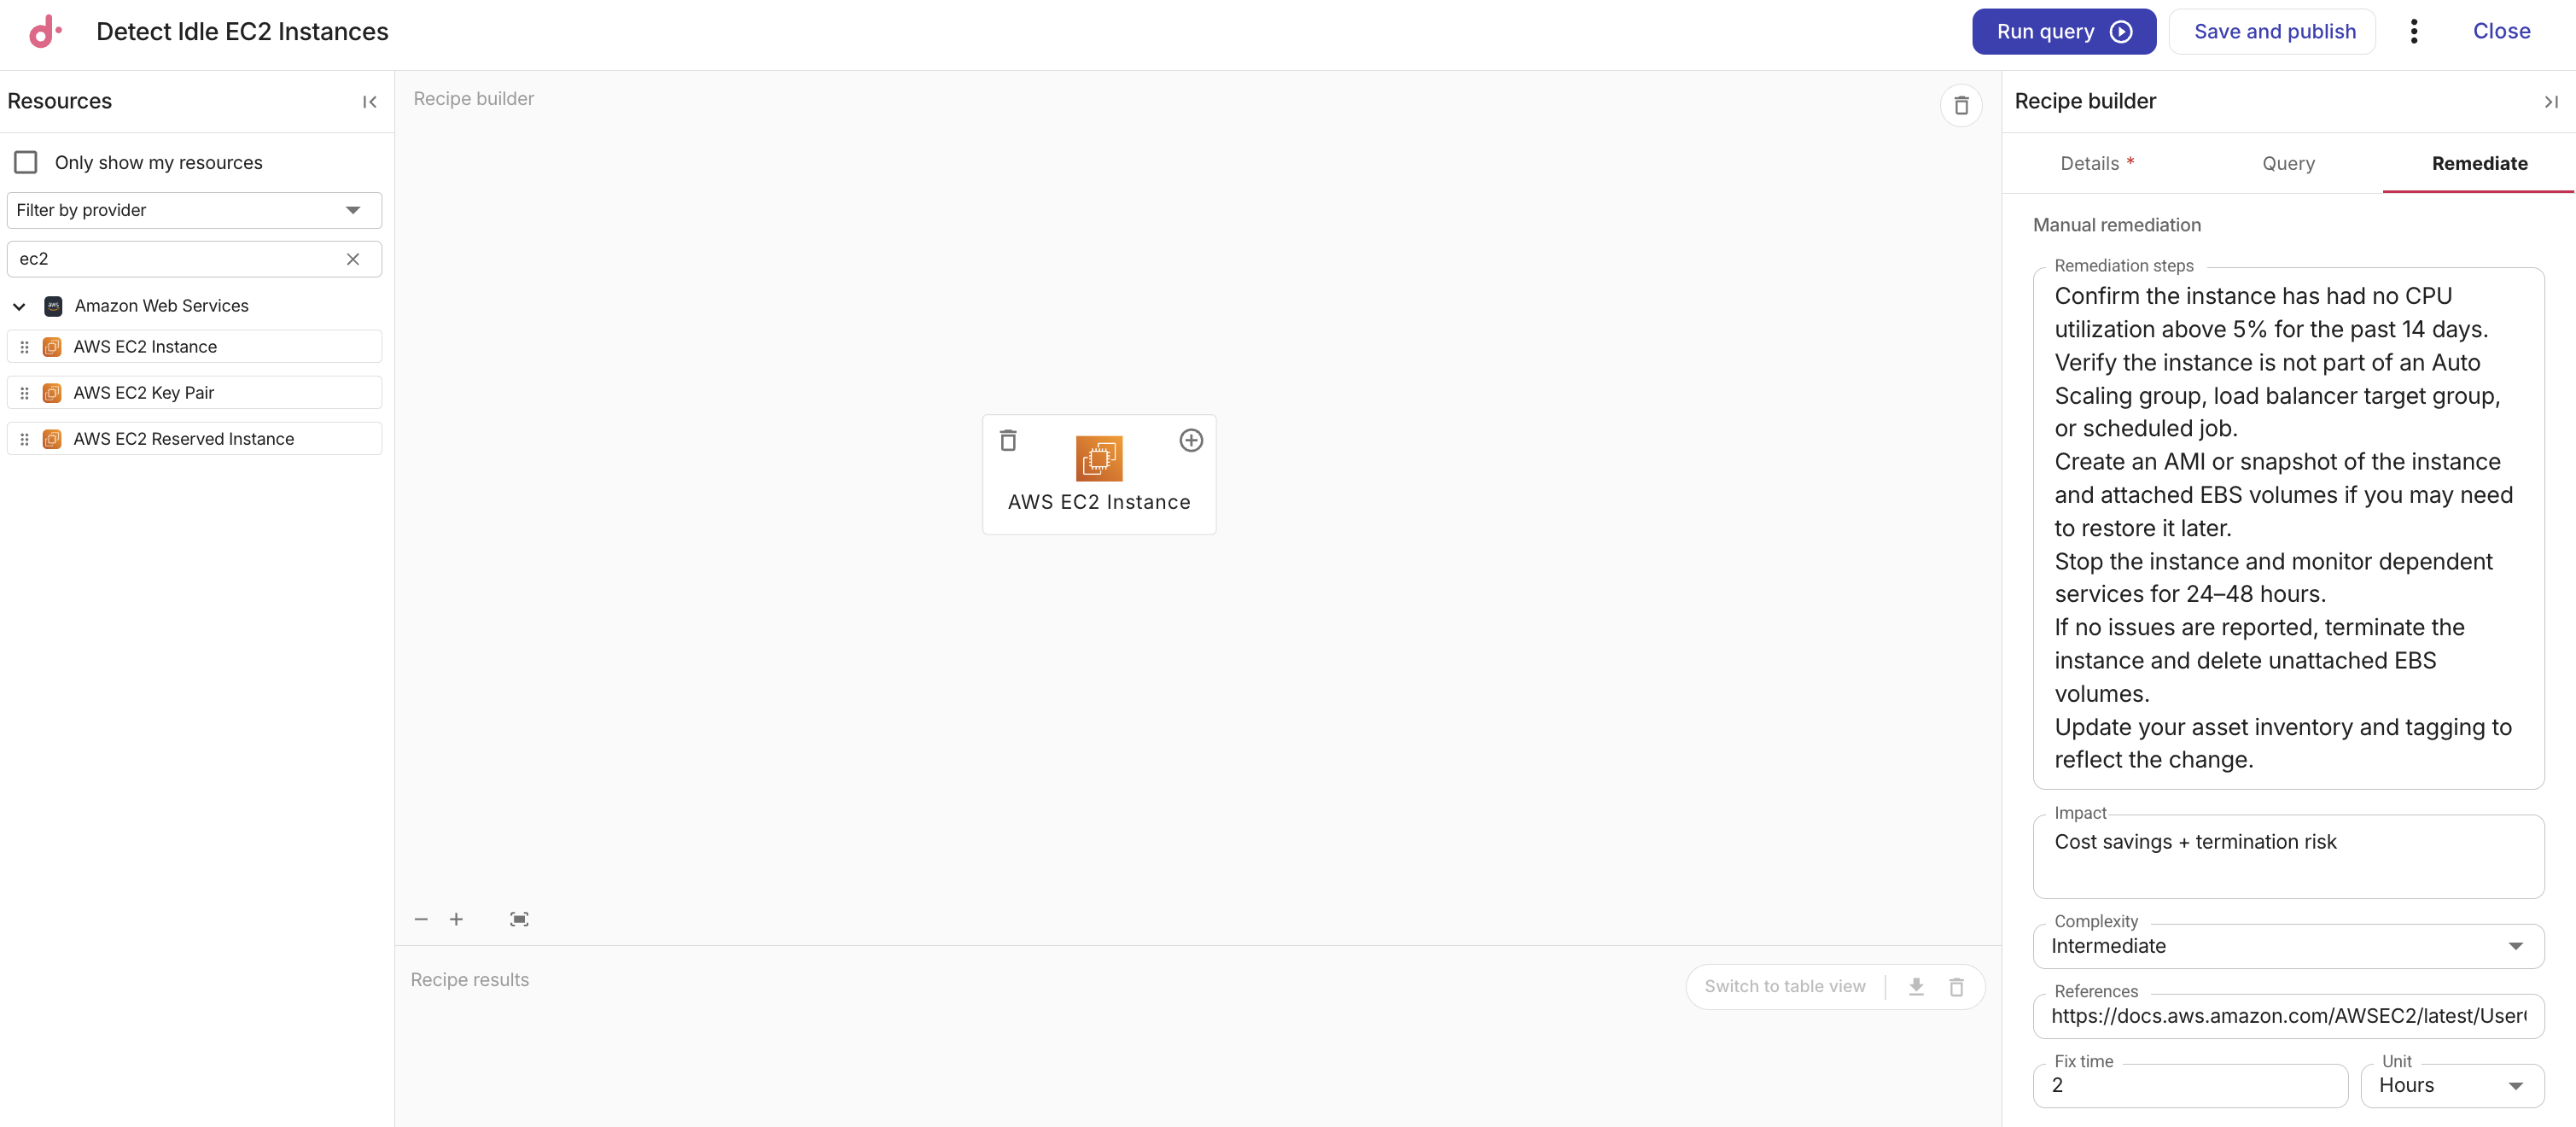
In the Recipe builder side panel, select the Remediate tab and fill in the remediation fields to document how to resolve issues detected by the recipe. All fields are optional. Any fields left empty are omitted when the recipe is saved.
-
Remediation steps: Step-by-step instructions for manually resolving the issue. Enter one step per line.
-
Impact: A description of the potential business impact or side effects that may result from applying the remediation steps.
-
Complexity: The estimated effort required to fix the issue. Supported values:
Simple,Intermediate,Complex. -
References: A URL linking to external documentation or related resources for additional context.
-
Fix time: The estimated time to resolve the issue. Enter a number and choose Hours or Days. Defaults to Hours.
-
When the recipe is published, the fields appear in the remediation details section of the corresponding insight's details page.
Clear all
If you need to start anew with a recipe, select Clear all from the kebab menu (⋮) in the top bar.
The Clear all option clears the canvas and resets all recipe details without requiring you to leave the page. You can also first select Save and publish to save the current recipe before clearing the canvas for a new one.
Publish the recipe
When the recipe is ready, search the Composer dashboard for an existing recipe that targets the same resource and condition. Prefer editing or duplicating that recipe over publishing a near-duplicate check—especially for Cost recipes, where overlapping matches can inflate savings totals. See Draft and published.
-
Select Save and publish. The recipe status on the dashboard changes to Published. Unpublished recipes remain Draft until you publish them. For more detail, see Recipe lifecycle.
-
Select Close to exit the Recipe builder.