Manage report subscriptions
Report subscriptions let you deliver reports on a schedule via email or Slack, including a snapshot chart and a link to view the full report in the console.
Limitations
-
You cannot create subscriptions directly for preset or managed reports. Instead, duplicate the report and create a subscription for the copy.
-
Processing new subscriptions can take up to an hour. To verify that a subscription produces the expected content right away, send a test delivery.
-
You can send up to three test deliveries per hour.
Required permissions
-
To create a report subscription, you need access to the report.
-
To edit or delete a report subscription, you must meet one of the following criteria:
-
You are the creator of the subscription.
-
You are the Owner of the report.
-
You have the Editor permission on the report.
-
You have the Cloud Analytics Admin permission.
-
-
You can subscribe or unsubscribe yourself from email notifications of any scheduled report visible to you.
Create a subscription
To create a new subscription:
-
Sign in to the DoiT console, select Reporting and analytics > Reports from the top navigation mega menu.
-
Open the report for which you want to schedule automated delivery.
-
Select Subscribe in the title bar.

You'll see a list of current subscriptions and an option to create a new one.
-
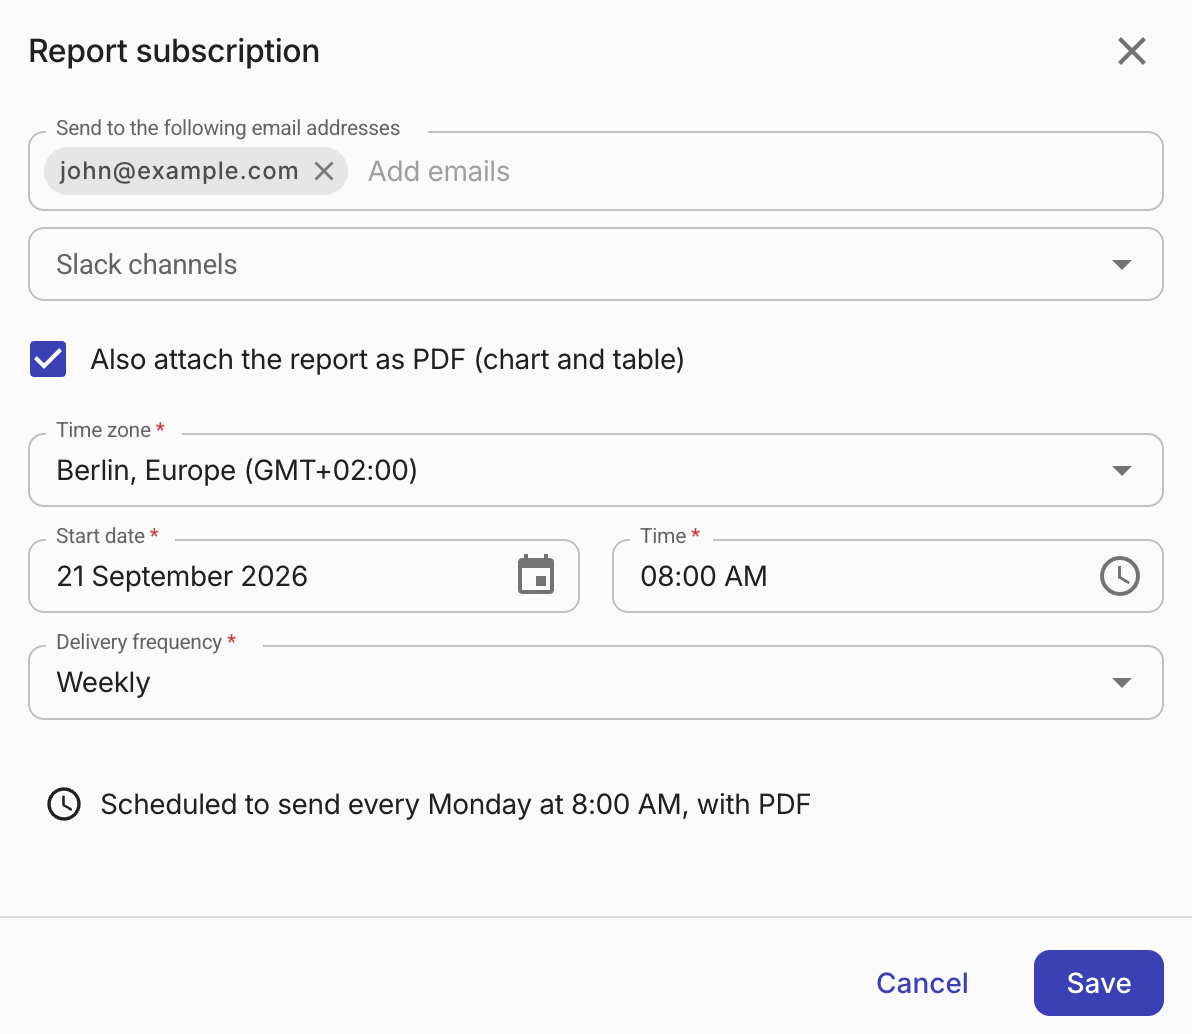
Select Create new subscription and configure it.
-
Email addresses: Email addresses of the intended recipients. The email addresses must belong to your organization's approved domains (see General settings) and must have been invited to the organization (see Create a new user).
-
Slack channels: If you have created a shared Slack channel with DoiT or installed the DoiT app for Slack in your workspace, you can choose one or more Slack channels to receive the reports.
-
Also attach the report as PDF (chart and table): Include a PDF attachment for email recipients. The PDF contains the report chart and a data table. If the report data is too large for the attachment, the PDF includes a link to the full report in the console.
-
Time zone, Start date, Time: The start date of the subscription and the time (hour:minute, timezone) of report delivery.
-
Delivery frequency: The frequency of report delivery:
Daily,Weekly,Monthly,Annually, orCustom.
-
-
Save the configuration.
If successful, a label named
Scheduledappears in the report's title bar and its entry on the main Reports screen.
Edit a subscription
To edit a report subscription:
-
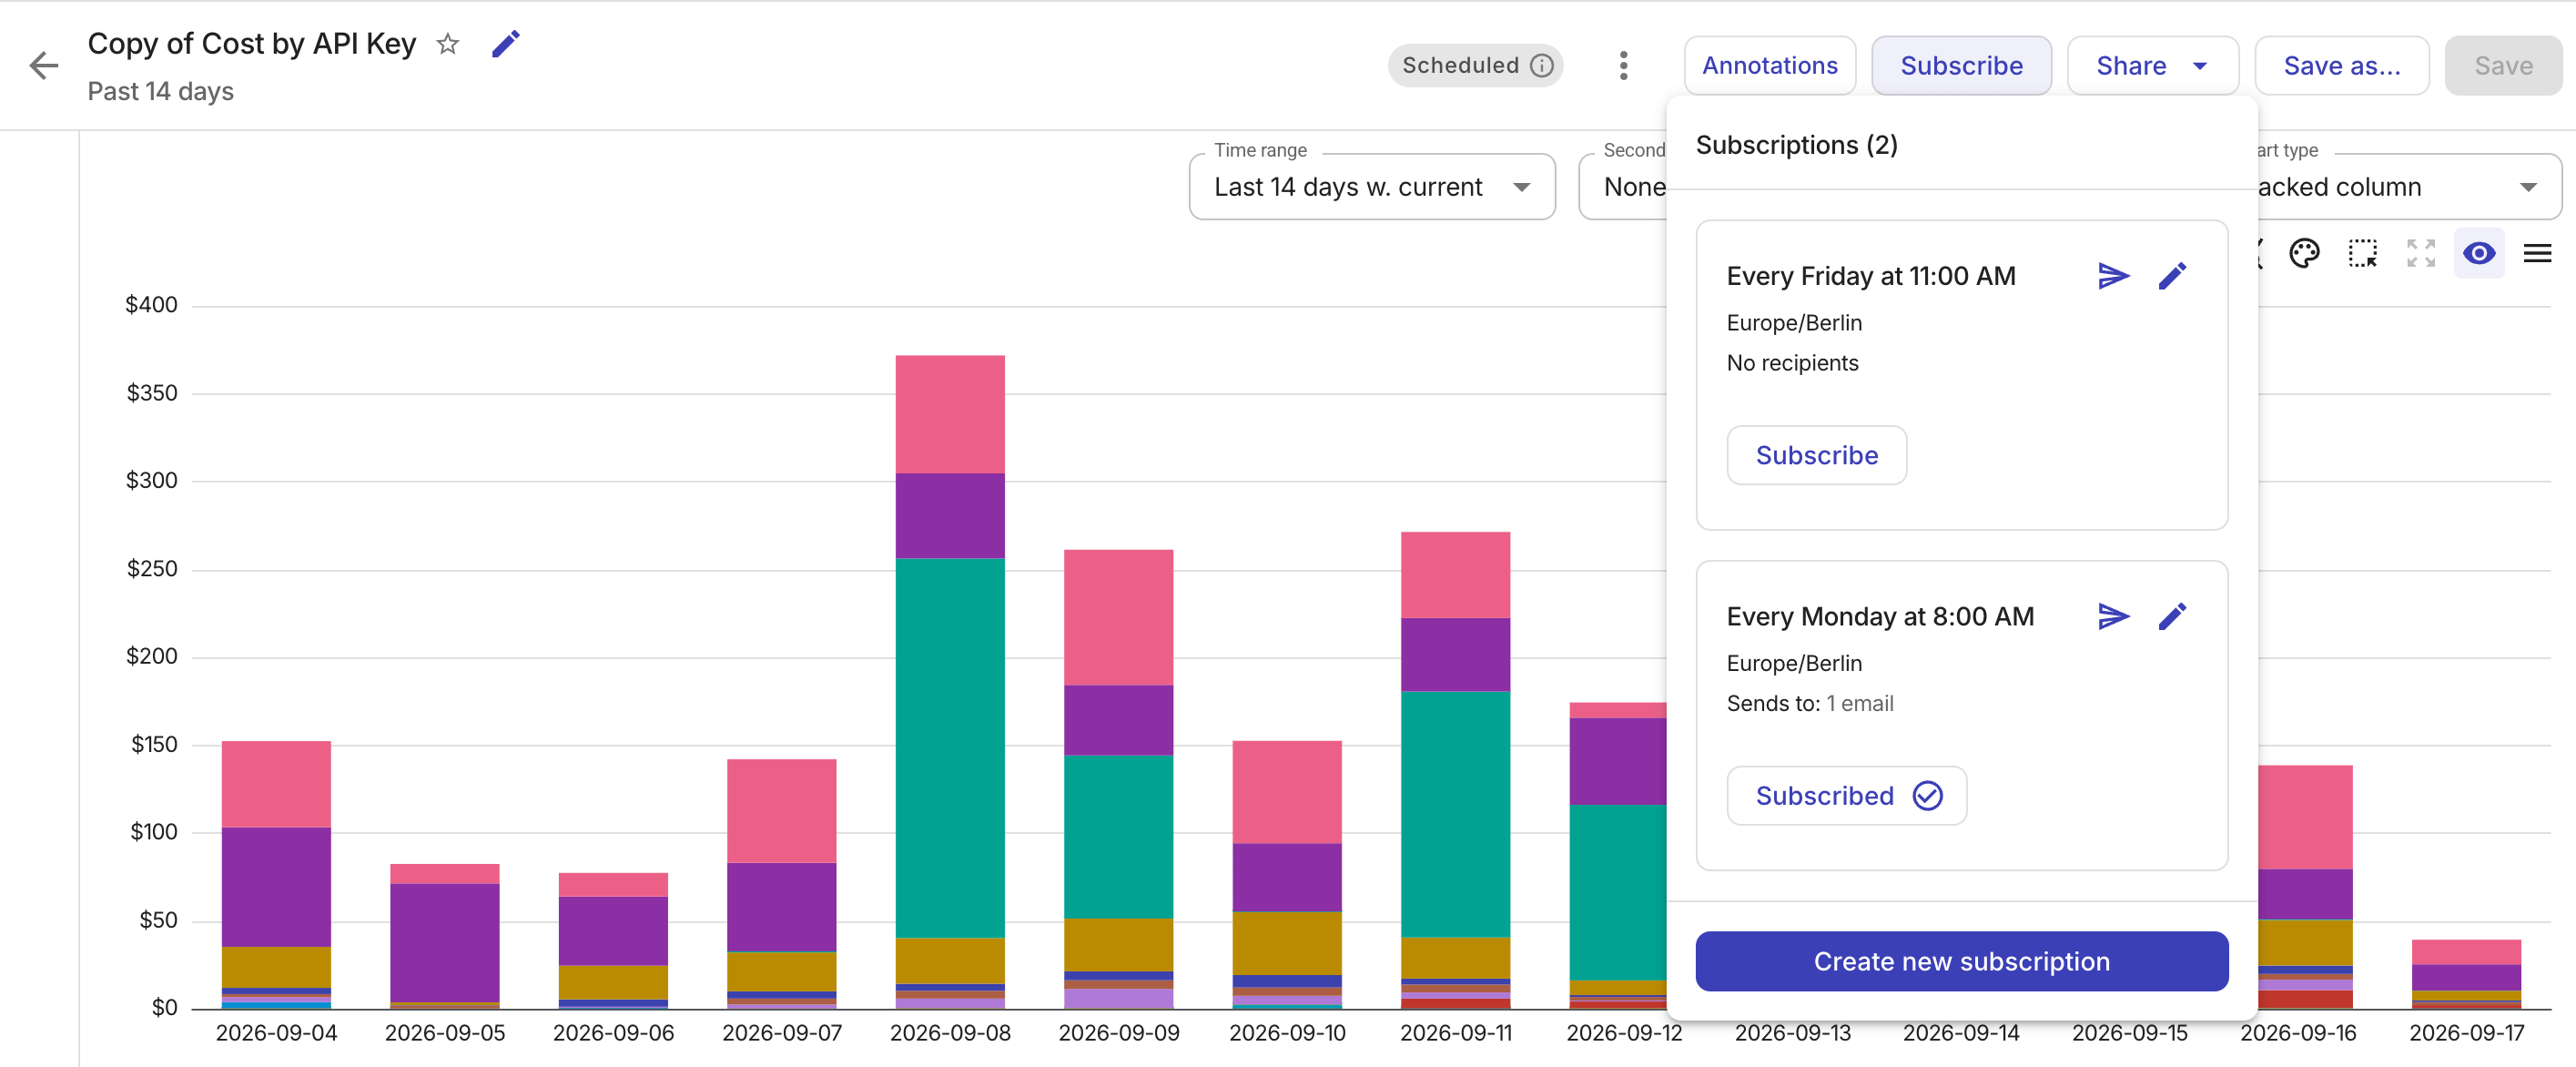
In the DoiT console, open the report of interest, and then select Subscribe in the title bar.
-
Locate the target subscription from the list.
-
Select the pencil icon for editing, update the configuration, and save your changes.
Send a test delivery
To verify that a subscription produces the expected content without waiting for the scheduled run, send a test delivery:
-
In the DoiT console, open the report of interest, and then select Subscribe.
-
Locate the target subscription from the list.
-
Select the Send test now icon (
) next to the subscription name, or open the subscription for editing and select Send test now. -
Choose who receives the test:
-
By default, the test is sent only to your email address.
-
If you're the subscription owner, you can select Everyone subscribed to send the test to all email recipients and Slack channels on the subscription.
-
-
Select Send test. The test delivery arrives within a few minutes.
Delete a subscription
Deleting a subscription removes it for all email recipients and Slack channels in your organization.
To delete a report subscription:
-
In the DoiT console, open the report of interest, and then select Subscribe.
-
Locate the target subscription from the list and select the pencil icon for editing.
-
In the Report subscription dialog, select Delete subscription.
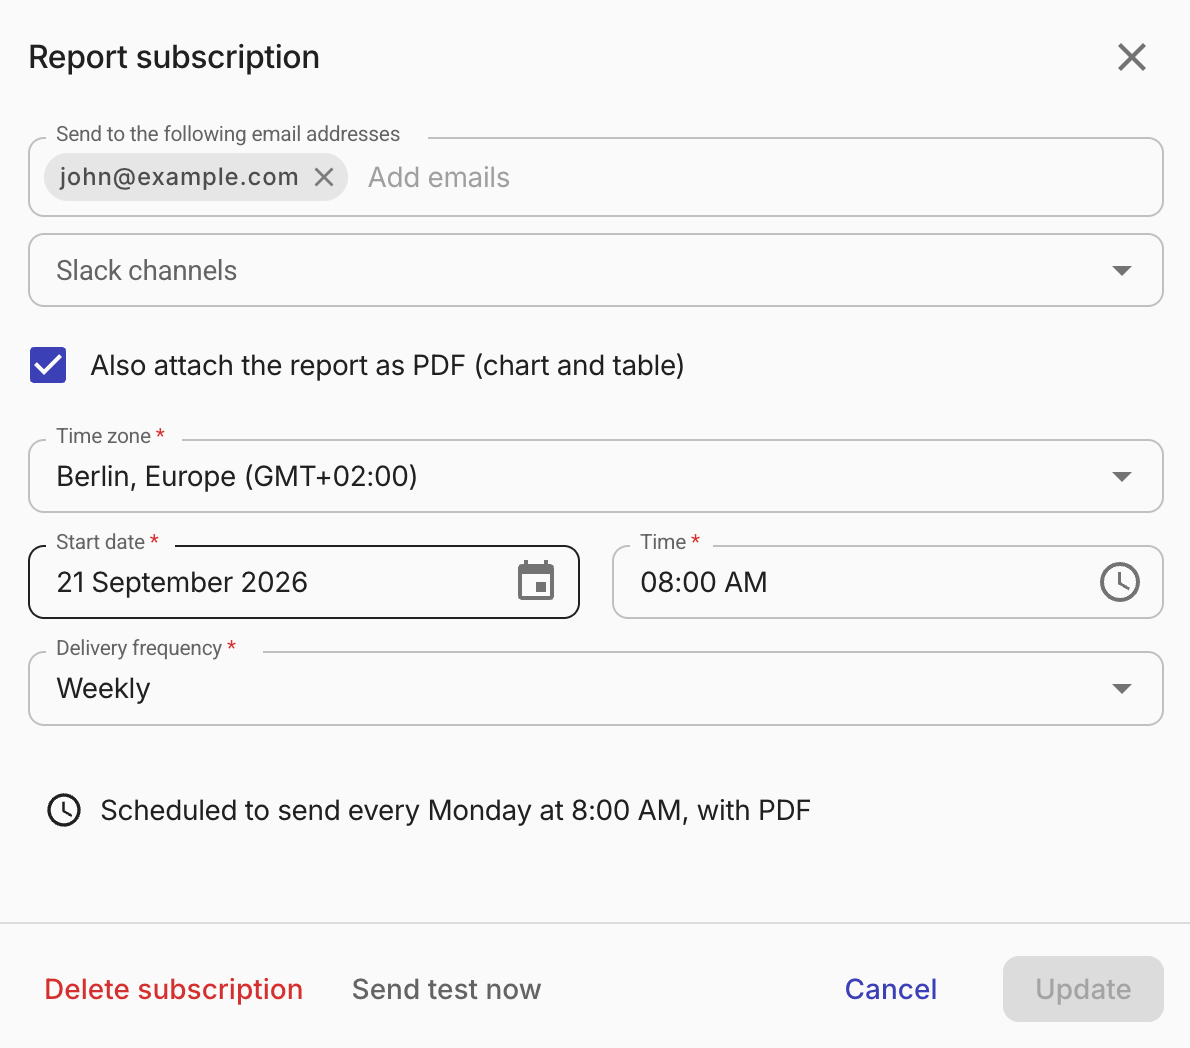
The Scheduled label is automatically removed from a report when all its subscriptions are deleted, but not when it has subscriptions without recipients.
Subscribe and unsubscribe for email notifications
Users in your organization who have access to a scheduled report can subscribe or unsubscribe themselves for email notifications anytime.
To subscribe for email notifications of a scheduled report:
-
In the DoiT console, open the report of interest, and then select Subscribe.
-
Locate the target subscription from the list and select Subscribe.
If successful, the Subscribe button becomes Subscribed.
To unsubscribe, follow the same process above. The only difference is that you select the Subscribed button for unsubscribing.