Create a new user
You can manage the access of other users on behalf of the organization, as well as create users for new employees who need access to the DoiT Platform.
Required permission
- User Manager
Invite new users
Invite users from the Users page to grant them access to DoiT Cloud Intelligence and assign a role.
Free email domains
By default, the Invite dialog blocks email addresses from free email providers such as Gmail, Yahoo, and Hotmail. This ensures that only users with organization-managed email accounts are invited to DoiT Cloud Intelligence.
Allow free email invitees is a per-organization setting that DoiT enables when required. Customer administrators cannot turn it on in the DoiT console. If your organization must invite users with free email addresses, contact your DoiT account manager.
When the setting is enabled for your organization, you can add free email addresses in the Invite dialog. An informational disclaimer appears reminding you that unmanaged accounts are not subject to your organization's identity, security, or governance controls.
Allowing logins from free email accounts means you lose the ability to manage user passwords, control what they can access, or manage what happens to your data over time.
If auto provisioning is enabled, any user with an email address from your organization's domain can sign up without being invited.
To invite new users:
-
Sign in to the DoiT console, select the gear icon () from the top navigation bar, and then select Users and access.
-
Select Users from the left-hand menu.
-
Select Invite user next to the filter bar.

-
In the Invite users dialog, add one or more email addresses you want to invite.
-
Select a role for the new users.
You can also choose to continue to edit their user profiles.
-
Select Invite.
The recipients you invited will receive an email that contains a link that they should use to complete sign up for a DoiT platform account.
Manage invitations
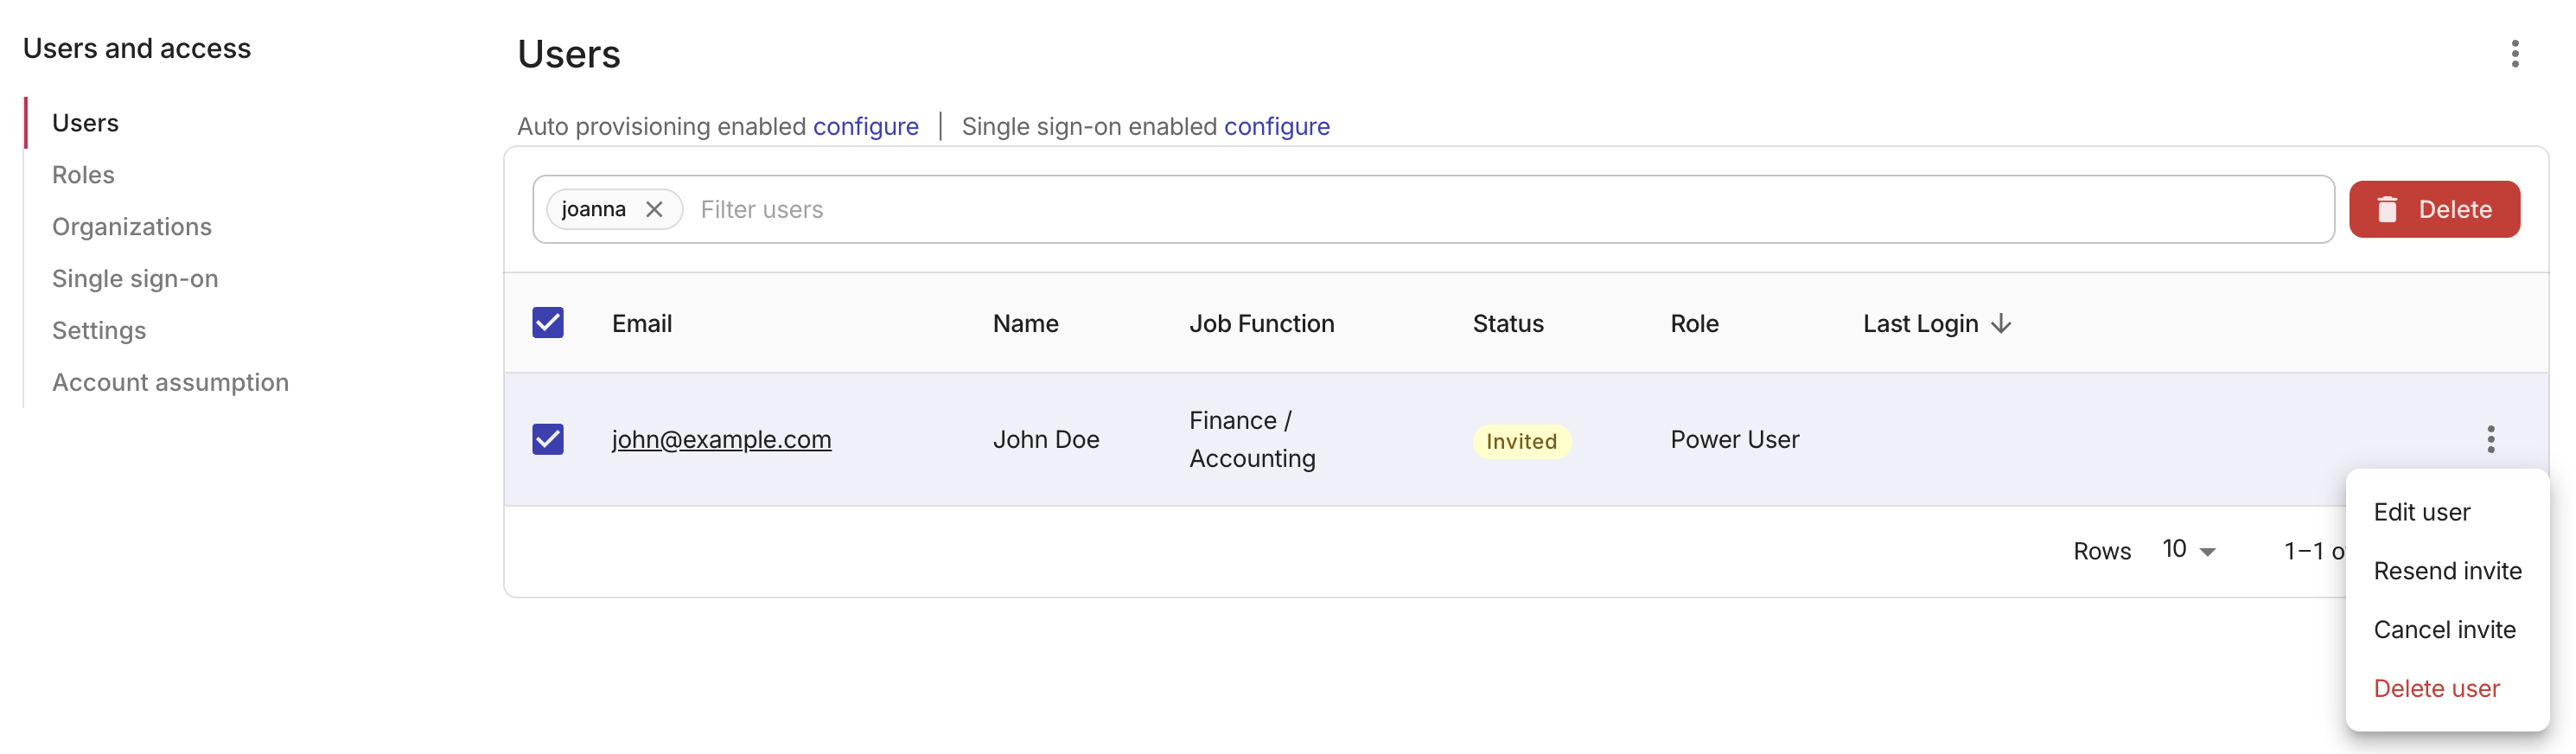
After you invite a user, you can track and manage the invitation from the Users page. Each invited user displays a status indicating the current state of their invitation. You can resend expired or cancelled invites, cancel pending invites, and see when an invite has expired.
| Status | Description |
|---|---|
| Invited | The invite has been sent and is waiting for the recipient to accept. |
| Expired | The invite was not accepted before it expired. |
| Cancelled | The invite was cancelled by an administrator. |
| Active | The user accepted the invite and their account is active. |
Resend an invite
You can resend an invitation to generate a fresh invite link. This is available for invitations with a Invited, Expired, or Cancelled status. Resending an invite sends a new invitation email and resets the invite status to Pending.
To resend an invite:
-
On the Users page, find the user whose invite you want to resend. The user's invite status displays as Invited, Cancelled, or Expired.
-
Select the three-dot menu (⋮) at the rightmost end of the user whose invite you want to resend, and then select Resend invite.
A confirmation message appears once the invite has been resent. The user receives a new invitation email with an updated sign-up link. Any previously sent invitation links are invalidated.
Cancel an invite
If you invited a user by mistake or no longer want them to join, you can cancel the invite while it is still pending. Canceling an invite invalidates the invitation link so the recipient can no longer use it to sign up.
You can only cancel invites that are still Invited. Expired or already-accepted invites cannot be cancelled.
To cancel a pending invite:
-
On the Users page, select the three-dot menu (⋮) at the rightmost end of the user whose pending invite you want to cancel.
-
Select Cancel invite.
-
Select Cancel invite to confirm.
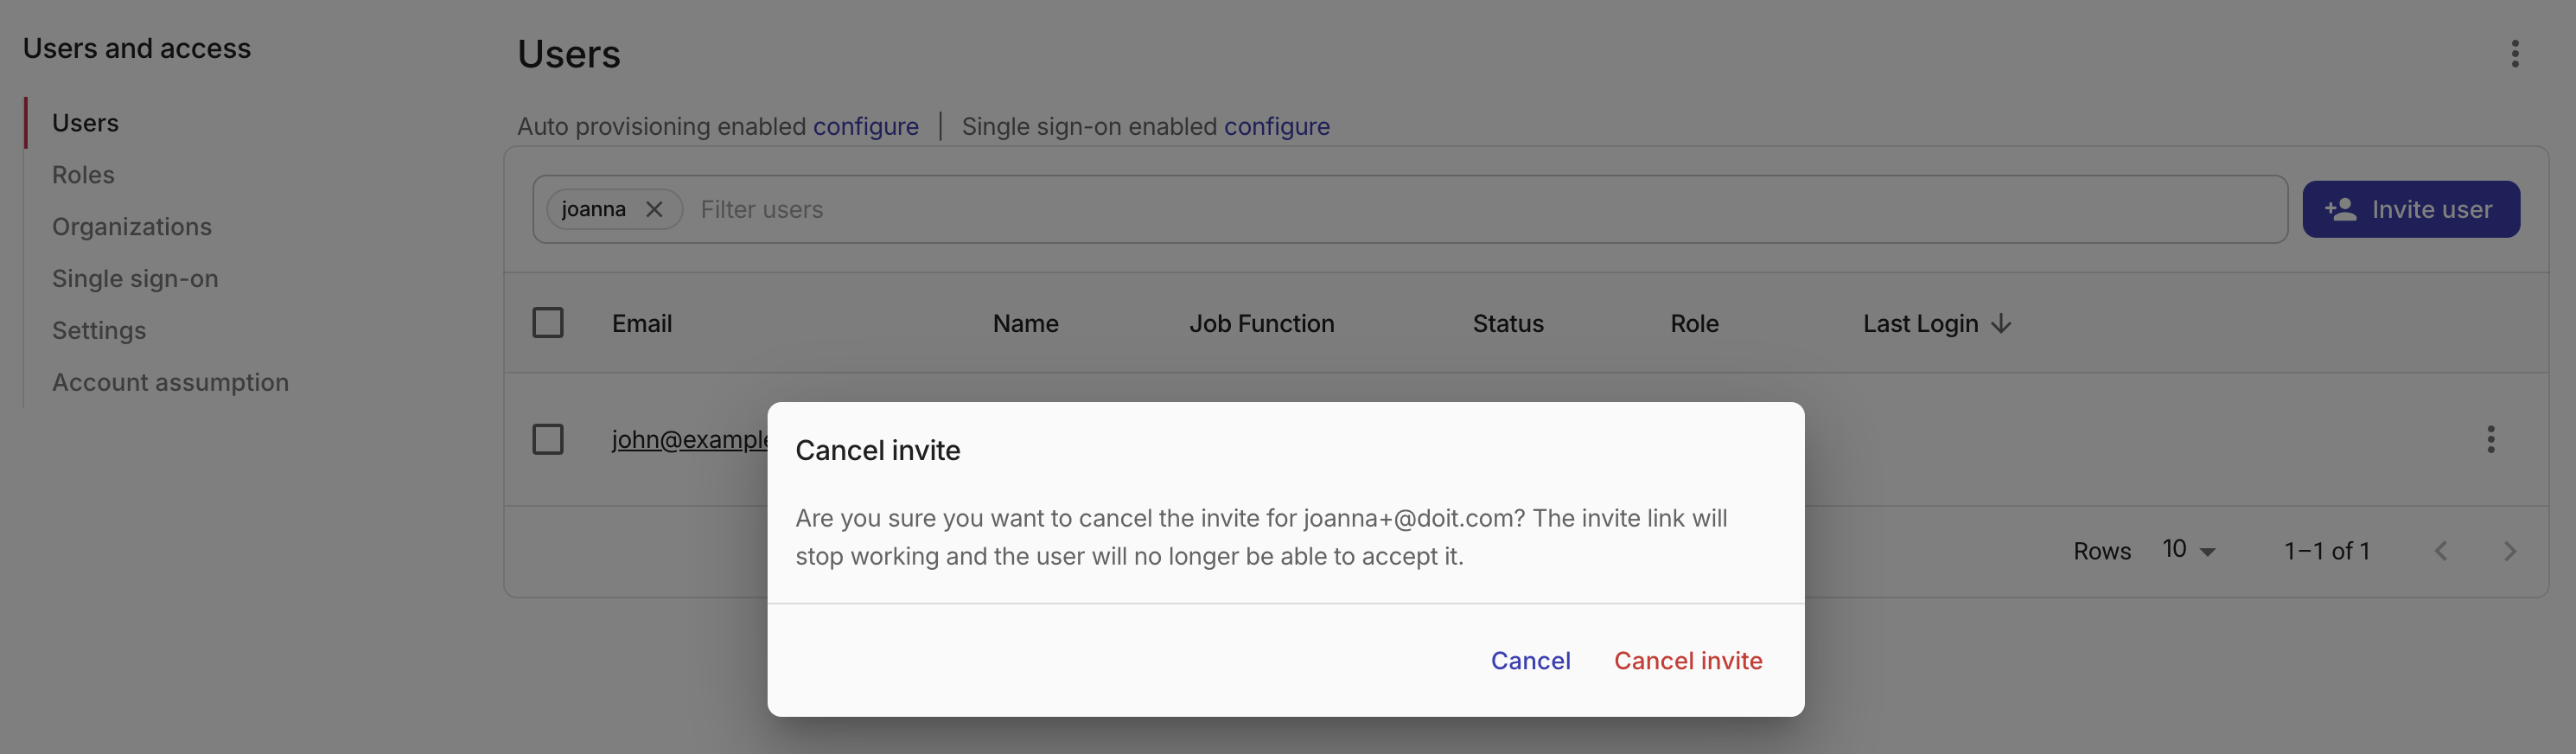
The user's invite status changes to Cancelled and the invitation link stops working. If a recipient tries to use an invitation link that has been cancelled, they see a message indicating that the invite is no longer valid and to contact their administrator for a new invitation. If you later decide to grant this person access, you can send a new invite.
Edit user profiles
There are two ways you can access the page to edit a user's profile:
-
Select the Continue to edit user profile checkbox when inviting them.
-
Select their email on the Users page.
See Your profile for more information.
Edit or delete
To delete a single user from your organization:
-
On the Users page, select the three-dot menu (⋮) at the rightmost end of the user you want to delete.
-
Select Delete user.
-
Select Delete to confirm.
To bulk update users in your organization:
-
Select the checkboxes next to the users you'd like to update.
-
Select Edit.
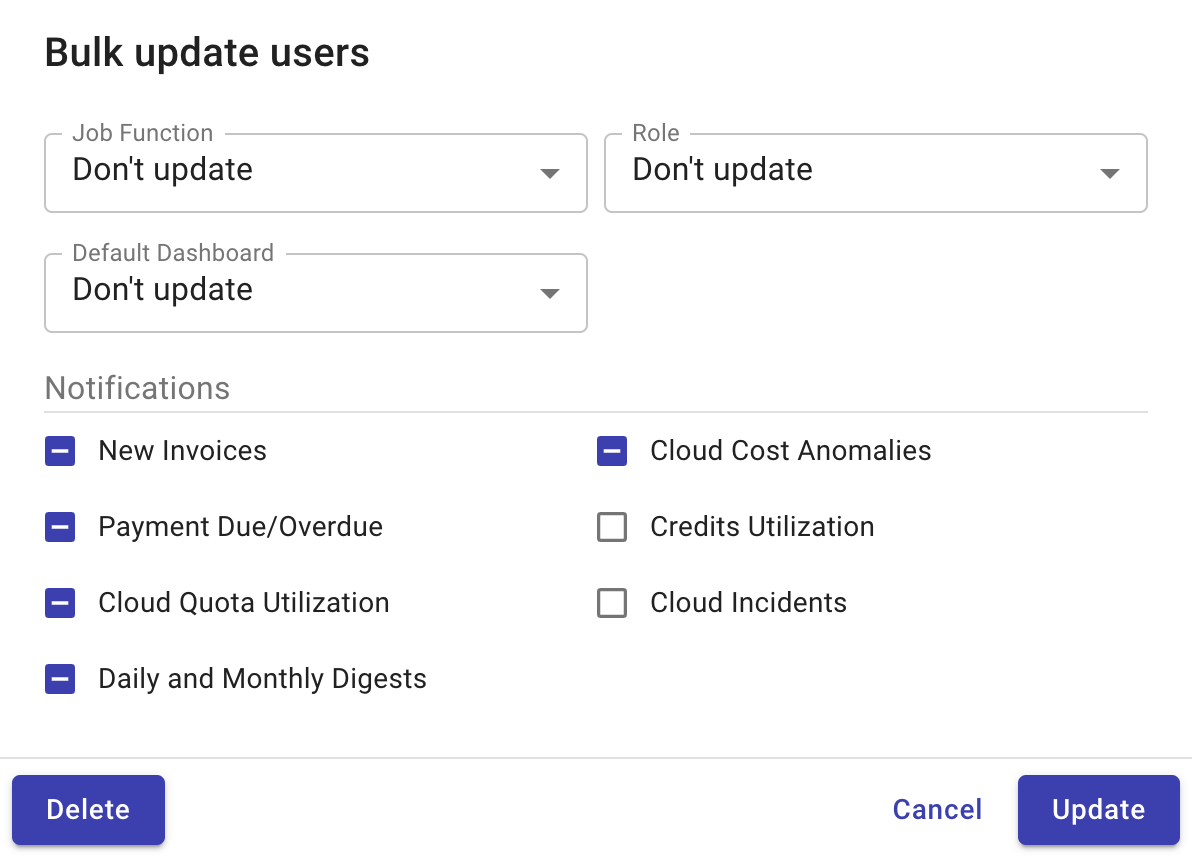
See Notifications for more information about notification options.
-
Once you've made your changes, select Update to confirm.
To bulk delete users from your organization, select Delete.