AWS connection
When you create a connection to access AWS cloud resources, you must define the scope of the connection. An AWS connection can be scoped to include specific AWS accounts or organizational units (OUs) for the selected AWS Organizations management account.
The DoiT console provides a step-by-step wizard to help you create an AWS connection. The wizard walks you through five steps: Details, Scope, Policies and permissions, Deploy to AWS, and User access.
Read the content below or check out the ▶️ interactive demo for a visual walkthrough.
Required permissions
To create an AWS connection, your DoiT account must have the CloudFlow Owner or CloudFlow Editor permission.
Prerequisites
To create connections to your AWS environment accounts, the corresponding management account must be linked and onboarded within DoiT Cloud Intelligence.
-
If the AWS account is already connected to DoiT Cloud Intelligence, you can create a connection from existing permissions. Select Create connection when you need a dedicated CloudFlow IAM role, custom organizational unit scope, or separate policies.
-
If you're a DoiT PartnerOps end customer, make sure to enable the CloudFlow feature on your AWS management account.
Step 1: Details
When you launch the wizard, first name the connection and the IAM role it creates.
-
Sign in to the DoiT console, select Automation and operations from the top navigation mega menu, and then select CloudFlow.
-
From the side bar, select Connections.
-
From the Connections pane, select the AWS tab.
-
Select Create connection. The Create your AWS connection wizard is displayed.
-
If not already expanded, select the arrow to expand Details.
-
In Connection name, enter a unique name that reflects the purpose or scope of this connection. This connection exists in the DoiT platform and defines your users' permissions to interact with the flow itself.
-
In IAM role name, enter a name for the AWS IAM role that the flow assumes when it executes. The role name is automatically prefixed with
doit-cloudflow-. By default, the IAM role name matches your connection name. You can change it if you need a different role name. This AWS IAM role does not have any permissions on the DoiT platform. -
Select Next.
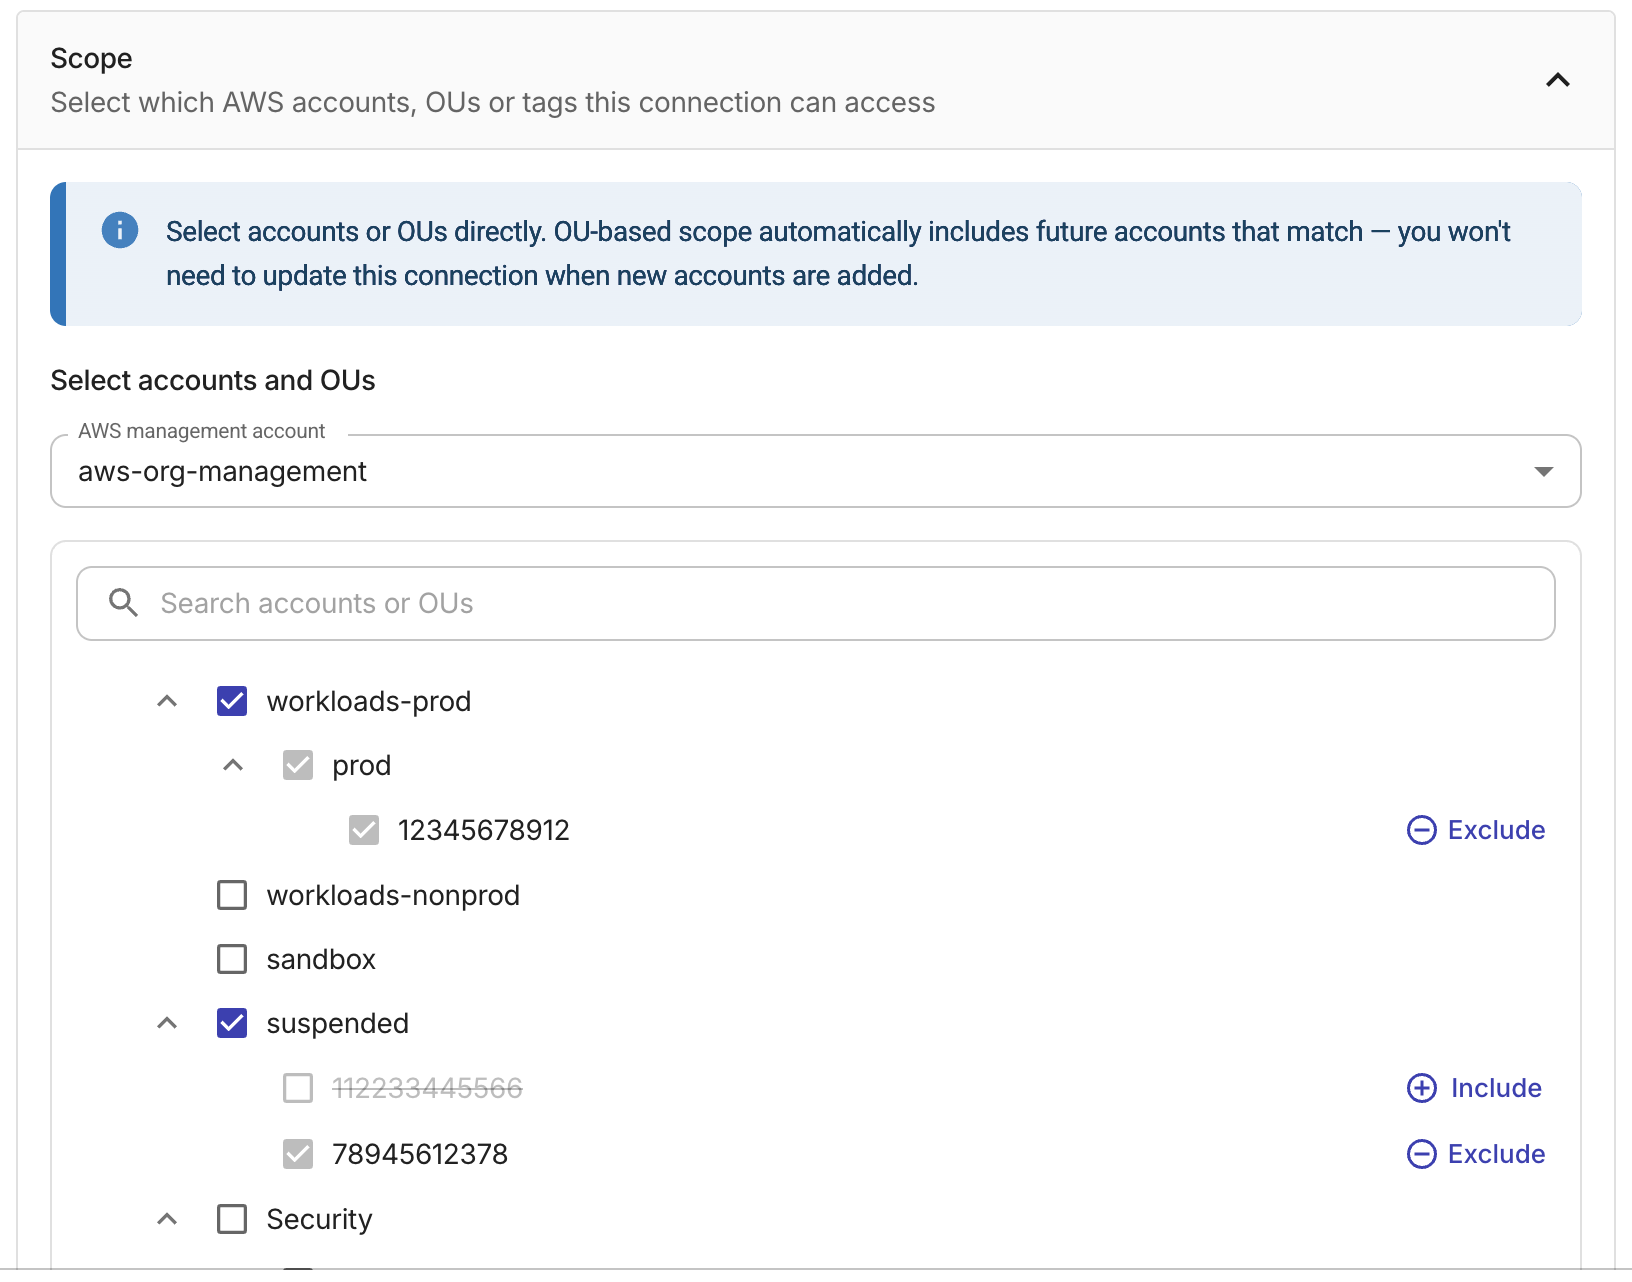
Step 2: Scope
In Scope, you first select the AWS Organizations management account, then build the connection scope by selecting AWS accounts or organization units (OU) from the AWS organizations tree. When you select an OU, the connection automatically includes any current or future accounts added to the OU. You can also exclude individual accounts from an OU.
-
If not already expanded, select the arrow to expand Scope.
-
In AWS management account, select the AWS Organizations management account whose AWS organizations structure you want the connection to access. The organization structure is displayed.
-
In the organization tree, select the AWS accounts and OUs that this connection can access.
-
If the accounts and OUs you selected cover the management account’s place in the organization tree (for example, you selected the organization root, or an OU that lists the management account among its members), you are asked to confirm whether this connection should explicitly include the management account in its scope. The management account may always be part of the organization, but it may sit directly under root or inside a child OU. If you select an OU where the account lives, you should choose to Include management account if flows must access resources in that account. Choose Don't include if you want member accounts only and to leave the management account out of this connection’s scope.
-
(Optional) Exclude any individual accounts from a selected OU.
-
Select Next.
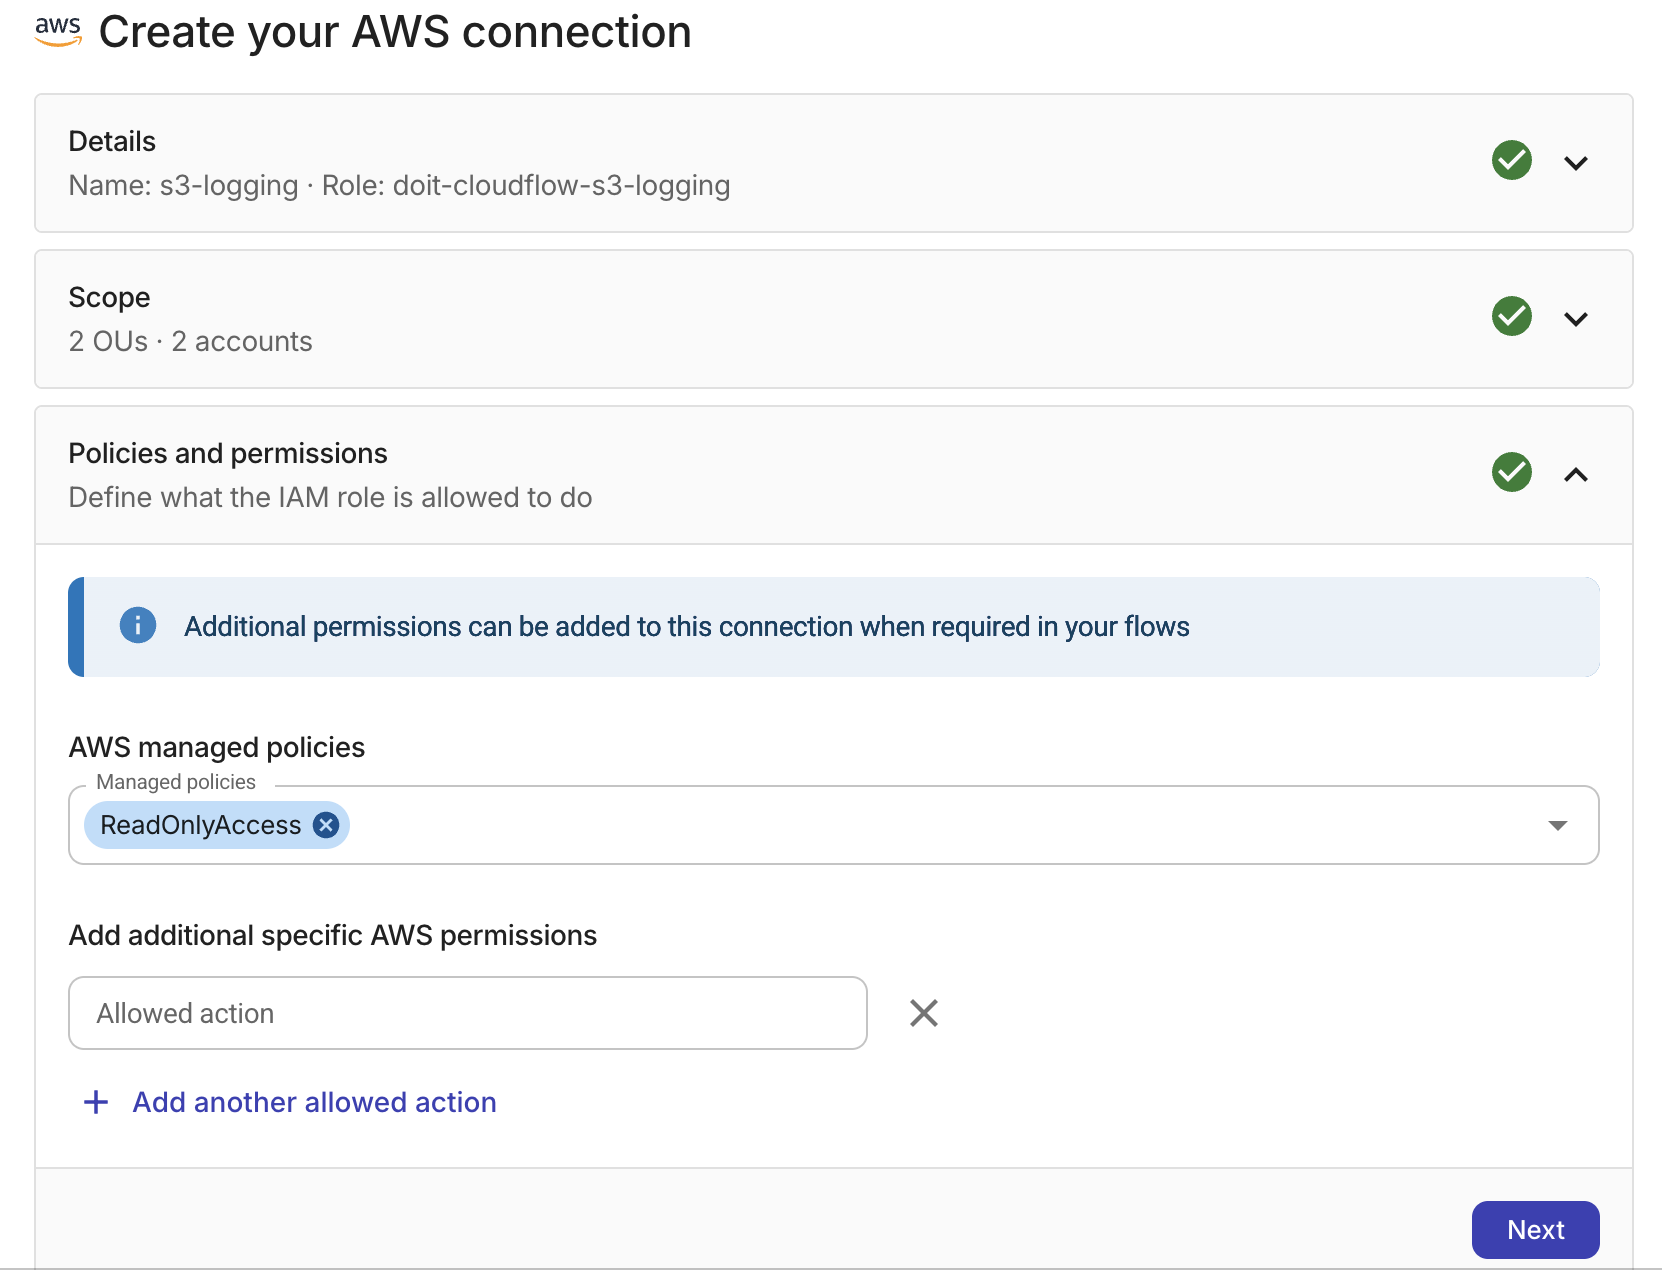
Step 3: Policies and permissions
Define the permissions for the AWS IAM role that the flow assumes when it executes.
-
If not already expanded, select the arrow to expand Policies and permissions.
-
(Optional) In AWS managed policies, select the AWS managed policies that you want to add to this IAM role.
-
In Allowed action, enter the additional permission, for example,
S3:GetObject. -
(Optional) If the flow requires additional AWS allowed actions, select Add another allowed action and repeat for each additional AWS allowed action you want to add.
-
Select Next.
Step 4: Deploy to AWS
You must apply either an AWS CloudFormation StackSet deployment or Terraform configuration that enables the connection to access your AWS accounts. When you run the AWS CloudFormation StackSet, it automatically deploys the connection from the management account across all accounts and OUs in your Scope. Terraform must be initialized and applied separately within each individual AWS account in Scope.
-
If not already expanded, select the arrow to expand Deploy to AWS.
- AWS CloudFormation StackSet
- Terraform
- Select the AWS CloudFormation StackSet tab.
- Open AWS CloudShell or a terminal while signed in to the AWS Organizations management account.
- Copy the provided AWS CLI command and run it to create the StackSet and deploy it to the selected OUs and accounts.
- If your scope includes the management account, the wizard shows an additional management account IAM role command. Run that command in the management account as well.
- (Optional) The wizard may check whether the StackSet deployment completed. This validation is feedback only; you can select Next whether or not the check ran or succeeded.
- Select the Terraform tab.
- If you have not already done so, install Terraform in your shell environment.
- Install AWS CLI and configure your AWS credentials.
- Select Download main.tf to create a
main.tffile. The file is saved in your Downloads folder. - Create a new directory and copy the
main.tffile to the new directory. If it is a new directory, runterraform initinside the directory to initialize the Terraform project before running other commands. - Copy the provided code block and paste it into the
main.tffile. - Run
terraform applyin each AWS account that you want to include in this connection. AWS Organizations scope is not supported for Terraform deployment. - The wizard does not validate Terraform deployments. After you apply the configuration in each account in scope, continue to the next step.
For more information, see the GitHub repository that stores connection scripts for Terraform with supporting documentation and examples.
-
Select Next.
Step 5: User access
Specify which DoiT accounts have access to this connection and are authorized to use it in a flow.
-
If not already expanded, select the arrow to expand User access.
-
In Email, select the email address of a DoiT account who can use this connection.
-
In Connection access level, select the access level the DoiT account has.
-
To add another account, select Add another account.
-
Repeat these steps for each DoiT account who can use this connection.
-
Select Finish connection. It may take a few minutes to create your connection. Once the connection is created, you can use it in your flows.
▶️ Interactive demo
Try out our interactive demos for a hands-on walk-through experience.
If the demo doesn't display properly, try expanding your browser window or opening the demo in a new tab.