Manage anomaly notifications
The anomaly detection engine is always running. You can set up notifications to receive near-real-time emails on detected anomalies, send messages to Slack or Microsoft Teams channels, or show alerts as in-app notifications in the DoiT console.
In addition to notifications, you can run CloudFlow flows automatically when cost anomaly events occur—for example when an anomaly is detected, when its status or cost changes, or when it is acknowledged. See DoiT Cloud Intelligence event trigger to set up a flow trigger.
Required permissions
- Users Manager, Anomalies Viewer, Cloud Analytics User
Cost anomaly notification settings
Cost anomaly notifications are managed together with other types of notifications.
To update the cost anomaly notification settings:
-
Sign in to the DoiT console.
-
Launch the Notifications page using one of the following methods:
-
Select the gear icon () from the top navigation bar and select Notifications.
-
On the Cost anomalies page, select Anomaly settings > Manage notifications.
-
-
Follow the instructions to Create a new notification or edit an existing one.
-
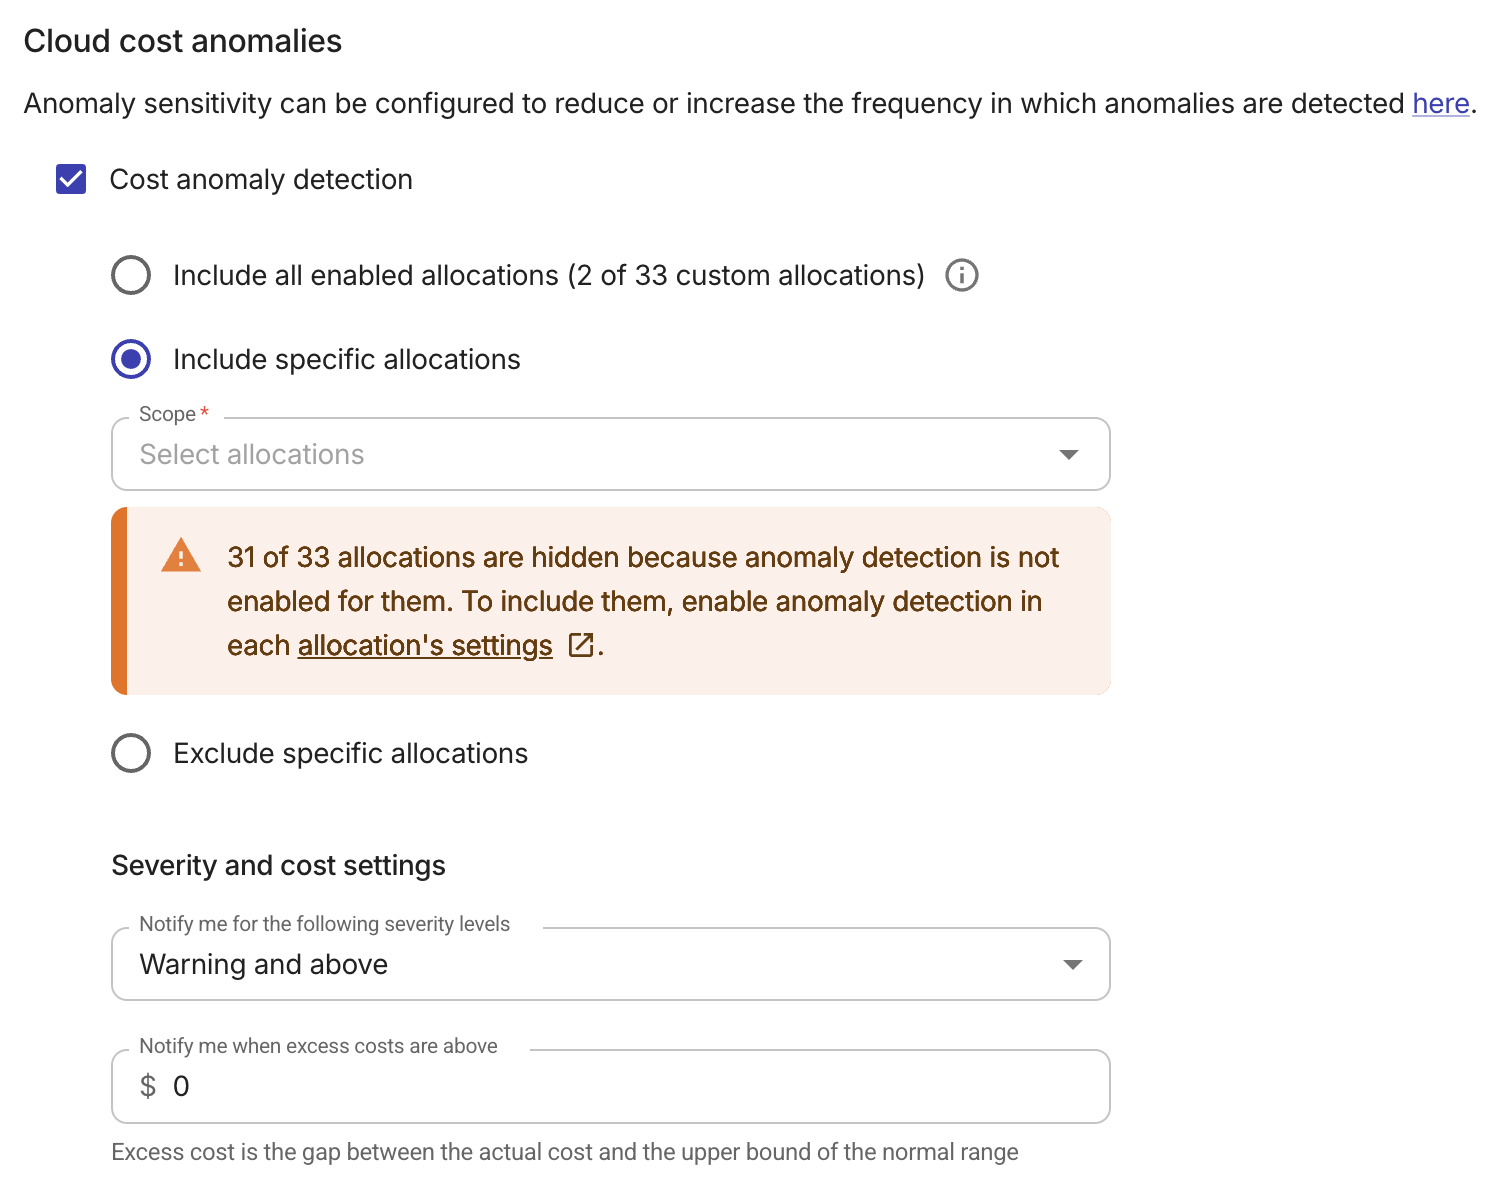
In the step to select notifications, go to the Cloud cost anomalies section, and select the Cost anomaly detection checkbox.
-
Specify the notification conditions. You receive notifications only when all of the specified conditions are met.
Allocations
To receive anomaly notifications for an allocation, you must enable anomaly detection for that allocation. See Monitor cost anomalies for details. Allocations without anomaly detection enabled are excluded from the notification scope of the Cloud cost anomalies section.
You can specify whether to receive notifications from specific resource groups (defined by allocations).
-
Include all enabled allocations: Default setting. Includes all allocations that have anomaly detection enabled.
-
Include specific allocations: Receives notifications only from the scopes defined by the specified custom allocations. The allocation picker only displays allocations that have anomaly detection enabled.
-
With this option, you don't receive notifications for anomalies that occur in a broader (superset) or a narrower (subset) scope of that allocation.
-
To avoid missing critical cost anomaly notifications, we recommend keeping a general anomaly notification channel active.
-
-
Exclude specific allocations: Receives no notifications from the scopes defined by the specified custom allocations. The allocation picker only displays allocations that have anomaly detection enabled.
A warning shows how many allocations are hidden when anomaly detection is enabled for some allocations and Include or Exclude filters are applied.
Severity and cost settings
These two options help you control the volume of notifications:
-
Notify me for the following severity levels: Sets the minimum severity level that triggers the notification. There are three severity levels: All severity levels, Warning and above, and Critical. By default, the severity level for email notifications is Critical.
-
Notify me when excess costs are above: Sets the minimum amount of the excess cost that triggers the notification. The excess cost is the gap between your actual cost and the upper bound of the normal range. You can't use decimals in this field.
If you want to reduce or increase the number of identified anomalies, consider adjusting the Anomaly sensitivity settings.
Resend notifications for active anomalies
By default, anomaly notifications are sent only upon initial detection. Because active anomalies can quickly drive up costs if left unattended, we recommend configuring renotification in case the cause of an anomaly is not addressed in time.
There are two types of renotification conditions:
-
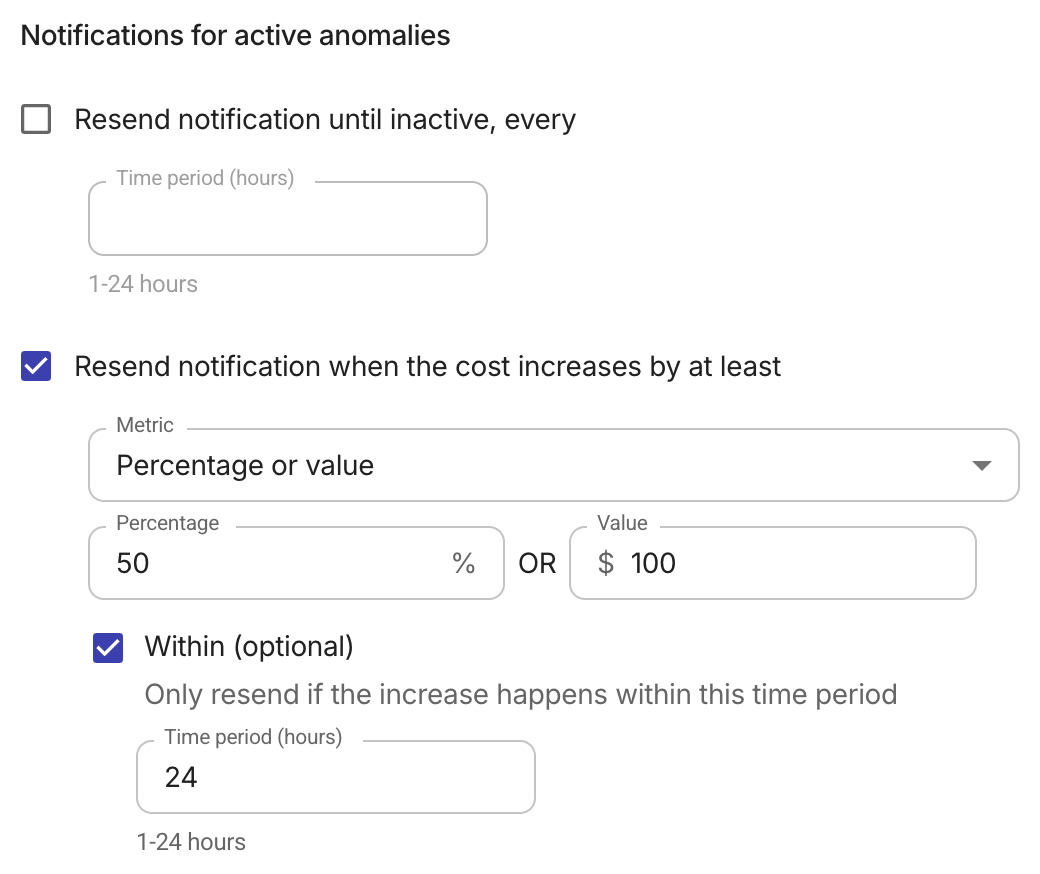
Resend notification until inactive, every: Resends notifications at regular intervals (
1to24hours) as long as the anomaly remains active. -
Resend notification when the cost increases by at least: Resends notifications if the cost increases by a specified percentage, amount, or both, relative to the cost at the time of the last notification.
-
Within (optional): Resends notifications only if the increase occurs within a specific timeframe.
We evaluate updated cost data every hour, regardless of whether a renotification has been sent. At each evaluation point, the system compares the maximum total cost during the period to the cost at the time of the last notification, and sends a notification if the threshold is crossed.
With Within (optional) enabled, each evaluation point only uses data inside the configured time period. The baseline is the cost at the last notification, if within the time period, otherwise it is the earliest cost in the time period. The threshold is the increase from that baseline to the current cost.
The example below triggers a renotification if the cost increases by 50% or $100 within the last 24 hours.
-