Access anomalies
Required permissions
- Anomalies Viewer: To view cost anomalies.
- Anomalies Manager: Additionally required to acknowledge, resolve, and comment.
- Allocations Admin, Cloud Analytics User: For anomaly detection on custom allocations.
View the anomaly list
To view the list of detected cost anomalies, sign in to the DoiT console, select Policy and governance from the top navigation mega menu, and then select Cost anomalies.
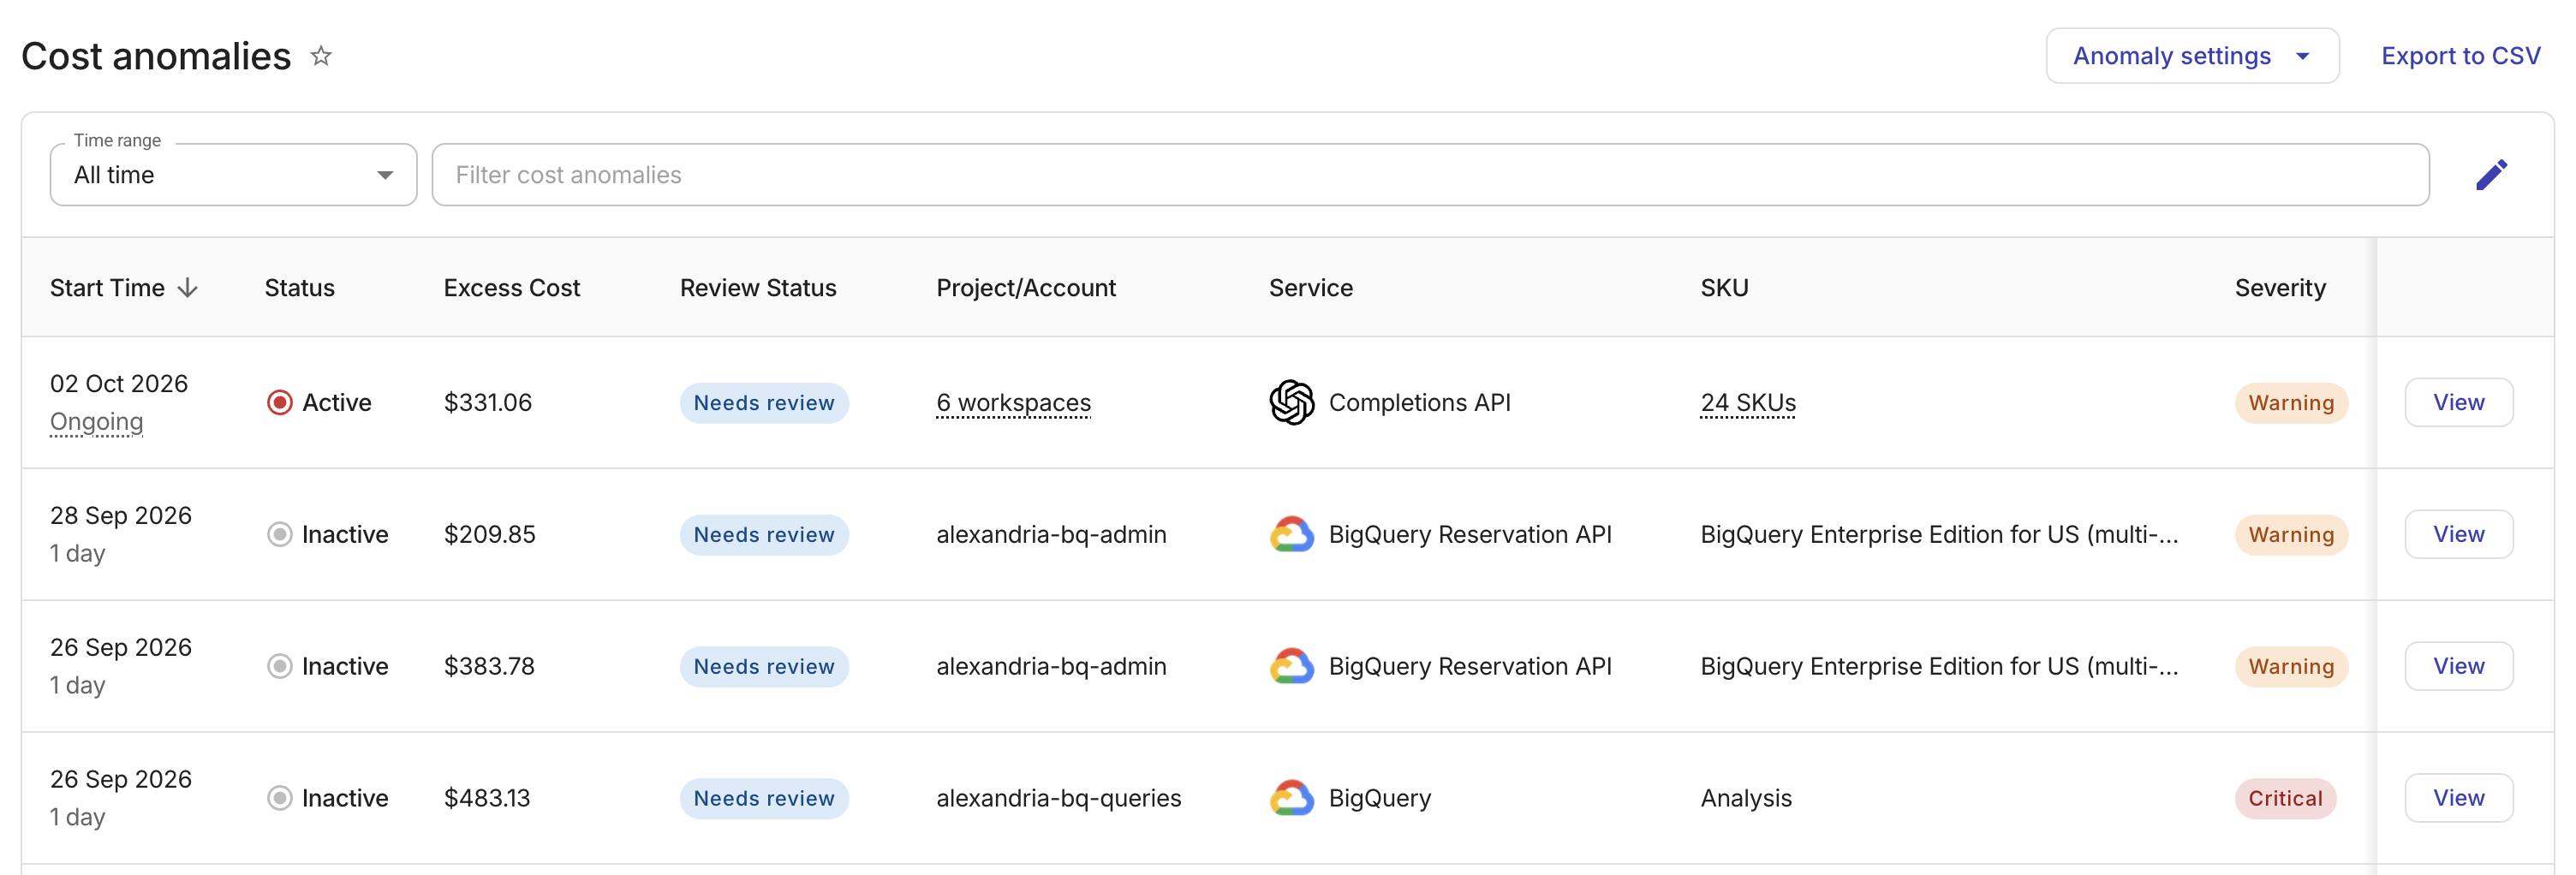
On the Cost anomalies page, you can:
-
Change the Time range or use anomaly properties to filter the results. (The platform stores all the historical cost anomalies.)
-
Select Anomaly settings to adjust the sensitivity settings and manage notifications.
-
Select Export to CSV to export the list of cost anomalies for custom analysis and reporting outside the console. The CSV file includes all supported properties (except thumbnail images) and preserves the sorting and filtering applied to the list. Columns that display a count, such as Allocation, SKU, or Project/Account, list every underlying value rather than the count. When anomalies are grouped, the export expands each group so that every anomaly appears as its own row in the CSV file.
-
For each anomaly, you can review its properties, or select the View button in the Details column to view its details.
Grouped view
For grouped anomalies, anomalies are displayed as collapsible groups.
You can filter, sort, and order grouped anomalies.
Filtering. A filter (such as Status, Review status, Service, or SKU) displays a group when any anomaly in the group matches the filter criteria. Within an expanded group, only matching anomalies are shown. Anomalies that do not match the active filters are hidden. If no anomaly matches, the entire group is hidden.
Sorting. The list sorts groups by a group-level value for each property rather than by a single anomaly value:
| Property | Description |
|---|---|
| Start Time | Earliest start time among all anomalies |
| Status | Active if any anomaly is active |
| Review status | The root anomaly's review status |
| Project/Account, Service, SKU | The first aggregate value |
| Severity | Maximum severity among all anomalies |
| Excess cost | Maximum excess cost among all anomalies |
Grouped anomalies ordering. When you expand a group, the sort order you selected for the list is also used for the anomalies inside the group.
Numeric and date filters (Severity, Excess cost, Start time) use the group's single representative value rather than checking each anomaly individually. For greater-than comparisons on Severity and Excess cost, this is equivalent to matching any anomaly, because the representative value is the maximum. For less-than comparisons — and for Start time filters in the opposite direction — a group may be hidden even when some individual anomalies would have matched the filter.
Anomaly properties
Each anomaly entry on the Cost anomalies page provides the following information (you can select the Edit icon to choose which columns to show or hide, or reorder them):
-
Start Time: The beginning of the usage window when the aggregated cost exceeds the predefined threshold and is considered a potential anomaly.
-
For anomalies based on billing data, this field shows the start date (billing data time series use a daily interval, with each day starting at 00:00 UTC).
-
For anomalies based on real-time usage data, this field shows the start hour in your local time zone, based on your browser setting (real-time usage data time series use an hourly interval).
-
Duration: Shown below the start time. Shows how long the anomaly lasted, shown below the start time. Shows Ongoing for active anomalies. For ended anomalies, shows the length of the anomalous period (for example, "3 days"). If the anomaly expired — meaning monitoring reached its time limit before the cost returned to its normal range — a tooltip on the duration explains the expiry.
-
-
Status: Shows whether the anomaly is
ActiveorInactive. See Dynamic updates for more information. -
Review status: Shows where the anomaly is at in your team's investigation cycle: Needs review, Under review, Resolved · Anomaly confirmed, or Resolved · Not an anomaly. See Review and classify anomalies for more information.
-
Project/Account: See Standard dimensions: Project/Account ID. For service-level anomalies, this field shows the project or account ID when one resource is responsible, a provider-specific count when multiple contribute (for example, "3 projects" or "3 accounts"), or an em dash when no information is available.
-
Allocation: The allocations associated with the anomaly, if applicable. A single match shows the allocation name. When several allocations match, the cell shows a count (for example, "2 allocations") and hovering lists the names, up to five, with a prompt to open the anomaly details for the rest. Anomalies from organization-wide monitoring aren't scoped to a custom allocation and show the built-in all-resources allocation instead (for example, "All GCP Resources"). This column is hidden by default; select the Edit icon to show it.
-
Service: See Resource metadata: Service. For Attribute usage anomalies, the Service column displays the logo of the vendor whose usage spiked (such as Anthropic, OpenAI, Vertex AI, or Amazon Bedrock) instead of the cloud provider logo, with a via Attribute™ caption below the service name.
-
SKU: See Resource metadata: SKU. A single SKU shows its name, while multiple SKUs show a count. For Attribute usage anomalies, token-priced SKUs identify input or output tokens and may show the primary usage driver (for example, Requests ×8.6).
-
Monitor Level: Shows
Serviceif the anomaly was detected at the service level orSKUif detected at the SKU (Stock Keeping Unit) level. This column is hidden by default; select the Edit icon to show it. -
Severity: The severity level of the anomaly:
Information,Warning, orCritical. DoiT defines the three severity levels in accordance with the extent to which the actual cost deviates from the established pattern. -
Excess cost: The difference between the actual cost and the upper bound of the normal range.
- Estimated cost: For anomalies based on real-time usage data, shown below the excess cost value with this label. Cost calculations are estimates and may not reflect exact charges. Select Estimated cost to learn more about real-time anomaly detection.
-
Anomaly: A thumbnail image of the anomaly chart.
Anomaly sensitivity settings
When evaluating whether a spend qualifies as an anomaly, one criterion is whether the spend exceeds the established normal range. The broader the range, the fewer anomalies will be identified.
To adjust the normal range, you can modify the anomaly sensitivity settings:
-
From the Anomaly settings dropdown, select Anomaly sensitivity settings.
-
In the Anomaly sensitivity settings dialog, review the current sensitivity settings and the audit log of the latest update, if applicable.

-
Update the global sensitivity setting, or add, modify, or remove the sensitivity scale of individual services.
Sensitivity settings configured at the service level always override the global setting.
-
Save your changes.
The new sensitivity settings only affect evaluations performed after the change; they do not affect anomalies already identified.