Create Google Cloud diagrams
This page describes how to create a diagram of your Google Cloud environment in the DoiT console.
Required permissions
To create Cloud Diagrams, your DoiT account must have the Cloud Diagram User permission.
Your Google Cloud organization or projects must be connected in the DoiT console through the DoiT service account with the permissions required for Cloud Diagrams. If you have not connected Google Cloud yet, or an organization or project is missing access, follow Connect Google Cloud service account and grant the permissions needed for Cloud Diagrams.
Read the content below or check out the ▶️ interactive demo for a visual walkthrough.
Import a Google Cloud organization
To import a Google Cloud organization:
-
Sign in to the DoiT console, select Automation and operations from the top navigation mega menu, and then select Cloud Diagrams.
-
If this is your first diagram, select Create first diagram, otherwise select Create diagram.
-
Choose Google Cloud and select Next. The console loads your Google Cloud organizations and projects.
NoteIf Google Cloud is your only connected cloud provider, the wizard shows only the Google Cloud option on the cloud selection step.
-
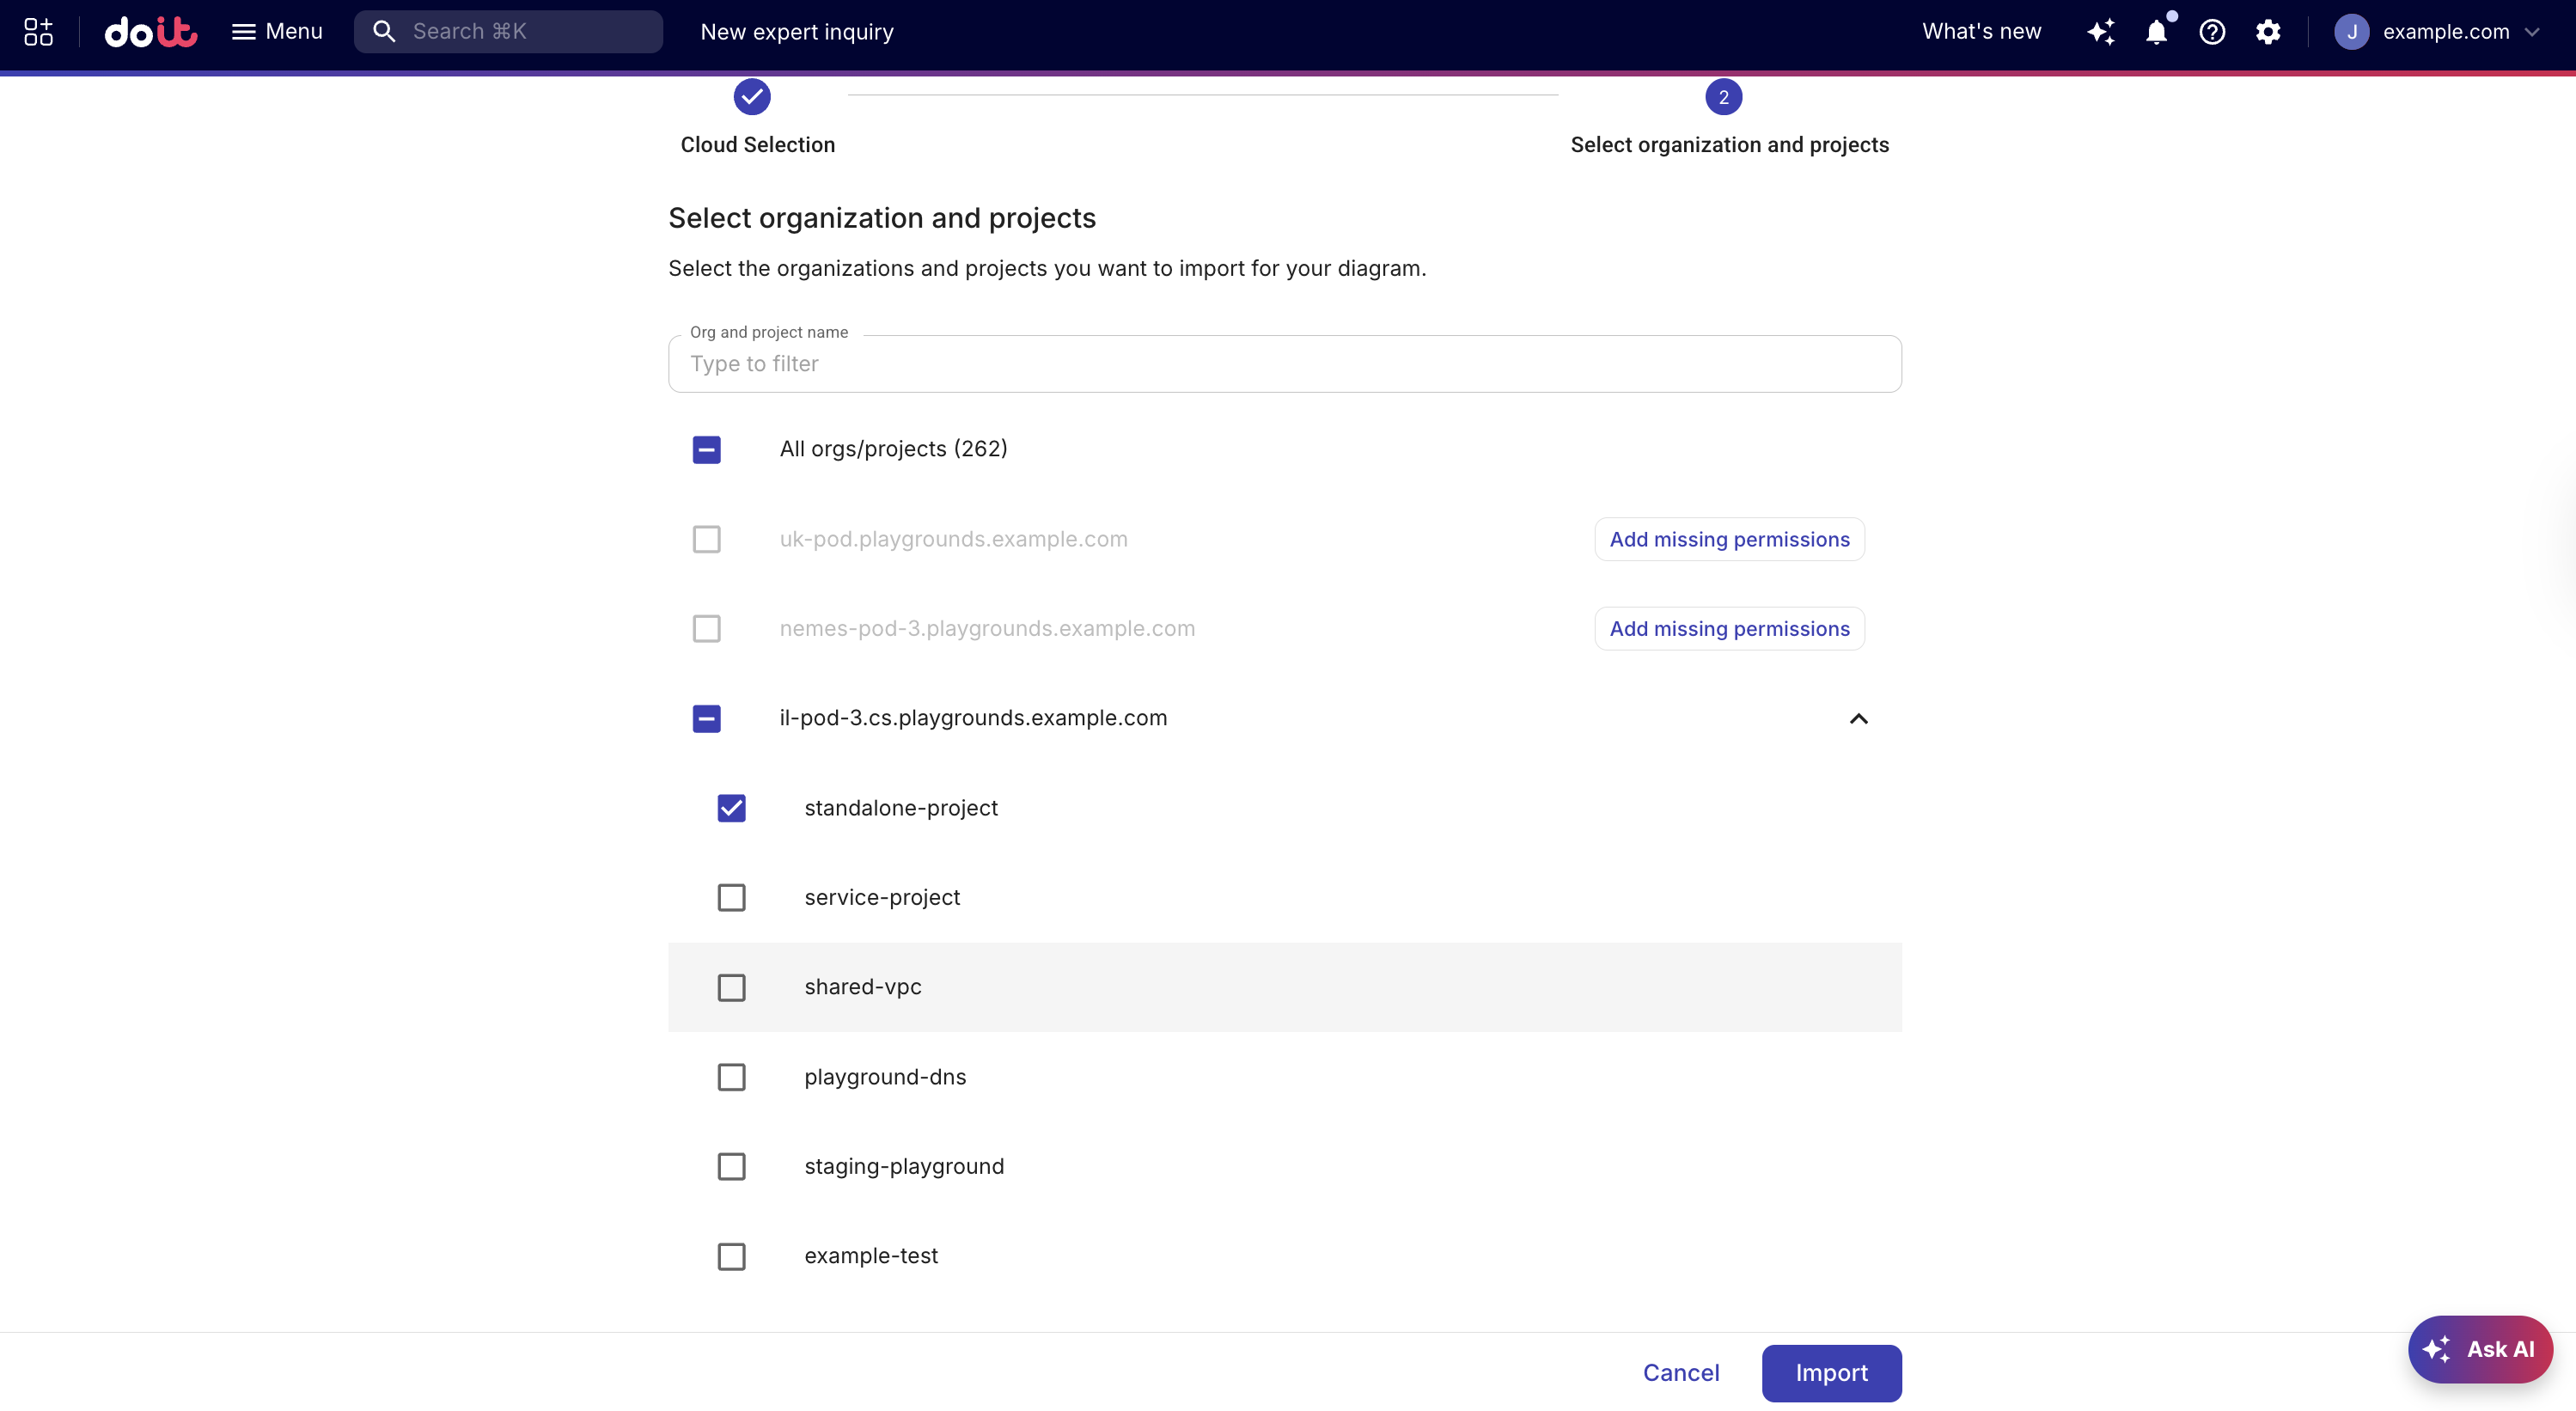
Select the organizations and projects to diagram:
-
To select all eligible organizations and projects at once, select the All orgs/projects checkbox at the top of the list.
-
To select specific organizations, select the checkbox next to each organization. If you select an organization, a diagram is created for each project in the organization.
-
To select individual projects, expand an organization and select the projects you want. A diagram is created for each project that you select.
NoteCloud Diagrams are static snapshots and do not automatically update. If you subsequently add new projects to the organization, you must create a new diagram for each newly added project. Similarly, if a project is deleted, you must manually delete the corresponding diagram.
-
-
Organizations and projects that are greyed out are missing the required permissions. Select Add missing permissions next to the organization or project and follow the steps in Add missing permissions.
-
If your Google Cloud environment uses VPC Service Controls, you need to configure it at organization level to allow context-aware access from Cloud Diagrams. See VPC Service Controls for details.
-
Select Import. Once your diagrams are created, you are redirected to the Cloud Diagrams dashboard, where you can find your newly created diagrams.
Add missing permissions
When an organization or project is missing the permissions required for Cloud Diagrams, you can add them as part of the onboarding flow. The DoiT service account associated with the organization requires specific permissions.
-
Next to the organization or project with missing permissions, select Add missing permissions. A dialog opens with the
gcloudcommands you need to run.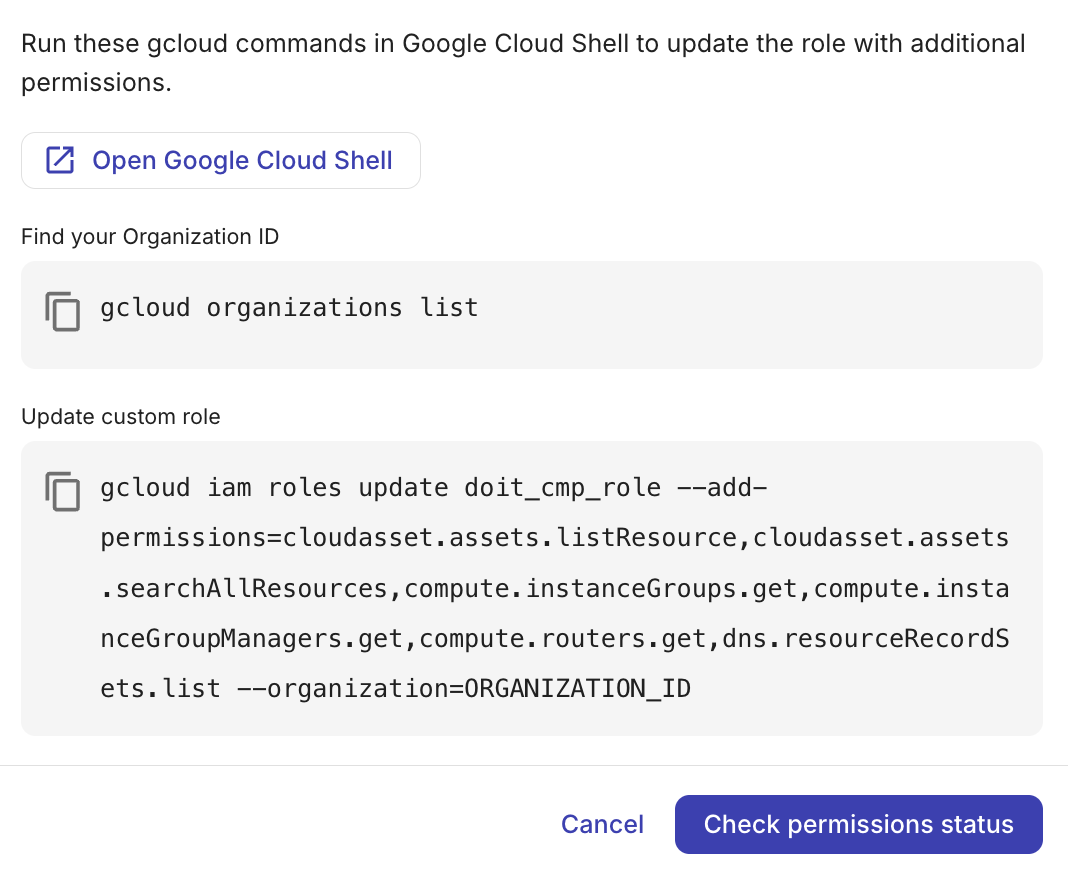
-
Select Open Google Cloud Shell to open a terminal session in your browser.
-
If you are updating permissions for an organization, in Find your Organization ID, copy the provided code block and run it in Cloud Shell. This retrieves a list of your Google Cloud organizations and their IDs.
-
Depending on whether you are granting permissions for an organization or a project, copy the provided code block.
-
Organization: Copy the provided code block in Update custom role.
-
Project: Copy the provided code block in Update custom role for project.
-
-
Paste the command in Cloud Shell. If the command contains
ORGANIZATION_ID, replace it with the ID of the organization you you retrieved in step 2. -
Run the command.
-
Go back to the DoiT console and select Check permissions status. The console verifies your permissions, which may take a few minutes.
-
If the check succeeds, the organization or project becomes selectable and you can continue with the import.
-
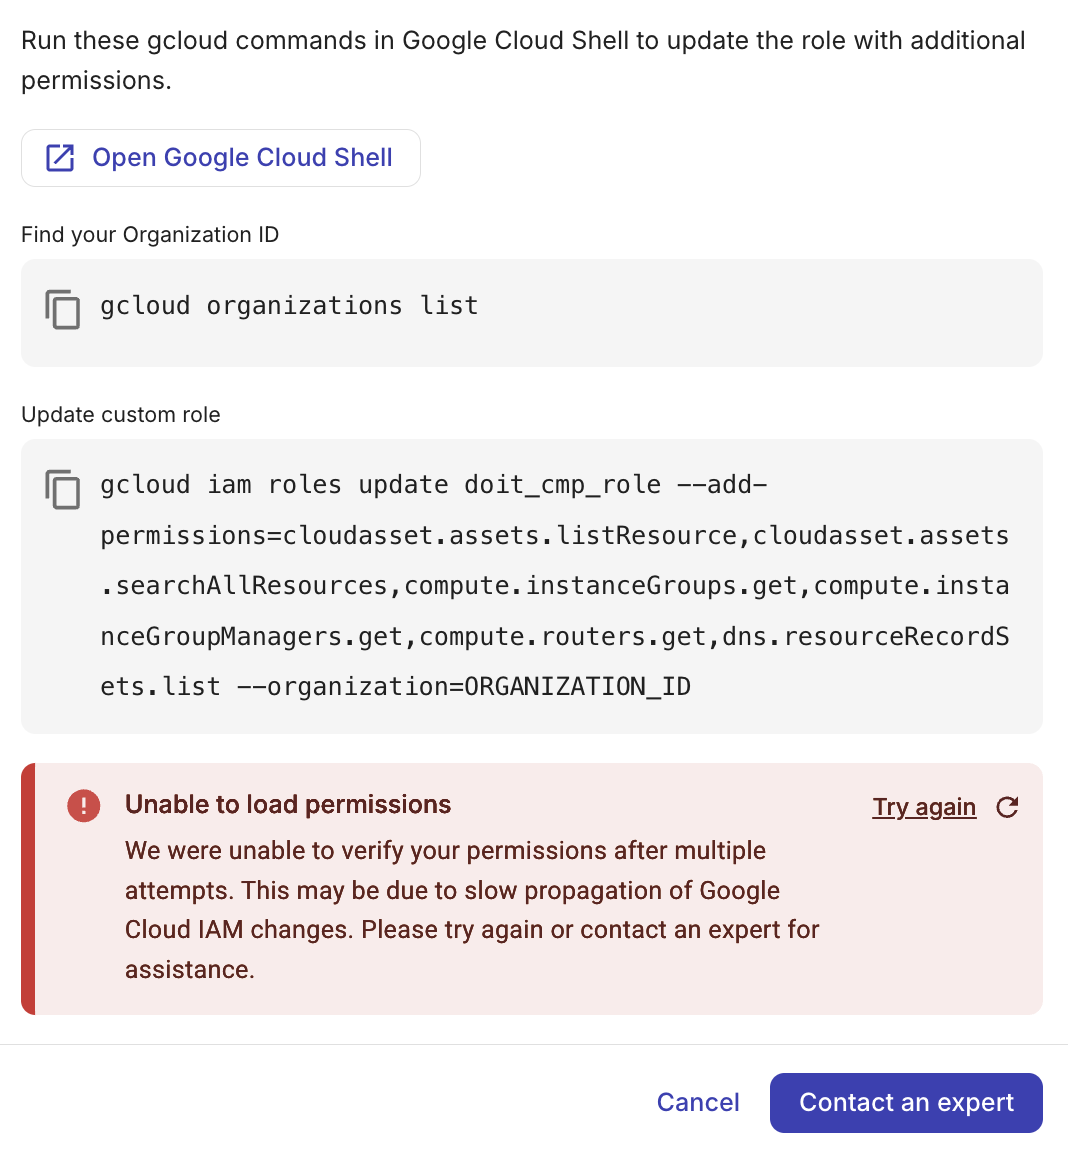
If DoiT Cloud Intelligence is unable to load permissions, select Try again to retry, or select Contact an expert to open an expert inquiry.
-
VPC Service Controls
If you deploy VPC Service Controls, Cloud Diagrams may be unable to access your Google Cloud organization or list its projects. When this happens, the error details include a VPC Service Controls unique identifier. Use this identifier with Google's VPC Service Controls troubleshooter to identify which rule blocked the request, then update your perimeter configuration to allow the DoiT service account to access the required Google Cloud resources.
After updating your VPC Service Controls configuration, return to the Create diagram page. You can also navigate to the GCP Cloud Connect settings page and select Test connection to verify that VPC access is healthy.
If you need help identifying the blocked request, select Contact an expert and provide the unique identifier from the VPC Service Controls error details.
▶️Interactive demo
Try out our interactive demo for a hands-on walk-through experience.
If the demo doesn't display properly, try expanding your browser window or opening the demo in a new tab.