Create and manage budgets
Creating budgets in the DoiT console does not cap your cloud spend but allows you to track it and get notified when it exceeds the defined thresholds.
Required permissions
- Allocations Admin, Budgets Manager, Cloud Analytics User
Create a budget
You can create a new budget from scratch or based on an existing one.
-
select Policy and governance from the top navigation mega menu, and then select Budgets.
-
Choose one of the following options:
-
To create a new budget from scratch, select Create budget.
-
To make a copy of an existing budget, select the kebab menu (⋮) at the rightmost end of the budget entry of interest, and then select Duplicate.
-
Creating a budget consists of three steps: defining the budget scope, configuring the budget, and setting the notification thresholds.
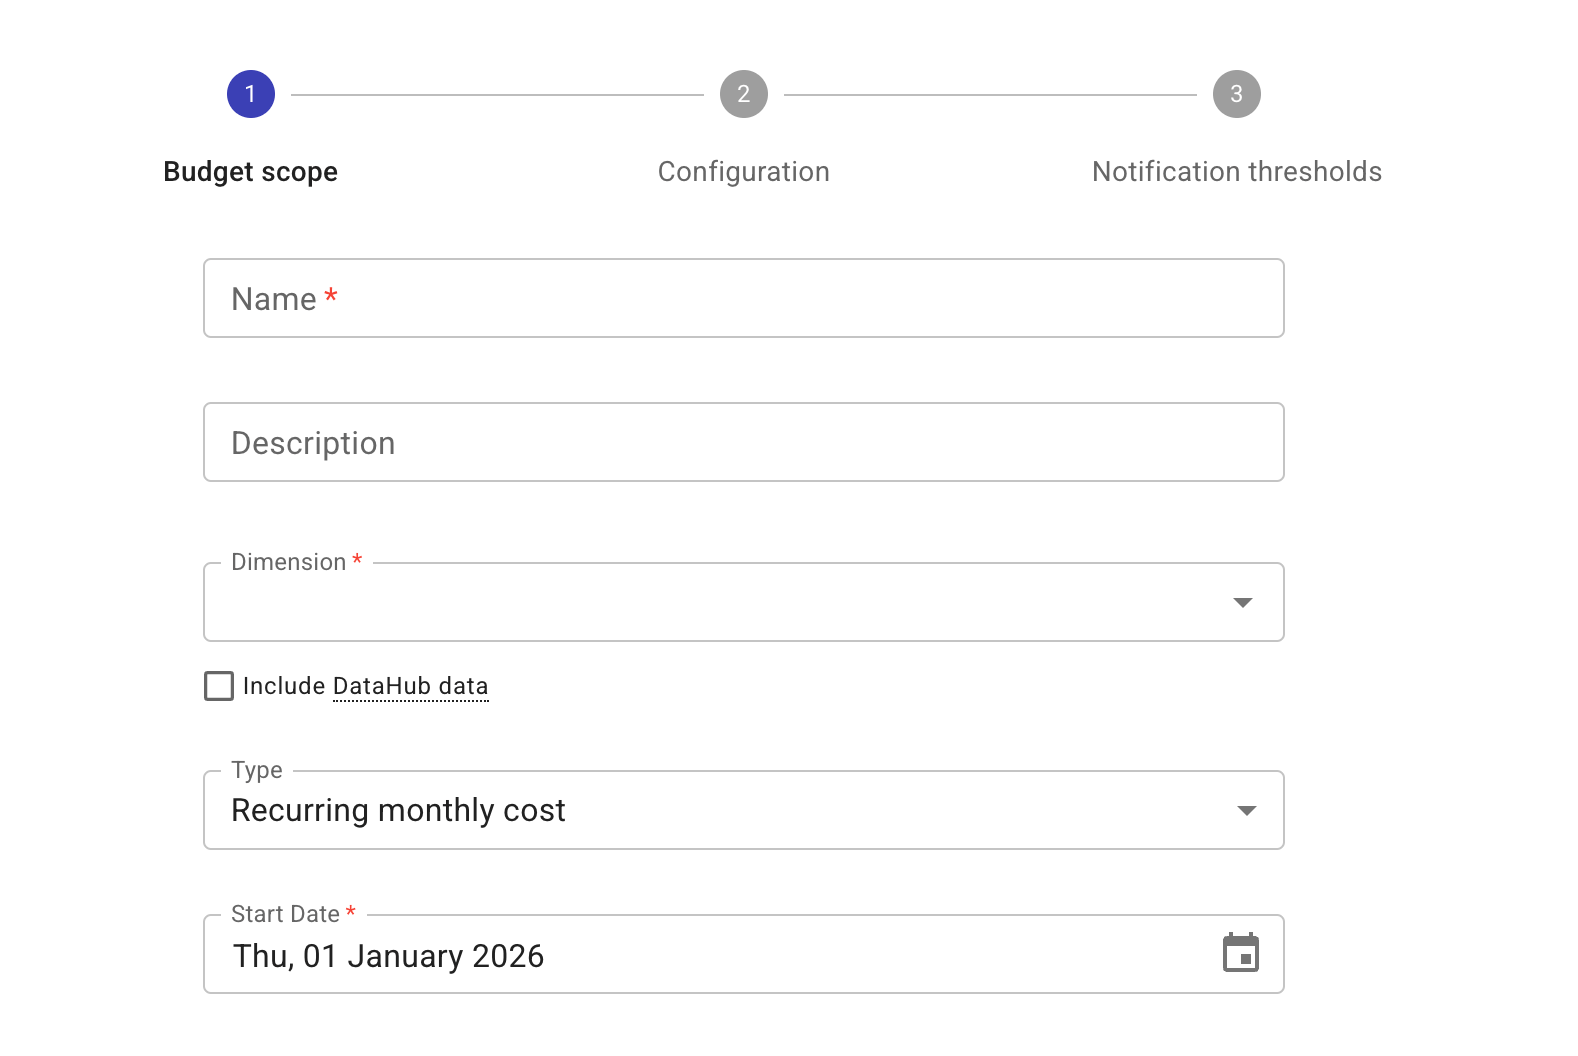
Step 1: Define budget scope
In this step, you name the new budget, define its scope and type, and specify the time period as required.
The metric of budgets is always Cost. It is not configurable.
-
Enter a name for the new budget. You can also add a description.
-
Choose a dimension for the scope to which the budget will be allocated.
There are two additional options:
-
Include DataHub data: If your DoiT subscription includes DataHub, you can select this checkbox to include data imported via DataHub.
-
Create new allocation: If none of the existing dimensions suits your need, you can create a new allocation.
-
-
Select the budget type. There are two main categories of budgets:
-
Recurring: A recurring budget restarts periodically. You can choose Recurring daily cost, Recurring weekly cost, Recurring monthly cost, Recurring quarterly cost, or Recurring yearly cost for the budget type.
-
Fixed: A fixed budget is a one-time budget. Choose Fixed period cost for this type.
-
-
Specify the Start date of the new budget. For a fixed budget, you also need to specify the End date.
-
Select Next to continue.
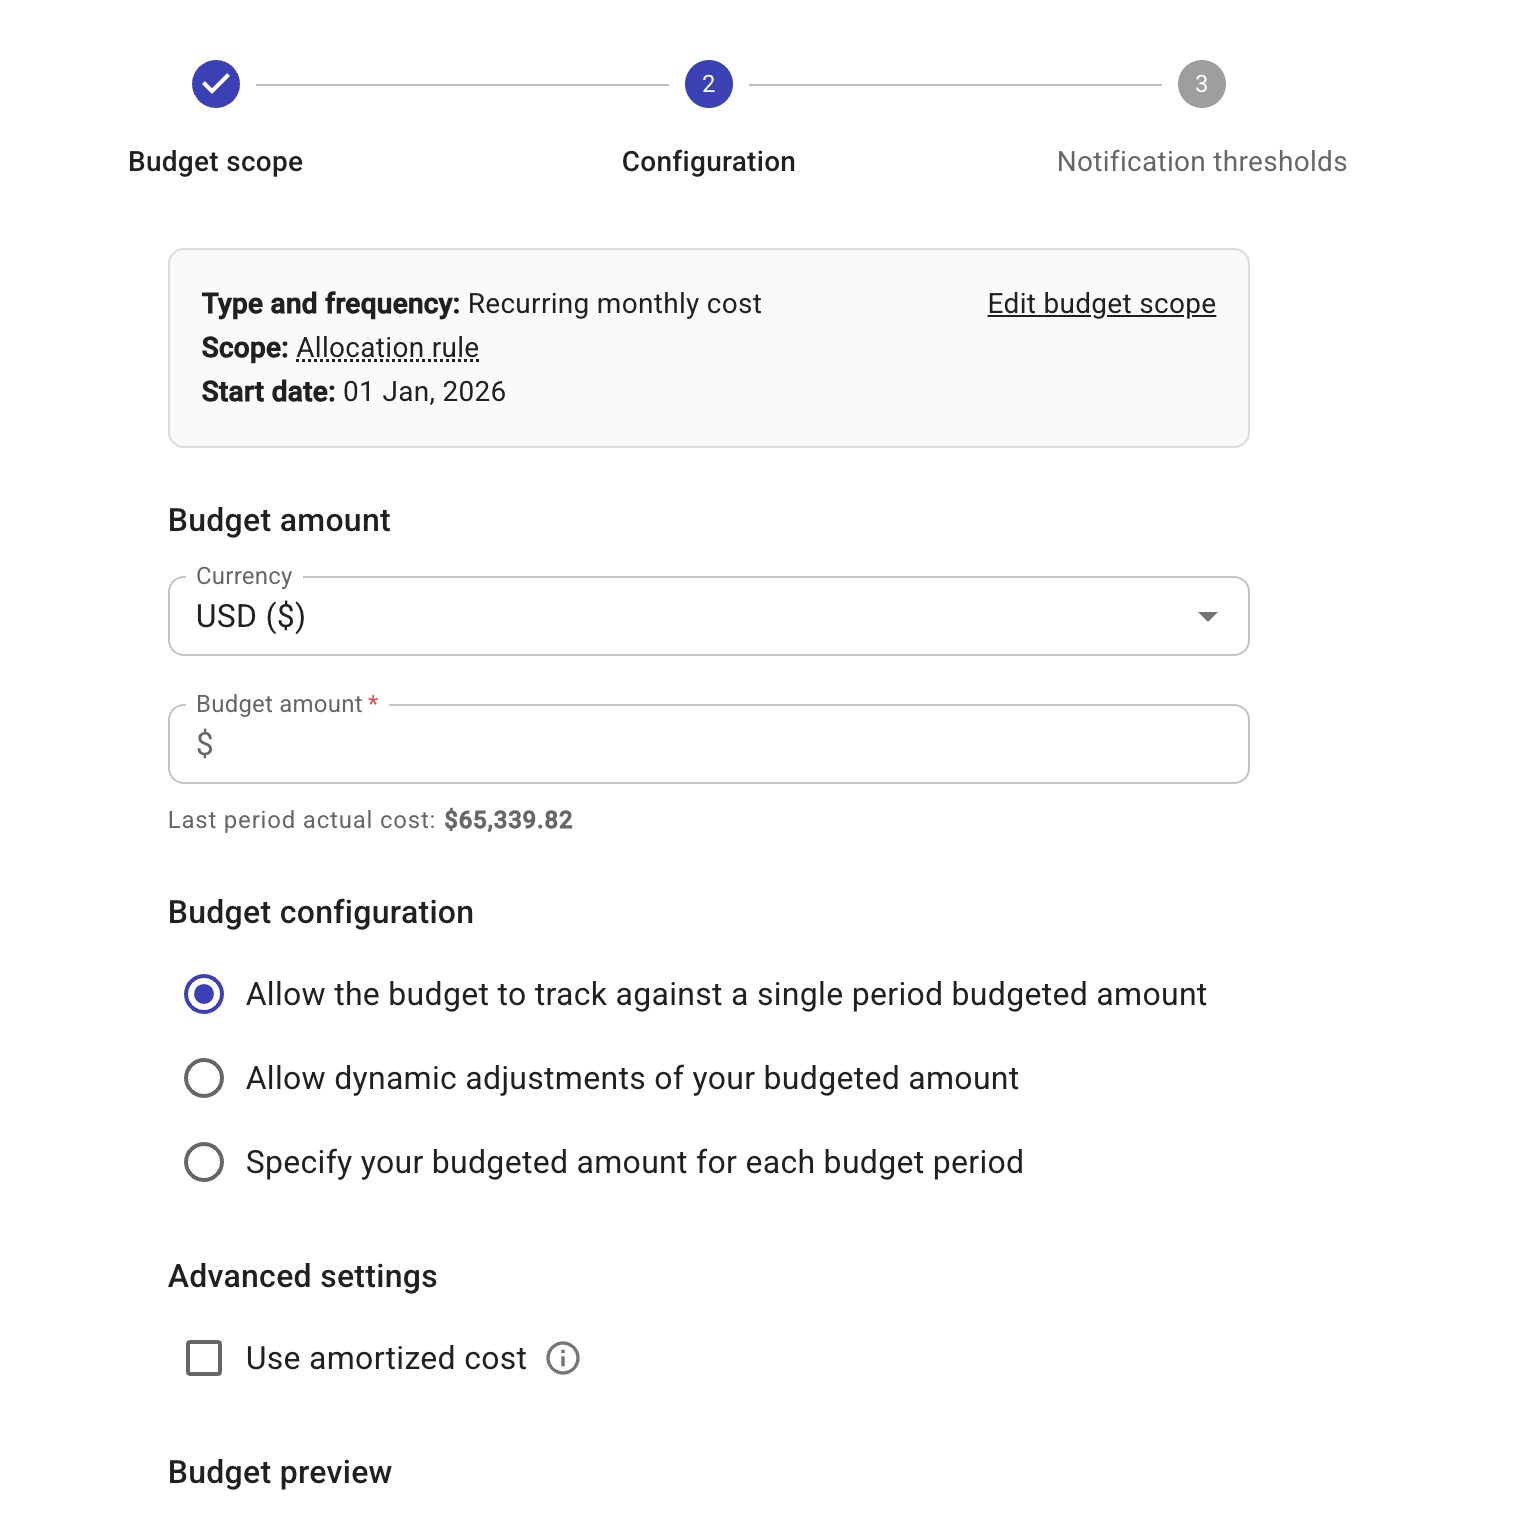
Step 2: Configure the budget
This step provides budget configuration options and a budget preview chart.
-
Budget amount:
-
Choose the currency. See Supported currencies.
-
Enter the budget amount, which is the upper limit of the budget. Note that you cannot use decimals in the budget amount.
-
-
Budget configuration (available only to recurring budgets): Specify how to calculate budget amounts of recurring budgets. There are three options:
-
Allow the budget to track against the budgeted amount for a single period.
-
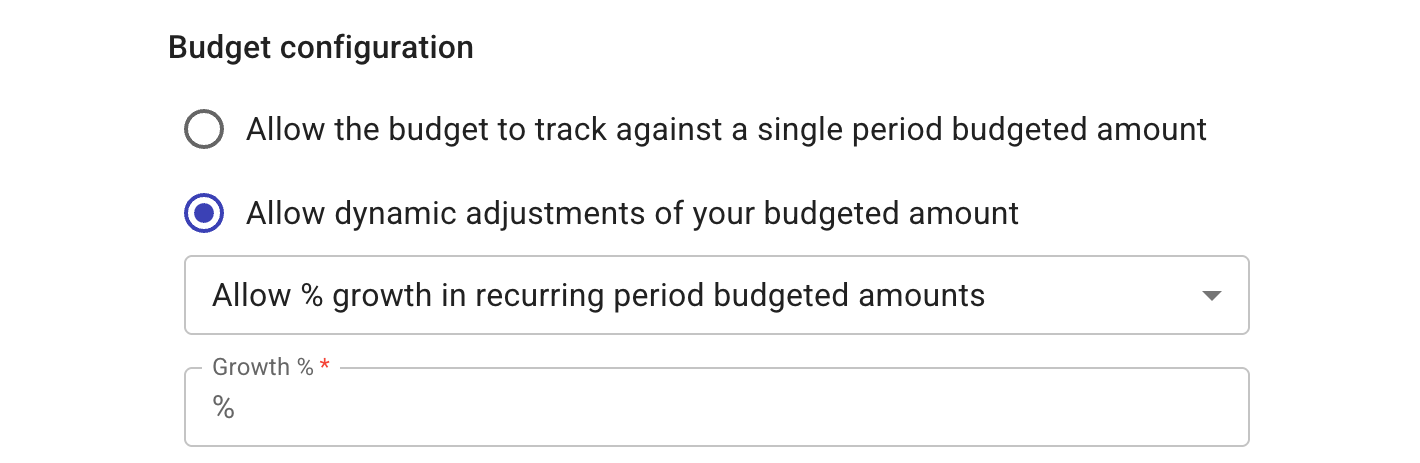
Allow dynamic adjustments of the budgeted amount. For this option, you need to further specify the way dynamic adjustments are made:
-
Budgeted amount is based on the actual amount of the previous period.
-
Allow a percentage-based growth of the budgeted amount in subsequent periods: If you choose to factor in expected spending growth, specify a uniform growth percentage for the subsequent periods.
-
A combination of the two options above: Budgeted amount is based on the actual amount of the previous period AND allows a percentage-based growth of the budgeted amount in subsequent periods
-
Allow budget surplus to roll over to the subsequent periods: This option allows you to define the number of subsequent periods into which the budget surplus will roll over.
-
-
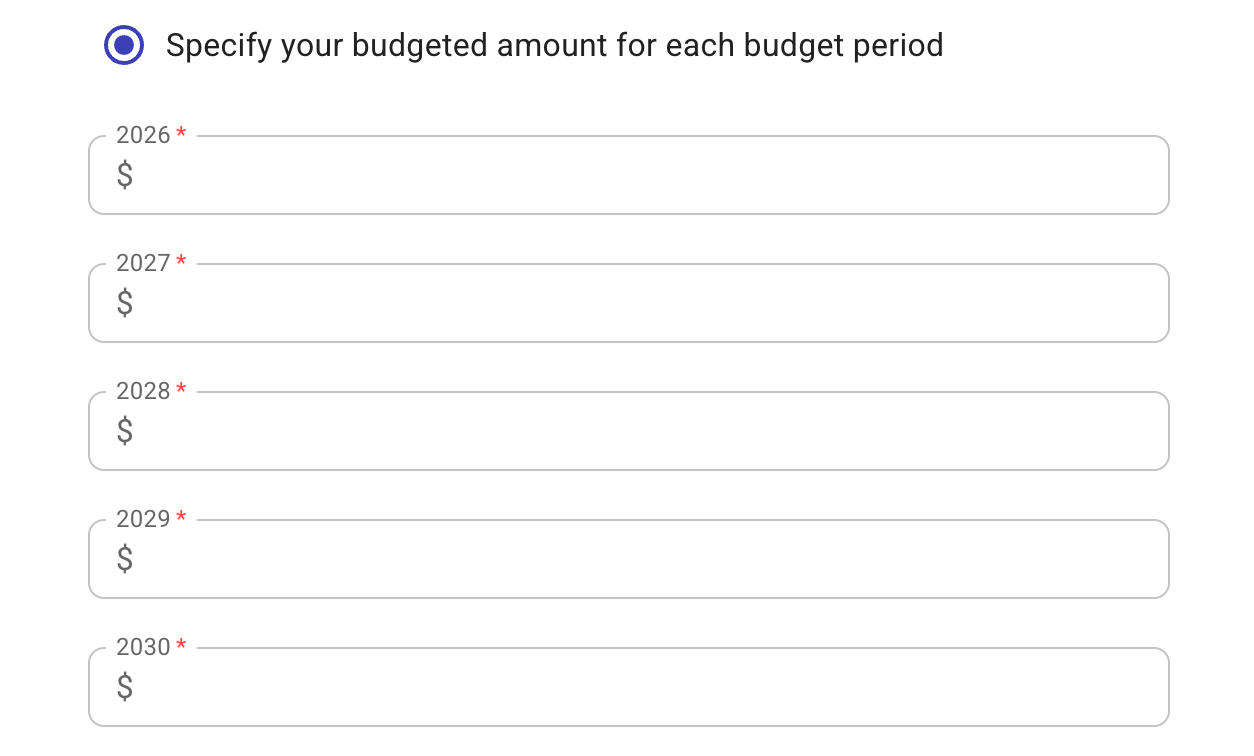
Specify your budgeted amount for each budget period. This is the most flexible option, allowing you to specify the budget amount for each period independently.
- Recurring daily cost: All 7 days of the week, from Monday to Sunday.
- Recurring weekly cost: Not supported.
- Recurring monthly cost: All 12 months of the year, from January to December.
- Recurring quarterly cost: All 4 quarters of the year, from the first to the fourth.
- Recurring yearly cost: 5 consecutive years, starting from the year the budget is created.
Below is an example budget configuration with a recurring yearly cost:
-
-
Advanced settings:
- Use amortized cost: This option applies only to AWS billing data. AWS amortized data spreads upfront and recurring charges over the period of time they apply, offering a more accurate picture of the effective daily costs.
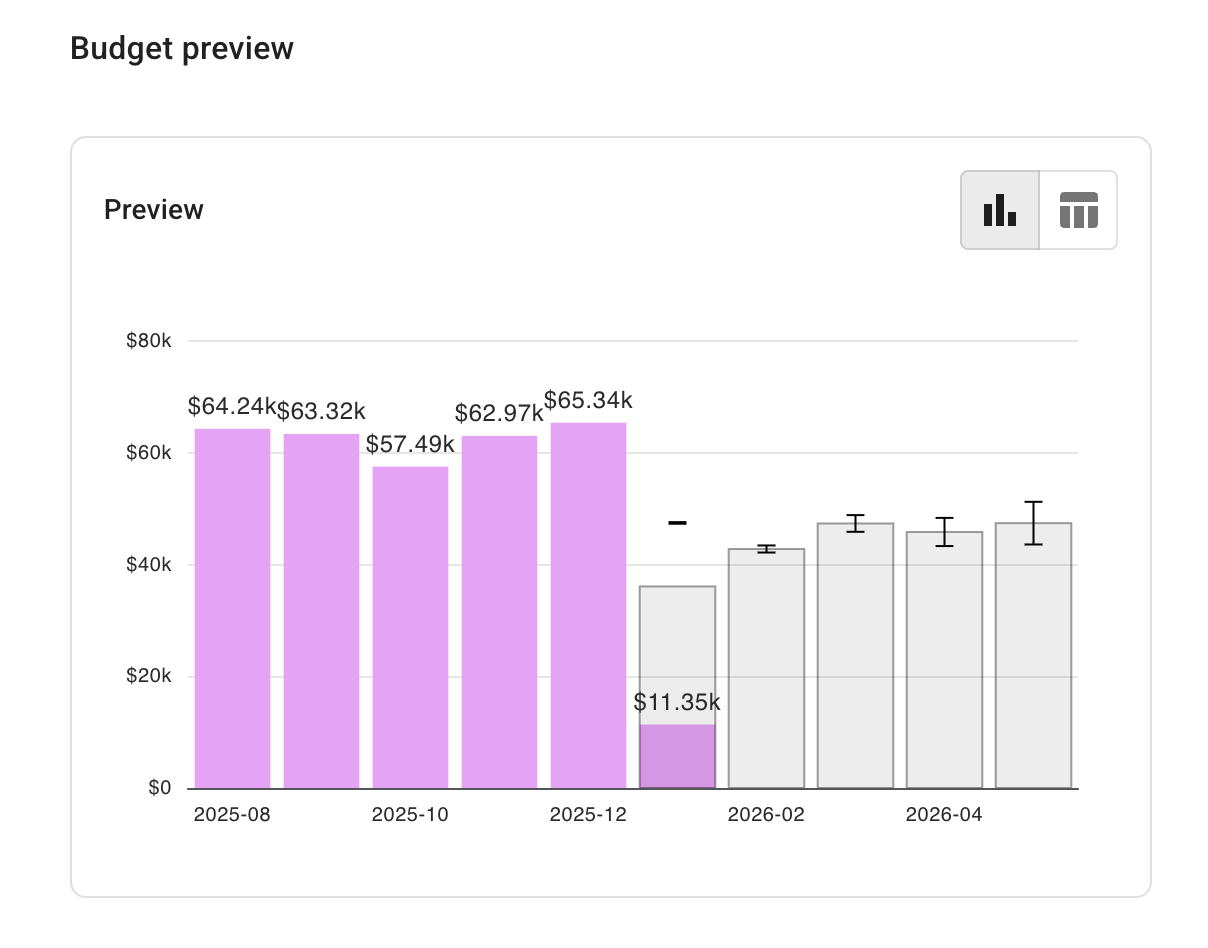
Budget preview
After setting the budget amount, you'll see a budget preview chart. The preview chart provides a ML forecast for future spend. You can switch between the Stacked Column view and the Table view.
Due to the billing data latency, if you choose Daily as the time interval, the budget preview chart will include the cost up to the previous day, not the current day.
Step 3: Configure budget notifications
In this step, you can:
-
Adjust the budget notification thresholds.
-
Configure alerts notifications to get informed when your actual spend exceeds a threshold.
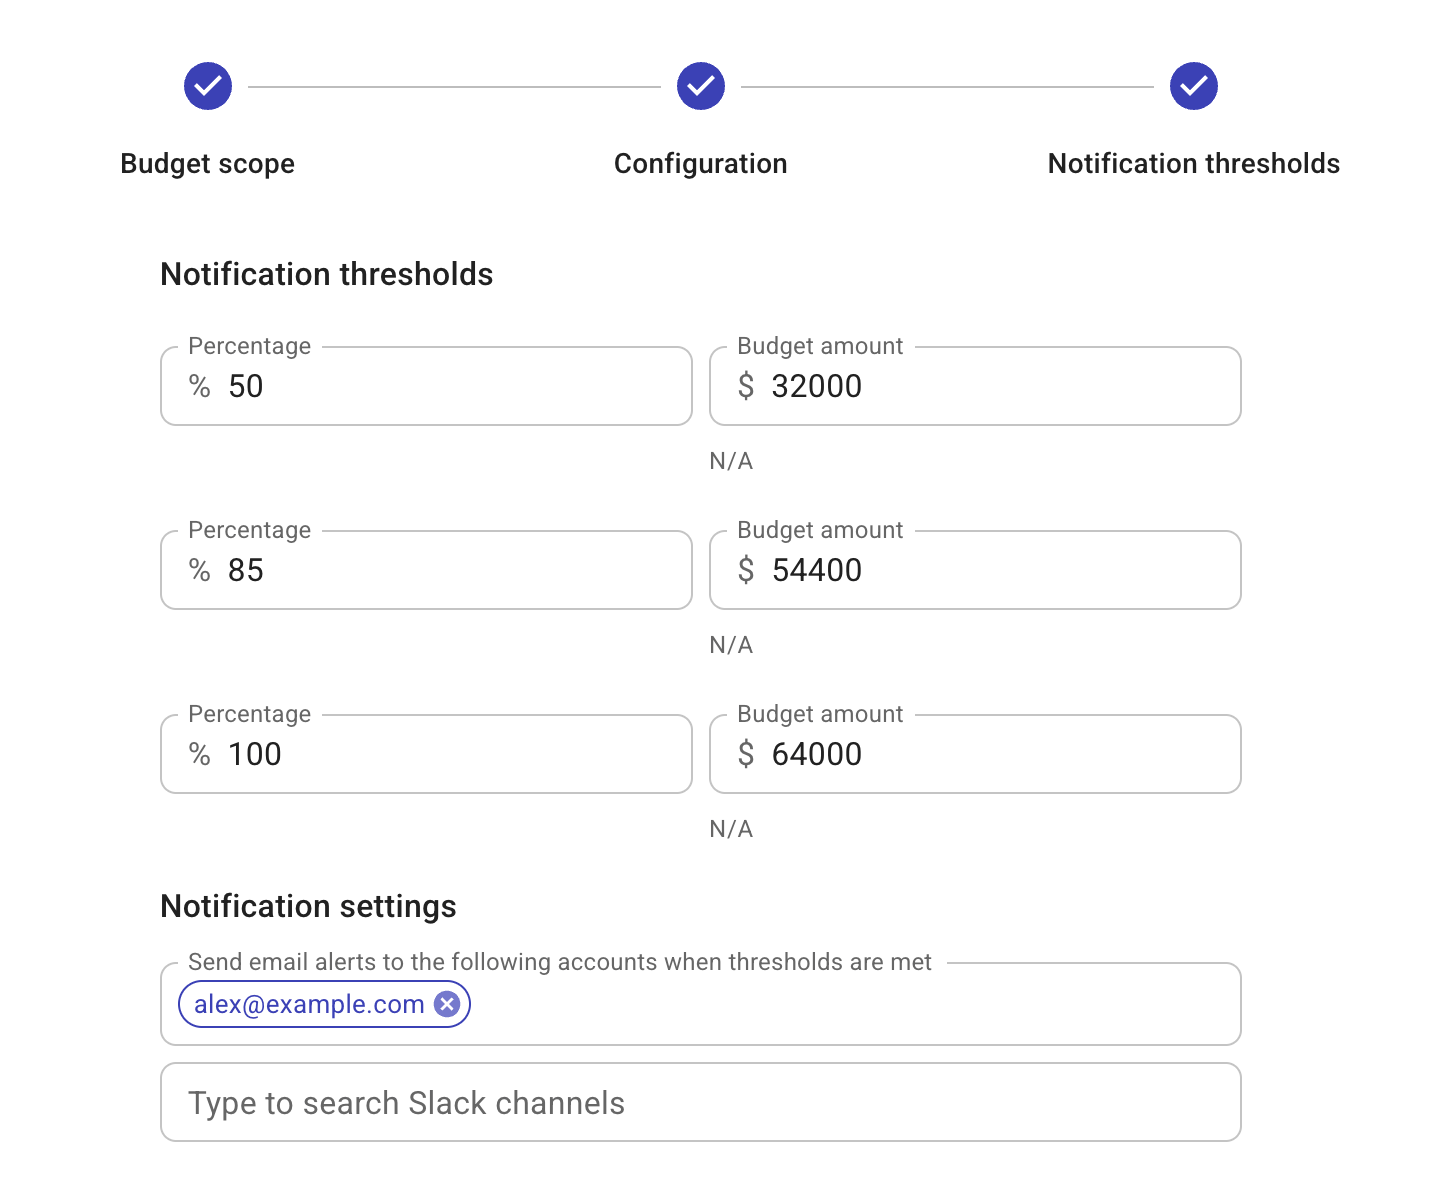
-
Notification thresholds: For each budget, you can set three alert thresholds. By default, the thresholds are set at 50%, 85%, and 100% of the budget amount. Both the percentage and the threshold amount are configurable. When one is changed, the other is updated automatically.
-
Notification settings: You always receive email alerts for budgets you create unless you manually remove yourself from the list of recipients. You can also add others as recipients of the alert notification emails or send the alerts to a Slack channel.
Email alerts
To send email alerts to other team members, add them to the list of recipients. If the intended recipients do not have sufficient permissions, you'll be prompted to Share budgets with them first.
The alert email includes the following information:
-
The alert threshold (amount and percentage) that has been exceeded
-
Your current spend amount and its percentage in the budget
-
The date when you're forecasted to reach 100% of the budget
You can use the link provided in the email to open the budget in the DoiT console.
Slack alerts
If your organization has created a shared Slack channel with DoiT or the DoiT app for Slack has been installed in your workspace, you can choose a Slack channel to receive the alerts.
Alerts sent to Slack channels include the following information:
-
Budget type and period if applicable
-
The alert threshold (amount and percentage) that has been exceeded
-
Your current spend amount and its percentage in the budget
-
The date when you're forecasted to reach 100% of the budget
-
The progress of forecasted spend
Delete budgets
You can delete a budget only if you are its owner.
To delete an individual budget:
-
Navigate to the main Budgets screen.
-
Locate the budget of interest.
-
Select the kebab menu (⋮) at the rightmost end of the budget entry.
-
Select Delete.
To delete multiple budgets at once:
-
Select the checkbox of each budget that you want to delete.
-
If you have Owner access to all the selected budgets, you can use the Delete button to perform a batch delete.
You'll be asked to confirm the deletion before it's executed.