Personal API tokens
Personal API tokens let you authenticate programmatically with the DoiT API, without using your interactive login session. Each token can be scoped to a subset of your available permissions, with an optional expiry date, so you can grant limited access for workflows such as exporting billing data, pulling Cloud Analytics reports, or automating API requests from internal scripts.
Create and manage personal API tokens from the API tab on your Users page.
Required permission
No special permission is required. Every authenticated user can create, view, disable, enable, and delete their own personal API tokens. See Service account and API token permissions.
Create an API token
You can create up to 10 API tokens. New tokens may take up to a minute to become active after creation.
-
On the API tab, select Create API token.
-
In Create API token, complete the following:
-
Token name: Enter a descriptive name for the token.
-
(Optional) Expiry date: Select a date after which the token will no longer be valid. If you leave this blank, the token does not expire.
-
Permission scope: Choose the level of access for the token. Token permissions are limited to those available to your user role. Choose one of the following permission scopes:
Scope Description Read only Grants only read-only permissions. Use this for monitoring or reporting integrations that don't need to make changes. Full access Grants all permissions available to your user role. Custom scope Lets you select individual permissions. Use the Search field to filter permissions by name or description. At least one permission must be selected. 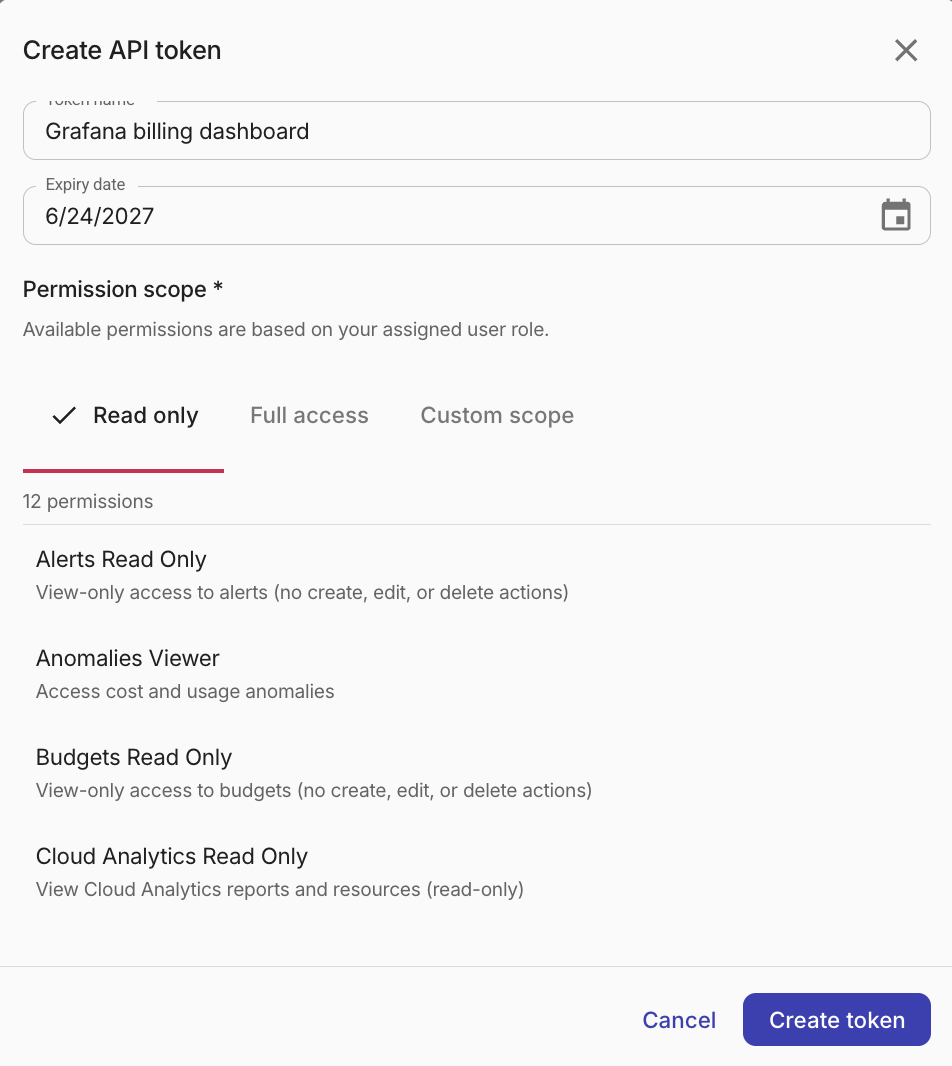
-
-
Select Create token.
-
Copy or download the token immediately. The token value is displayed only once and cannot be retrieved later.
-
Select Done to close the dialog.
Treat API tokens as securely as any other password. Do not share tokens or commit them to source control. After you close the dialog, the token value is no longer accessible.
See DoiT Developer Hub: Get started for how to use an API token.
Manage API tokens
View API tokens
The token list displays each token with the following information:
| Column | Description |
|---|---|
| Token | The token name, permission scope, number of permissions, and a masked key. |
| Status | Current state: Active, Disabled, or Expired. |
| Created | The date the token was created. |
| Expires | The expiration date, if one was set during creation. |
| Last used | The date the token was last used to make an API request. |
A summary row above the table shows how many tokens you have, how many are expiring in the next 30 days, and how many have been inactive for 60 or more days.
View token permissions
To view the full list of permissions assigned to a token, select the permissions count link (for example, "5 permissions") in the token row. This opens a dialog showing each permission with its name and description.
The permissions dialog shows the token's selected and effective permissions. If your role permissions change after you create a token, the token's effective permissions may become narrower than what you originally requested. When this happens, a warning appears indicating that some permissions are no longer available.
Filter API tokens
Use the filter bar to search and filter your token list. To include expired tokens in the list, enable Show expired tokens.
Token lifecycle statuses
Each token has a lifecycle status:
-
Active: The token is valid and can be used for API requests.
-
Disabled: The token has been temporarily deactivated.
-
Expired: The token has passed its expiration date and can no longer be used.
Disable or enable a token
Disabling a token temporarily revokes its access without deleting it.
-
Select the three-dot menu on the token row.
-
Select Disable token.
To re-enable a disabled token, select Enable token from the same menu. Requests using the token will succeed again after it is re-enabled.
Delete a token
Deleting a token permanently removes it and cannot be undone. Any applications or scripts using the token will no longer be able to authenticate.
-
Select the three-dot menu on the token row.
-
Select Delete token.
-
In Delete this token?, enter DELETE to confirm deletion of the token.
Legacy API tokens
Legacy API tokens previously issued from user profiles were revoked on September 17, 2026 and can no longer authenticate API requests. Replace any legacy token still configured in an integration with a personal API token or a service account API token.
If a request using a legacy token returns 403 with invalid token: missing expiration, create a replacement token and update the integration. Personal API tokens and service account API tokens still support an optional expiry date.
Migrate a legacy token to a service account
-
Identify the permissions the integration actually needs. Legacy tokens inherited the creating user's full role, which is often broader than required.
-
Create a service account with only those permissions. See Create a service account.
-
On the service account's API tokens tab, create a token, copy it to your secrets manager or CI/CD store, and update the integration to send
Authorization: Bearer <token>. -
Verify that requests succeed with the new token, then remove the revoked legacy token from your secrets manager, CI/CD store, and integration configuration.
Migrate a legacy token to a personal API token
If the automation should remain tied to one user, create a personal API token with the appropriate scope instead of a service account. Update each caller to use the new token, verify that requests succeed, and remove the revoked legacy token from your stored configuration.