Manage conversations
Ava allows you to manage your conversations, enabling you to perform tasks such as uploading files, sharing conversations with team members, deleting chats, and creating expert inquiries.
The steps on this page apply to Chat history in the DoiT console. If you use Ava in Slack, conversations live in Slack assistant threads and are not the same as console chat history.
Conversations are managed in the Chat history, where Ava stores them. To access your Chat history:
-
If Ava is maximized, check the left sidebar.
-
If Ava is minimized, select the conversation from the Chat History drop-down list.
Upload files
You can upload files and images to Ava to get answers, summaries and insights about your content.
-
A maximum of 2 files can be uploaded to each conversation, and each file can be up to 10 MB.
-
Supported file types include text files (TXT), code files (SQL, JSON), image files (PNG, JPEG), tabular data files (CSV), and document files (PDF).
You can review your uploaded files in your recent conversations in Chat history. Similarly, you can delete conversations that you uploaded files to.
-
Sign in to the DoiT console.
-
Select the plus icon (+).
-
Select Upload a file.
-
Browse to the location of the file you want to upload and select Open.
Copy Ava's responses
You can copy Ava's responses to use them in another file or application.
This option is not available for responses that contain reports.
-
Sign in to the DoiT console.
-
Either:
-
Start a chat. Once Ava has finished her answer, the Copy button becomes available.
-
In Chat history, find the response you want to copy.
-
-
Select the Copy button.
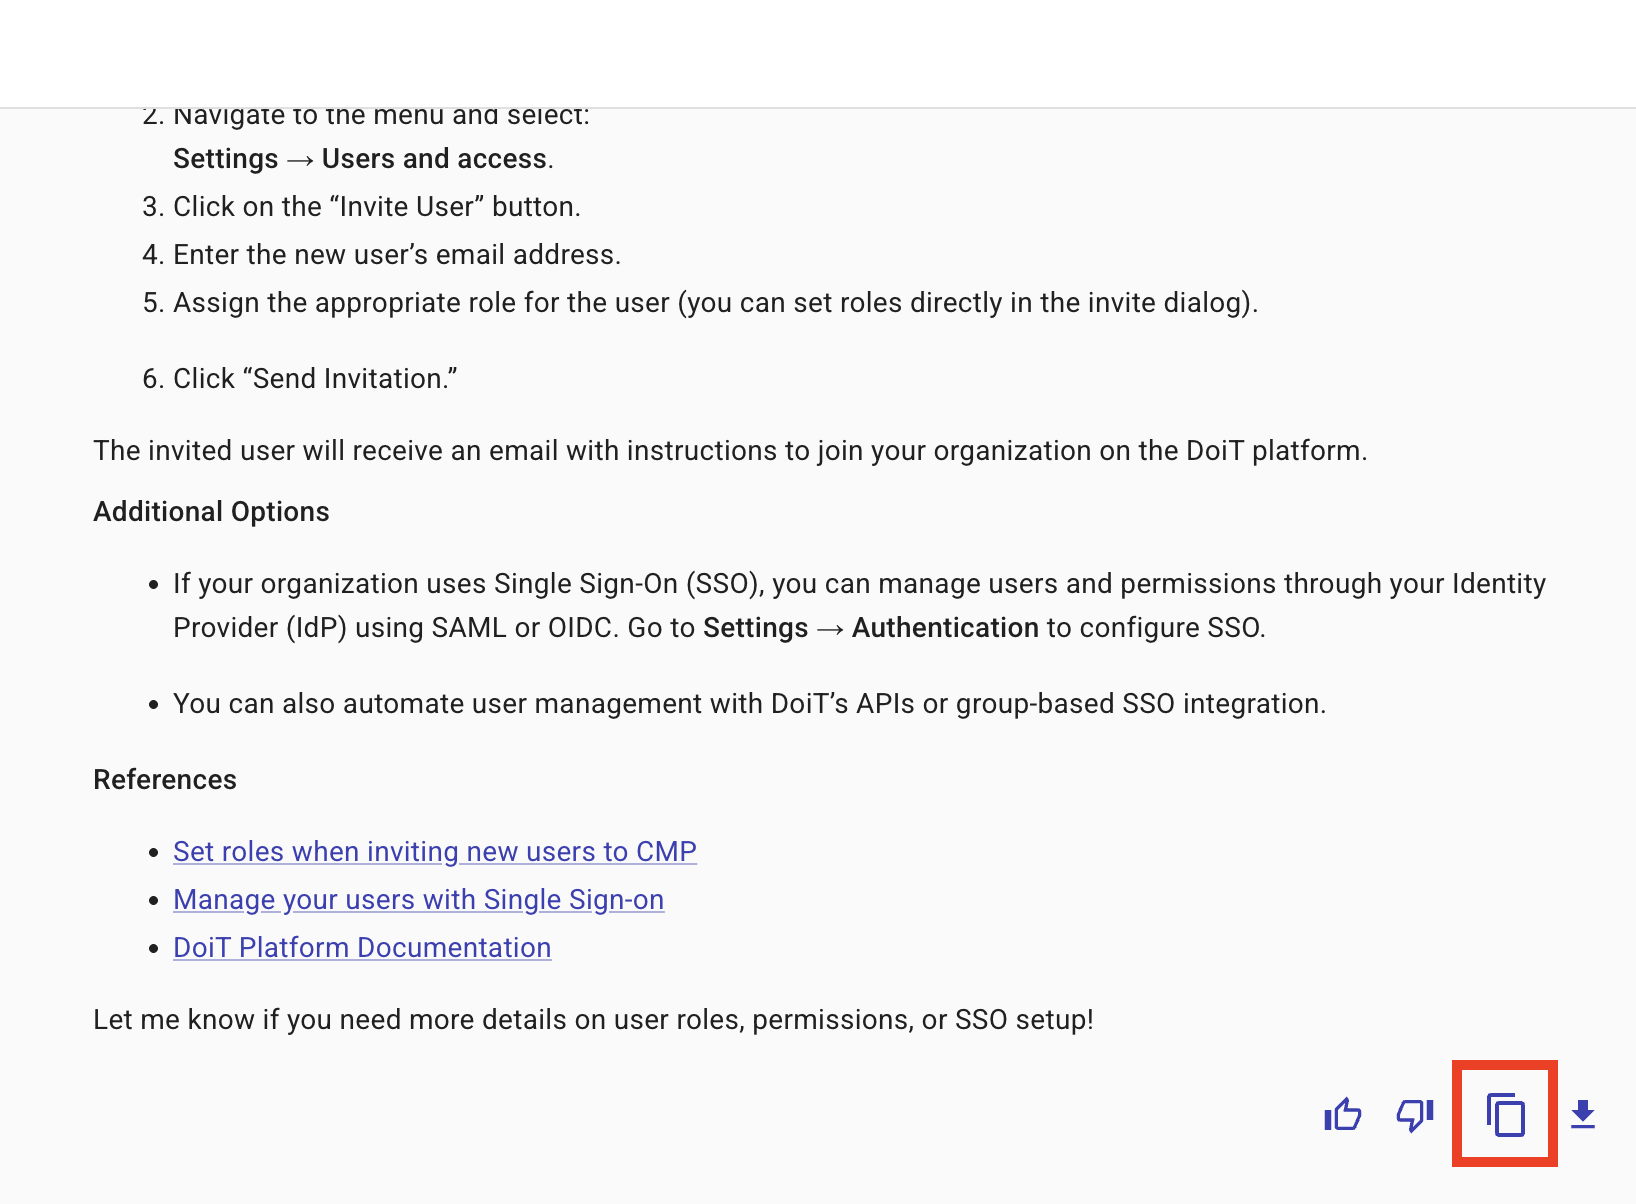
The content is copied to your clipboard. You can now paste it into another file or application.
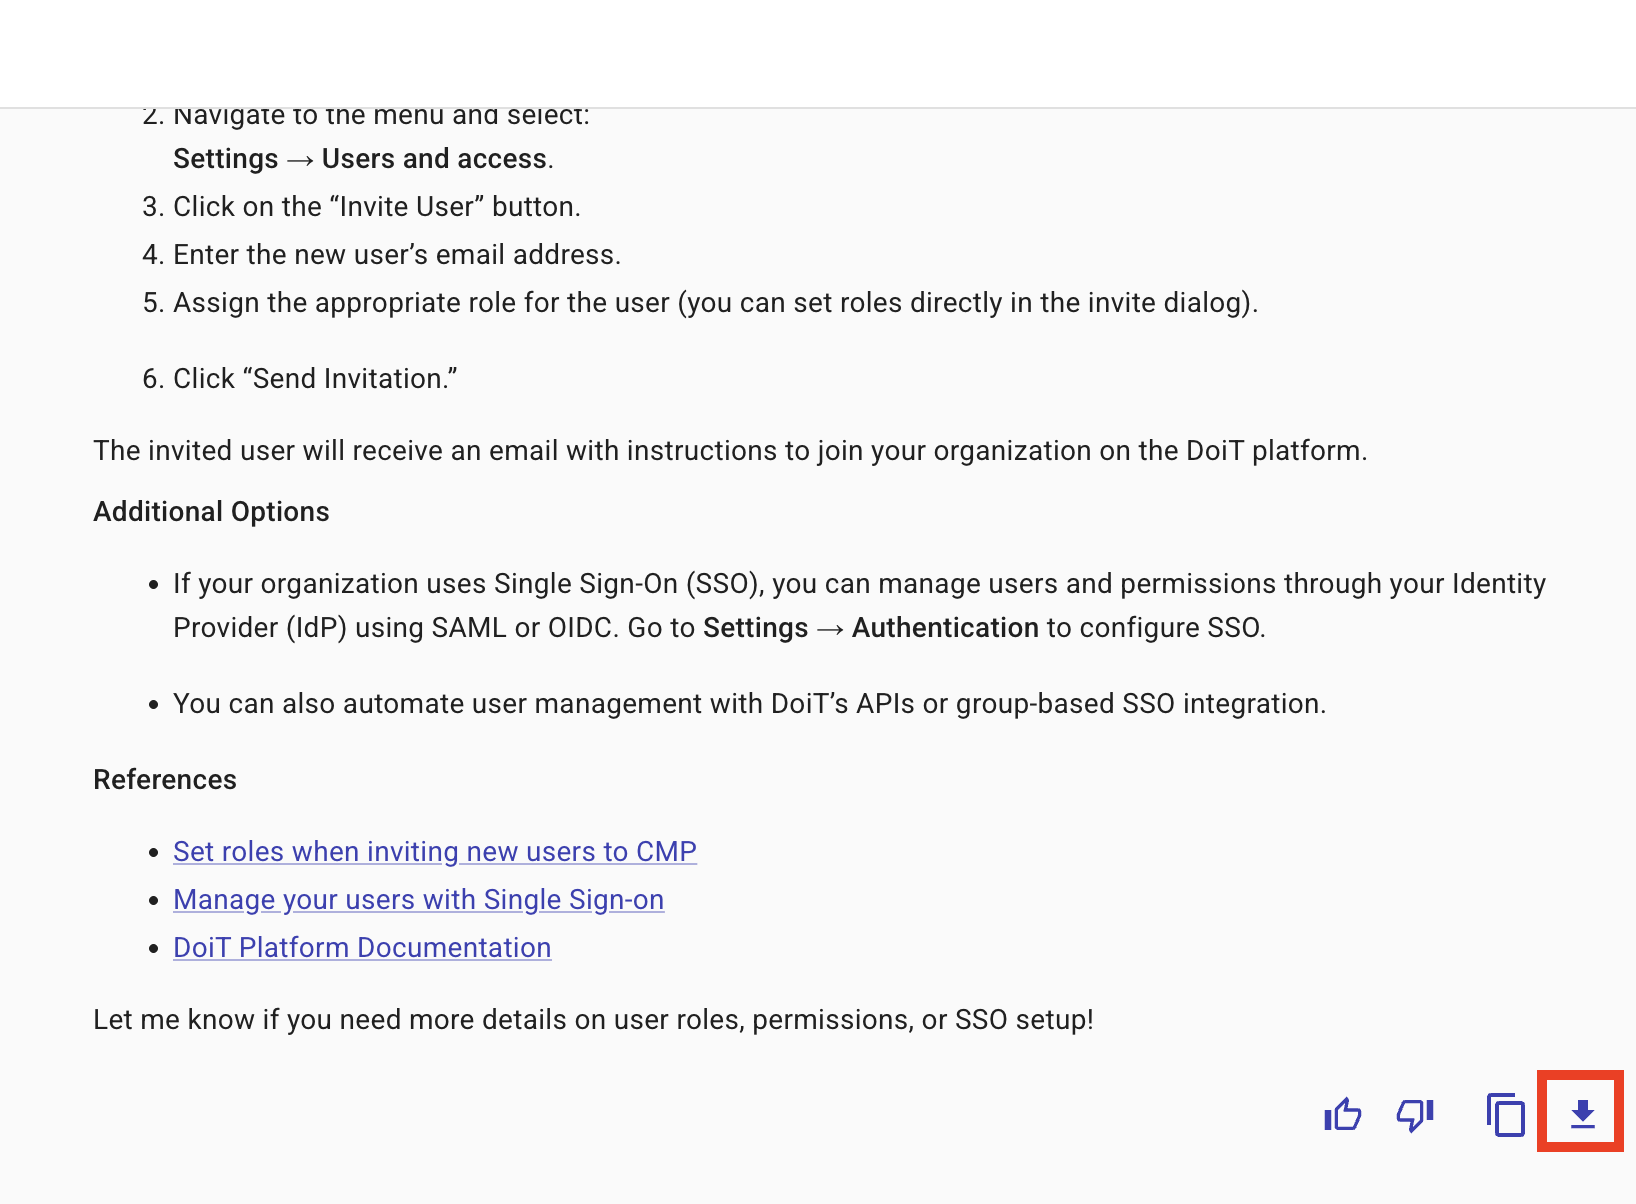
Export Ava's responses
You can export Ava's responses as a PNG.
-
Sign in to the DoiT console.
-
Either:
-
Start a chat. Once Ava has finished her answer, the Export button becomes available.
-
In Chat history, find the response you want to export.
-
-
Select the Export button.
-
The image is saved in your Downloads folder. You can check your browser settings to confirm the default download location.
-
The name of the exported image is
ava_message.png. We recommend renaming this to a more descriptive name. -
A response is exported as one image, irrespective of its length.
Pin a conversation
You can pin important conversations to keep them at the top of your Chat history. Pinned conversations appear in a dedicated Pinned section (
) above your recent conversations, making them easy to find. Pins sync across all your devices, so a conversation you pin on one device is also pinned when you sign in on another.To pin a conversation:
-
Sign in to the DoiT console.
-
In Chat history, find the conversation you want to pin.
-
Select the kebab menu (
) on the conversation and select Pin conversation.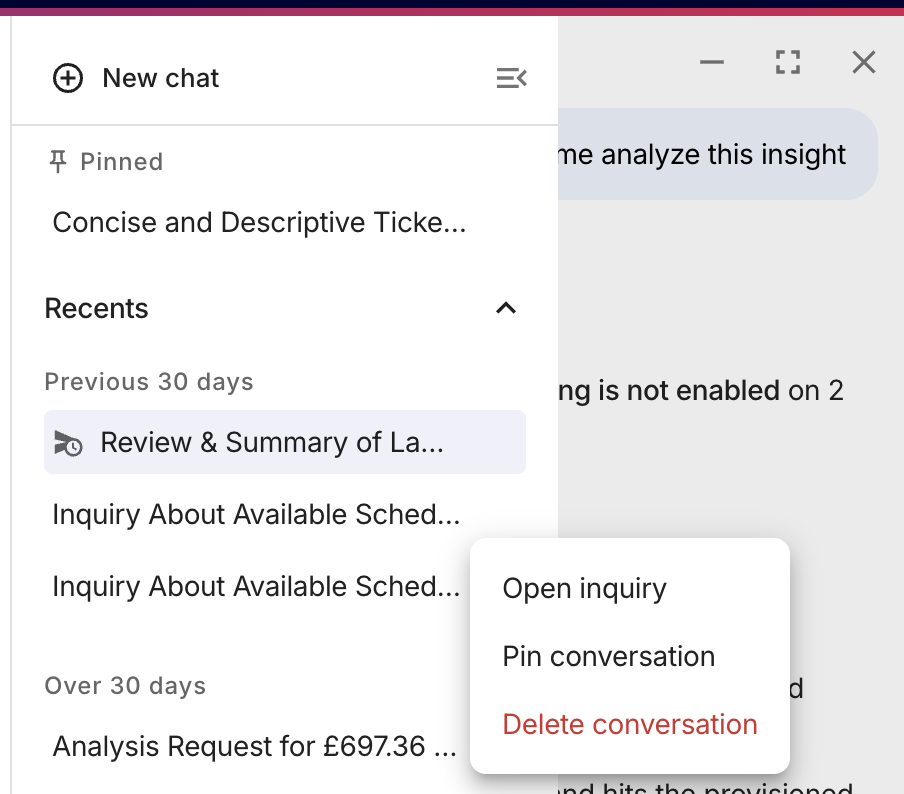
The conversation moves to the Pinned section at the top of Chat history.
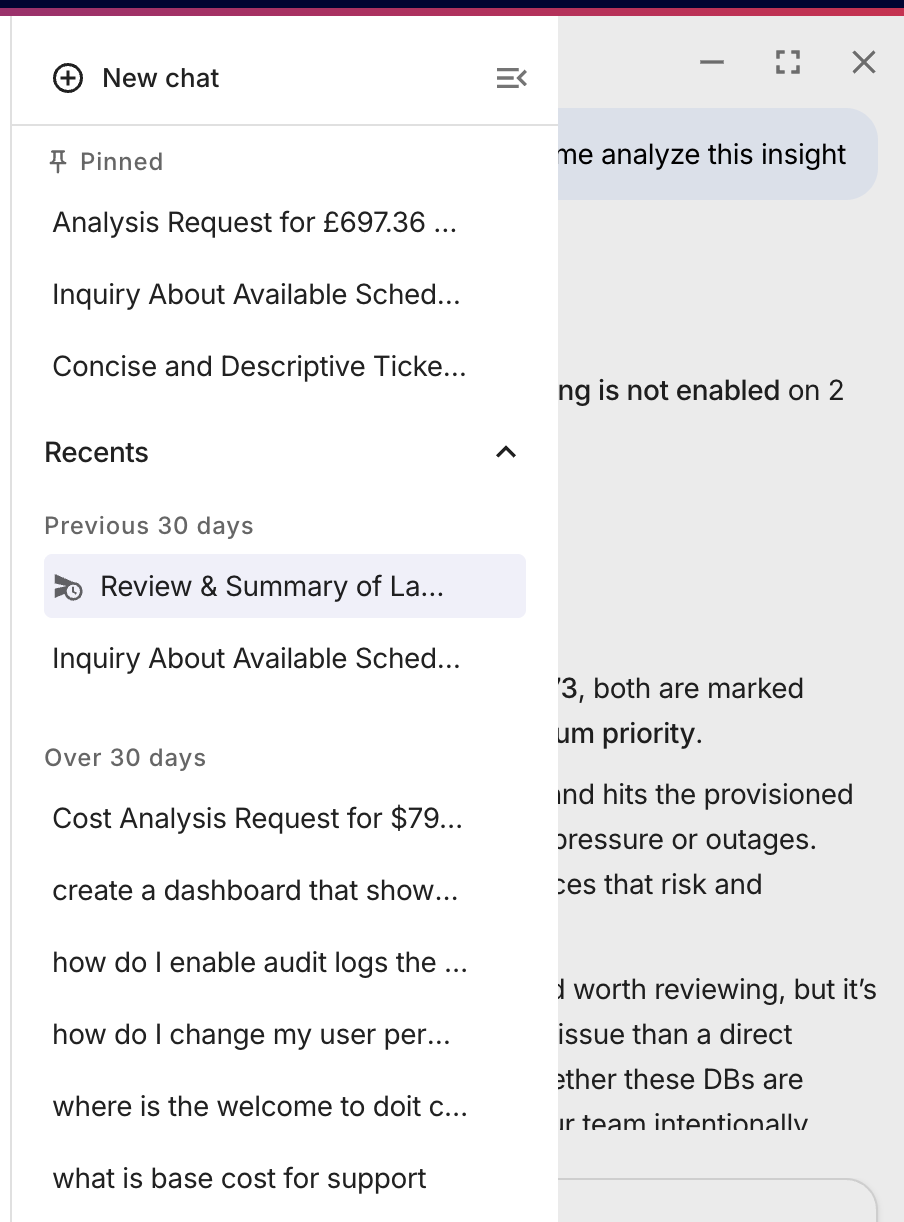
You can also pin a conversation by dragging it from the recents list into the Pinned section.
Reorder pinned conversations
To change the order of your pinned conversations, drag a conversation within the Pinned section to your preferred position.
Unpin a conversation
To unpin a conversation:
-
In Chat history, find the pinned conversation you want to unpin.
-
Select the kebab menu (
) on the conversation and select Unpin conversation.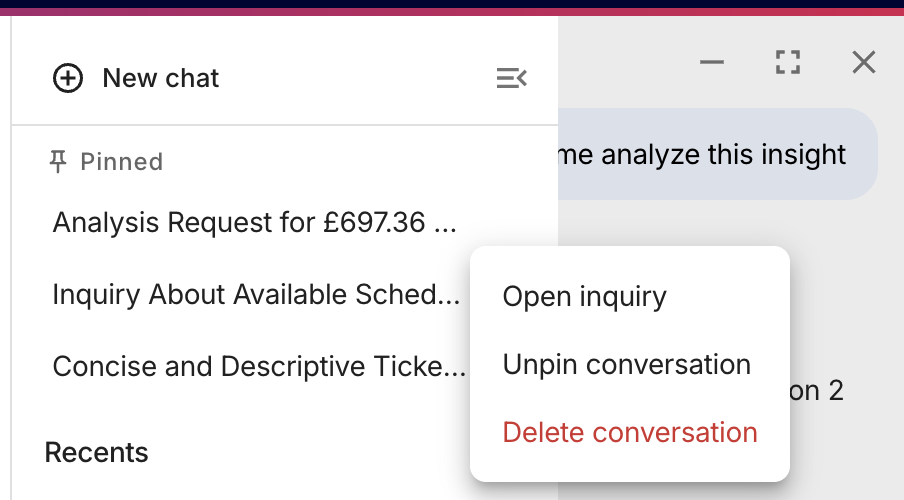
The conversation returns to the recents list in Chat history.
Delete a conversation
To delete a conversation:
-
Sign in to the DoiT console.
-
Select the chat you want to delete in Chat history.
-
Select the kebab menu (
). -
Select Delete Conversation.
-
In the confirmation dialog, select Delete to permanently remove the conversation.
Share a conversation
You can share an Ava conversation with other members of your tenant. You can share a conversation in two ways:
-
(Default) Invite via email: Send an email notification to specific people in your tenant with a link to the conversation.
-
Copy link: Generate a shareable link that you can copy and distribute yourself.
The shared link includes only the messages that exist at the time you share the conversation. Any messages added after sharing are not included.
Sharing works only within your tenant. Users outside your tenant cannot access a shared conversation, even if they have the URL.
To share a conversation:
-
Sign in to the DoiT console.
-
Open the conversation you want to share.
-
In the chat toolbar, select the Share conversation icon (
).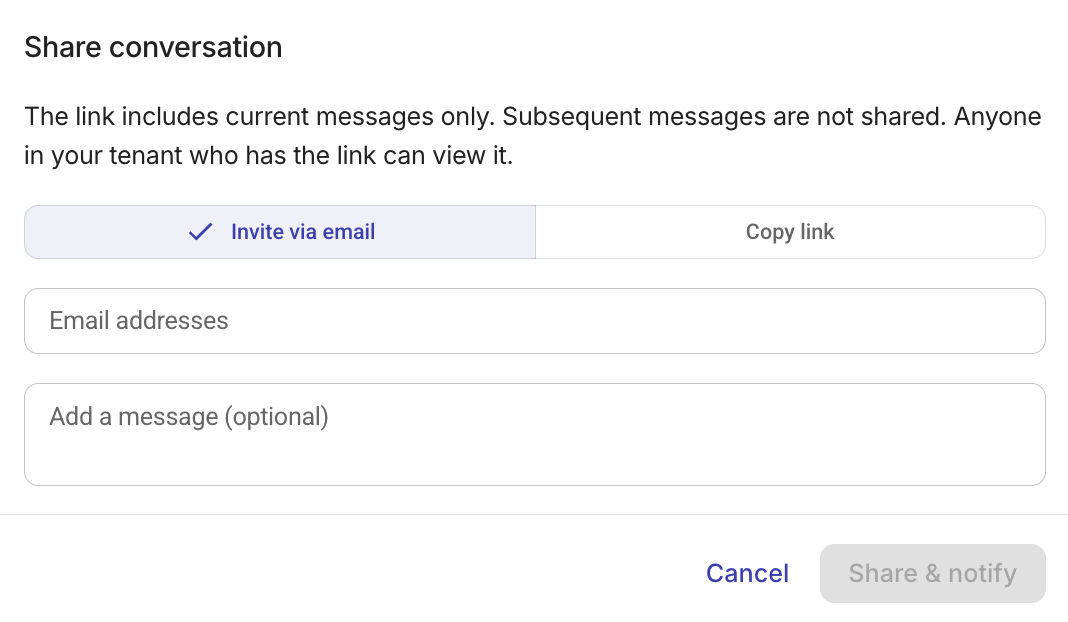
- Invite via email
- Copy link
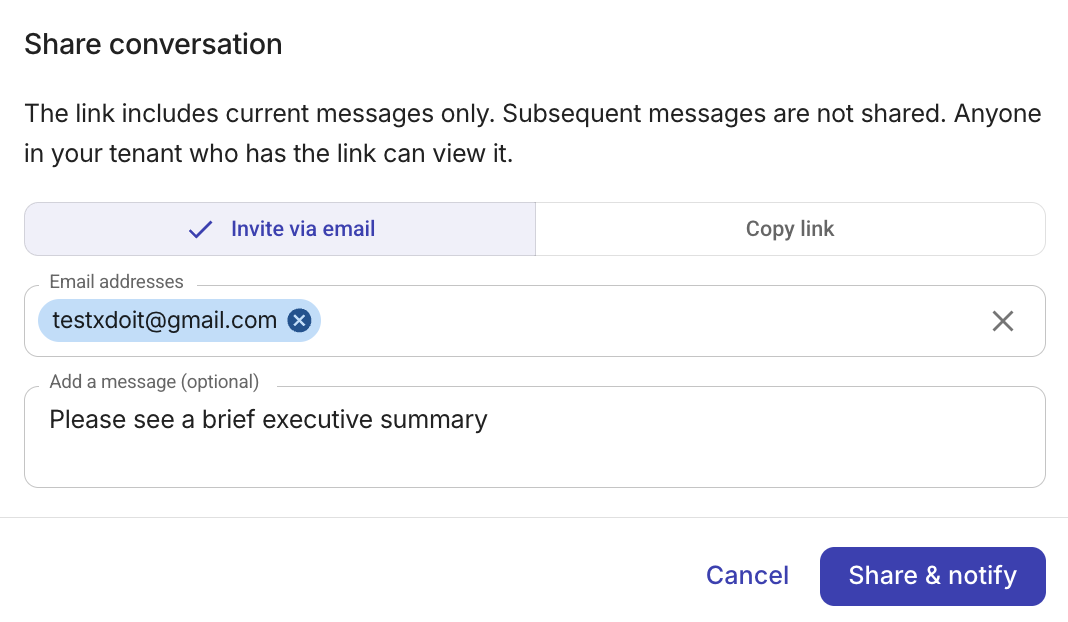
The Invite via email tab lets you share a conversation and notify recipients by email.
-
In the Share conversation dialog, select the Invite via email tab.
-
In the Email addresses field, enter the email addresses of the people you want to share with. You can add up to 20 recipients. As you type, Ava suggests matching users from your tenant.
-
(Optional) In the Add a message field, enter a personal message to include in the notification email (up to 500 characters).
-
Select Share & notify.
A shareable conversation link is created, and each recipient receives an email notification with a link to the shared conversation. The console also tries to copy that same link to your clipboard (when your browser allows it), so you can paste it elsewhere if needed.
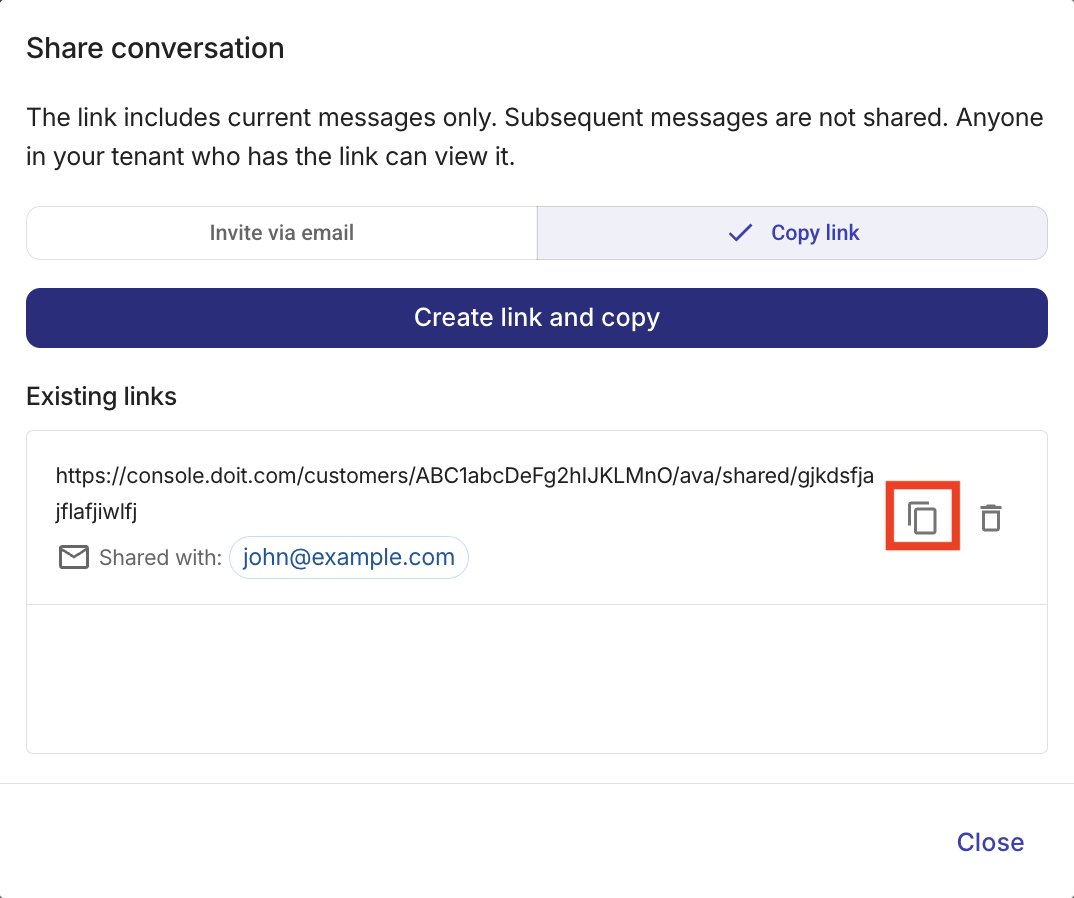
The Copy link tab lets you generate a shareable link without sending email notifications.
-
In the Share conversation dialog, select the Copy link tab.
-
Select Create link and copy.
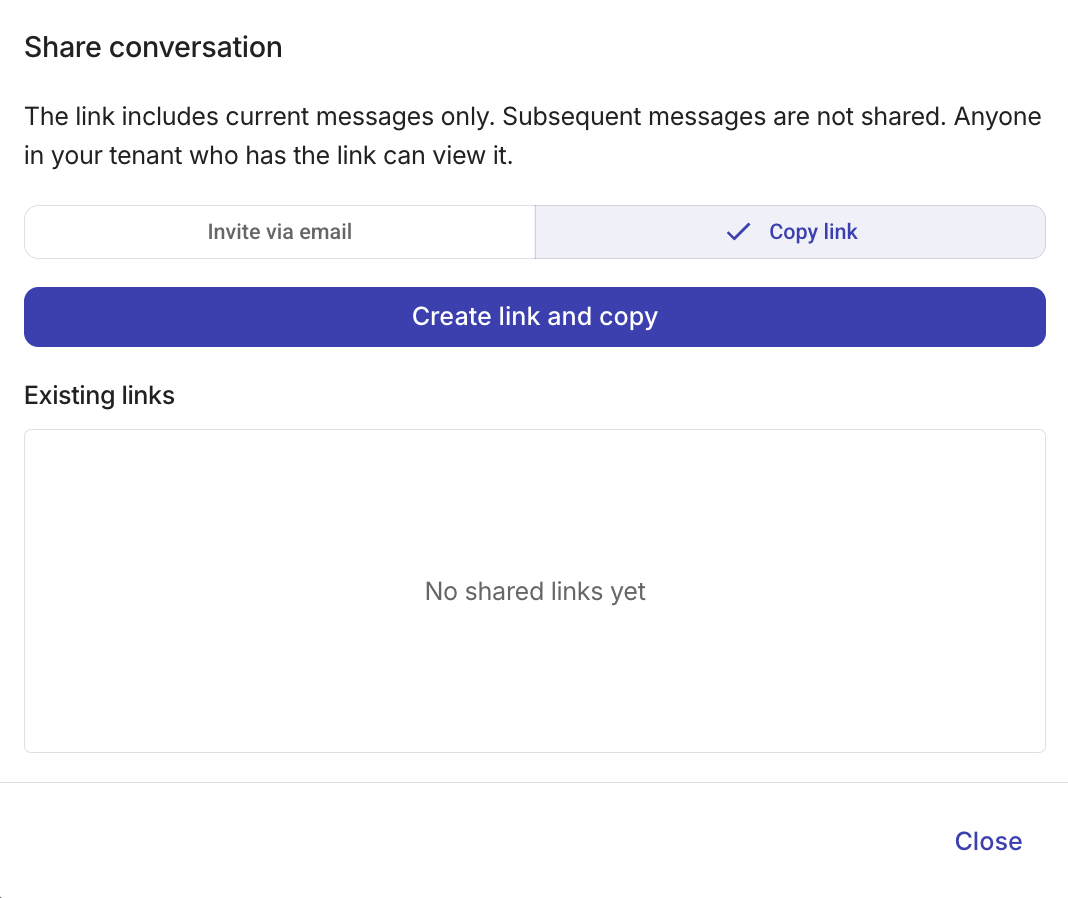
The link is created and copied to your clipboard. Paste the link into your browser to open the shared conversation, or share it with other members of your tenant.
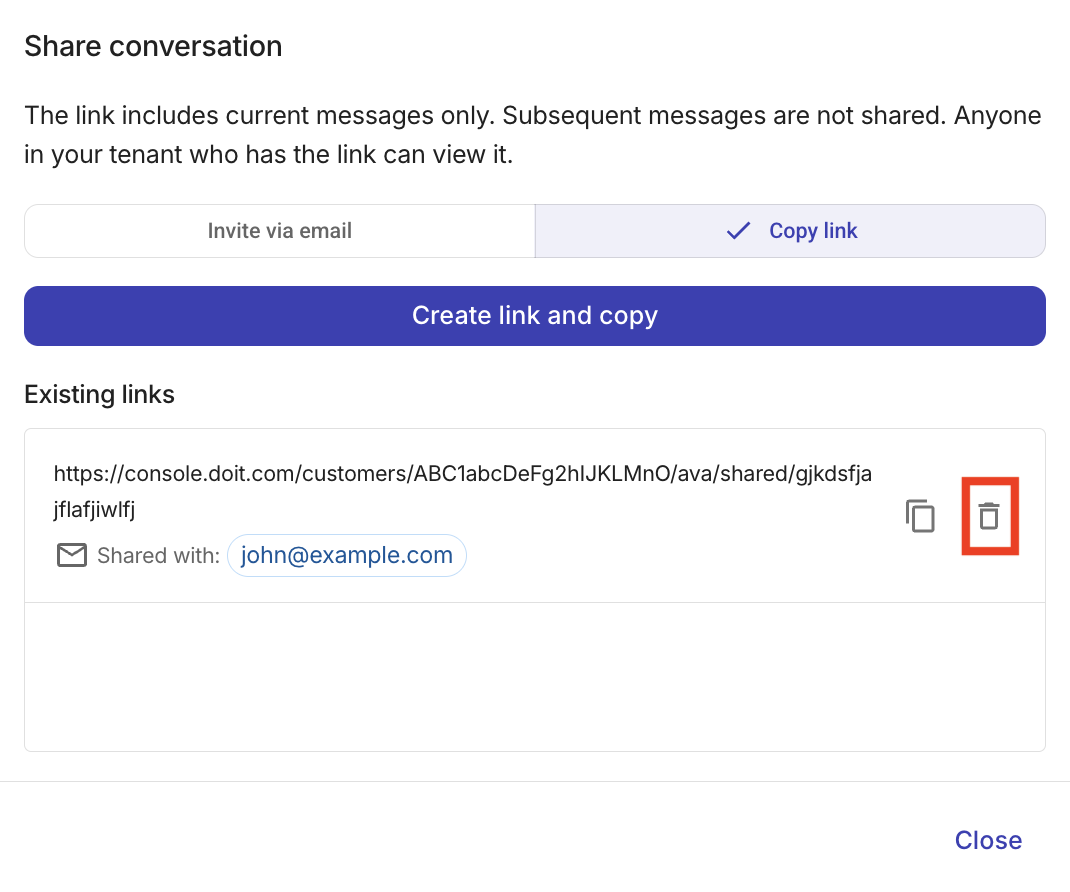
Manage conversation links
To manage your shared links, select the Share conversation icon to open the Share conversation dialog. Existing links displays your active conversation links and their recipients. From here you can:
-
Select Copy link to copy an existing conversation link.
-
Select Delete link to delete a shared conversation link. Once deleted, the link no longer works for anyone.
Open a shared conversation
When you open a shared conversation link, you can view the read-only conversation. A banner at the top indicates who shared the conversation.
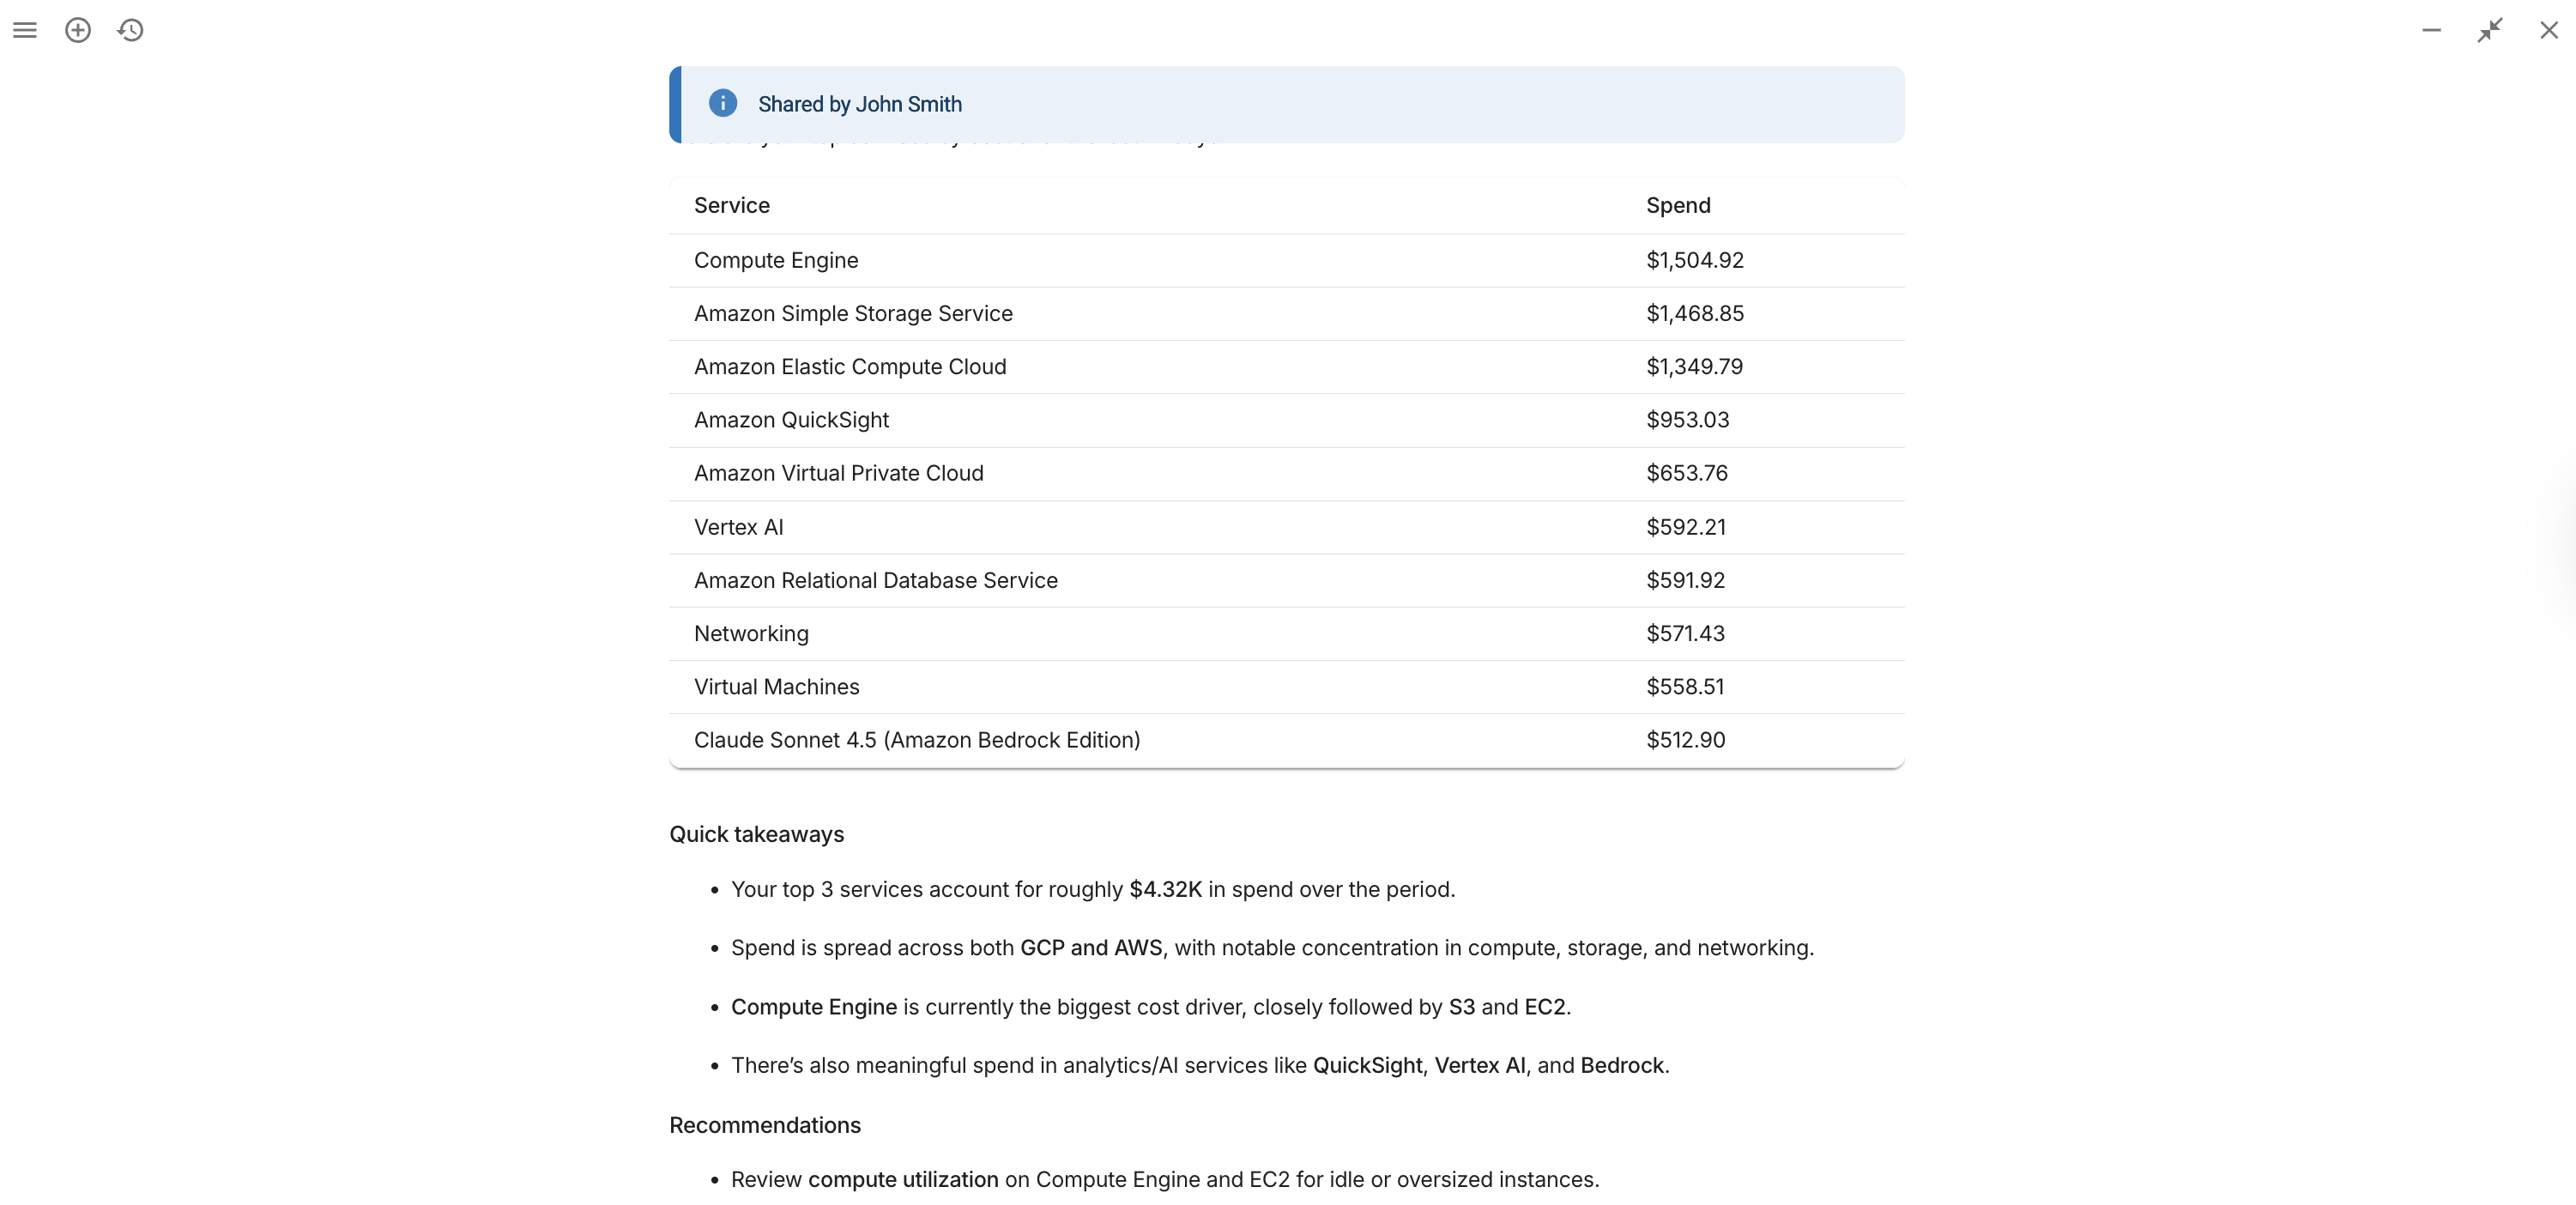
To continue the conversation with your own follow-up questions, type a message in the text field. Ava creates a private copy of the shared conversation in your own chat history, and your new messages are added to that copy. The original shared conversation is not affected. A banner confirms that the shared conversation has been copied.
Create an expert inquiry
This feature is available to the following customers:
- DoiT Cloud Intelligence Enhanced tier and above
- DoiT Heritage customers
If Ava does not answer your question, or you require help from our support team, Ava can help you create an expert inquiry. Ava ensures that accurate and complete information is captured, categorizes and prioritizes the inquiry, and routes the inquiry to the correct team, offering you a faster and more efficient way to create inquiries.
To ask Ava to create a new expert inquiry:
-
Sign in to the DoiT console.
-
You can either:
-
Ask Ava to help you create a new inquiry, for example, Can you help me open an inquiry?
NoteAva always attempts to answer your questions. An inquiry is only created when you explicitly ask Ava to create one.
-
In Chat history, select the chat from which you want to create an expert inquiry Select the kebab menu (
) and Open request.
-
-
In How can we help you today?, Ava summarizes your conversation. Add or change the description of the issue, depending on your requirements.
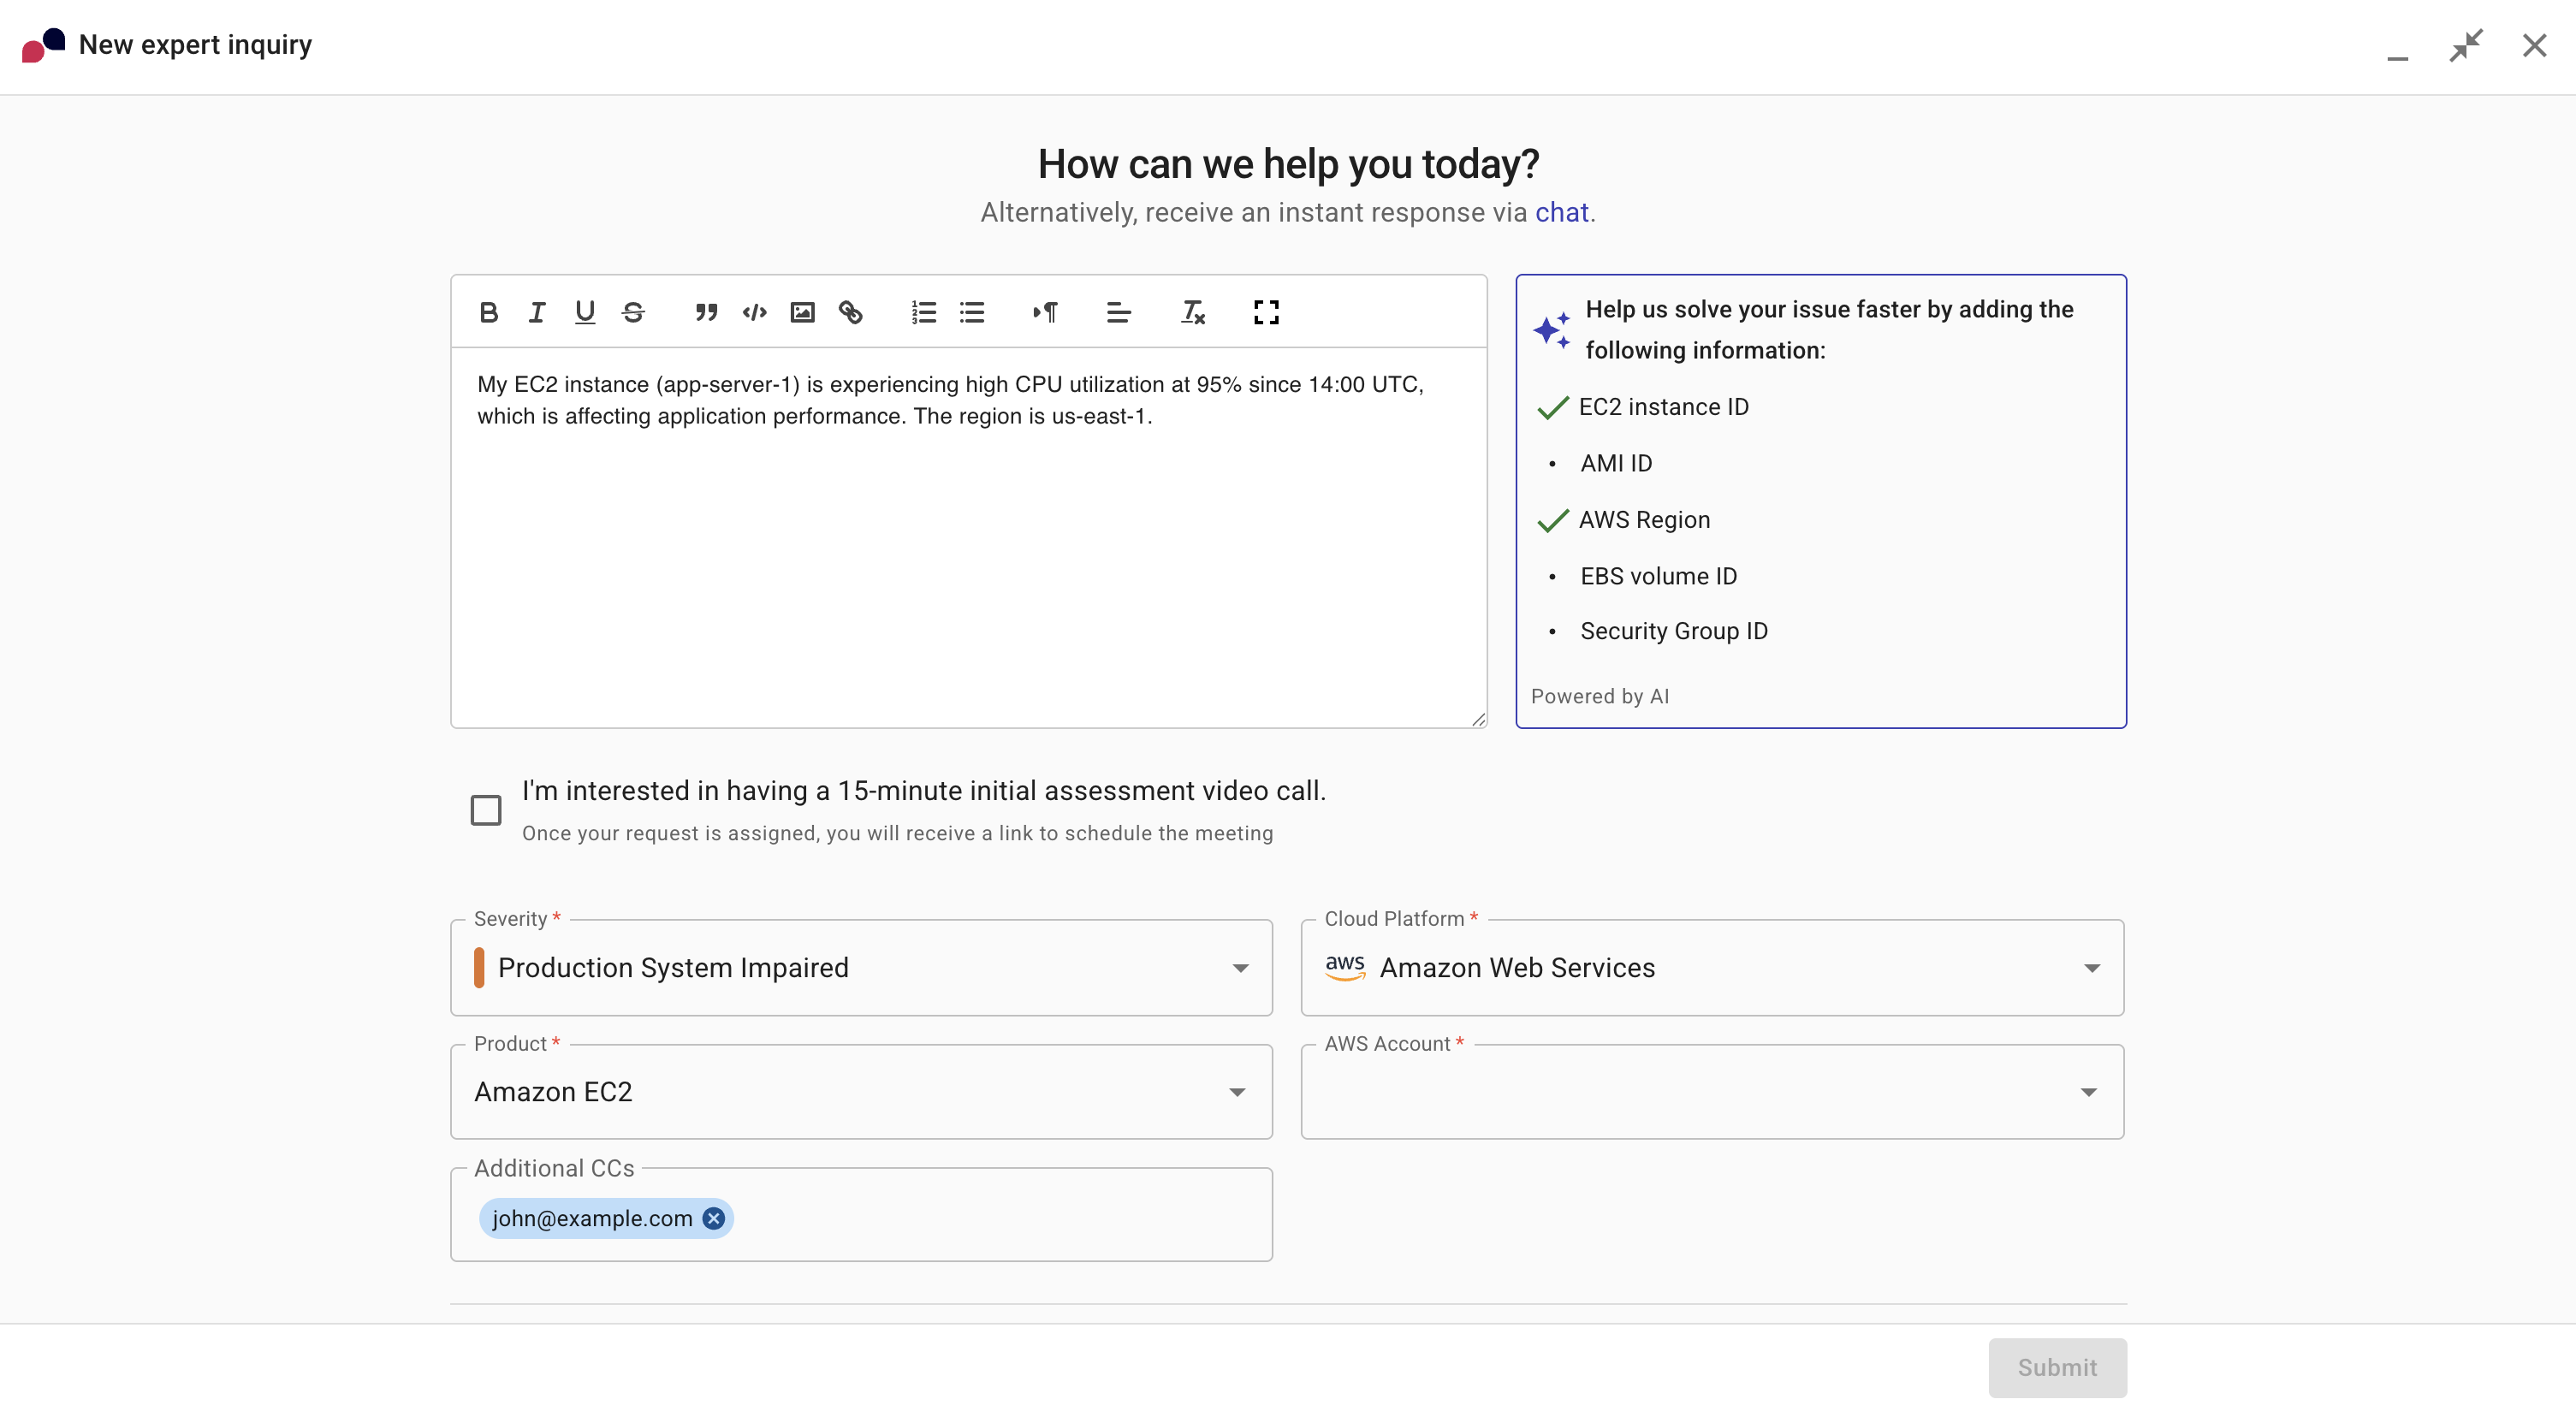
-
Select the Severity of your inquiry:
-
General Guidance: You have general questions about a product.
-
System Impaired: An issue is impairing your systems.
-
Production System Impaired: An issue is impairing your production systems.
-
Production System Down: An issue is causing downtime to your production systems.
-
-
Select the Cloud Platform of the issue you are facing.
-
Select the Product of the issue you are facing.
-
Depending on your cloud provider, select the AWS account or Azure subscription of the issue you are facing.
-
Select Submit to create an inquiry.
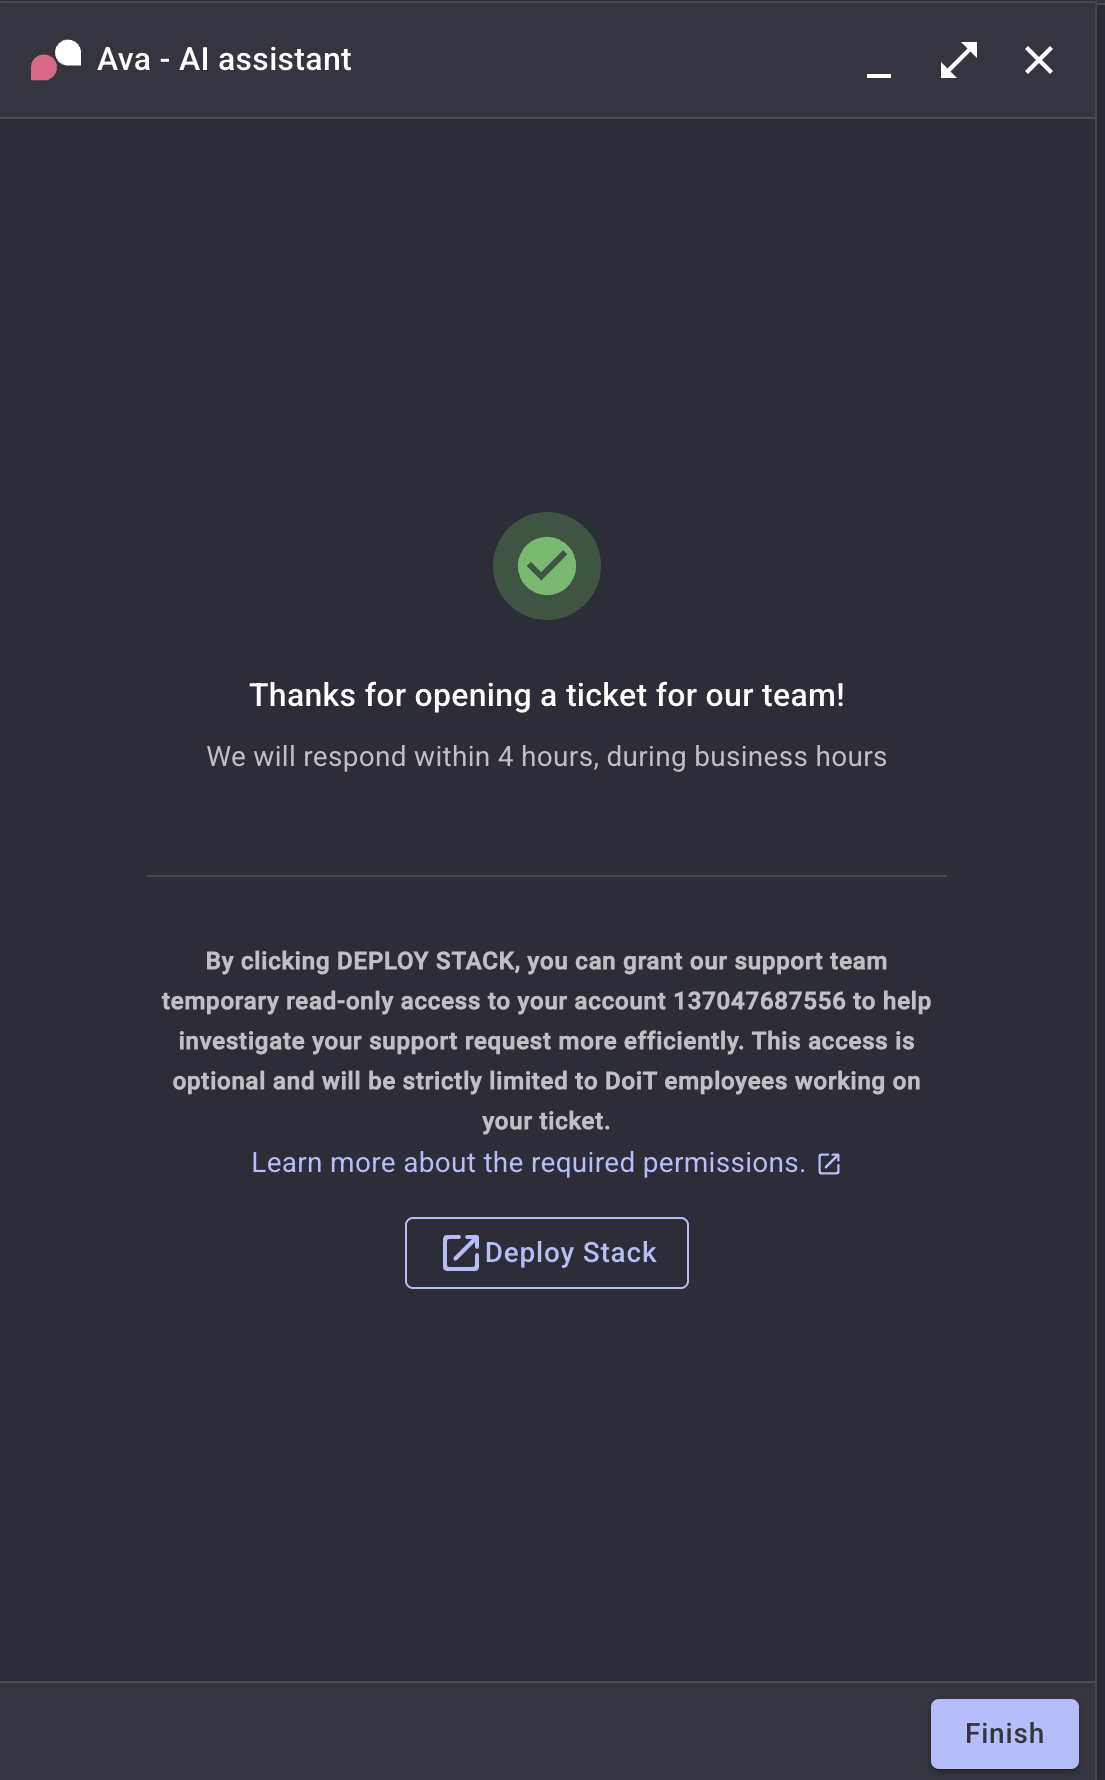
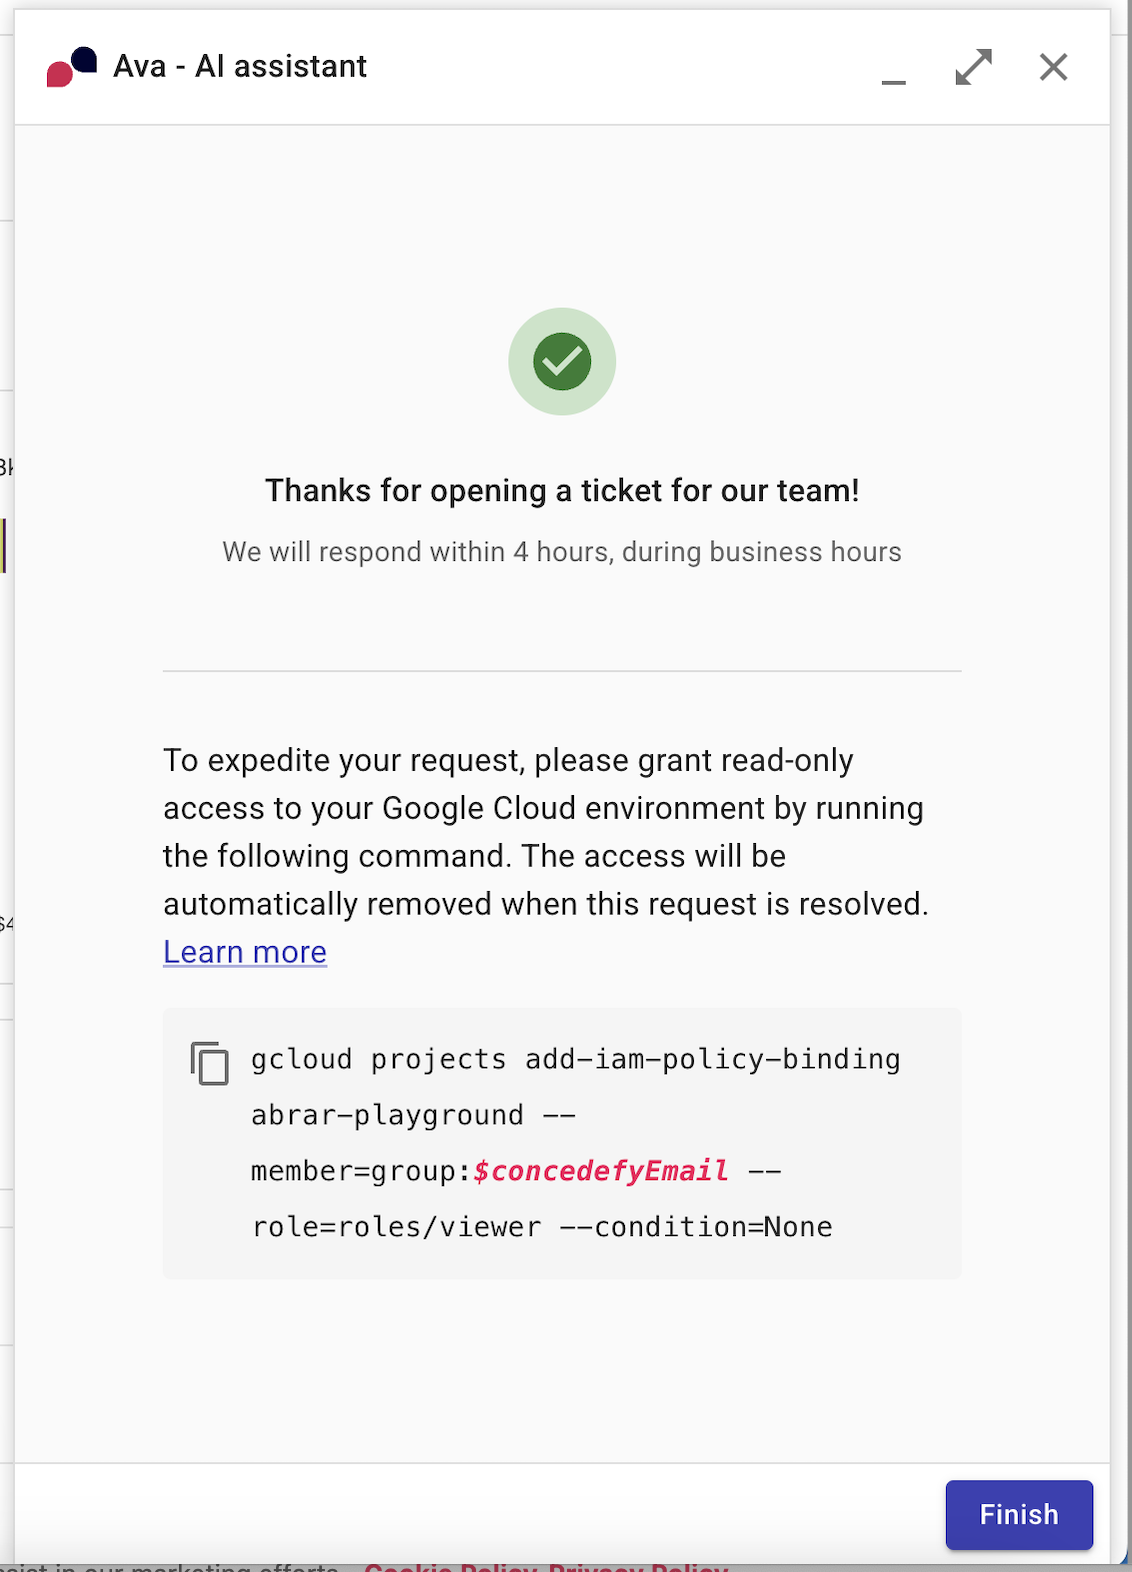
-
(Optional) To expedite your inquiry, we need temporary read-only access to your Cloud environment. Access is automatically removed when the inquiry is resolved. The method you use depends on your cloud provider.
NoteThis is not applicable to Azure.
-
AWS. Select Deploy stack.
-
Google Cloud. Copy and run the code from the code block provided. See also Support access to Google Cloud.
-
To view your newly created inquiry, select Get expert advice from the top navigation mega menu, and then select View all expert inquiries to see a complete list of your inquiries.