Connect AWS accounts
Workspace Admins can connect a client's AWS Management Account to the MSP Workspace.
Required permission
- Your MSP Workspace account must have the Workspace Admin role.
Launch the connection wizard
Use one of the following approaches to launch the connection wizard in your MSP Workspace:
-
In the sidebar, select Continuous cloud monitoring, then select Connect account.
-
In the sidebar, select Audit home, then select Connect AWS on the Readiness scores card, if available.
Step 1: Client
Specify the client whose AWS environment you want to connect:
-
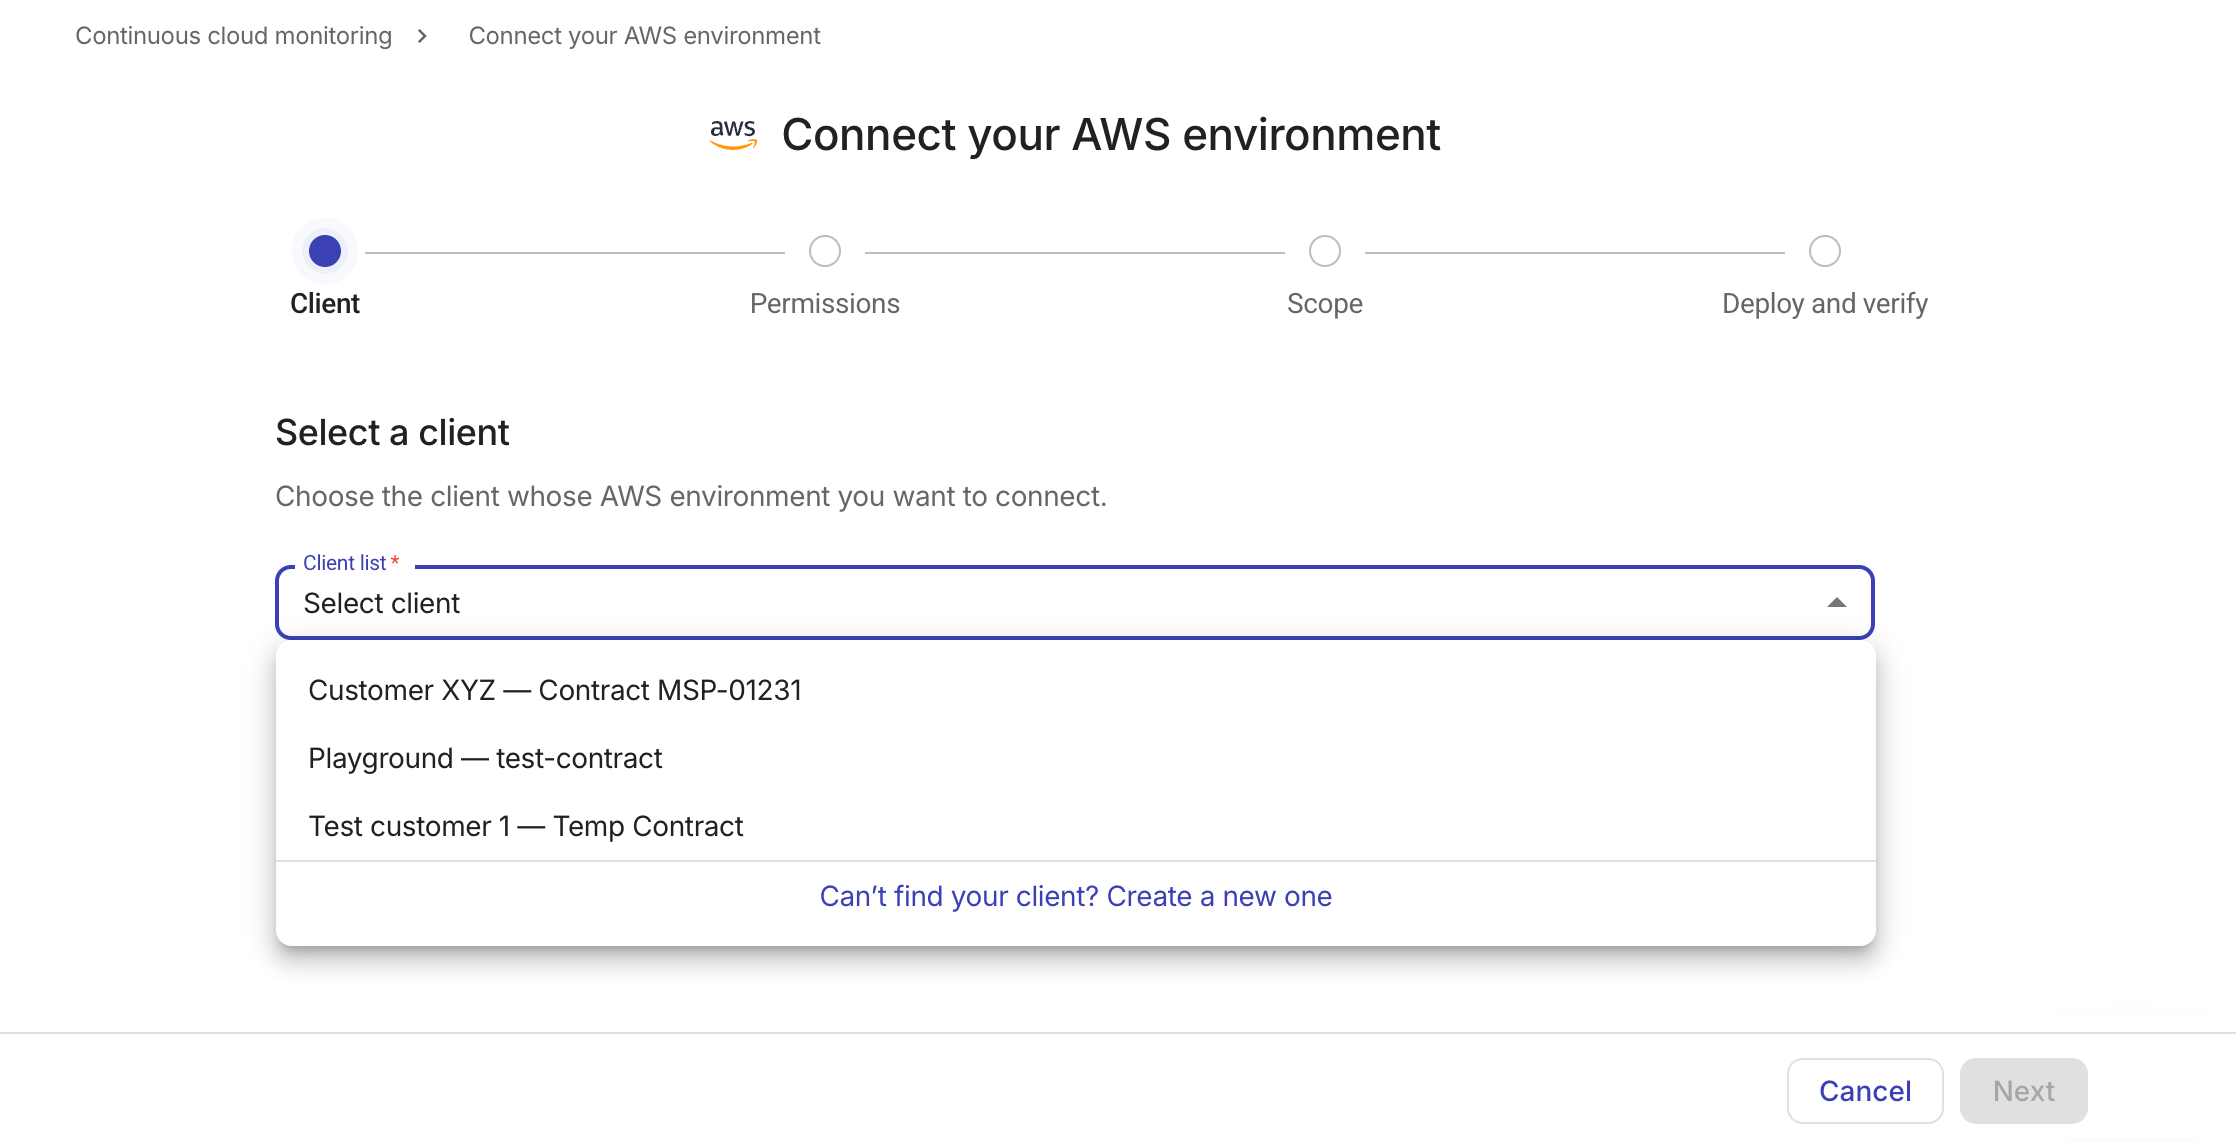
In the Client list dropdown, select the client whose AWS environment you want to connect.
The list shows all MSP-contract clients associated with your partner account.
-
If your client is not on the list, select the option at the bottom of the list to create a new one.
-
In the Create new client dialog, enter the client name and the unique MSP contract number associated with the client.
-
Select Create new.
-
-
Select Next to proceed.
Step 2: Permissions
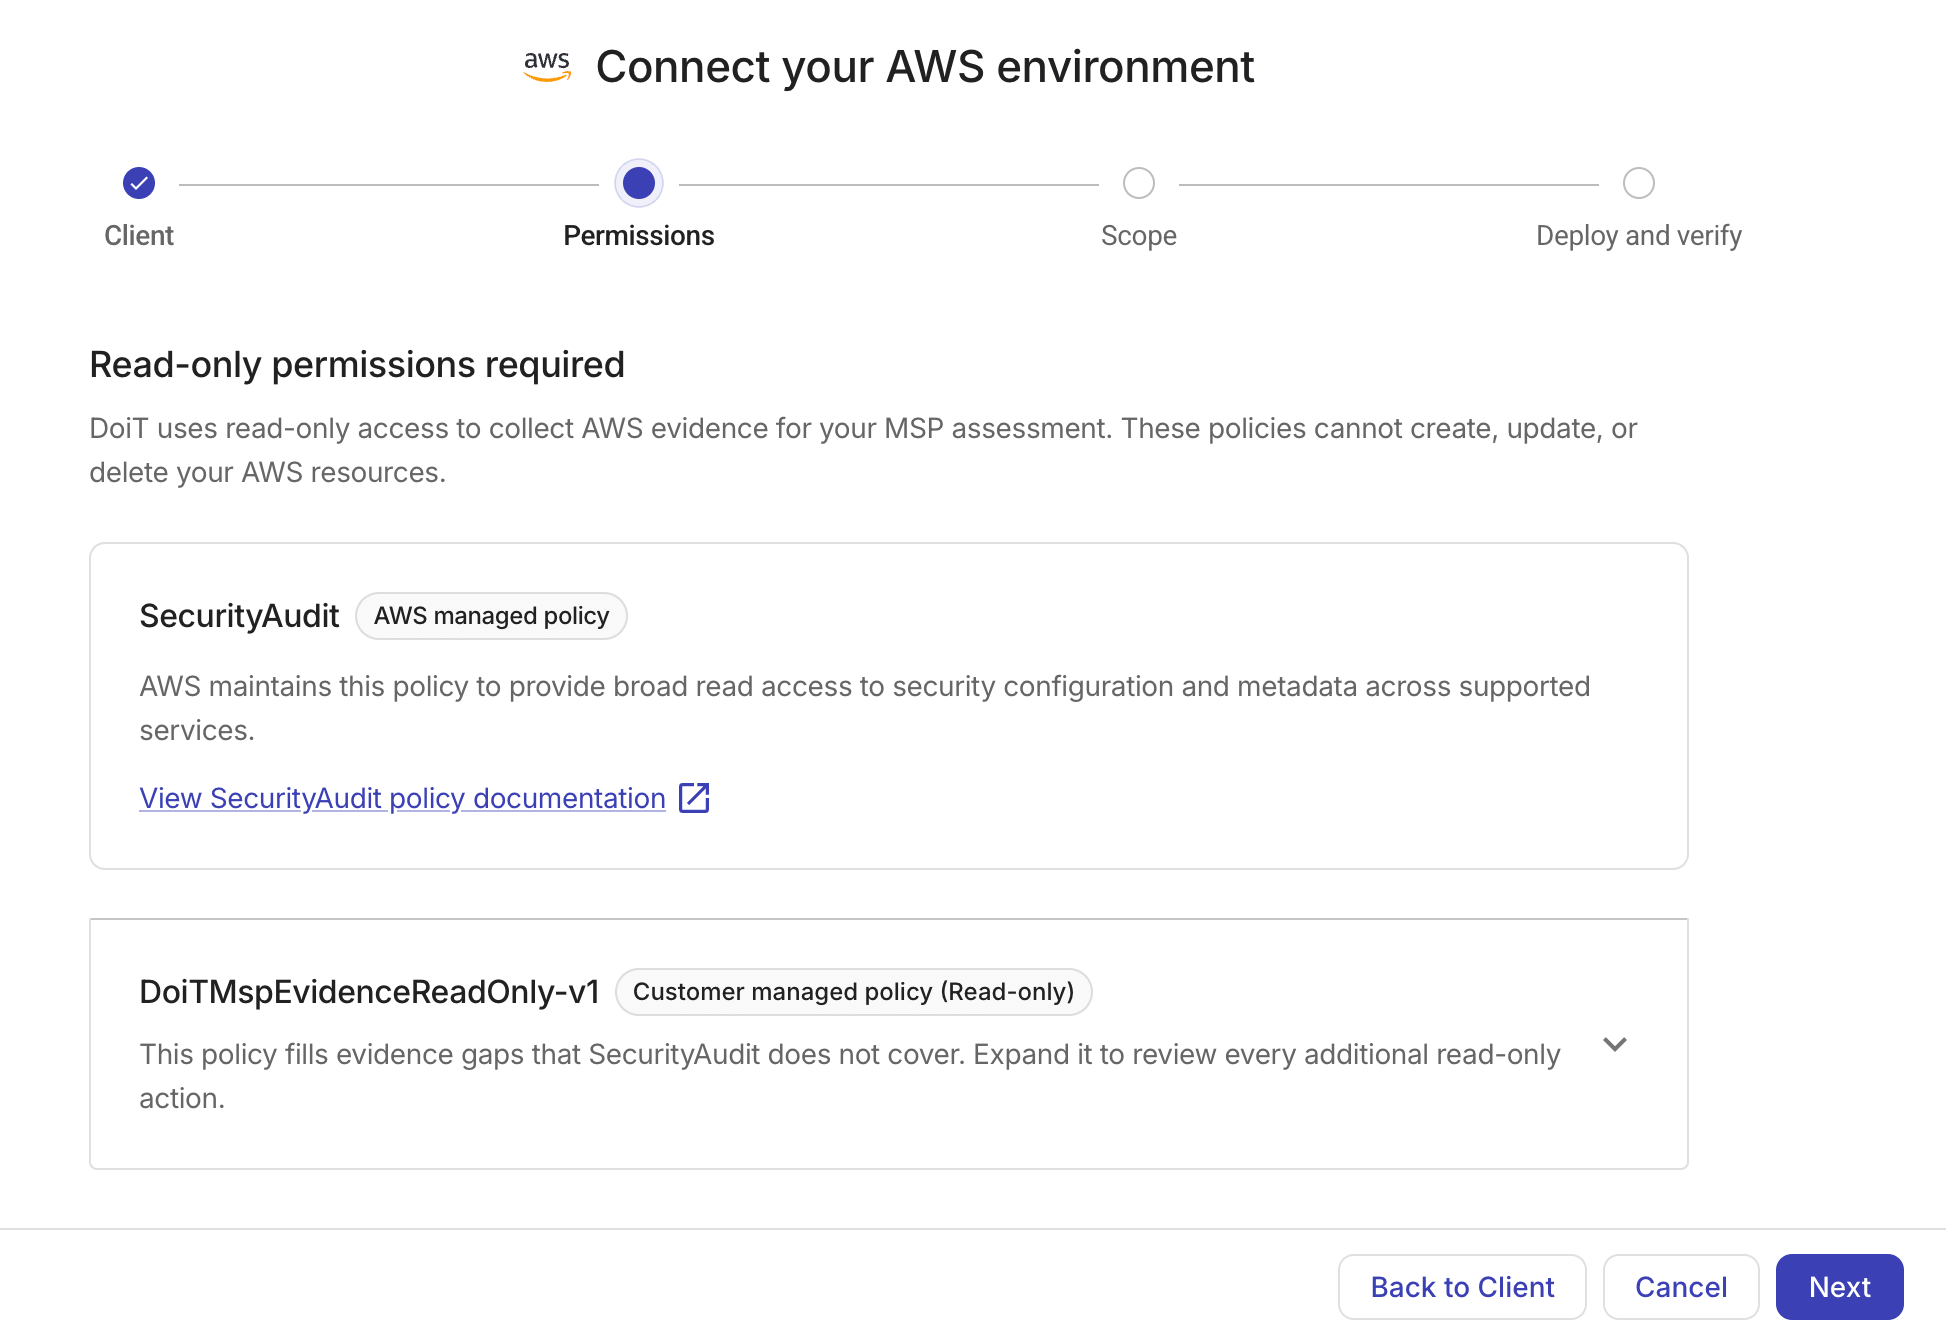
In this step, you review the policies that DoiT uses to collect AWS evidence for MSP assessment. These are read-only policies; they do not create, update, or delete your AWS resources.
-
SecurityAudit (AWS managed policy): Grants read access to security configuration and metadata across supported AWS services.
-
DoiTMspEvidenceReadOnly-v1 (Customer managed policy, read-only): Fills evidence gaps that the SecurityAudit policy does not cover. Expand it to review additional actions, or view the full list of permissions.
Select Next to proceed.
Step 3: Scope
Define the scope where DoiT collects read-only AWS evidence for the client:
-
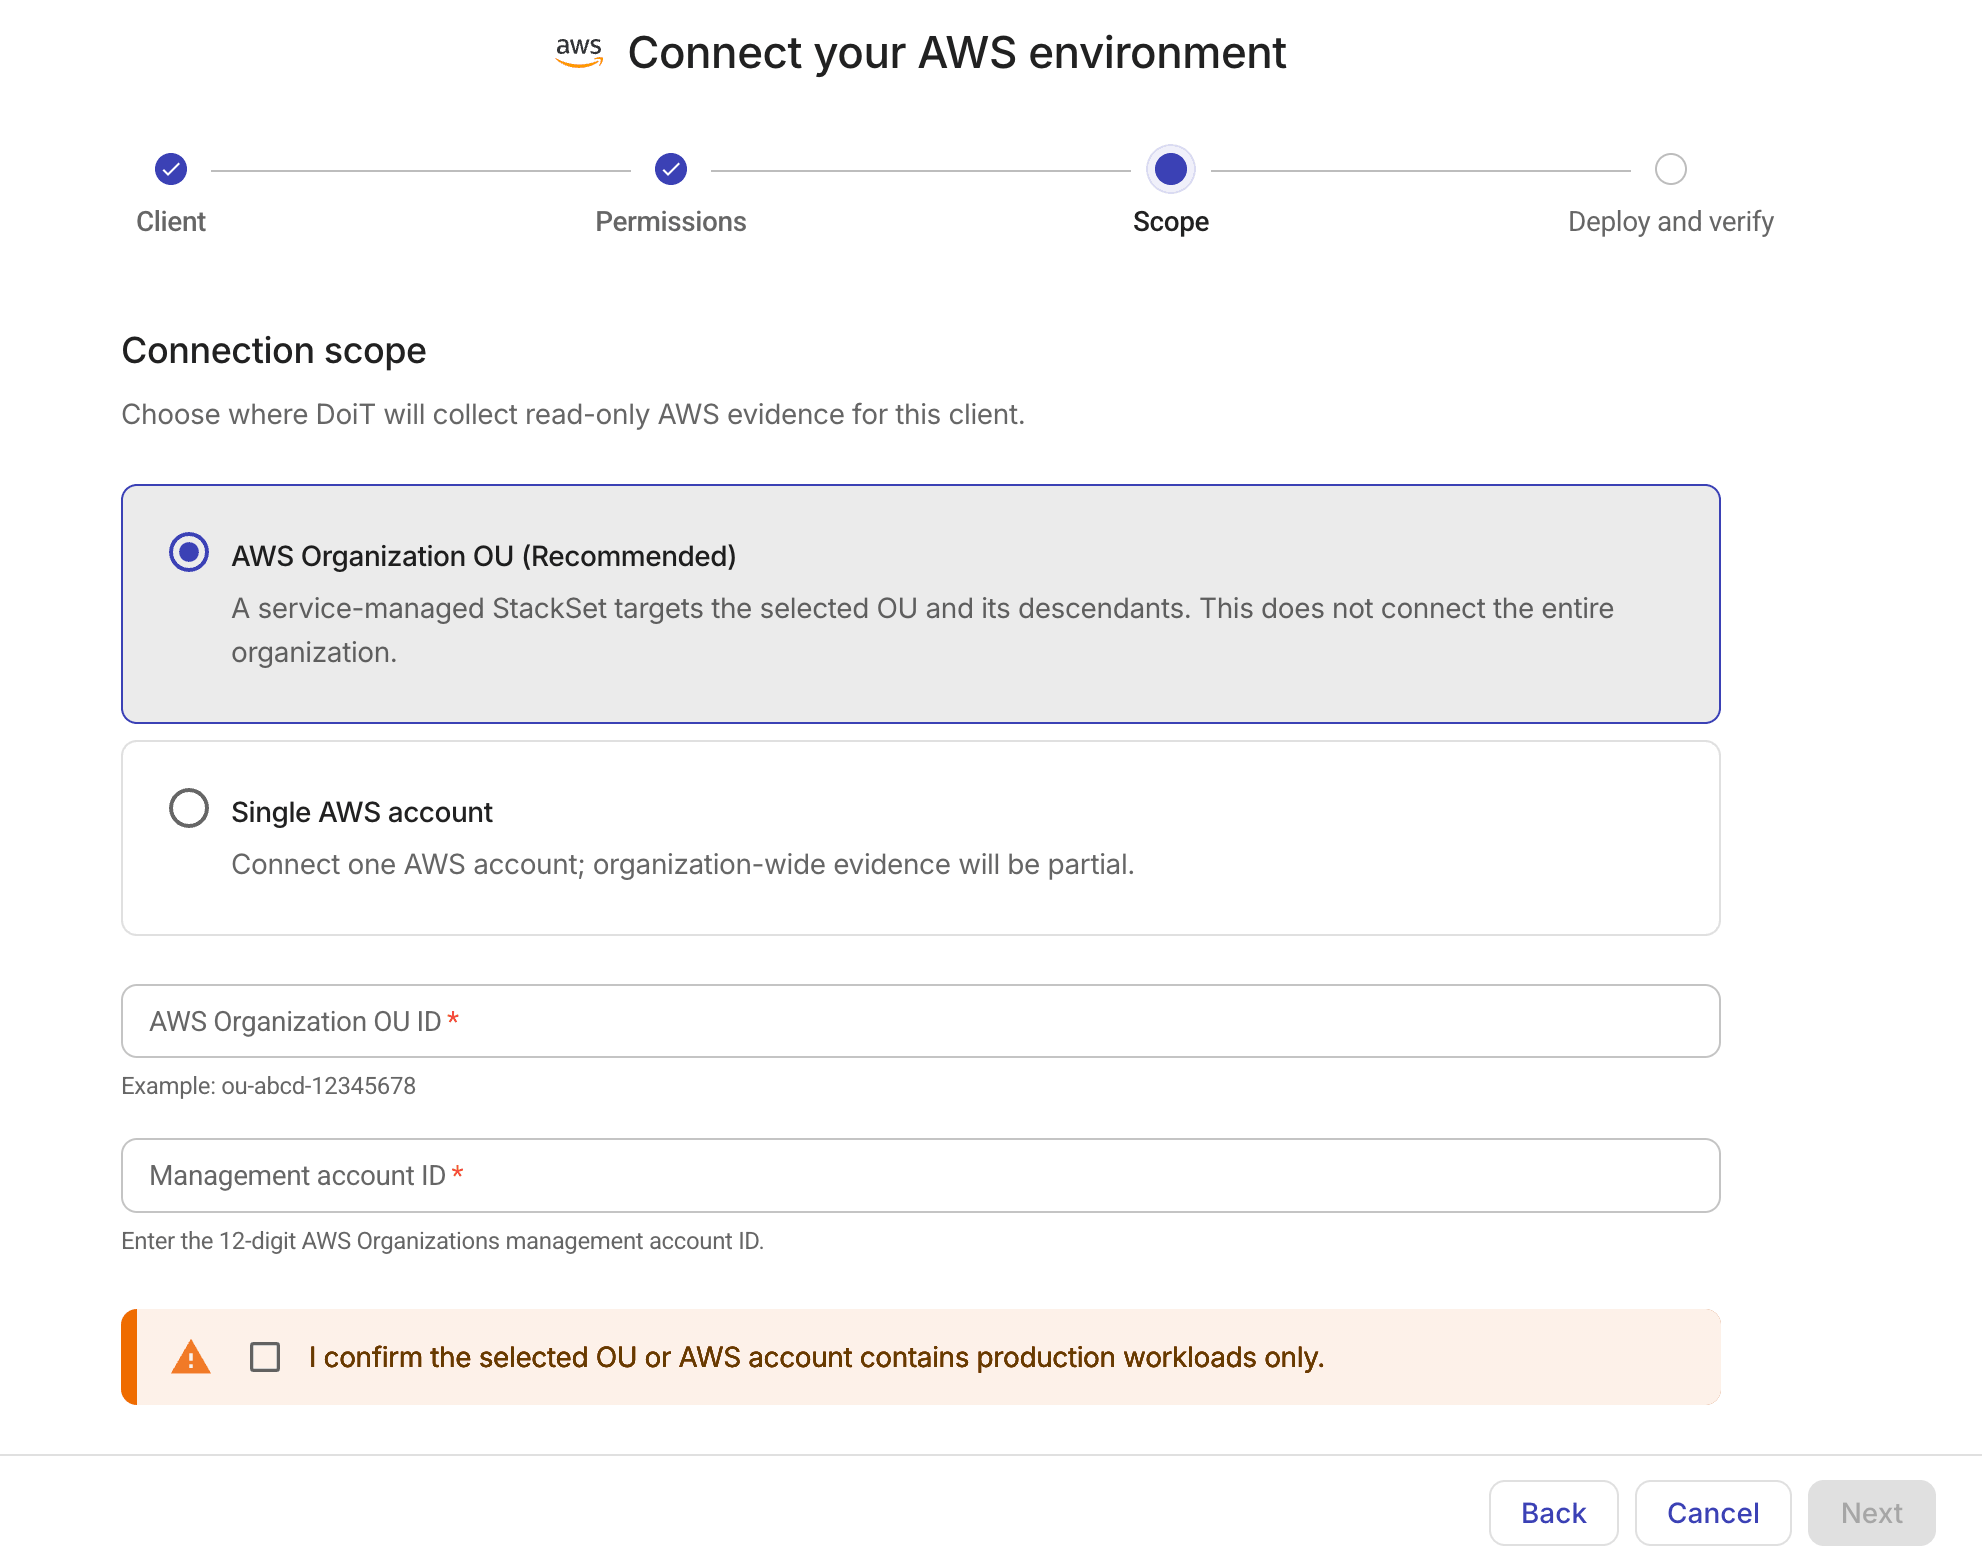
Select a scope type.
-
AWS Organization OU (Recommended): Connect the selected OU and its descendants.
-
Single AWS account: Connect one AWS account. Organization-wide evidence will be partial.
-
-
Enter scope details.
-
Organization OU: Enter the AWS Organization OU ID (for example,
ou-abcd-12345678) and the 12-digit Management account ID . -
Single AWS account: Enter the 12-digit AWS account ID.
-
-
Select the checkbox to confirm that the selected scope contains only production workloads.
-
Select Next to proceed.
Step 4: Deploy and verify
The last step includes two main parts:
-
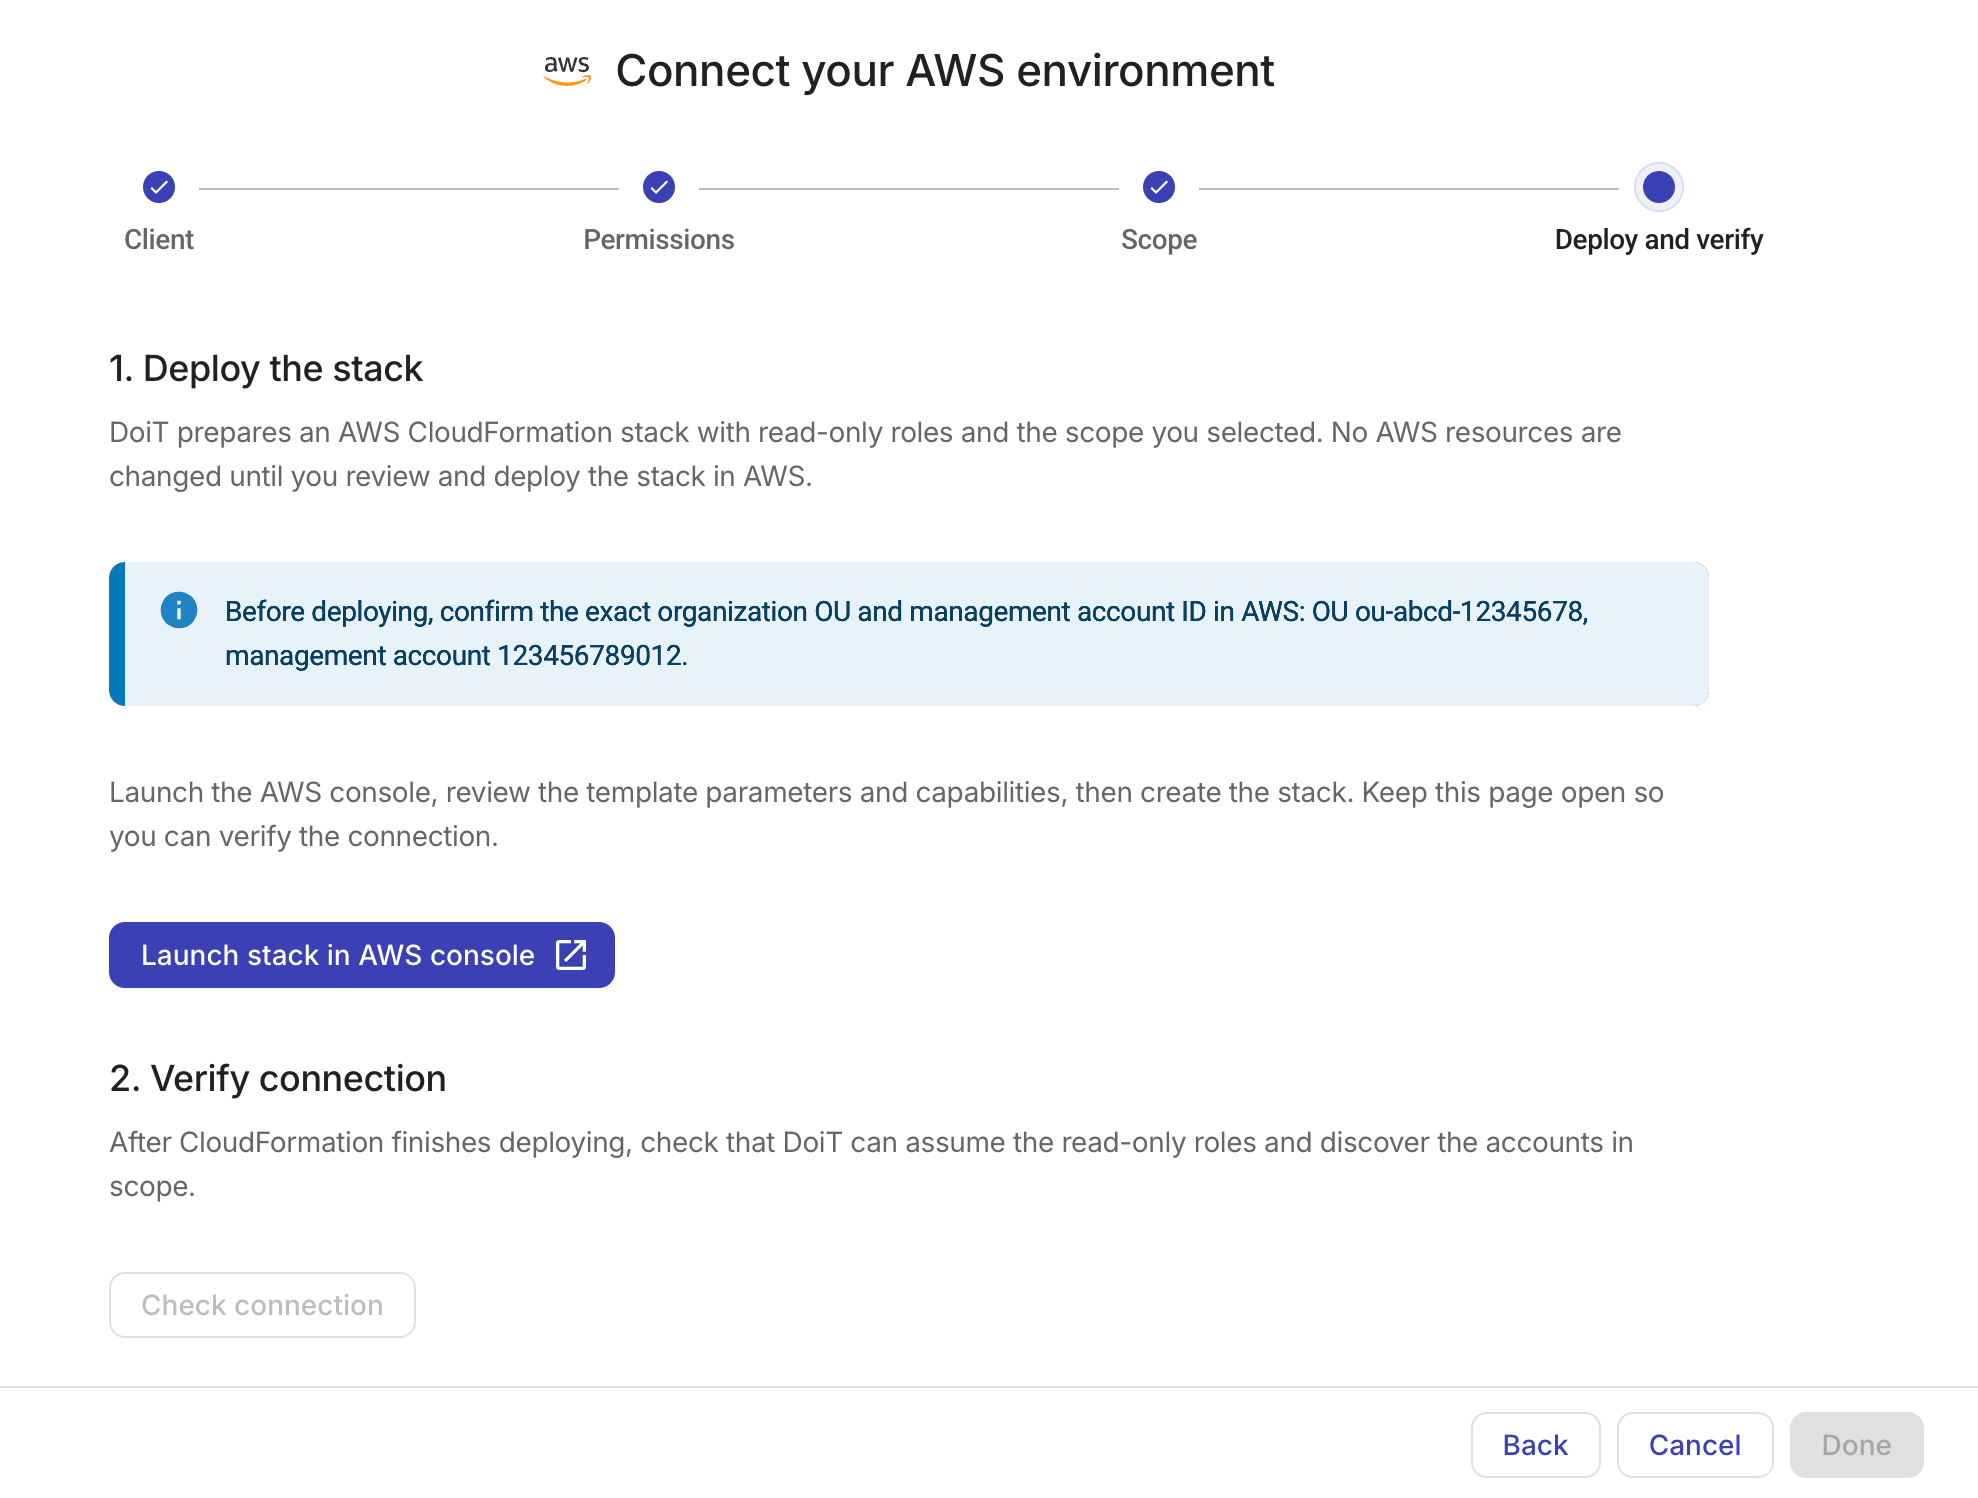
Deploy a CloudFormation stack with read-only roles and the scope you defined to your AWS environment.
-
Review the scope reminder. It displays the OU and management account ID or the single account ID you entered.
-
Select Launch stack in AWS console to open the AWS CloudFormation console in a new tab.
-
Create the stack in the AWS CloudFormation console.
-
-
After CloudFormation finishes deploying, select Check connection to verify that DoiT can assume the read-only roles and discover the relevant accounts.
-
Review the results.
-
If all checks pass, the wizard displays the number of discovered accounts and accounts ready for evidence collection.
-
If any checks fail, follow the remediation guidance shown for each failed check.
-
-
When the connection is verified, select Done.