AWS アカウントを接続
ワークスペース管理者は、クライアントの AWS 管理アカウントを MSP ワークスペースに接続できます。
必要な権限
- MSP ワークスペースのアカウントに Workspace Admin ロールが割り当てられている必要があります。
接続ウィザードを起動する
MSP ワークスペースで接続ウィザードを起動するには、次のいずれかの方法を使用します。
-
サイドバーで Continuous cloud monitoring を選択し、Connect account を選択します。
-
サイドバーで Audit home を選択し、Readiness scores カードで利用可能な場合は Connect AWS を選択します。
ステップ 1: クライアント
接続したい AWS 環境を持つクライアントを指定します。
-
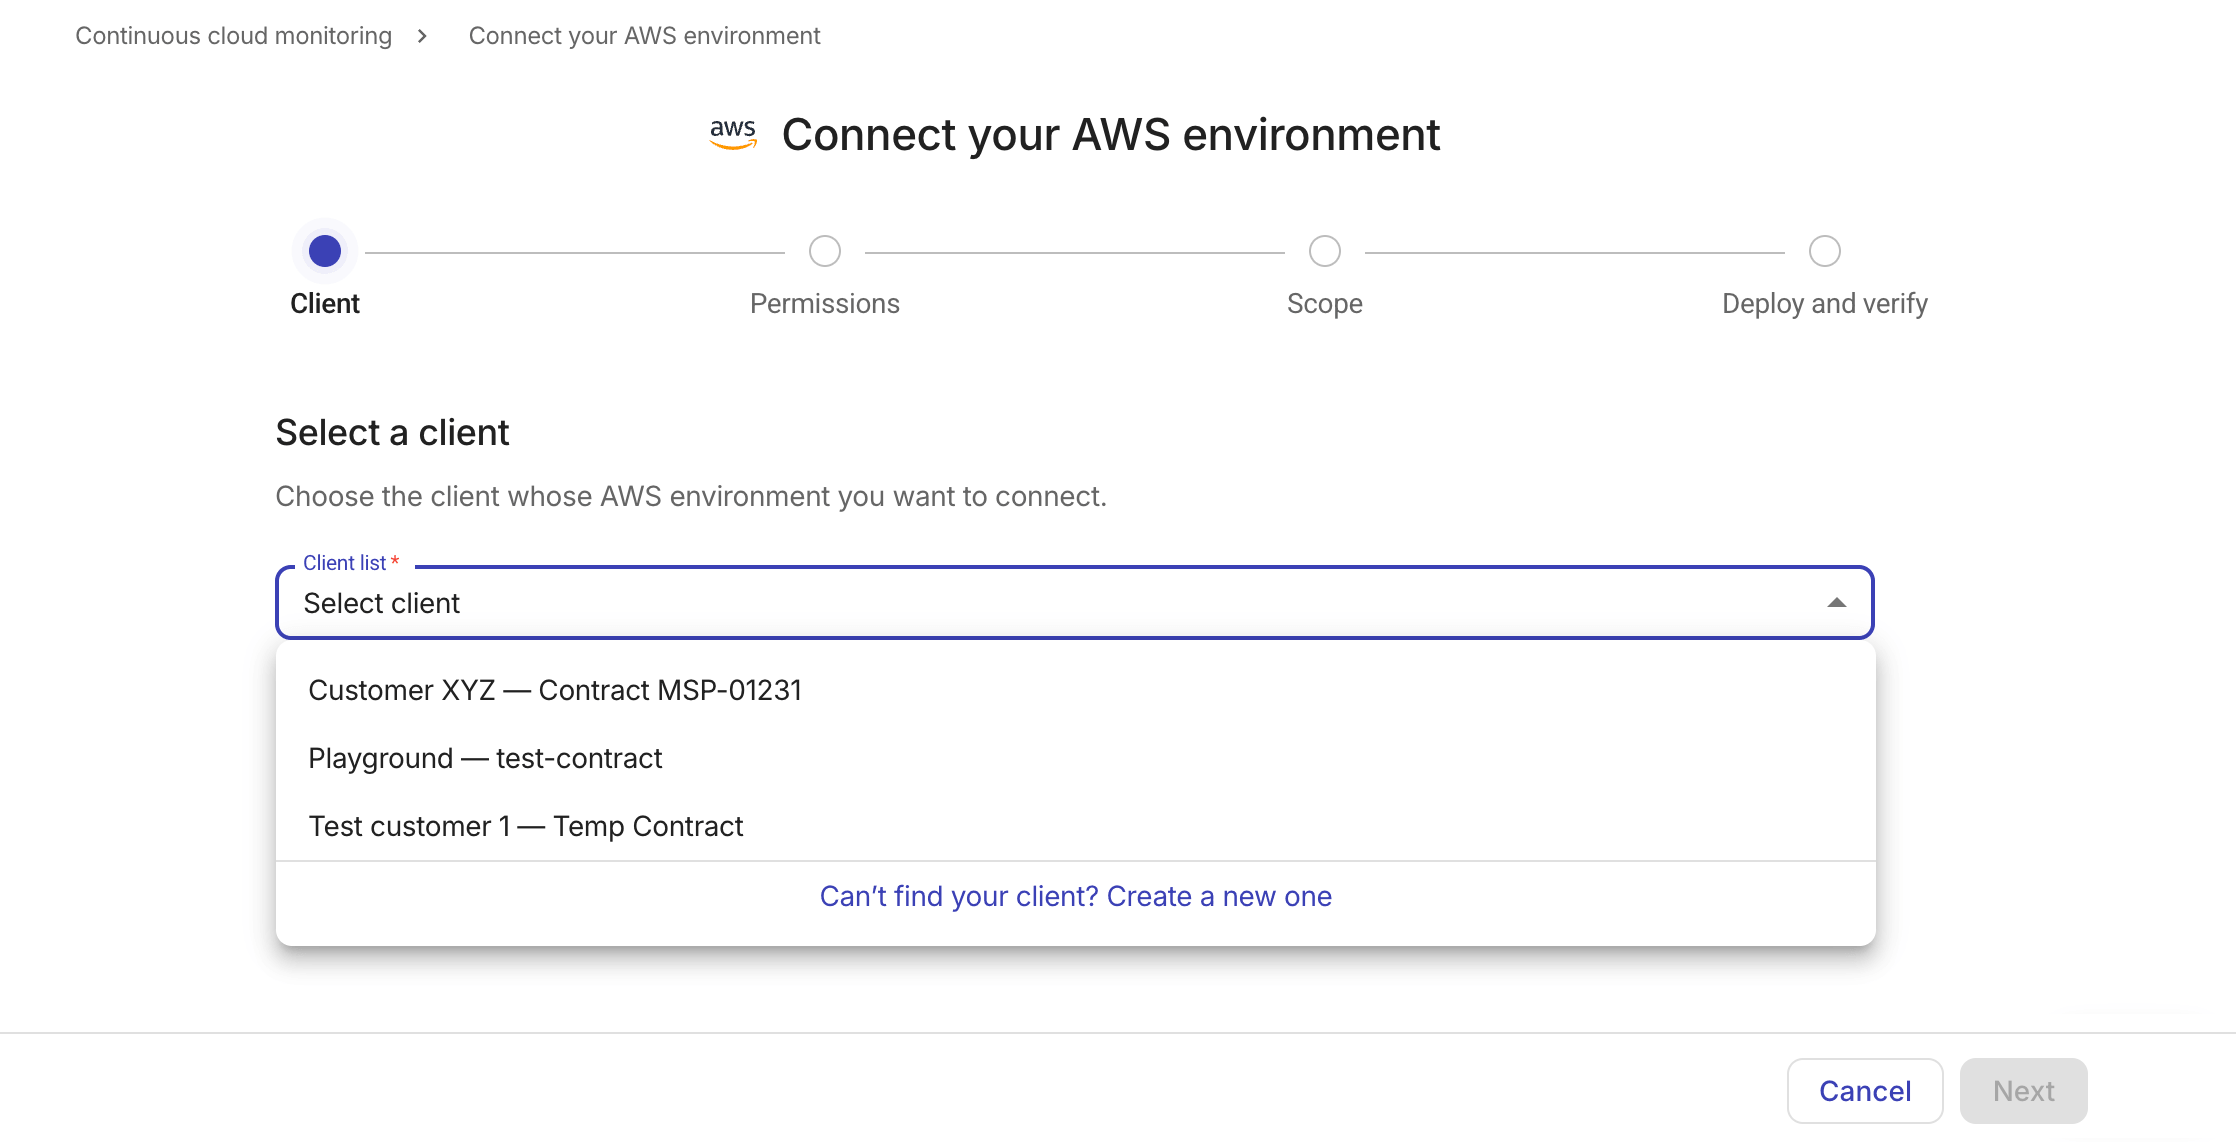
Client list ドロップダウンで、AWS 環境を接続したいクライアントを選択します。
このリストには、パートナーアカウントに関連付けられているすべての MSP 契約クライアントが表示されます。
-
クライアントがリストにない場合は、リストの一番下のオプションを選択して新しいクライアントを作成します。
-
Create new client ダイアログで、クライアント名と、そのクライアントに紐づく一意の MSP 契約番号を入力します。
-
Create new を選択します。
-
-
Next を選択して次に進みます。
ステップ 2: 権限
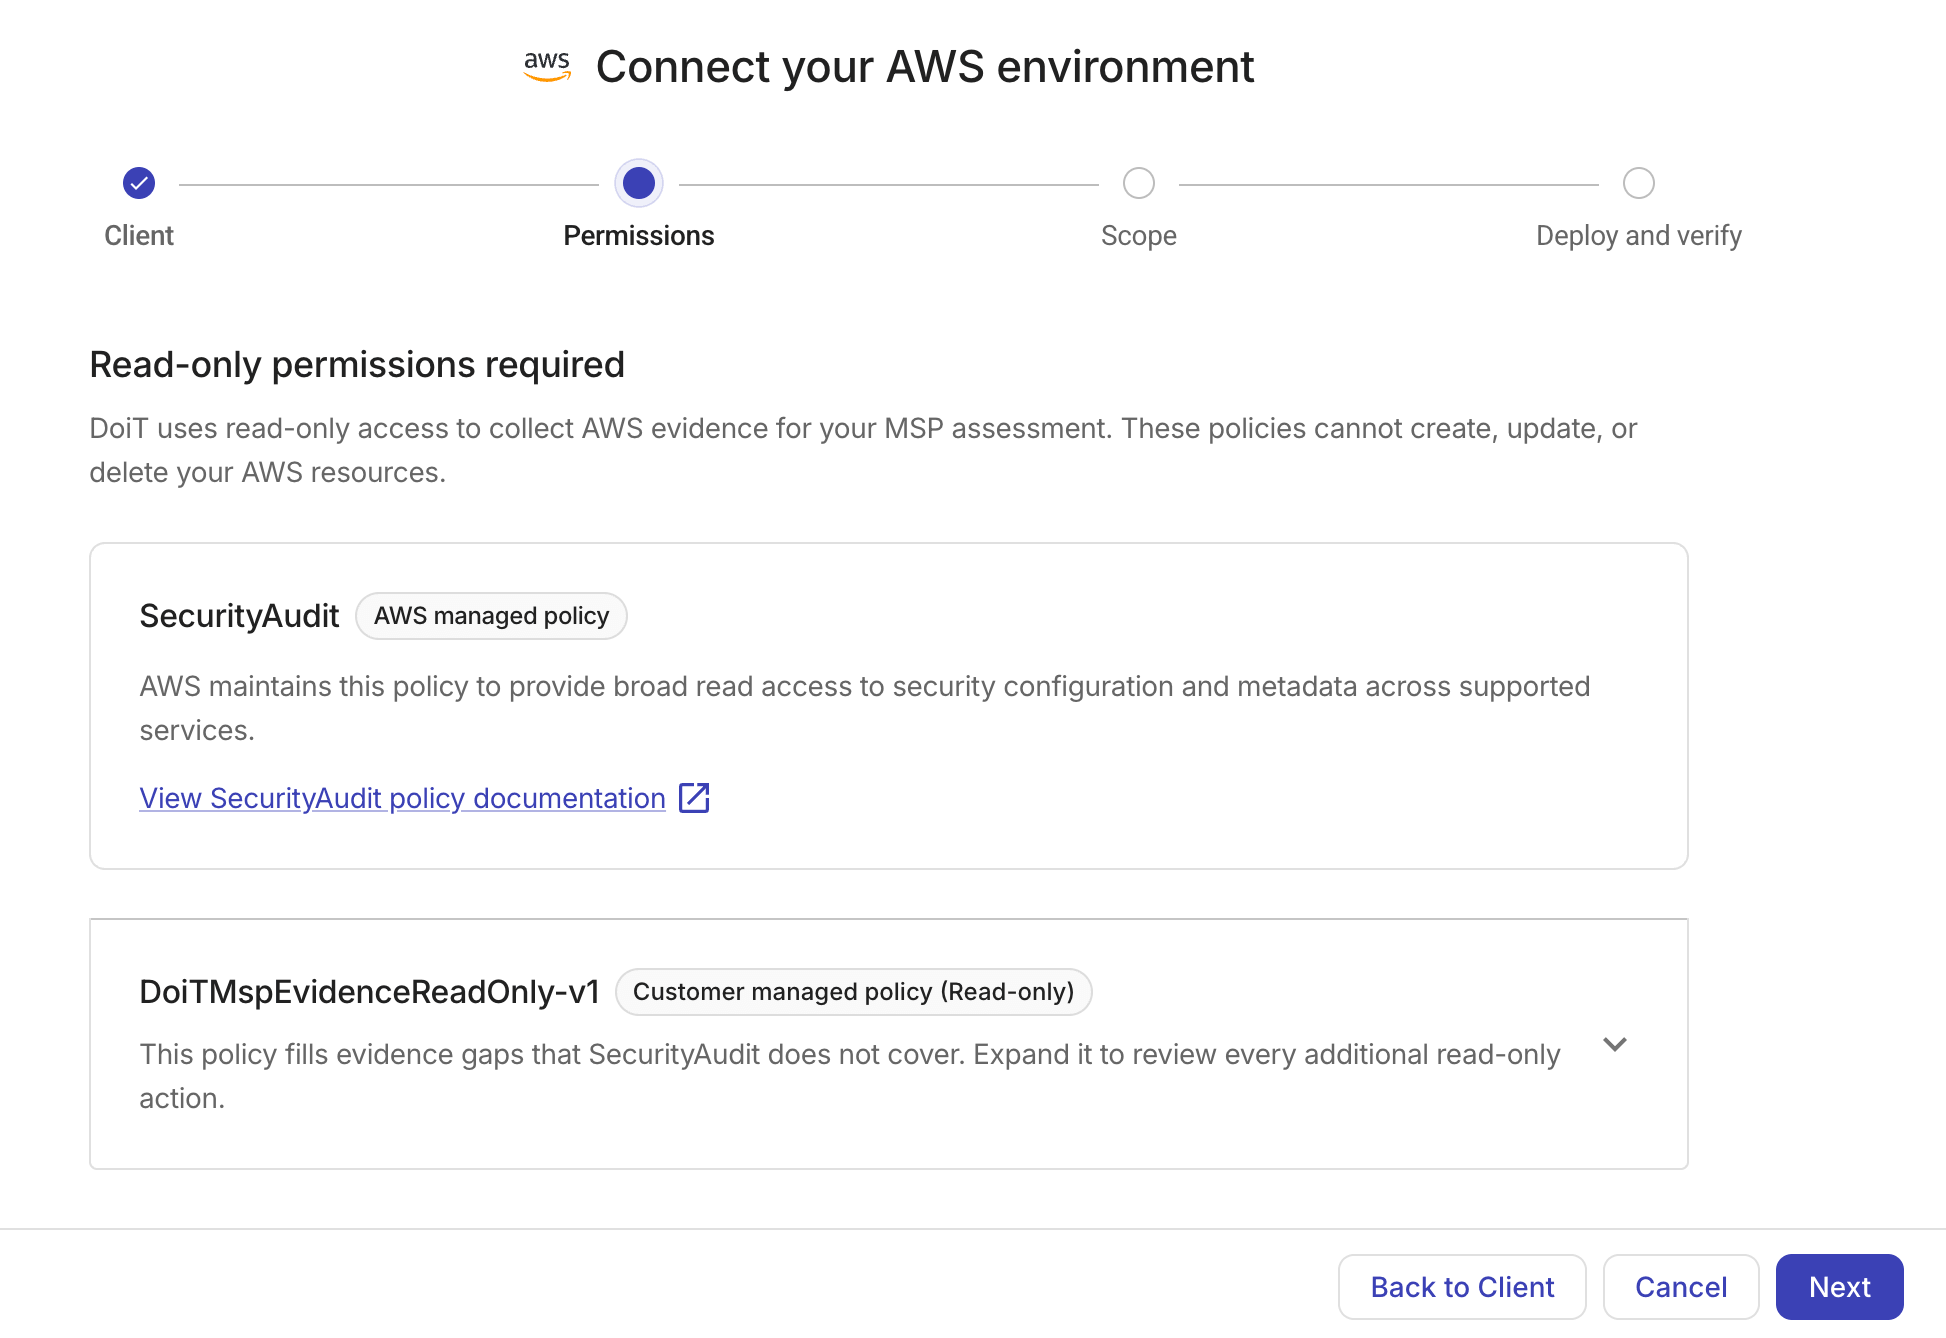
このステップでは、DoiT が MSP アセスメントのために AWS のエビデンスを収集する際に使用するポリシーを確認します。これらは読み取り専用ポリシーであり、AWS リソースの作成・更新・削除は行いません。
-
SecurityAudit(AWS 管理ポリシー):サポート対象の AWS サービス全体で、セキュリティ構成およびメタデータへの読み取りアクセスを許可します。
-
DoiTMspEvidenceReadOnly-v1(顧客管理ポリシー、読み取り専用):SecurityAudit ポリシーでカバーされないエビデンスのギャップを補完します。展開して追加のアクションを確認するか、権限の完全な一覧を参照してください。
Next を選択して次に進みます。
ステップ 3: スコープ
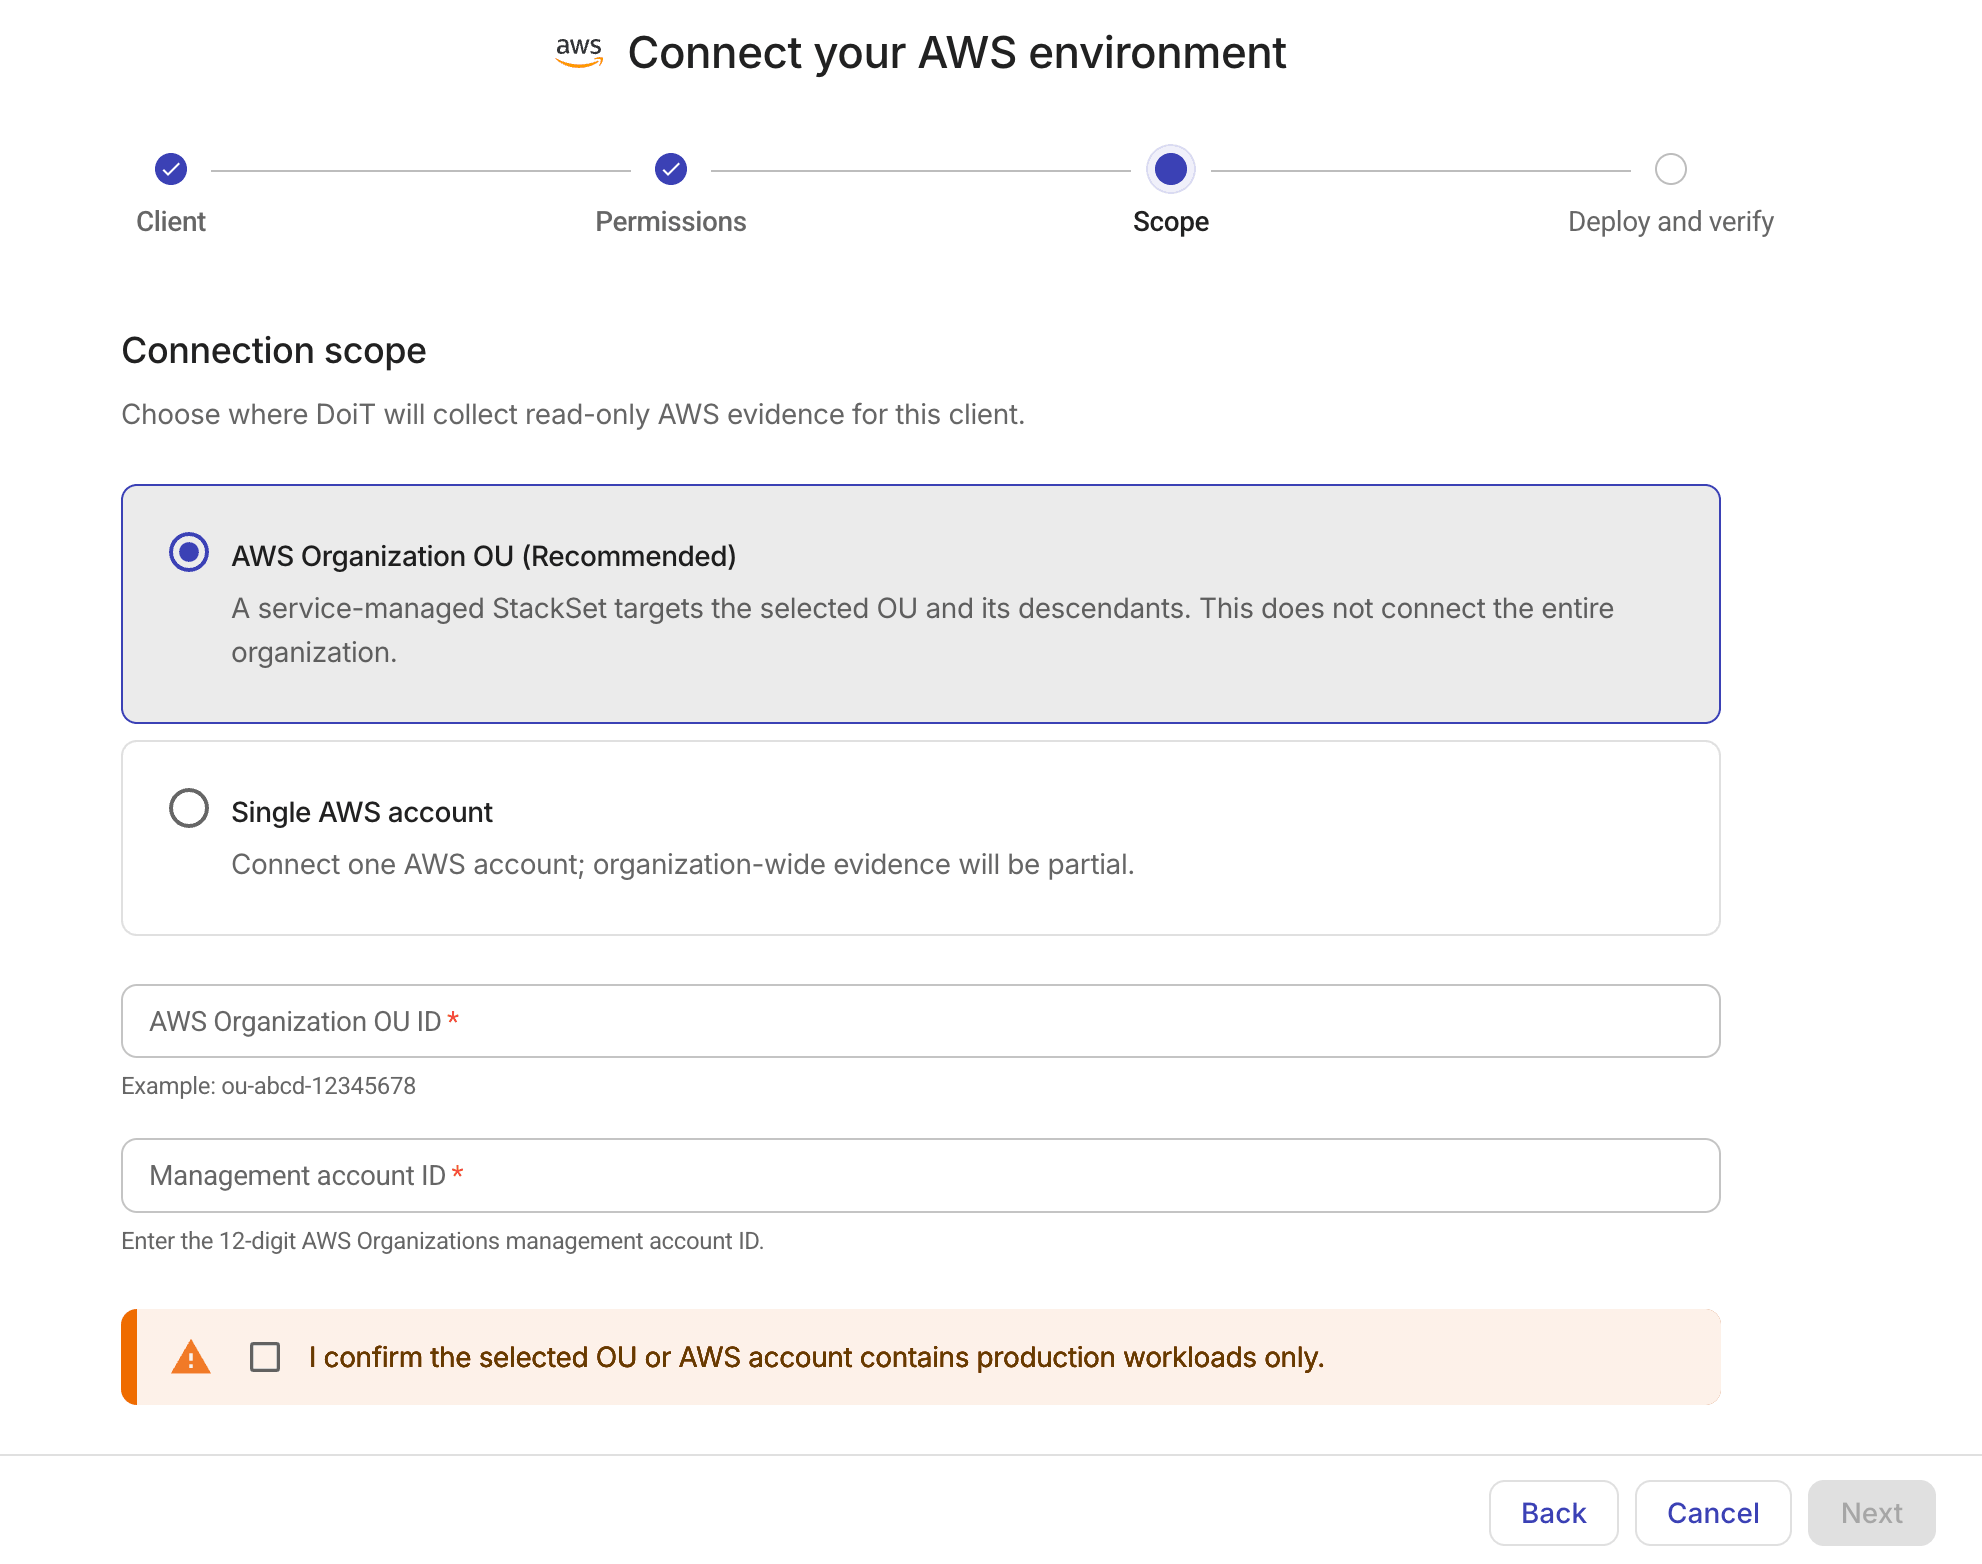
DoiT がクライアント向けに読み取り専用の AWS エビデンスを収集するスコープを定義します。
-
スコープタイプを選択します。
-
AWS Organization OU(推奨):選択した OU とその子孫を接続します。
-
Single AWS account:1 つの AWS アカウントを接続します。組織全体でのエビデンスは一部のみとなります。
-
-
スコープの詳細を入力します。
-
Organization OU:AWS Organization OU ID(例:
ou-abcd-12345678)と、12 桁の Management account ID を入力します。 -
Single AWS account:12 桁の AWS account ID を入力します。
-
-
選択したスコープに本番ワークロードのみが含まれていることを確認するチェックボックスを選択します。
-
Next を選択して次に進みます。
ステップ 4: デプロイと検証
最後のステップは、主に次の 2 つのパートで構成されます。
-
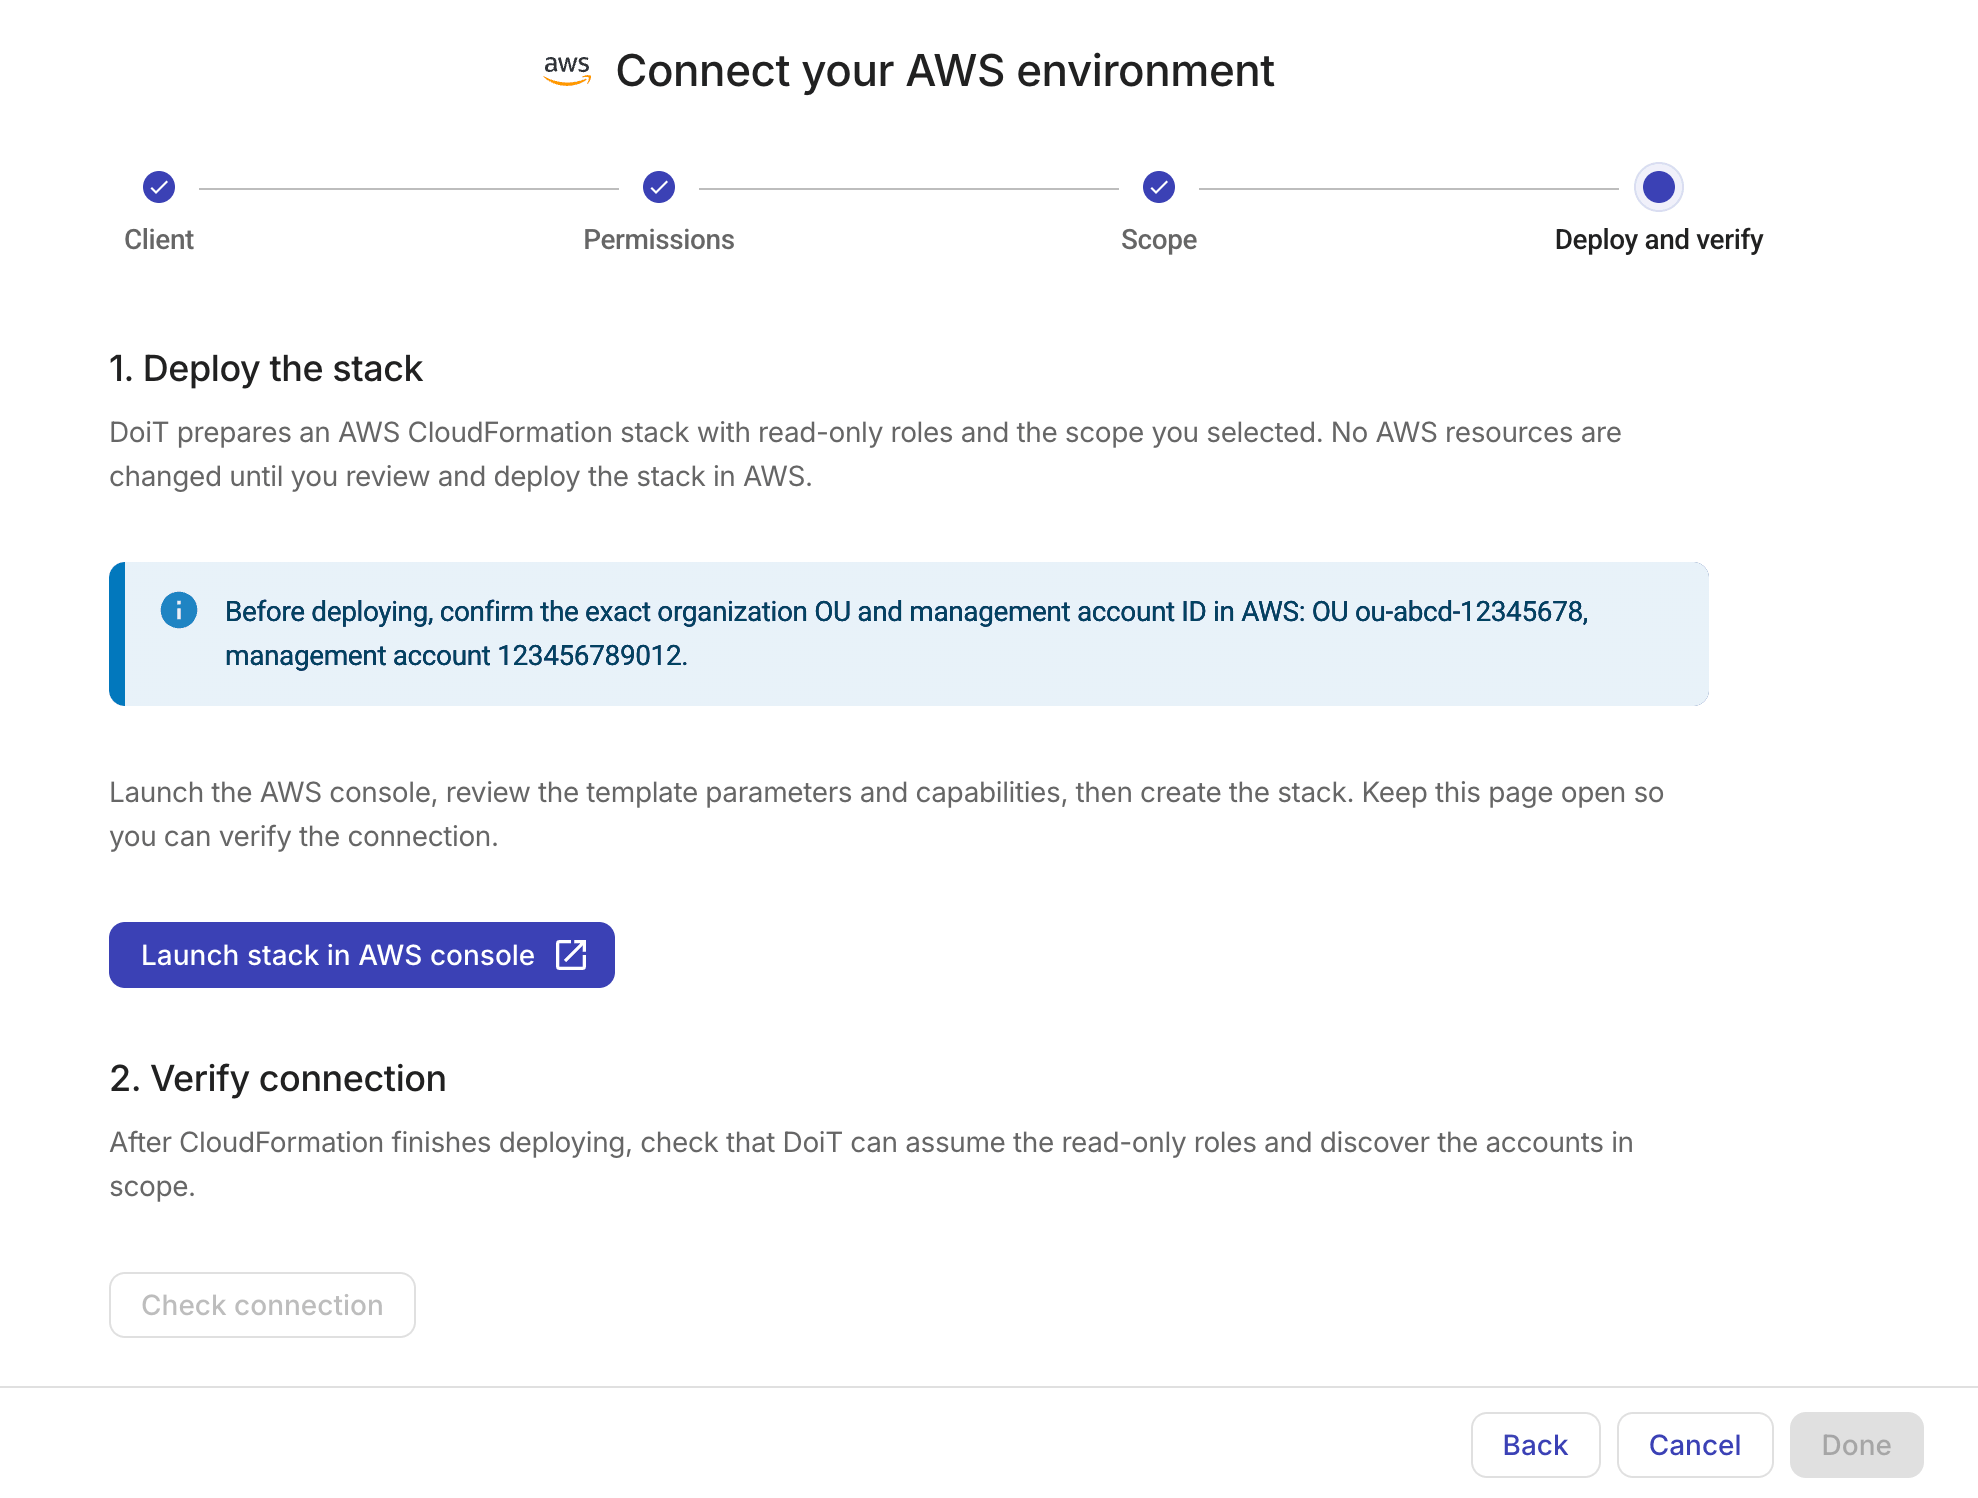
読み取り専用ロールと、指定したスコープを含む CloudFormation スタックを AWS 環境にデプロイします。
-
スコープのリマインダーを確認します。ここには、入力した OU と管理アカウント ID、または単一アカウント ID が表示されます。
-
Launch stack in AWS console を選択し、新しいタブで AWS CloudFormation コンソールを開きます。
-
AWS CloudFormation コンソールでスタックを作成します。
-
-
CloudFormation のデプロイが完了したら、Check connection を選択して、DoiT が読み取り専用ロールを引き受け、関連アカウントを検出できることを検証します。
-
結果を確認します。
-
すべてのチェックが成功した場合、ウィザードには検出されたアカウント数と、エビデンス収集の準備が整ったアカウント数が表示されます。
-
いずれかのチェックが失敗した場合は、それぞれの失敗したチェックに表示される修復手順に従ってください。
-
-
接続が検証されたら、Done を選択します。