Set up PerfectScale for Commitments
To begin optimizing your costs with PerfectScale for Commitments, you first need to connect your cloud provider. Once done, DoiT will detect accounts with billing roles in your cloud environment and prompt you to add them to PerfectScale for Commitments.
Currently, PerfectScale for Commitments supports only Amazon Web Services (AWS) payer accounts.
Prerequisites
Before you can set up PerfectScale for Commitments, make sure the following requirements are met:
-
PerfectScale Commitments Admin permission assigned to your user account.
-
Active PerfectScale for Commitments contract. Your DoiT subscription must include the PerfectScale for Commitments entitlement, and you must have a signed contract in place. If your subscription includes the entitlement but you don't yet have an active contract, you'll see a message prompting you to contact your account team or DoiT support.
Step 1: Select cloud provider
Select your cloud provider and the service types you want to optimize.
- AWS
-
In the DoiT console, select Workload optimization > PerfectScale for Commitments.
-
Select the AWS Savings Plan types to include, then select Connect. Compute is selected by default. If your account is eligible, you can also select Database to optimize Database Savings Plans alongside Compute.
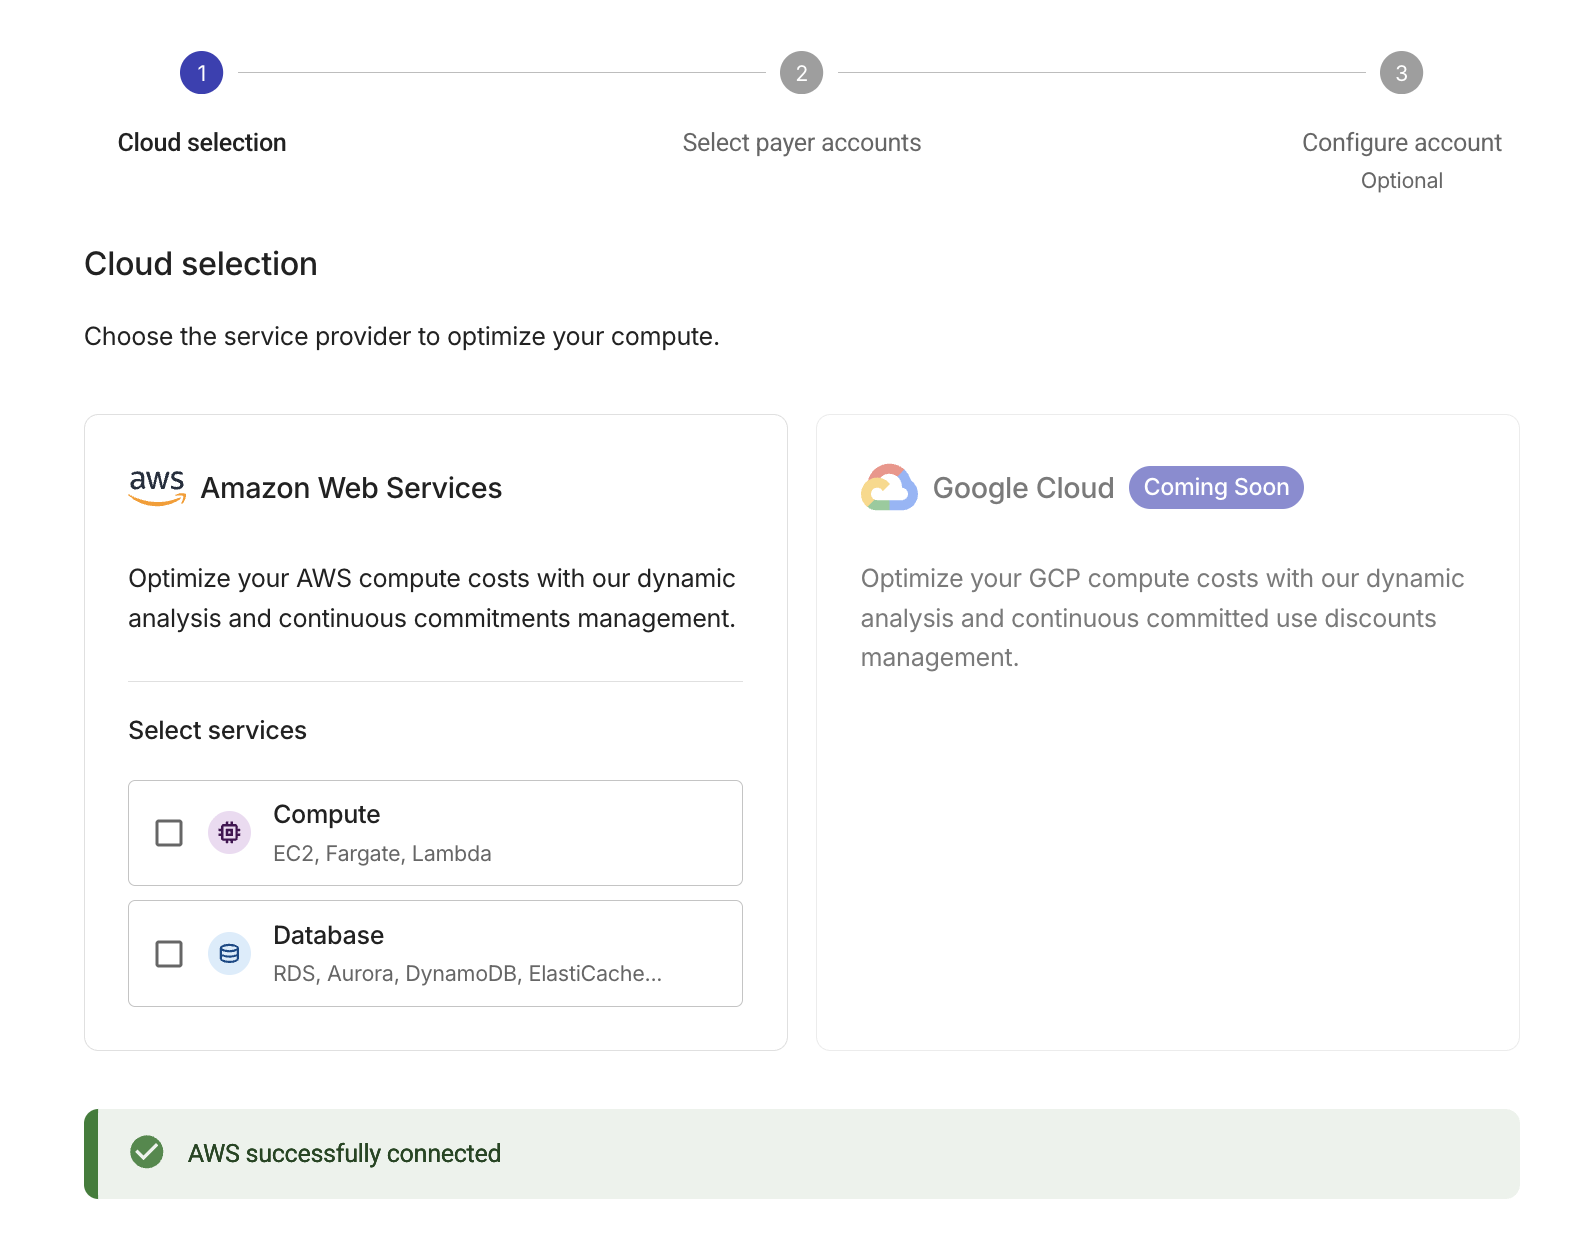
-
You should now see a note about successful connection. If there is an issue with your AWS connection, make sure you are using the correct DoiT account for your organization and have onboarded AWS with DoiT.
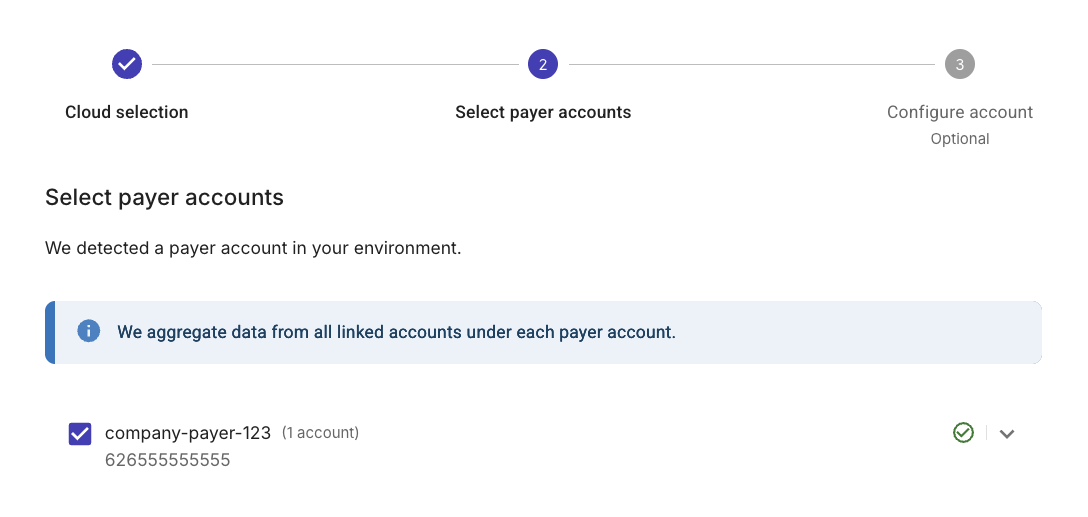
Step 2: Select accounts
PerfectScale for Commitments automatically detects accounts with billing roles in your cloud environment.
- AWS
At this step, PerfectScale for Commitments automatically detects AWS payer accounts and linked Savings Plans (SP) purchase accounts in your environment. You must select the relevant accounts and grant at least read-only permissions to them:
-
Select the payer accounts you want to use with PerfectScale for Commitments. Data from all linked SP purchase accounts under each payer account will be aggregated.
-
If your accounts are missing the required read permissions, you will be prompted to configure those accounts. In this case, for each account, select Configure and select the following checkboxes:

-
Required: PerfectScale for Commitments - Read & Recommend — grants read-only permissions and enables visibility and recommendation features.
-
Optional: PerfectScale for Commitments - Purchases — grants write permissions and enables auto-purchasing features.
For the full list of required AWS IAM permissions, see Security and Data Policy.
-
-
Select Update account. You should see a green checkbox indicating that permissions have been verified. Repeat this step for each linked SP purchase account if necessary.
-
Select Next.
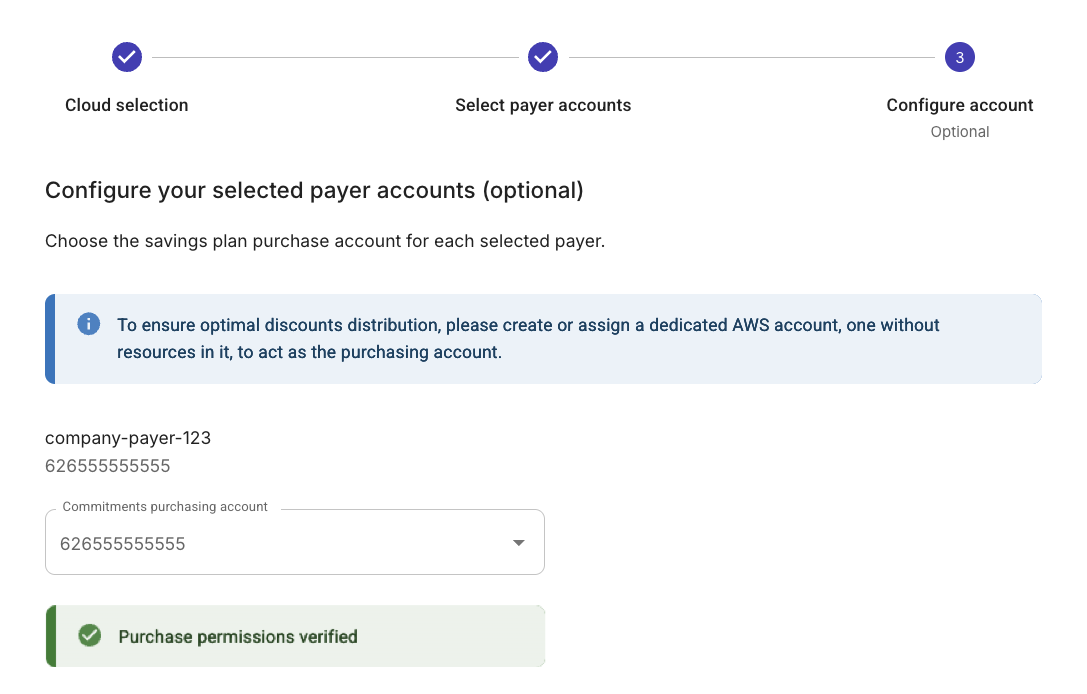
Step 3: (Optional) Configure accounts
If you want to use the auto-purchase feature with PerfectScale for Commitments, you must also select the SP purchase accounts to be used for purchasing discounted products. These accounts must have the write permissions configured. If you see permission warnings, repeat the steps in Step 2: Select accounts.
- AWS
-
For each selected payer account, select an SP Purchase Account. SP Purchase Account is the specific AWS account within your organization where PerfectScale for Commitments will actually buy the Savings Plans. The Savings Plans are owned by your organization; they are not DoiT-owned commitments.
You can select the payer account itself as the SP purchase account.
AWS applies Savings Plans within a payer account first and then distributes the remaining plans across linked accounts based on their discount level.
-
Additionally, make sure you have enabled the PerfectScale for Commitments - Purchase flag in your cloud account at the previous step: Step 2: Select accounts. If you haven't enabled this flag, you will see a permission error across the selected account.
 Tip
TipWe recommend selecting an account with no eligible compute usage. Because AWS applies Savings Plans to the SP purchase account first, any usage there reduces what's available to distribute — even if linked accounts would receive a greater discount.
-
Select Next to complete the setup.
Once you have completed these steps, your accounts will be onboarded, and PerfectScale for Commitments will begin analyzing your usage to provide optimization recommendations.
It may take up to 90 minutes before you see Recommendations and other data in your PerfectScale for Commitments dashboard.