Invoice settings and bucketing
Invoice settings allow you to control how your cloud asset invoices are generated. You can also use the invoice bucketing feature to generate granular invoices for chargebacks.
Required permission
- Billing Profile Admin
Invoice settings
To check the invoice settings of a specific billing profile, select its name on the main Billing profiles screen, then go to the Invoice settings section.
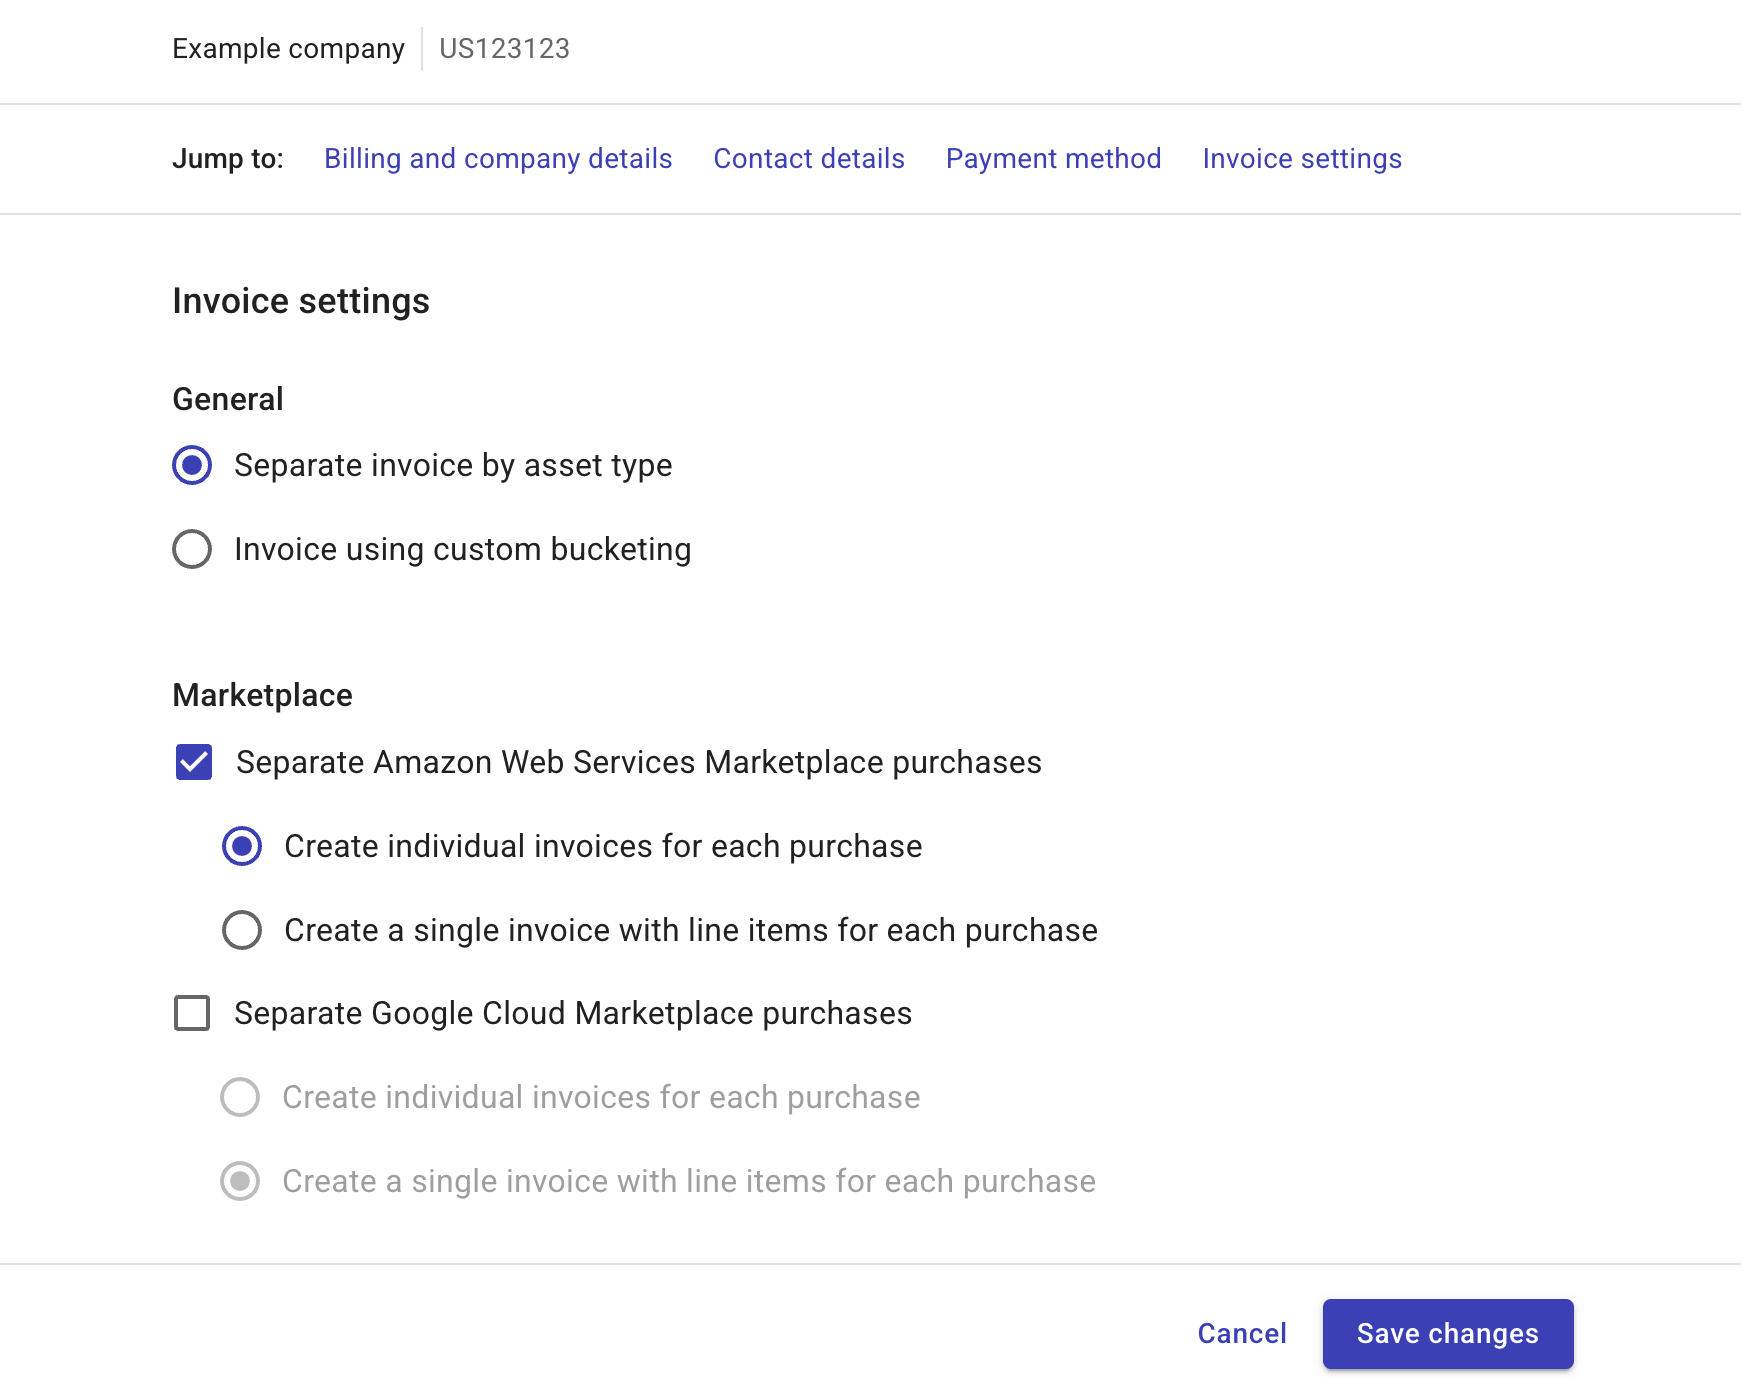
There are two parts of invoice settings: General and Marketplace.
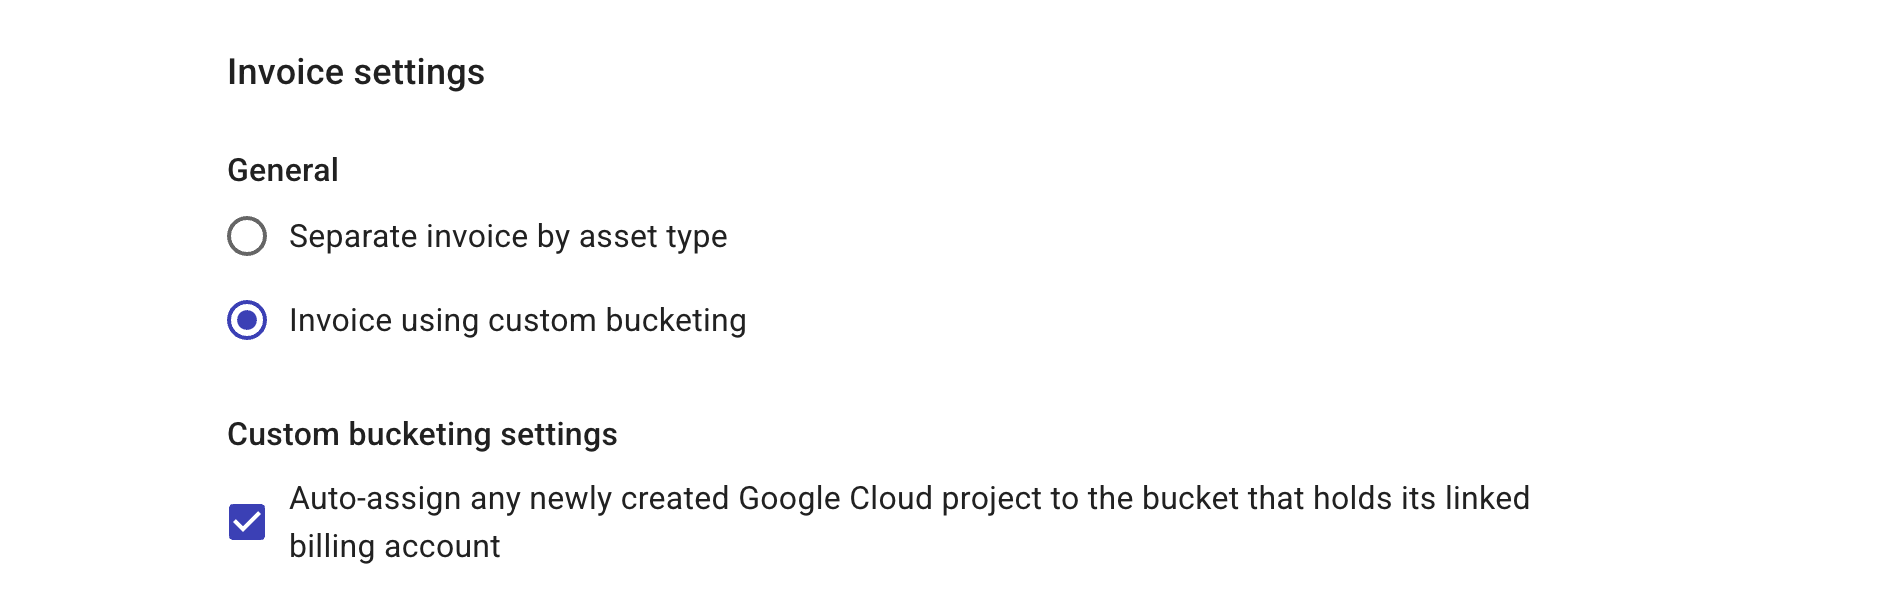
General
General settings provide two options:
-
Separate invoice by asset type: Generates one invoice per asset type.
-
Invoice using custom bucketing: Generates one invoice per custom bucket, also known as invoice bucketing.
You can always switch between the two options. Unless you explicitly delete a custom bucket, DoiT platform retains the bucket configuration, including the asset assignments.
Marketplace
The Marketplace setting allows you to specify whether you want to receive dedicated invoices for AWS and Google Cloud Marketplace purchases.
For each cloud provider, there are two options:
-
Create individual invoices for each purchase: Generates one invoice per item purchased via the provider's marketplace.
-
Create a single invoice with line items for each purchase: Generates one invoice that includes all the items purchased via the provider's Marketplace.
Invoice bucketing
Choosing Invoice using custom bucketing allows you to create subgroups of assets of the same type and generate granular invoices for chargeback. It's typically used in the following scenarios:
-
You have several cost centers in the same billing profile, and you want separate invoices for each cost center. (Cost centers are entities in your organization to which costs can be allocated. For example, products, environments, teams.)
-
You have many projects in the same billing profile, and you want separate invoices for different groups of projects.
Instead of creating more billing profiles, you can assign assets to different custom buckets. You will then receive separate invoices for each bucket, billed to the same billing profile.
Supported asset types
Invoice bucketing is available to the following asset types:
-
Amazon Web Services: AWS accounts
-
Google Workspace: Google Workspace subscriptions
-
Google Cloud (GCP): Google Cloud projects, Google Cloud billing accounts (for costs charged at the Cloud Billing account level, such as support costs)
-
Microsoft Azure: Microsoft Azure subscriptions
-
Office 365: Microsoft 365 subscriptions
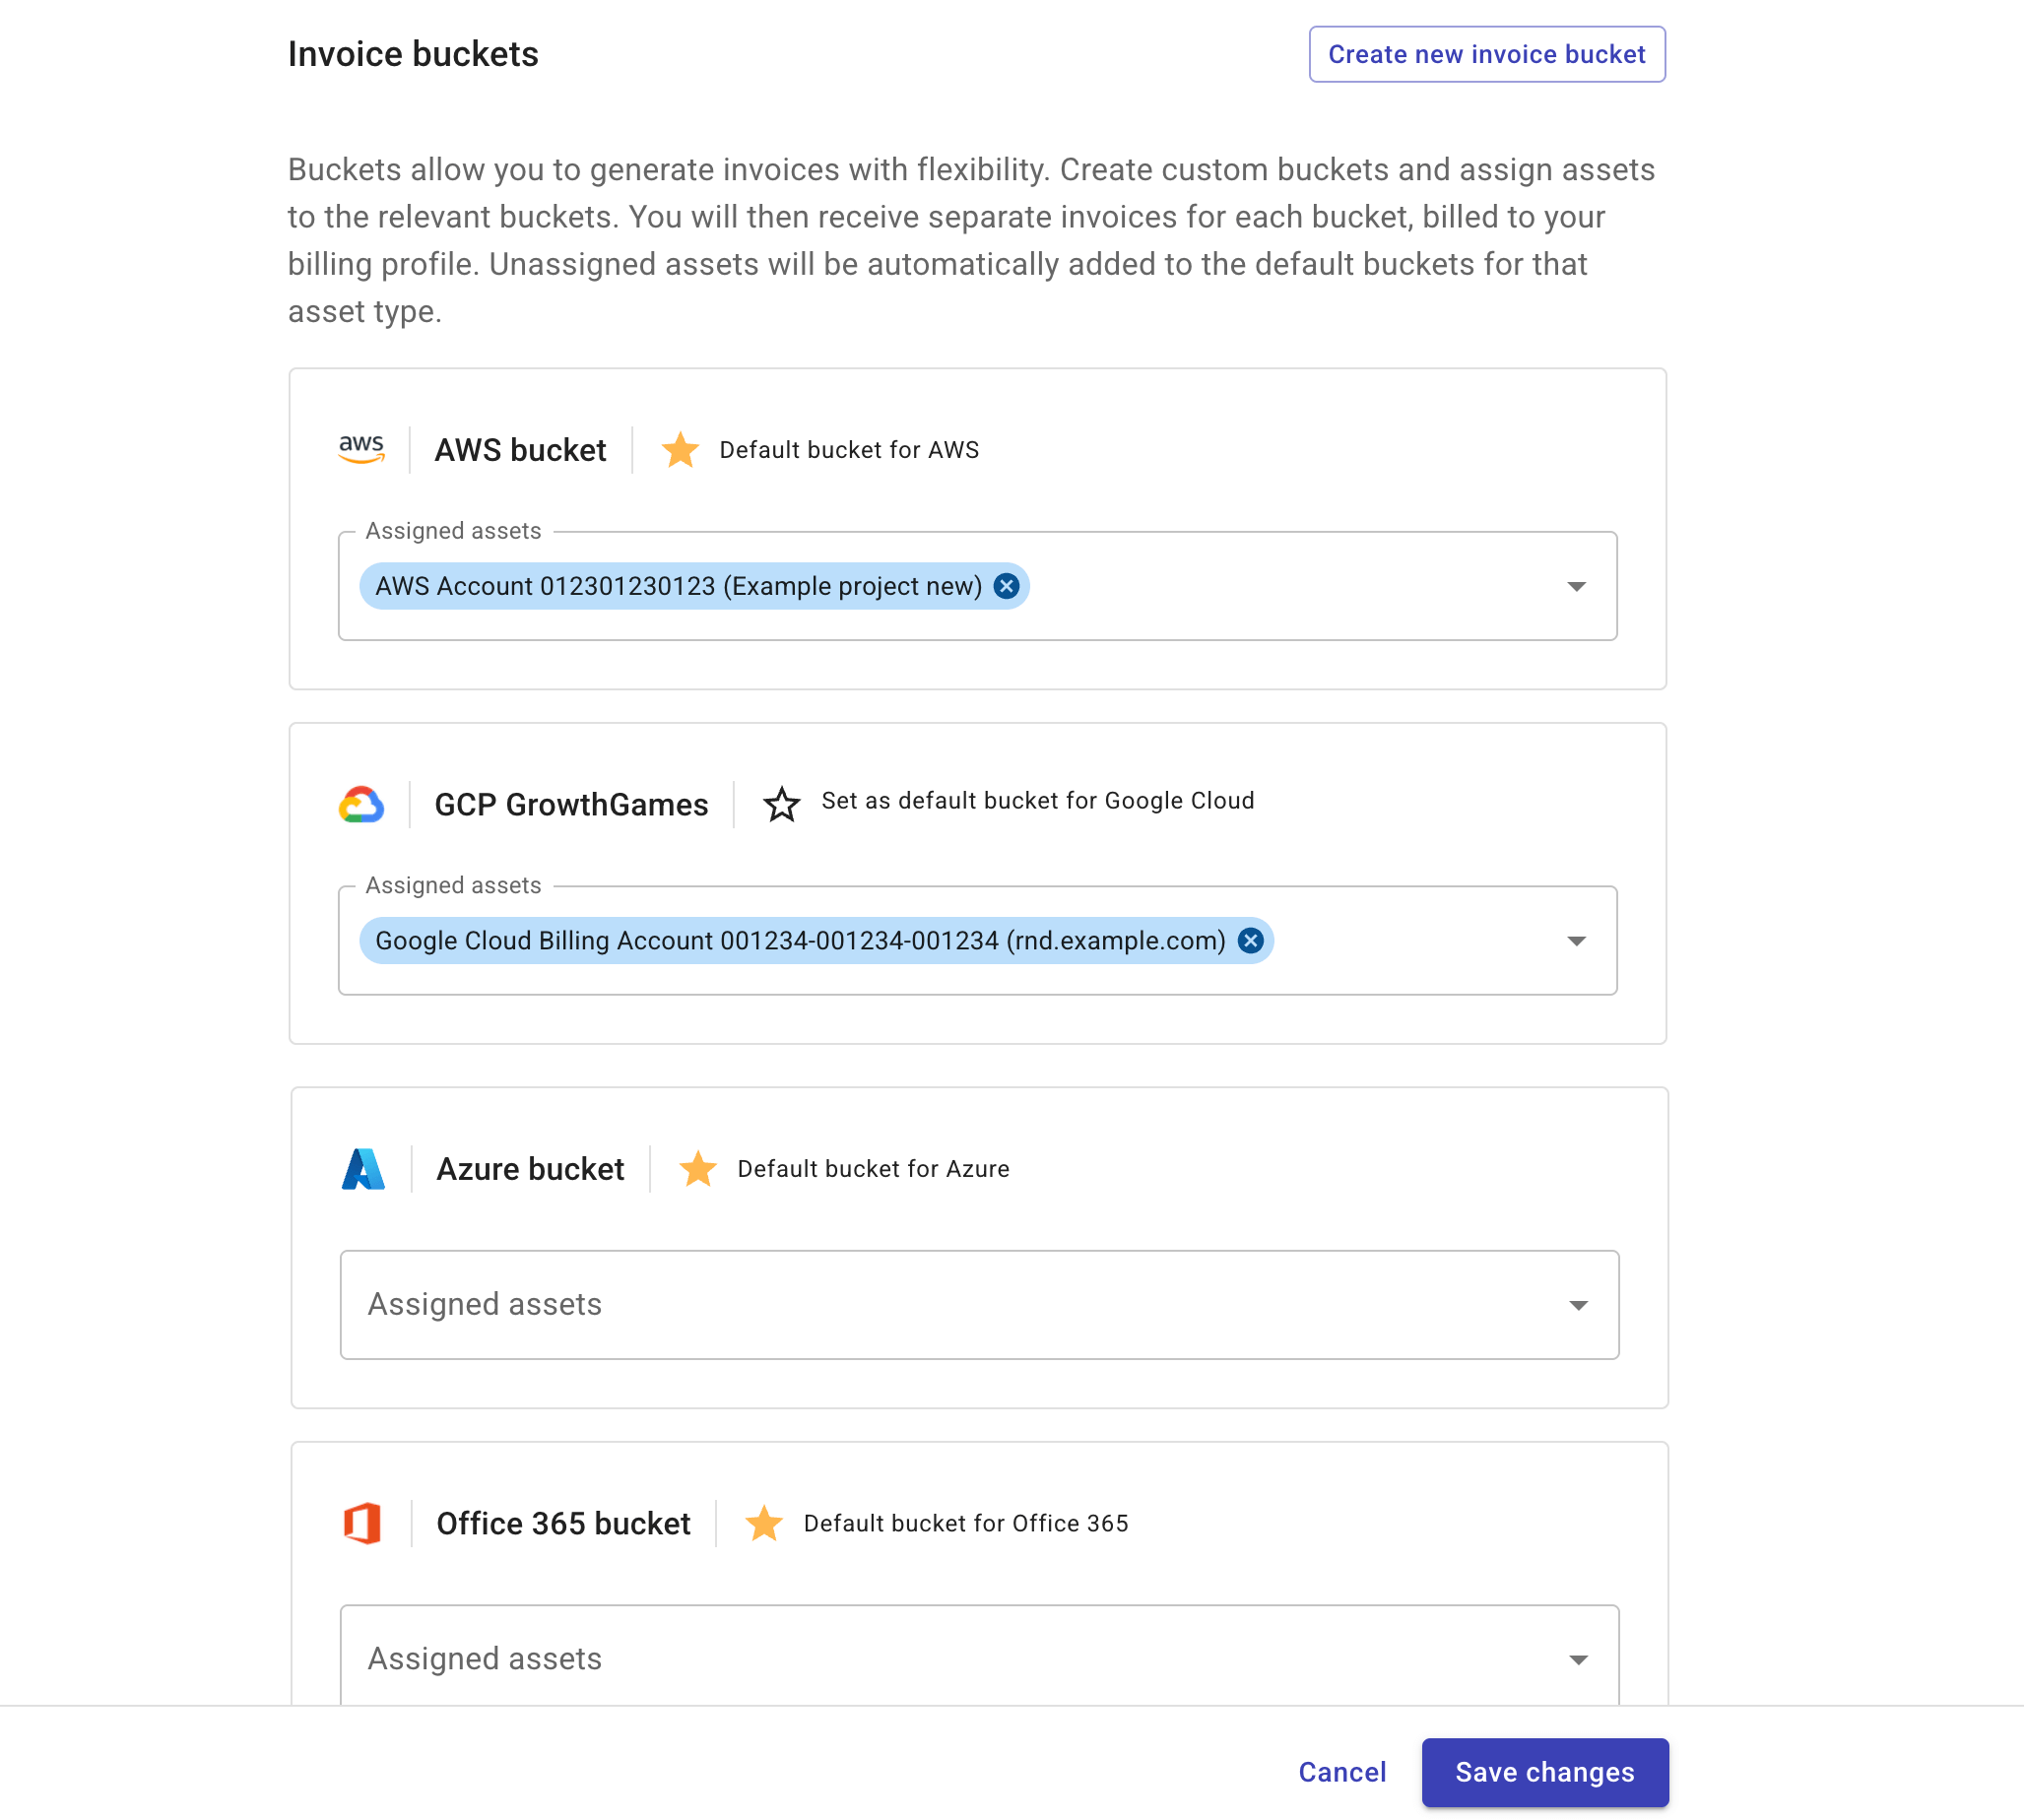
If you choose to use custom bucketing, the DoiT console will display a list of asset types without default buckets. You must set a default bucket for each of them.
Note that an invoice bucket is a grouping of assets of the same type. It's not allowed to mix asset types in the same bucket (Google Cloud projects and Google Cloud billing accounts are of the same asset type and can be placed in one bucket).
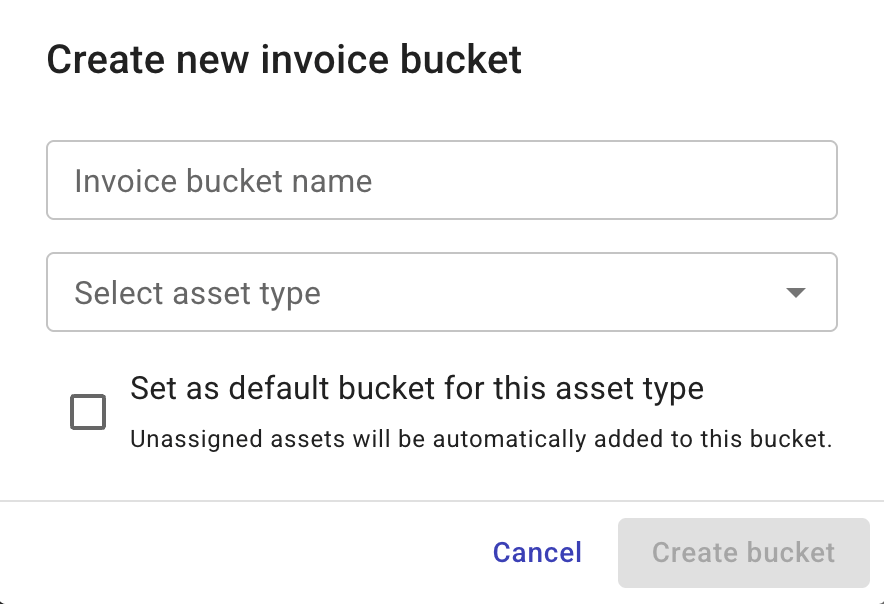
Create an invoice bucket
To create an invoice bucket:
-
Select Create new invoice bucket.
-
Configure the new bucket.
-
Enter a bucket name. You can change the bucket name afterward.
-
Select the asset type of the bucket.
-
(Optional) Select the Set as default bucket for this asset type checkbox if needed.
-
-
Select Create bucket to finish.
If successful, the new bucket will appear on the bucket list.
Set as default bucket
With custom bucketing, it's mandatory to set a default bucket per supported asset type. You can set a bucket as the default when creating it or afterward.
To set an existing bucket as the default:
-
Locate the target bucket on the bucket list.
-
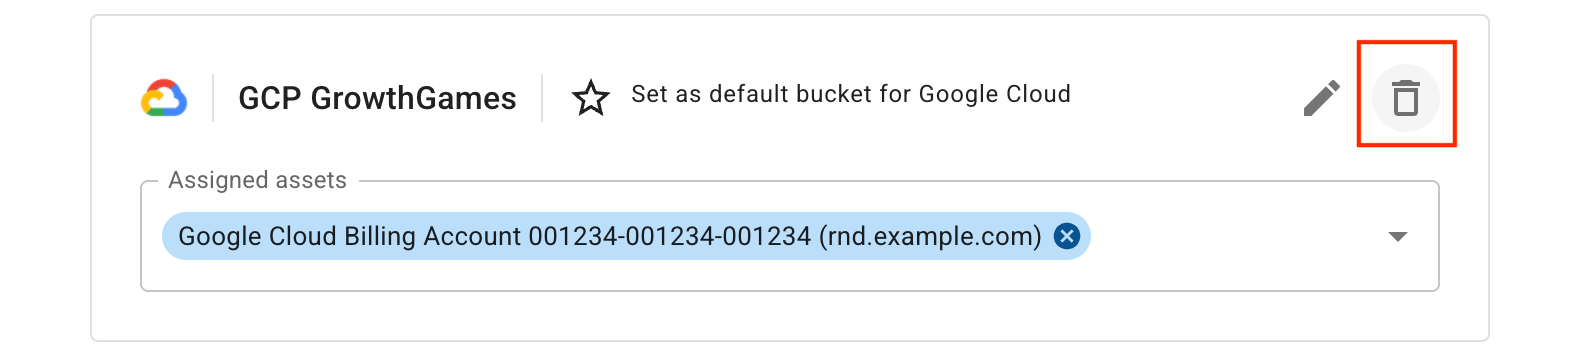
Select the star icon () that precedes Set as default bucket for
ASSET_TYPE.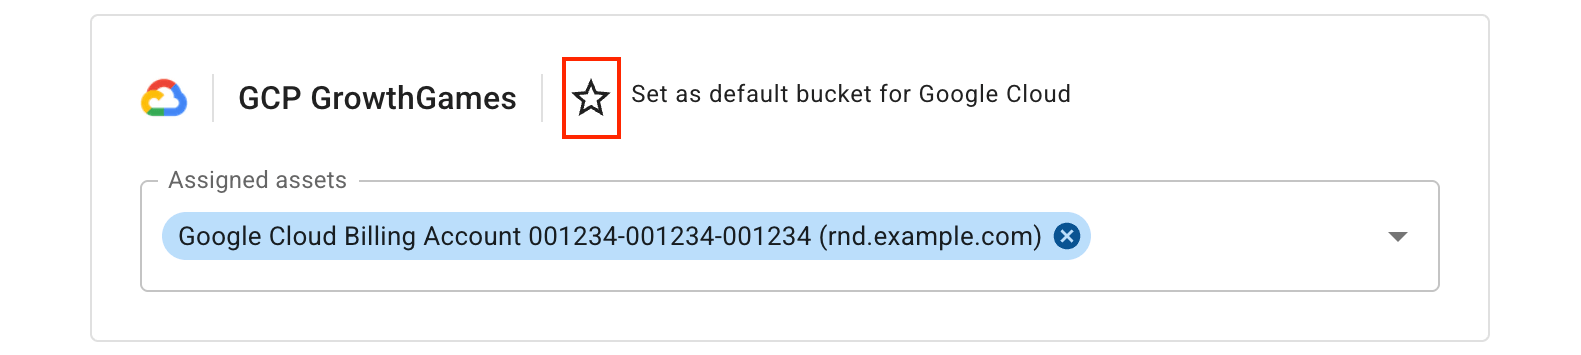
To switch to a different bucket, simply set the new bucket as the default. It will automatically take over the default role.
Assign assets
When using custom bucketing for granular invoices, you should manually assign assets to the relevant buckets (unassigned assets will appear in the default bucket for their type on the invoice).
To manually assign an asset:
-
Locate the target bucket on the bucket list.
-
Select the asset from the drop-down list to assign to the bucket.
-
Save the changes.
Delete an invoice bucket
To delete a bucket:
-
Locate the target bucket from the bucket list.
-
Hover over the bucket box to reveal the bin icon and then select the icon.
-
Confirm the deletion.
-
If you're deleting a default bucket, you'll be asked to choose a new default before proceeding.
-
Assets assigned to the bucket will become unassigned once the bucket is deleted.
-
Auto-assign new Google Cloud projects
Under Custom bucketing settings, the Auto-assign any newly created Google Cloud project to the bucket that holds its linked billing account checkbox is selected by default.
The Auto-assign option applies to projects created after you enable invoice bucketing. For existing projects, you have to manually assign them to your target bucket.
Example invoices
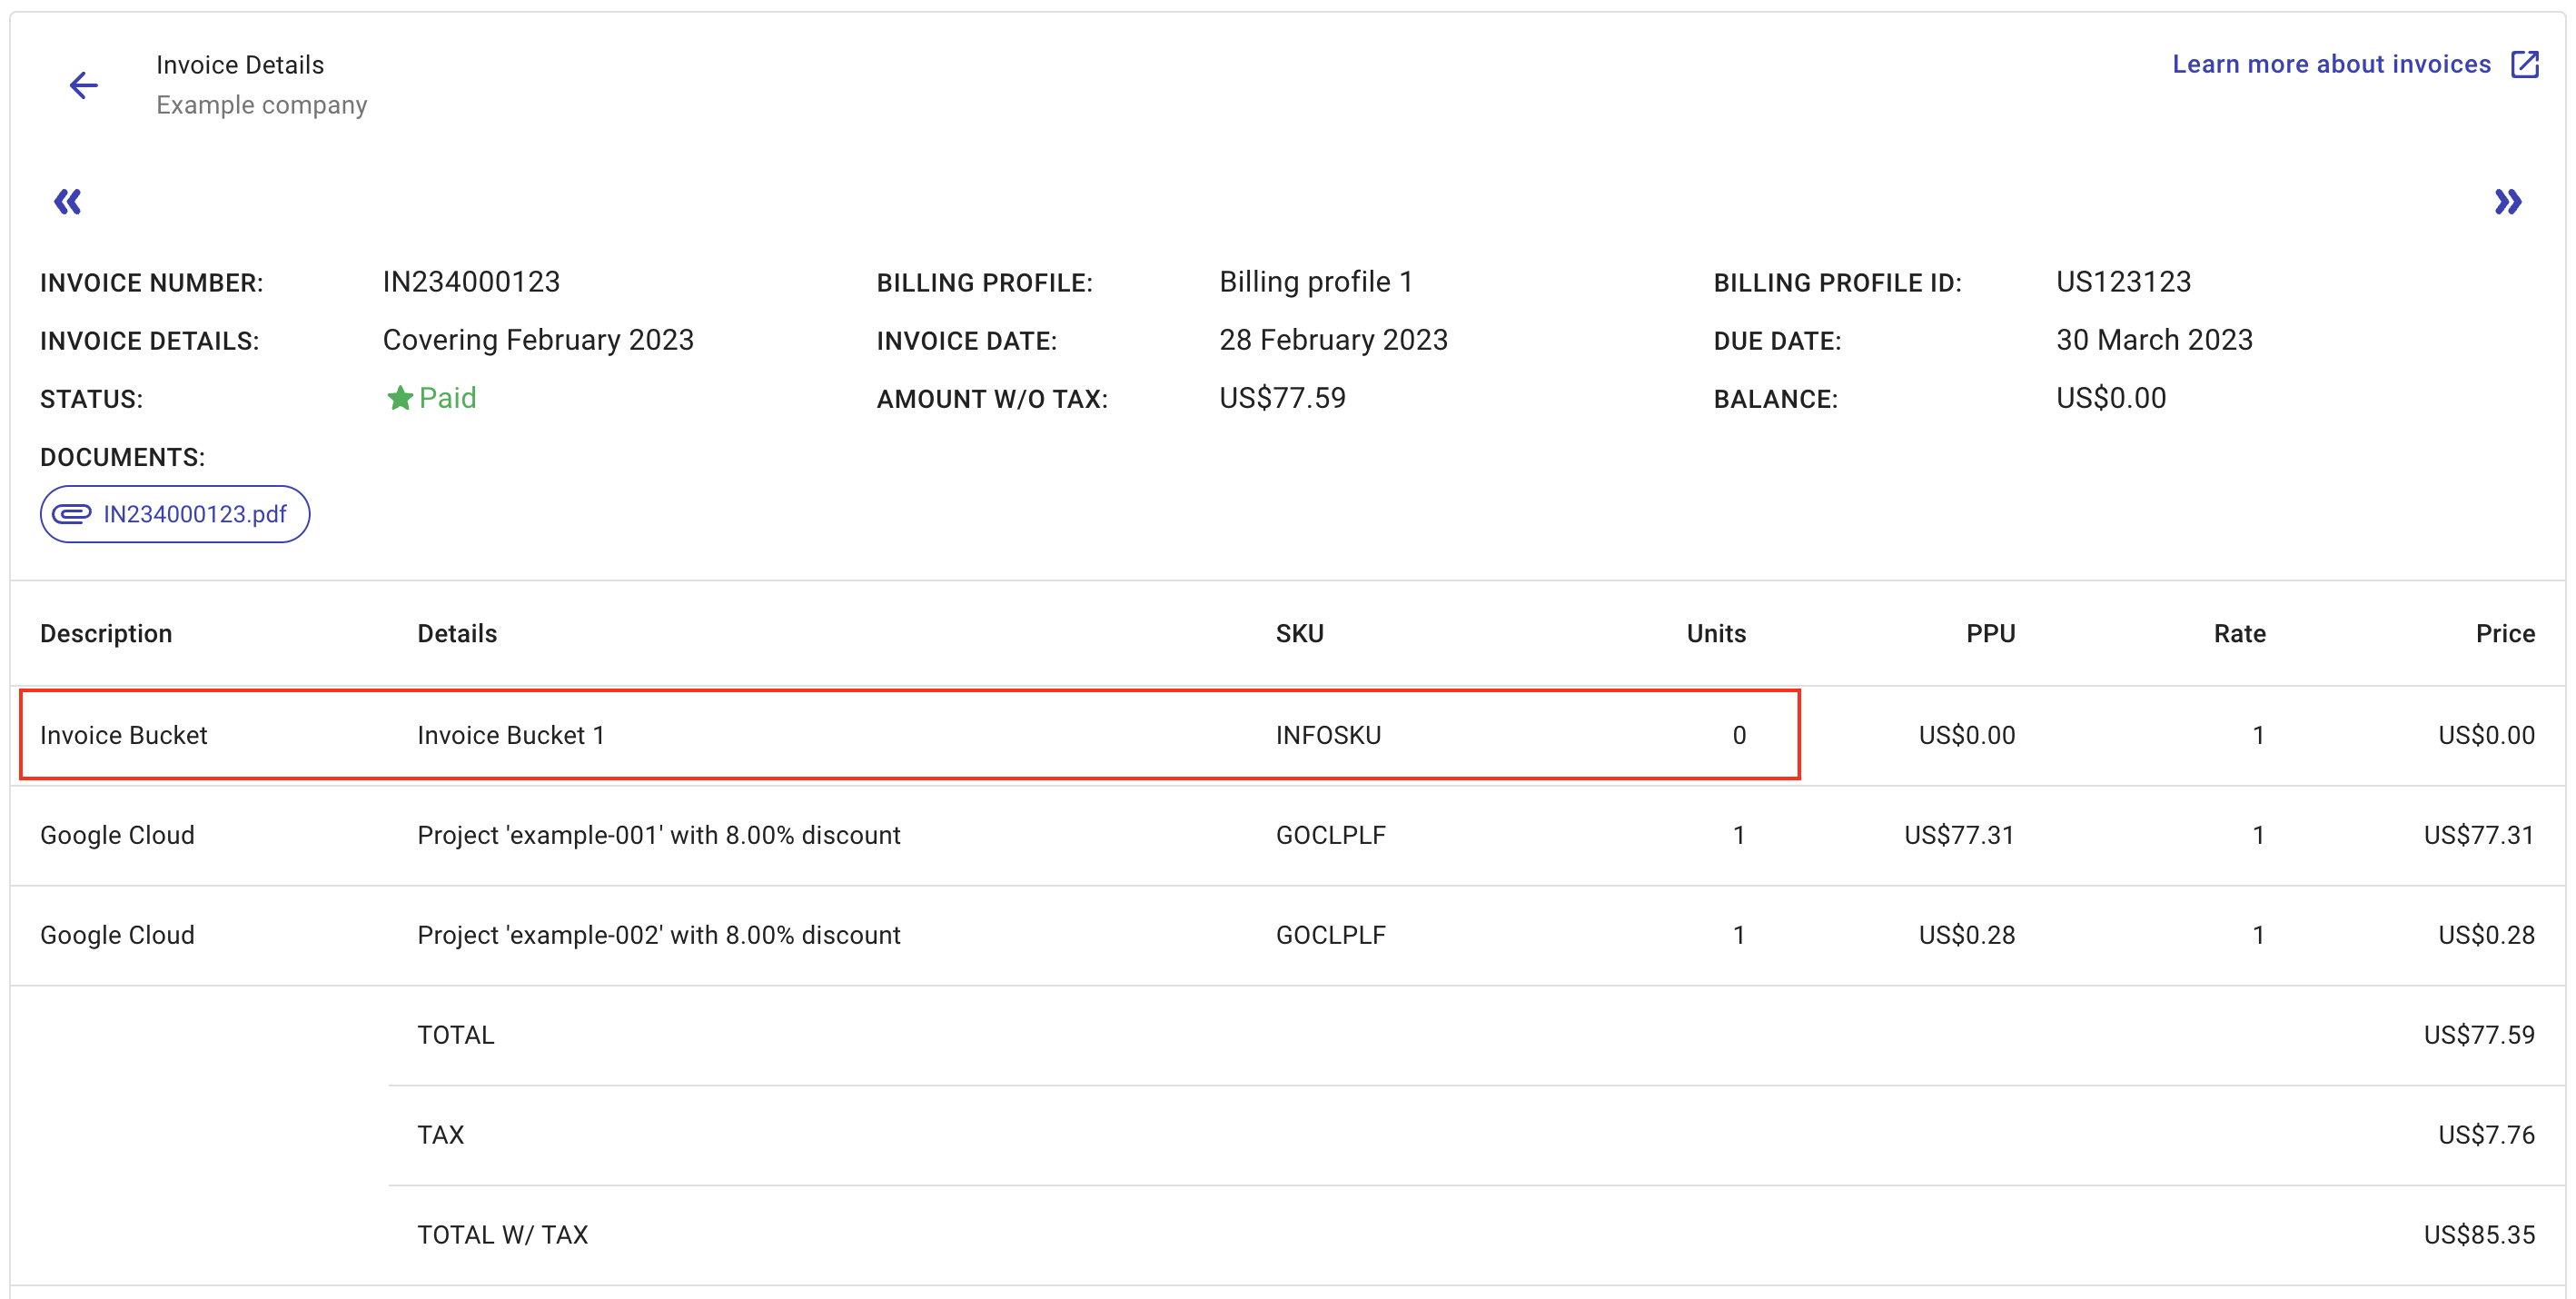
Invoice of a custom bucket
If you've set up invoice bucketing, you'll receive one invoice per custom bucket.
Below is an example invoice issued on a custom bucket named Invoice Bucket 1.
-
The first line item is always Invoice Bucket /
bucket_name. It is associated with the SKUINFOSKUand has a quantity (Units) 0, which means you do not pay for the bucket itself. -
The following line items correspond to the member assets in the bucket.
Marketplace purchases
If you've chosen to separate Marketplace purchases in the invoice settings, you'll receive dedicated invoices for marketplace spending.
Single invoice with line items for each purchase
In the example below, the billing profile has been set to create a single invoice with line items for each AWS Marketplace purchase. Therefore, one invoice is issued with multiple line items.

Individual invoices for each purchase
In this example, the billing profile has been set to create individual invoices for each Google Cloud Marketplace purchase. Therefore, the Datadog and Elastic Services invoices are issued separately.


Flexsave savings in buckets
If Flexsave has been activated on your account, starting with March 2023 invoices, you'll see relevant Flexsave line items on bucket invoices.
Below is an example invoice with Flexsave AWS savings.
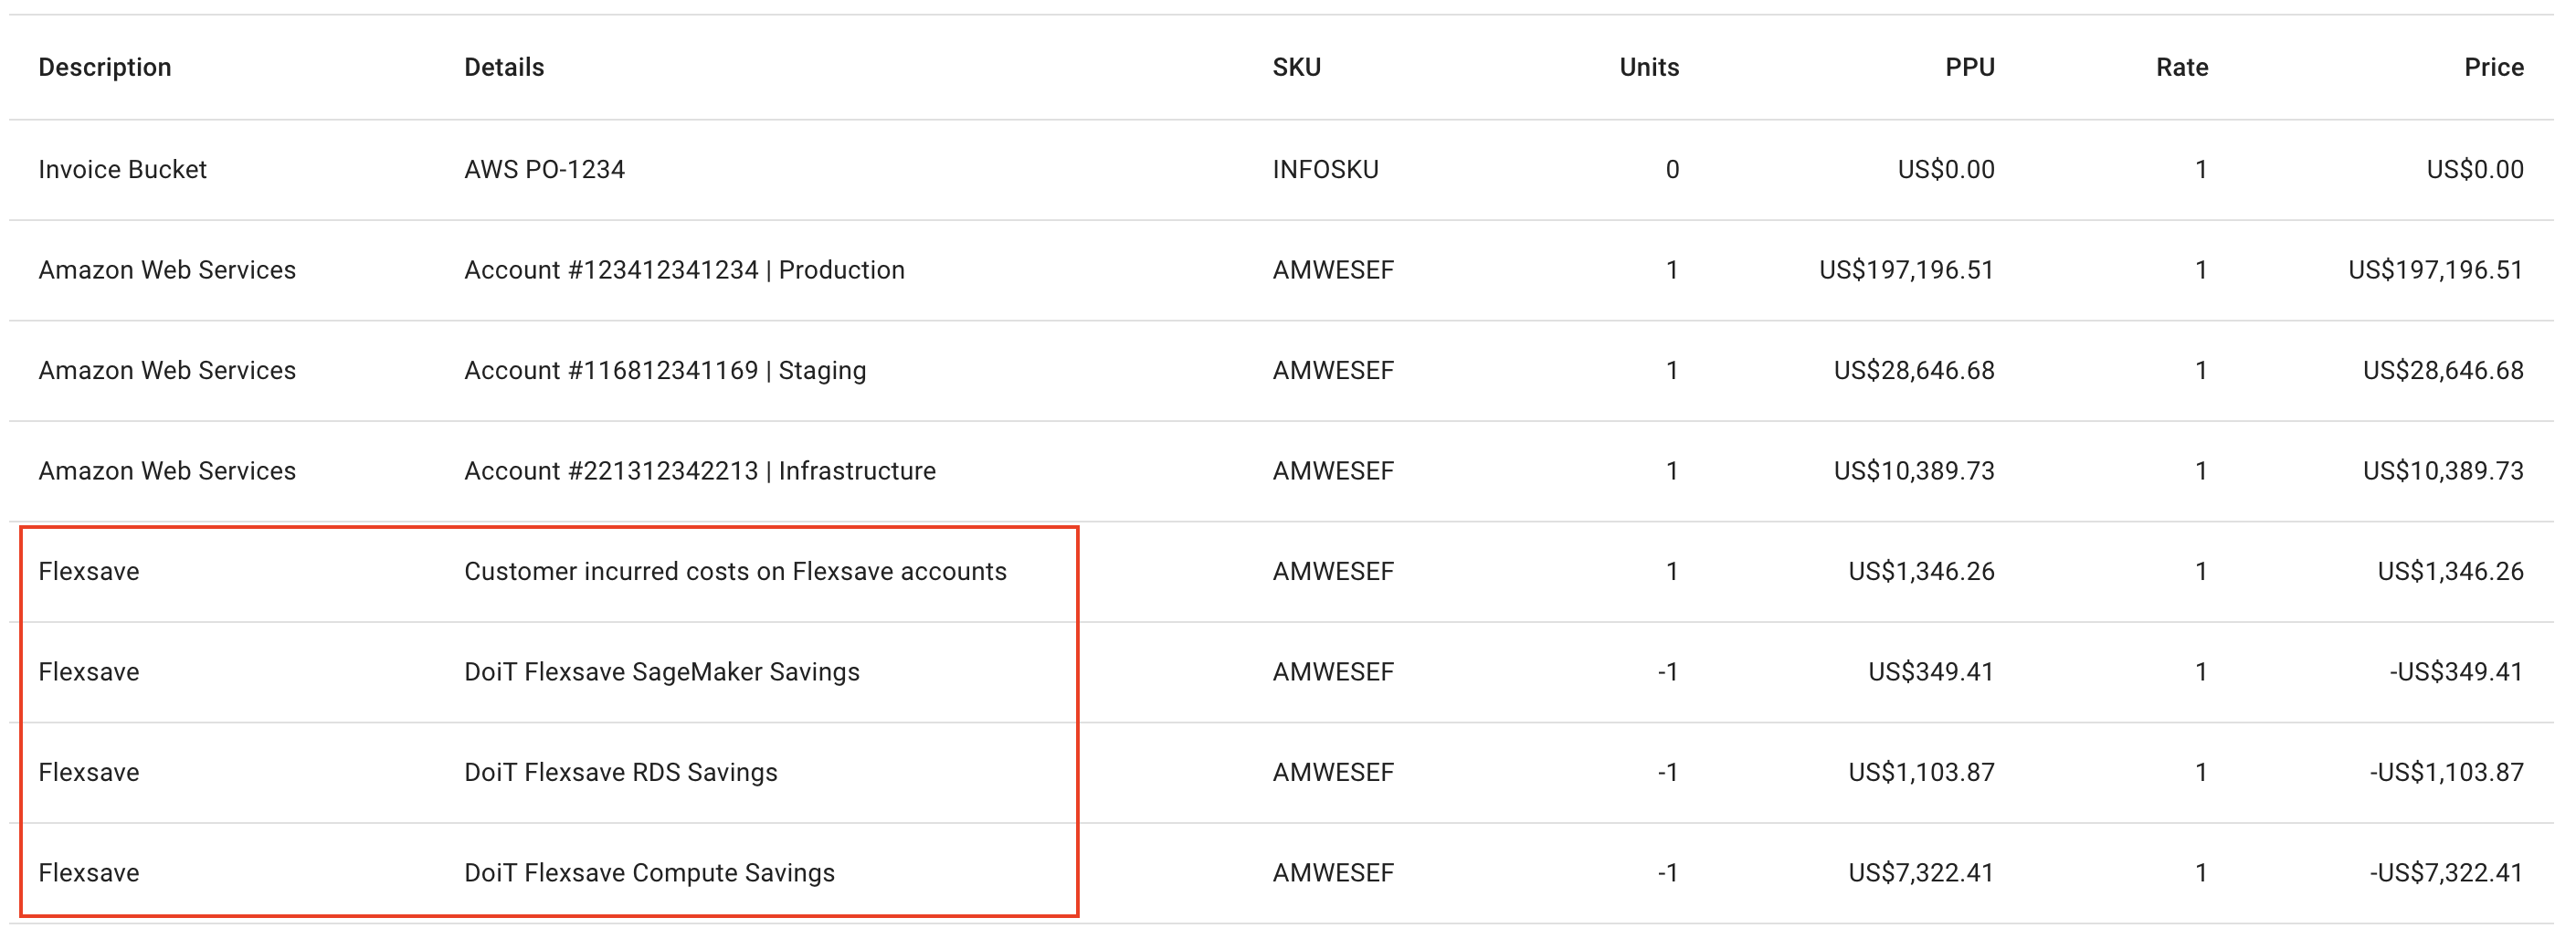
See Flexsave invoicing for more information.