Shared payers (Reseller only)
An AWS shared payer account (management account) is responsible for paying for its linked member accounts. In the DoiT console, a reseller can link shared payers and map member accounts to end customers.
Caveats
-
Full-month allocation: Account mapping changes apply retroactively to the entire billing cycle. If you add a mapping or remap a linked account to a new customer mid-month, all usage and charges for that month are allocated to the new customer.
-
Unmapped member accounts: Distributors bill costs incurred by unmapped member accounts directly to the reseller. These costs are not visible in the DoiT console.
Required permissions
-
To link a shared payer, or to add or change end customer mappings, you must have the Shared Payers Admin permission.
-
Users without Shared Payers Admin permissions can view shared payers and account mappings but cannot add or change them.
Access shared payers
To access shared payers:
-
Sign in to the DoiT console as a reseller (or switch to the reseller perspective if you're the distributor).
-
Select Customers from the top navigation mega menu, then select Settings (the gear icon
) on its own row to open the details page. -
Select Shared payers.
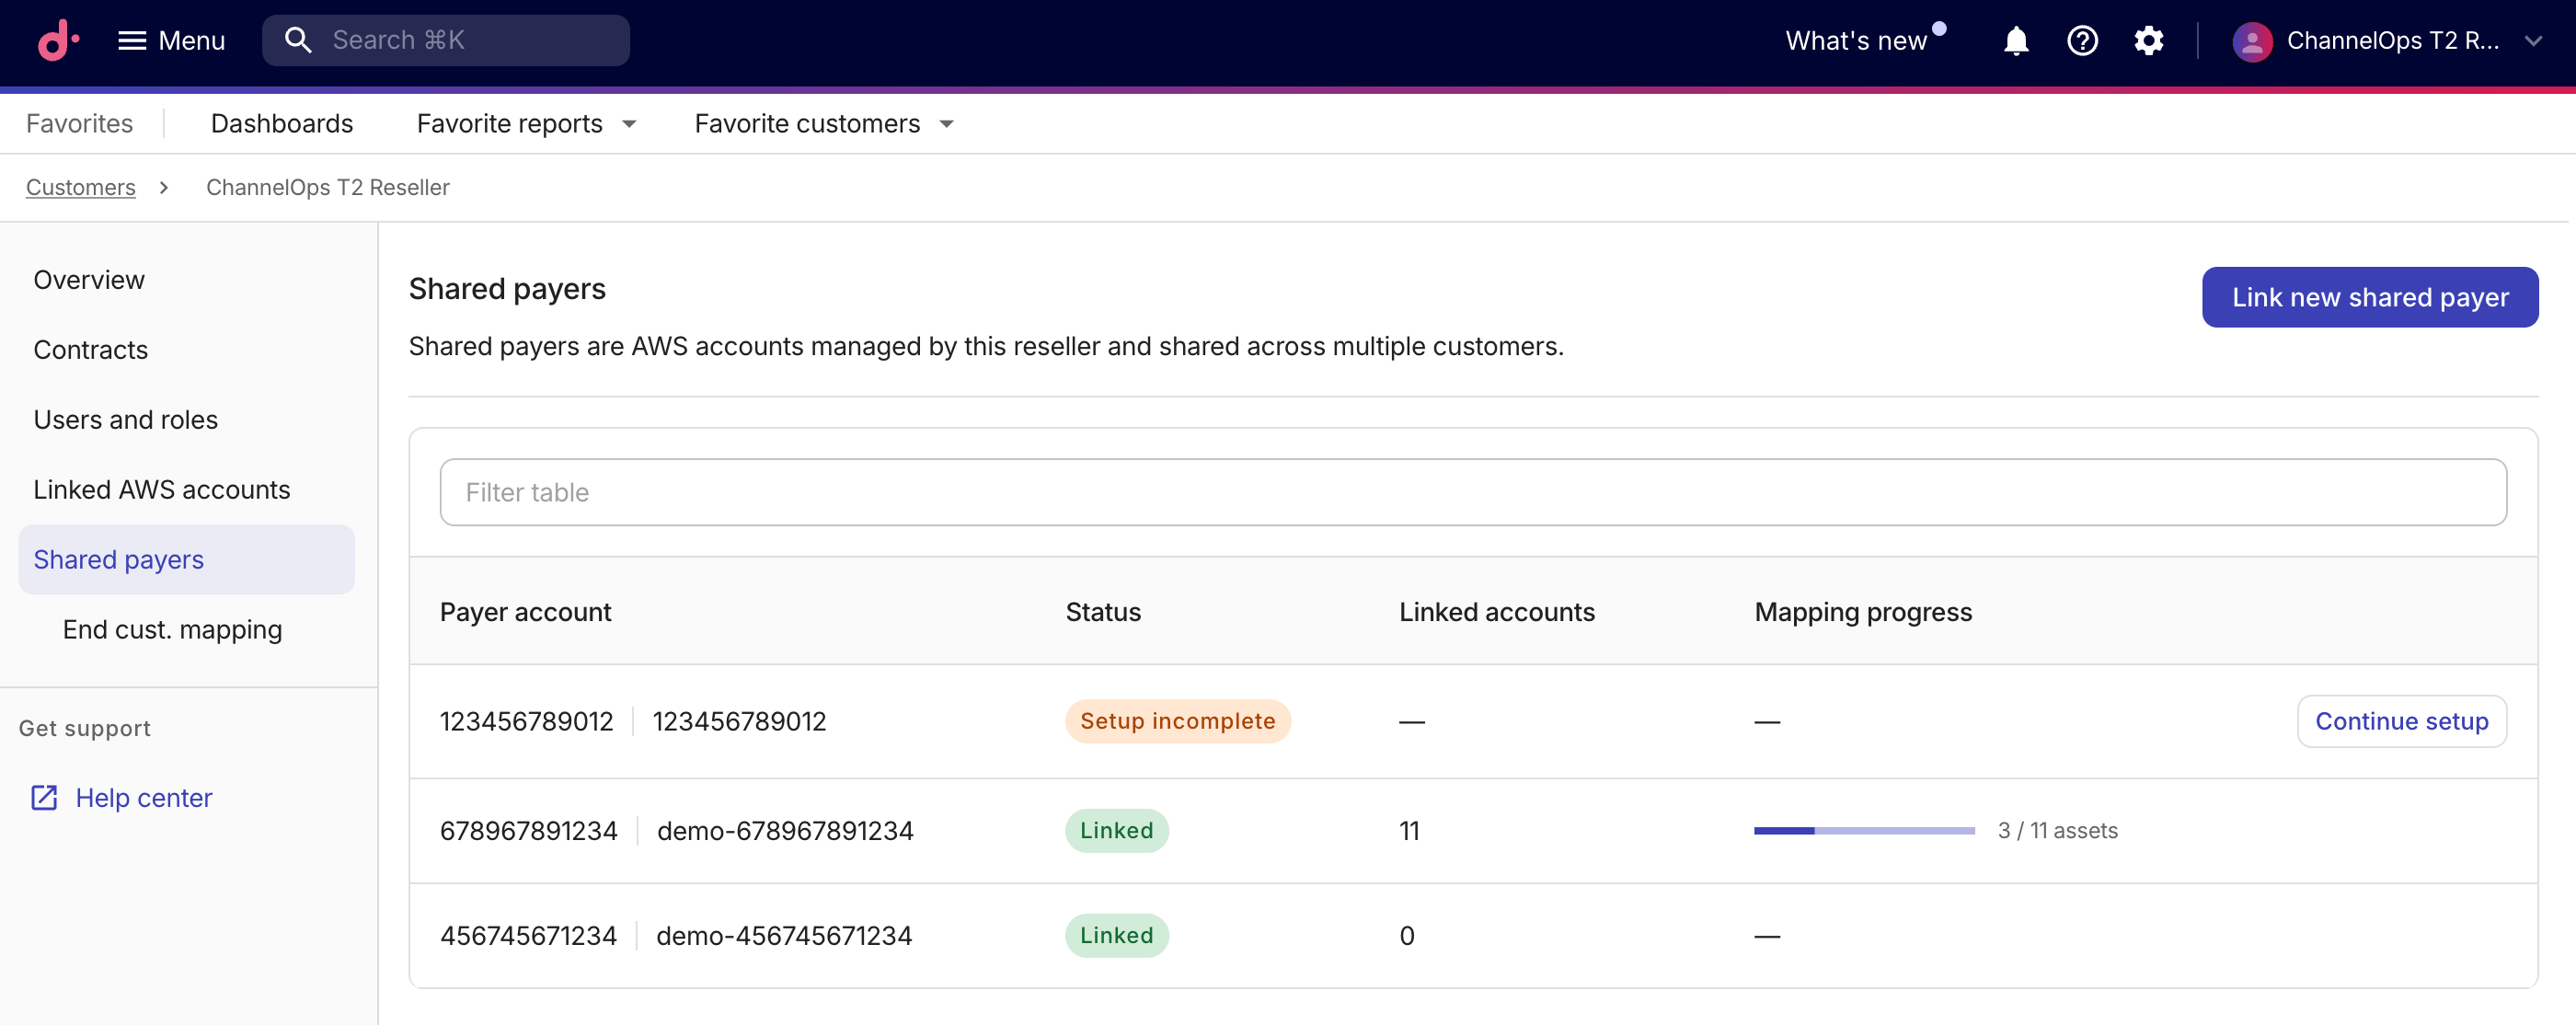
The shared payers table lists AWS payer accounts that the reseller has started or completed linking.
-
Payer account: The 12-digit AWS account ID and payer name.
-
Status:
-
Linked: Onboarding is complete, and the payer is active. -
Setup incomplete: Onboarding was started but not finished. Linked-account count and mapping progress show as an em dash until setup is complete.
-
-
Linked accounts: The total number of accounts under the shared payer, including the payer's own account and all linked member accounts.
-
Mapping progress: A progress bar indicating how many member accounts have been mapped to end customers. If setup is incomplete, select Continue setup to resume the setup wizard.
-
Link a new shared payer
To link a new shared AWS payer account, select Link new shared payer to launch the setup wizard.
The wizard contains three steps, as explained below.
Step 1: Overview
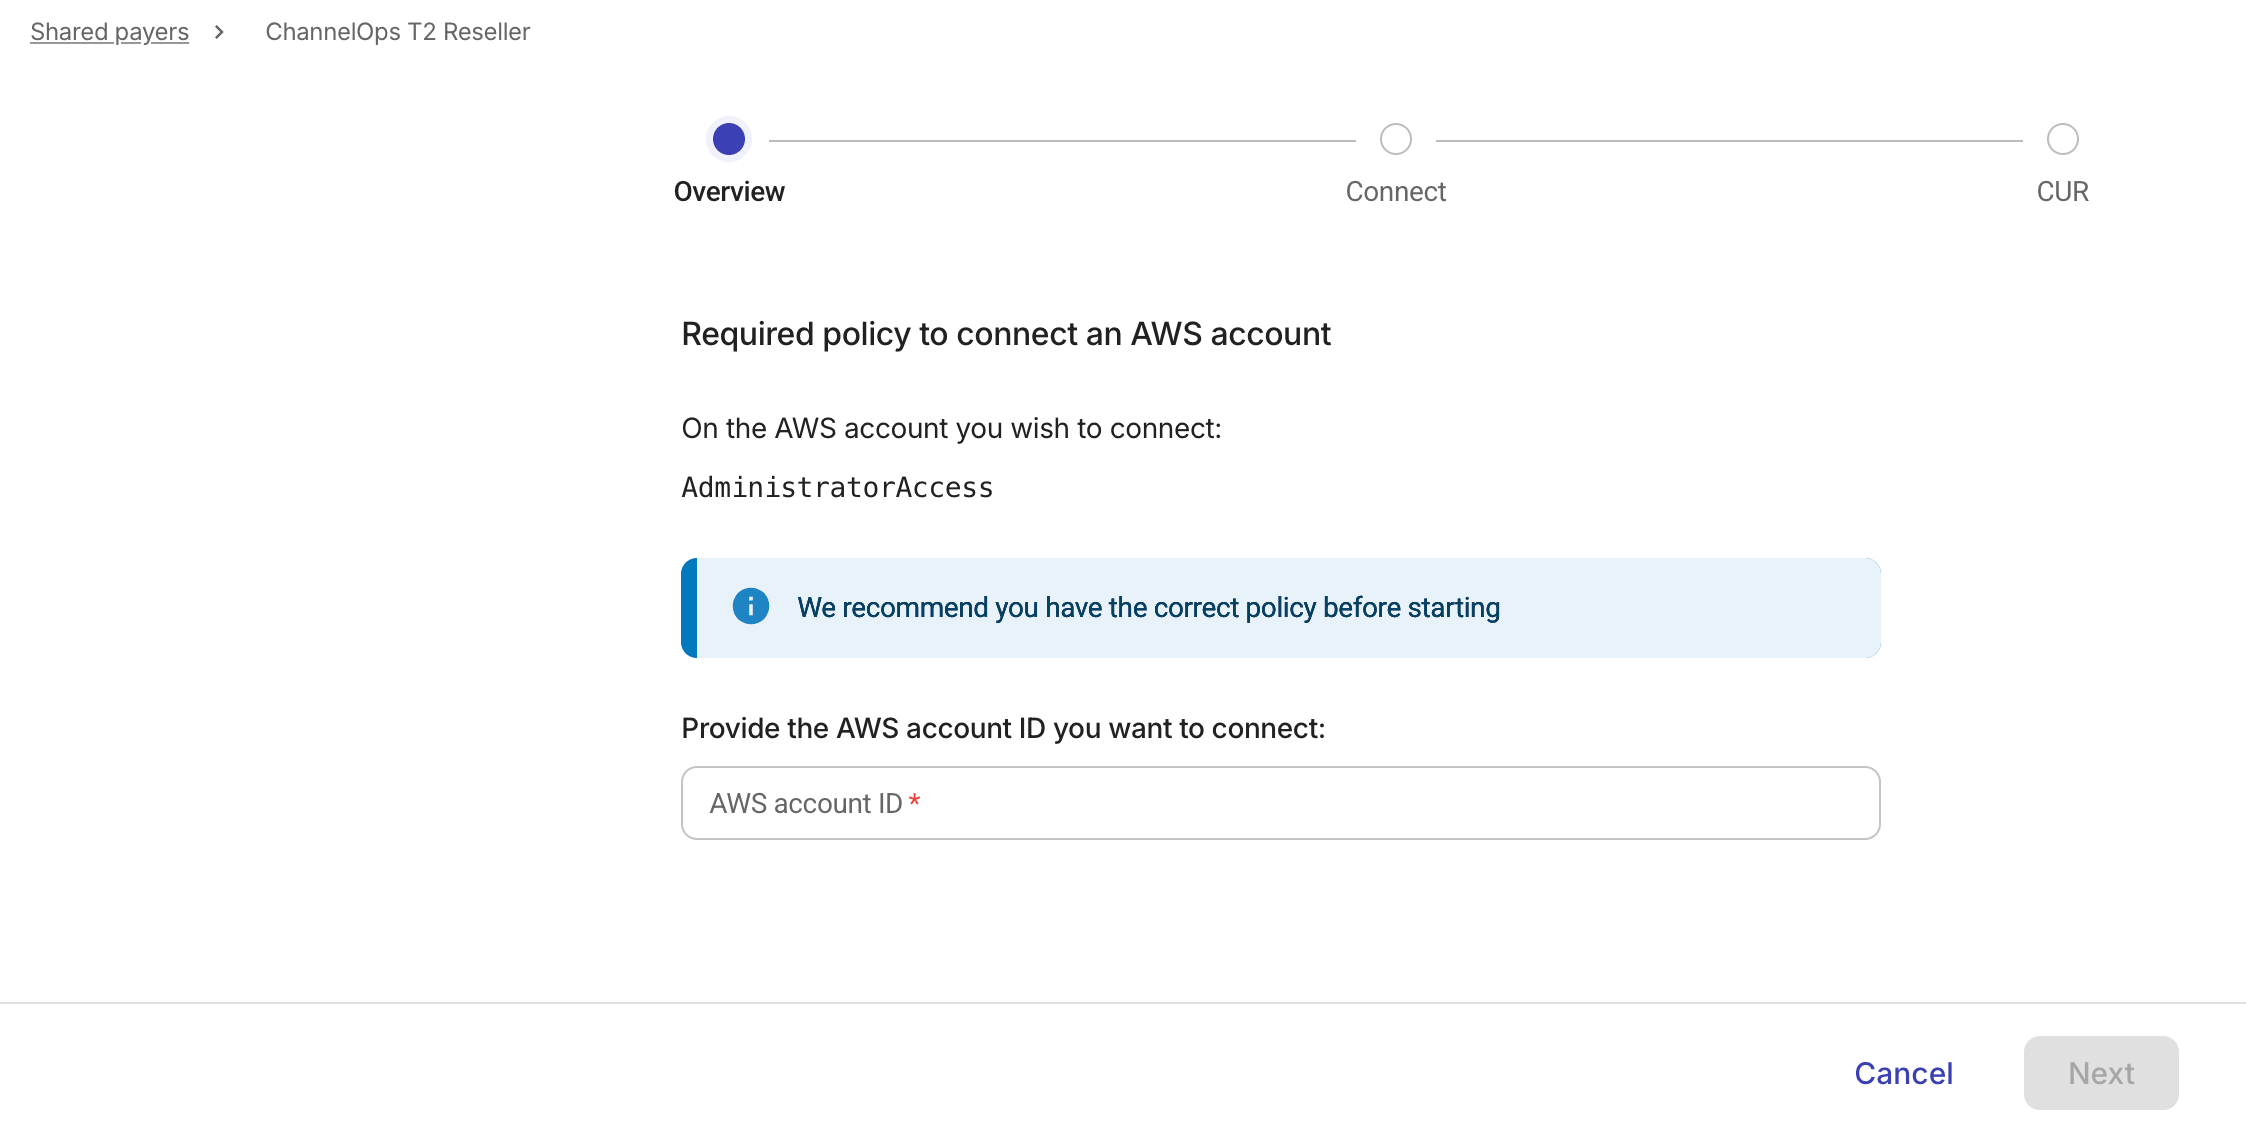
In this step, you confirm that the required IAM policy is in place and provide the AWS account ID.
-
Verify that the AWS account you want to connect has the
AdministratorAccesspolicy attached. -
Enter the 12-digit AWS account ID of the payer account.
-
Select Next to proceed.
Step 2: Connect
Follow the instructions displayed in the DoiT console:
-
In the AWS Billing and Cost Management console, create a standard CUR 2.0 export (see Create an export of CUR 2.0 for details).
-
In the DoiT console, enter the S3 Bucket name where the export is stored. You do not need to enter the S3 prefix.
-
Select Open AWS CloudFormation Console, then create the stack in AWS CloudFormation using the DoiT template. The stack creates the
doitintl_cmpcross-account IAM role. -
Return to the DoiT console and select Confirm connection.
-
If successful, select Next.
-
If the connection fails, select Restart onboarding to start again. Restarting removes the payer and every member account under it, including accounts already mapped to end customers.
-
If the connection times out, select Try again or Contact support.
-
Step 3: CUR
After the connection succeeds, the console lists Cost and Usage Reports found in the specified S3 bucket.
-
Select the correct report from the list. If no reports appear, select Refresh to re-scan the bucket.
-
Select Confirm and link to finish.
After you link a shared payer, map each linked AWS member account to a specific end customer.
End customer mapping
Mapping changes who owns the member account in the console. Cost and usage for the payer's CUR continue to be attributed to the reseller; mapped end customers do not receive billing data for these accounts.
To access end customer mapping:
-
On the tenant details page, under Shared payers, select End cust. mapping.
-
Use the Management account dropdown at the top of the page to select a shared payer.
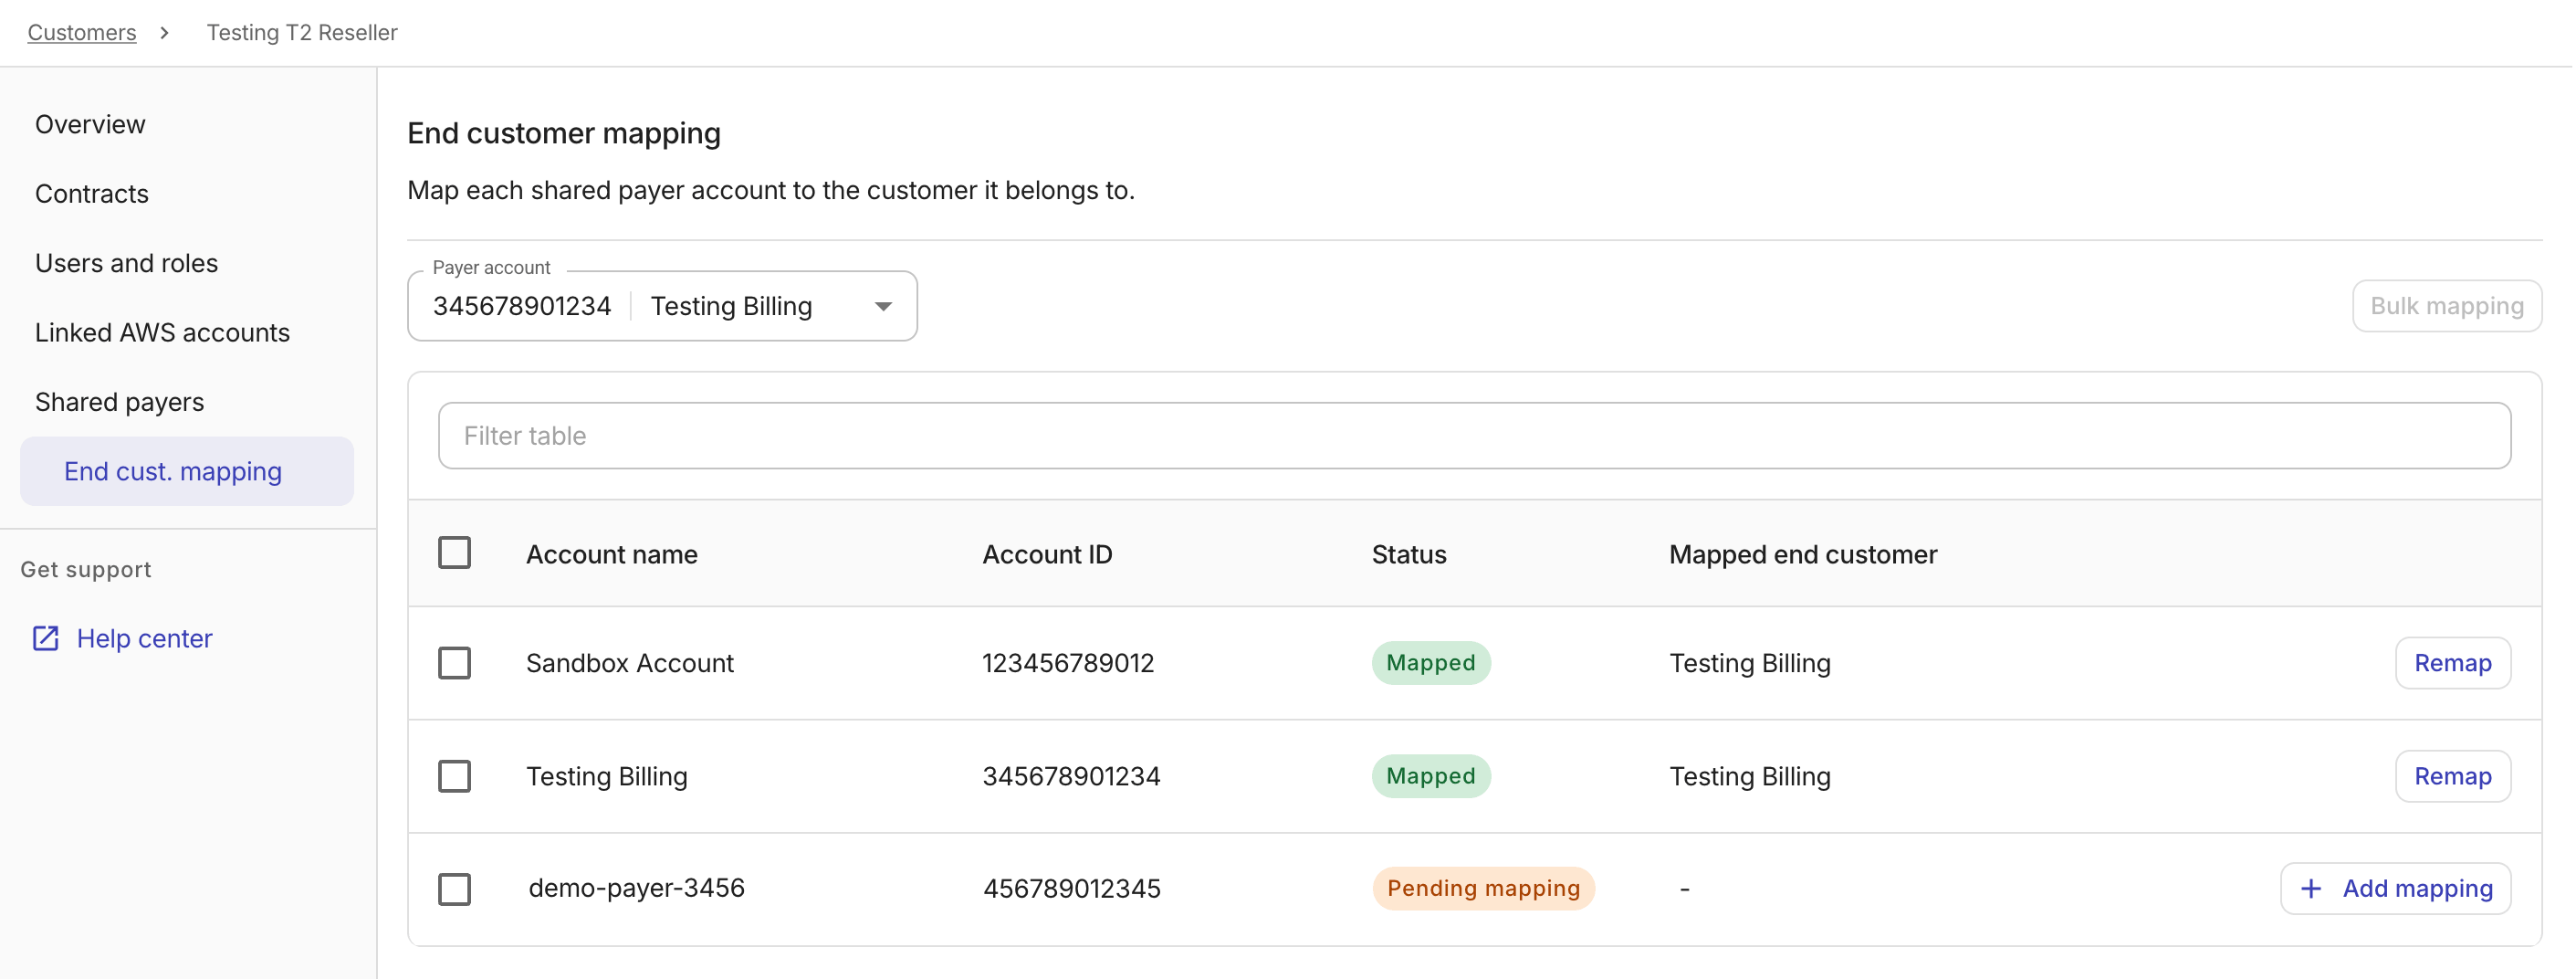
The mapping table lists the accounts under the selected management account, including the shared payer's own account and all linked member accounts:
-
Account name: The name of the account.
-
Account ID: The 12-digit AWS account ID.
-
Status: The mapping status of the account:
-
Mapped: The account is mapped to an end customer. -
Pending mapping: The account has not yet been mapped. Newly discovered member accounts start asPending mapping.
-
-
Mapped end customer: The name of the end customer tenant linked to the account. If the account is not yet mapped, this field displays the reseller's name.
Depending on the status of the account, you can choose to Add mapping or Remap directly from an account row.
-
Add a mapping
-
In the mapping table, select Add mapping on the row of the unmapped account.
-
Select an end customer from the End customer dropdown.
-
Select Add mapping.
Remap an account
To change the end customer linked to a mapped account:
-
In the mapping table, select Remap on the row of the mapped account.
-
In the dialog, select a different end customer from the End customer dropdown.
-
Select Remap.
Bulk mapping
To map multiple member accounts to the same end customer at once:
-
Select the checkboxes next to the accounts you want to map. You can choose both mapped and unmapped accounts.
-
Select Bulk mapping.
-
Select an end customer from the End customer dropdown.
-
Select Map accounts to apply the mapping to all selected accounts.
See also
For resellers using the billing transfer (RPMA) model, see EC mapping.