Manage datasets via the UI
Required permission
- DataHub Admin
View datasets
To view the list of datasets:
-
Sign in to the DoiT console.
-
Select Data ingestion and integrations > DataHub from the top navigation mega menu.
You'll see a list of successfully ingested datasets and datasets that are currently being processed.

The Dataset column shows the identifier of each dataset, specified in the Provider field of DataHub API payload. The Template column shows the schema template assigned to each dataset.
You can filter the list by dataset properties, for example, dataset identifier, number of records in the dataset, last update time, and who made the update.
View dataset details (CSV only)
For datasets that are imported via CSV files, you can select View details to check their history.
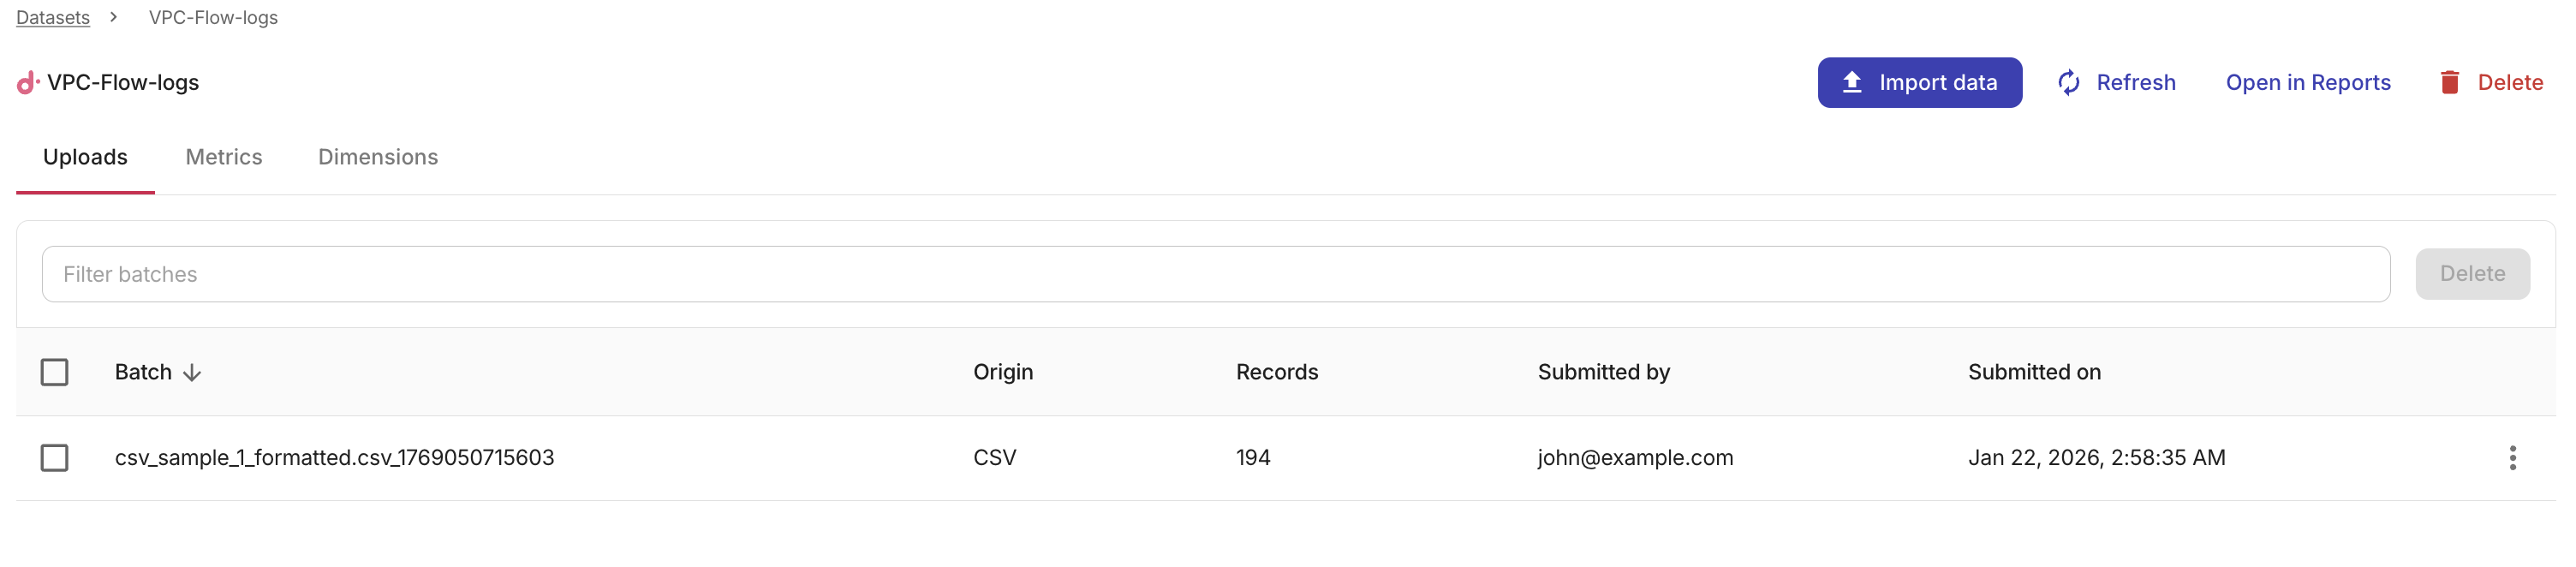
You can also select Delete to remove the data records imported via that batch operation.
Note that the Dataset details page is designed to help with CSV uploads, it doesn't show operations via the /datahub/v1/events endpoint.
Create a new dataset
To create a new dataset from the UI:
-
Select Create new dataset.
-
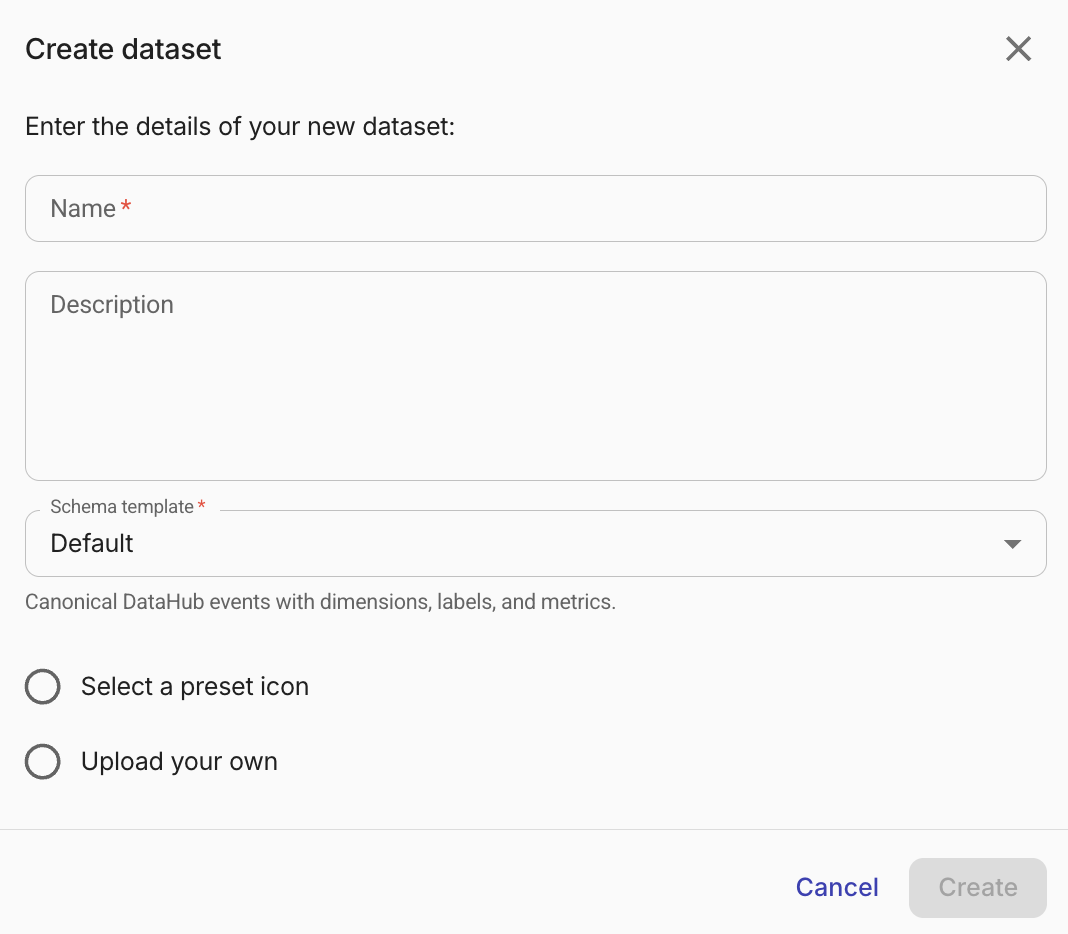
Enter a name for the new dataset, add an optional description, select a schema template, and then select Create.
-
Name: The identifier of the data provider. It corresponds to the provider property in the DataHub Events schema.
-
Description (optional): This field is visible only in the UI.
-
Schema template: Tells DataHub how to read your CSV. Default is selected unless you choose FOCUS or Anthropic. To use a different template later, create a new dataset. For more information, see Schema templates.
-
Select a preset icon or Upload your own (optional): Choose one option to set the icon next to the dataset name on the DataHub page, or leave both unselected. Select a preset icon uses a logo from the built-in list. Upload your own accepts a PNG, SVG, or WebP file up to 200 KB; square images with a transparent background work best.
-
-
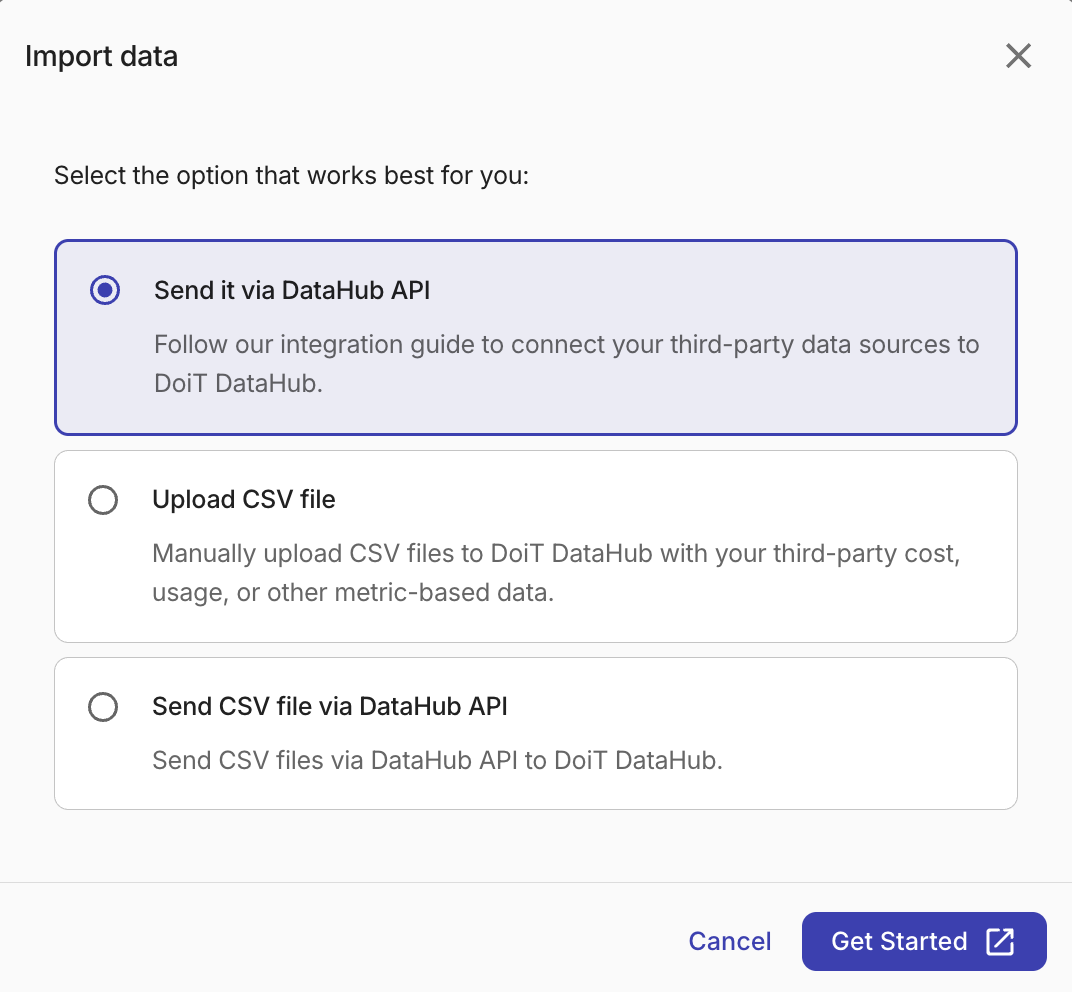
Select Import data.
-
Choose how you want to import data, then follow the instructions to proceed.
Update a dataset
To add new data records or overwrite existing ones in a dataset:
-
Find the dataset of interest on the DataHub page.
-
Select the kebab menu (⋮) at the rightmost end of the dataset entry, and then select Import data.
-
Choose how you want to import data, then follow the instructions to proceed.
Rename a dataset
A dataset has two names:
-
The dataset ID is the
nameyou gave the dataset when you created it. It is theprovidervalue on every ingested event, the value stored in your reports, budgets, alerts, attributions and allocations, and the identifier used by the DataHub API and CSV imports. It cannot be changed. -
The display name is optional and only changes how the dataset appears. When set, the DataHub page, dataset details, report tables, chart legends and tooltips, filter value pickers, exports, and scheduled report and notification emails show the display name wherever the dataset ID would otherwise appear.
To rename a dataset:
-
Find the dataset of interest on the DataHub page.
-
Select the kebab menu (⋮) at the rightmost end of the dataset entry, and then select Rename.
-
Enter a display name of up to 64 characters, and then select Save. Clear the field to go back to showing the dataset ID.
Renaming never moves or rewrites data, so existing reports, budgets, alerts, attributions and allocations keep working without changes. When a display name is set, the dataset ID is shown underneath it on the DataHub page. Keep using the dataset ID as the provider when you ingest events: sending the display name instead creates a new dataset.
You can also set the display name through the DataHub API with the displayName field on the update dataset endpoint.
Download dataset records
You can download the live records of a dataset as a file, for example to audit what was ingested, keep a backup, or move the data to another dataset.
-
Open the dataset details page and select Download.
-
Choose a format:
- CSV: one row per record. The first five columns are provenance columns (
event_id,batch,source,export_time,updated_by), followed by the record's columns in the CSV import vocabulary (usage_date,fixed.<key>,label.<key>,project_label.<key>,system_label.<key>,metric.<type>). Datasets that use the FOCUS schema template use the FOCUS column names instead. - JSONL: one record per line in the same shape as the
/datahub/v1/eventspayload, plus aprovenanceobject. Not available for FOCUS datasets.
- CSV: one row per record. The first five columns are provenance columns (
-
Select a period of at most 366 days. The console fetches the records in pages and saves them as a single file. Very large exports are refused in the console; use the records API with pagination instead.
Records that were deleted are not included.
The exported CSV is not accepted as-is by the CSV import. Before uploading it to another dataset, remove the batch, source, export_time and updated_by columns, and either remove the event_id column or rename it to id to keep the original record identifiers.
Delete datasets
You can delete DataHub data 90 minutes after its ingestion.
-
To delete an individual dataset, select the kebab menu (⋮) at the rightmost end of the dataset entry, and then select Delete.
-
To delete multiple datasets at once, select the checkbox of each dataset that you want to delete, and then select the Delete button next to the filter bar.