CSV ingestion
Comma-separated values (CSV) is a text file format commonly used for data exchange. You can upload CSV files to:
-
Create new datasets.
-
Add new records or overwrite records in an existing dataset.
Ingestion methods
DataHub supports two ingestion methods for CSV.
| Ingestion method | Supported file formats | Maximum file size |
|---|---|---|
| DataHub API | uncompressed, or ZIP or GZ of a single CSV file | 30MB |
| DoiT console | uncompressed | 100MB |
Be aware of the following:
-
The DataHub API only accepts files no larger than 30MB. If your CSV is beyond 30MB, compress it into a ZIP or GZ archive.
-
The Data Hub API doesn't accept ZIP or GZ archives that contain more than one CSV.
-
When uploading CSV via the console, large files take longer to process.
Schema templates
A schema template tells DataHub how to read your CSV so it can validate the file and turn the rows into events.
Not every source file uses the same columns, so the template you choose needs to match the file you upload. For example, if you download a spend report from the Anthropic console, choose Anthropic and upload the file as downloaded. For a Codex usage report, choose Codex and supply the report's inclusive date range. You do not need to rename columns. If you have a spreadsheet of internal costs, such as month, territory, and cost, choose Default and format the columns as shown in Example CSV. Choose FOCUS when you are uploading a FOCUS billing export.
You must choose a template when creating a dataset. Default is selected unless you choose another. The template applies to every CSV you upload to that dataset. To use a different template, create a new dataset.
| Template | Description |
|---|---|
| Default | DataHub events with dimensions, labels, and metrics. See Syntax and conventions. |
| FOCUS | FinOps Open Cost and Usage Specification (FOCUS) data. |
| Anthropic | Anthropic spend report CSV uploaded directly from the Anthropic console. See Anthropic spend report. |
| Codex | Codex usage report CSV. See Codex usage report. |
Syntax and conventions
The following syntax and conventions apply to CSV files uploaded with the Default schema template.
-
Separate values with commas.
-
Add each data record as a new line, using Carriage Return and Line Feed (CRLF) as the line break.
-
The first line is a header row.
Header row syntax: usage_date[,id],DIMENSION_KEY...,METRICS_TYPE...
-
Field names in the header row must use the correct format; DataHub doesn't modify the field names.
-
usage_date: The timestamp (RFC3339) of the data record, corresponding to the time property in the DataHub Events schema.- The CSV file must not contain records with timestamps (
usage_date) older than two years. - The timestamps must strictly follow a subset of RFC 3339/ISO 8601 UTC format:
YYYY-MM-DDTHH:MM:SSZwith the uppercaseZ. For example,2025-07-23T18:24:34Z. This restriction eliminates timezone ambiguity and simplifies validation.
- The CSV file must not contain records with timestamps (
-
id: The unique identifier of the record, corresponding to the id property in the DataHub Events schema.- If you prefer the UUIDv4 identifier automatically generated at ingestion time, do not include this property in your CSV.
- To overwrite an existing record in a dataset, make sure to include the correct
idin your CSV.
-
DIMENSION_KEY: The keys of dimensions in your dataset. At least one dimension key must be present.- For fixed dimensions, see Allowed keys for fixed dimensions.
- Fixed dimensions must be prefixed with
fixed, for example,fixed.billing_account_id,fixed.sku_description. - Fixed dimensions are case insensitive.
- A primary use case for fixed dimensions is joining business and cloud billing datasets for unit economics analysis.
- Fixed dimensions must be prefixed with
- For label dimensions, use the format
label.CUSTOM_DIMENSION_KEY. For example,label.foo. Label dimensions are case sensitive. - For project_label dimensions, use the format
project_label.DIMENSION_KEY. For example,project_label.app. Project_label dimensions are case sensitive. - For system_label dimensions, use the format
system_label.DIMENSION_KEY. For example,system_label.app. System_label dimensions are case sensitive.
- For fixed dimensions, see Allowed keys for fixed dimensions.
-
METRICS_TYPE: The types of metrics in your dataset. At least one metric type must be present.- Use the format
metric.METRICS_TYPE. For example,metric.cost,metric.usage,metric.savings, ormetric.custom_metric. - Basic metrics (
metric.cost,metric.usage, andmetric.savings) are case insensitive, all other metric types are case sensitive.
- Use the format
-
Fields in the header row can be arranged in any order. The order is preserved when you preview the ingested CSV.
Make sure to sanitize your data, for example, mask personally identifiable information (PII), before sending it to DoiT.
Example CSV
Below is a simple example CSV:
- CSV from a third-party provider
- CSV ready to be uploaded to DataHub
Month,Territory,Cost
2024-03-01,AMER,$70000
2024-04-01,AMER,$70000
2024-05-01,AMER,$70000
2024-03-01,EMEA,$7500
2024-04-01,EMEA,$7500
2024-05-01,EMEA,$7500
2024-03-01,APAC,$3700
2024-04-01,APAC,$3700
2024-05-01,APAC,$3700
usage_date,label.territory,metric.cost
2024-03-01T00:00:00Z,AMER,70000
2024-04-01T00:00:00Z,AMER,70000
2024-05-01T00:00:00Z,AMER,70000
2024-03-01T00:00:00Z,EMEA,7500
2024-04-01T00:00:00Z,EMEA,7500
2024-05-01T00:00:00Z,EMEA,7500
2024-03-01T00:00:00Z,APAC,3700
2024-04-01T00:00:00Z,APAC,3700
2024-05-01T00:00:00Z,APAC,3700
You can also download a sample CSV with more columns.
Anthropic spend report
If your dataset uses the Anthropic schema template, you can upload a spend report CSV directly from the Anthropic console without converting it to the Default CSV format. DataHub validates the Anthropic-specific columns and normalizes them into standard DataHub events.
Claude Team organizations can automate this export with the Claude Usage Exporter browser extension, which uploads one spend report per day.
Export the spend report from Anthropic
To export spend data from the Anthropic console:
-
Navigate to Settings > Analytics.
-
Scroll down to the How much is Claude costing? section.
-
Select Export spend report.
-
Select a time period: MTD, Last Month, Last 90 Days, or Custom.
If you select Custom, choose your start and end dates. You can go back up to 90 days, and the most recent data available is from yesterday.
-
Select Download.
Do not open, edit, rename, re-save, or otherwise alter the downloaded CSV before uploading it to DataHub. Keep the original filename so the report period can be preserved.
The file must use the Anthropic filename format: spend-report-<report-id>-YYYY-MM-DD-to-YYYY-MM-DD.csv. The file size must not exceed 100 MB.
For more information, see Anthropic's usage analytics documentation.
Anthropic CSV columns
The following table lists the columns expected in an Anthropic spend report CSV.
| Column | Required |
|---|---|
user_email | Yes |
account_uuid | Yes |
product | Yes |
model | No |
total_requests | Yes |
total_prompt_tokens | Yes |
total_completion_tokens | Yes |
total_net_spend_usd | Yes |
total_gross_spend_usd | Yes |
total_uncached_input_tokens | Yes |
total_cache_read_tokens | Yes |
total_cache_write_5m_tokens | Yes |
total_cache_write_1h_tokens | Yes |
total_web_search_count | Yes |
user_id | No |
slack_channel_id | No |
These columns are present in the standard Anthropic spend report export. DataHub rejects files with missing required columns, duplicate columns, or unrecognized columns.
Overlap restrictions
DataHub does not allow overlapping report periods within the same dataset. If you upload a report whose date range overlaps with a previous upload, the upload is rejected. To replace or correct data for an overlapping period, delete the existing batch first and then upload the new report.
API uploads can instead set replace=true on POST /datahub/v1/csv/upload. DataHub then removes the overlapping batches and ingests the new file in one request, as long as every overlapping batch lies inside the new report's period. A replacement that would remove data outside its own period (for example, a one-day upload overlapping a 90-day report) is rejected, and so is a replacement of a batch uploaded less than 90 minutes ago.
Codex usage report
If your dataset uses the Codex schema template, you can upload a Codex usage report without converting it to the Default CSV format. DataHub validates the Codex-specific columns and normalizes the aggregate report into standard DataHub events.
Prepare a Codex report
-
Export the Codex usage report for the period you want to import.
-
Keep the exported column names unchanged.
-
When uploading the file, select the inclusive start and end dates used for the export. DataHub does not derive these dates from the filename.
DataHub books the aggregate events on the selected end date and preserves both dates as report labels and batch metadata. The file size must not exceed 100 MB.
The report contains user identifiers, names, and email addresses. Review your organization's data-handling requirements before uploading it to DoiT.
Codex CSV columns
The CSV must contain the following case-sensitive columns. All listed columns are required.
| Column |
|---|
Rank |
User ID |
Name |
Email |
Credits |
Estimated costs |
Estimated cost currency |
Tokens |
Lines of code |
DataHub rejects files with missing required columns or duplicate columns. Additional unrecognized columns are ignored. Identity fields must not be blank, numeric values must be non-negative, and the estimated cost currency must be USD. Rank, token, and line counts must be whole numbers.
Codex normalization
| Source column | DataHub value |
|---|---|
Estimated costs | Cost metric |
Tokens | Usage metric with the tokens pricing unit |
Credits | Credits extended metric |
Lines of code | Lines of Code extended metric |
User ID | genai/user_id system label |
Name | genai/user_name system label |
Email | genai/user_email system label |
User identity is not written to Project ID, Project Name, Resource ID, or another fixed dimension. DataHub identifies the service, SKU, product, and model family as Codex. Because the report is not attributed to individual models, Codex events do not include genai/model, genai/base_model, or genai/model_version labels.
Codex report periods follow the same overlap restrictions as Anthropic reports. To correct a period that overlaps an existing upload, delete the previous batch before uploading the replacement.
Upload CSV
- DataHub Admin
The description below explains how to upload a CSV file using the console. For uploading CSV using the DataHub API, see DataHub API.
Once you formatted the CSV file correctly, you can upload it when creating a new dataset or updating a dataset.
-
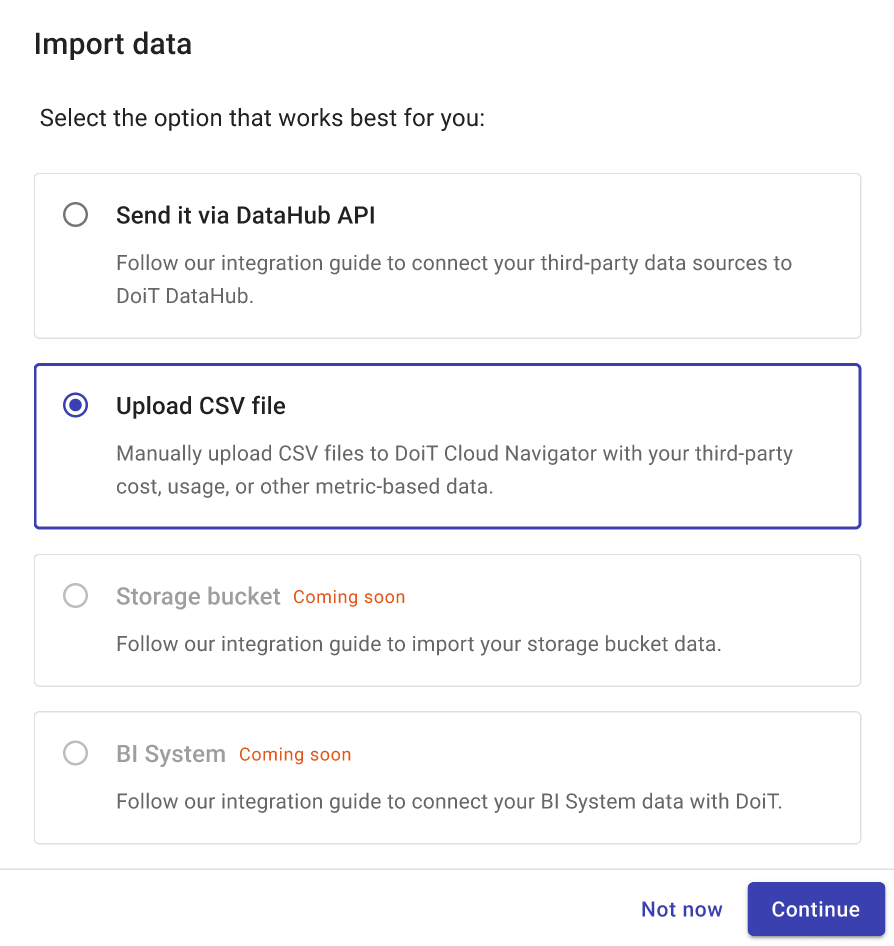
In the Import data dialog, select Upload CSV file, and then select Continue.
-
Prepare file: Review the instructions for your dataset's schema template. For the Default template, make sure your CSV file complies with the Syntax and conventions. For the Anthropic template, follow the steps in Export the spend report from Anthropic. For the Codex template, follow Prepare a Codex report and enter its report dates. Select Next to continue.
-
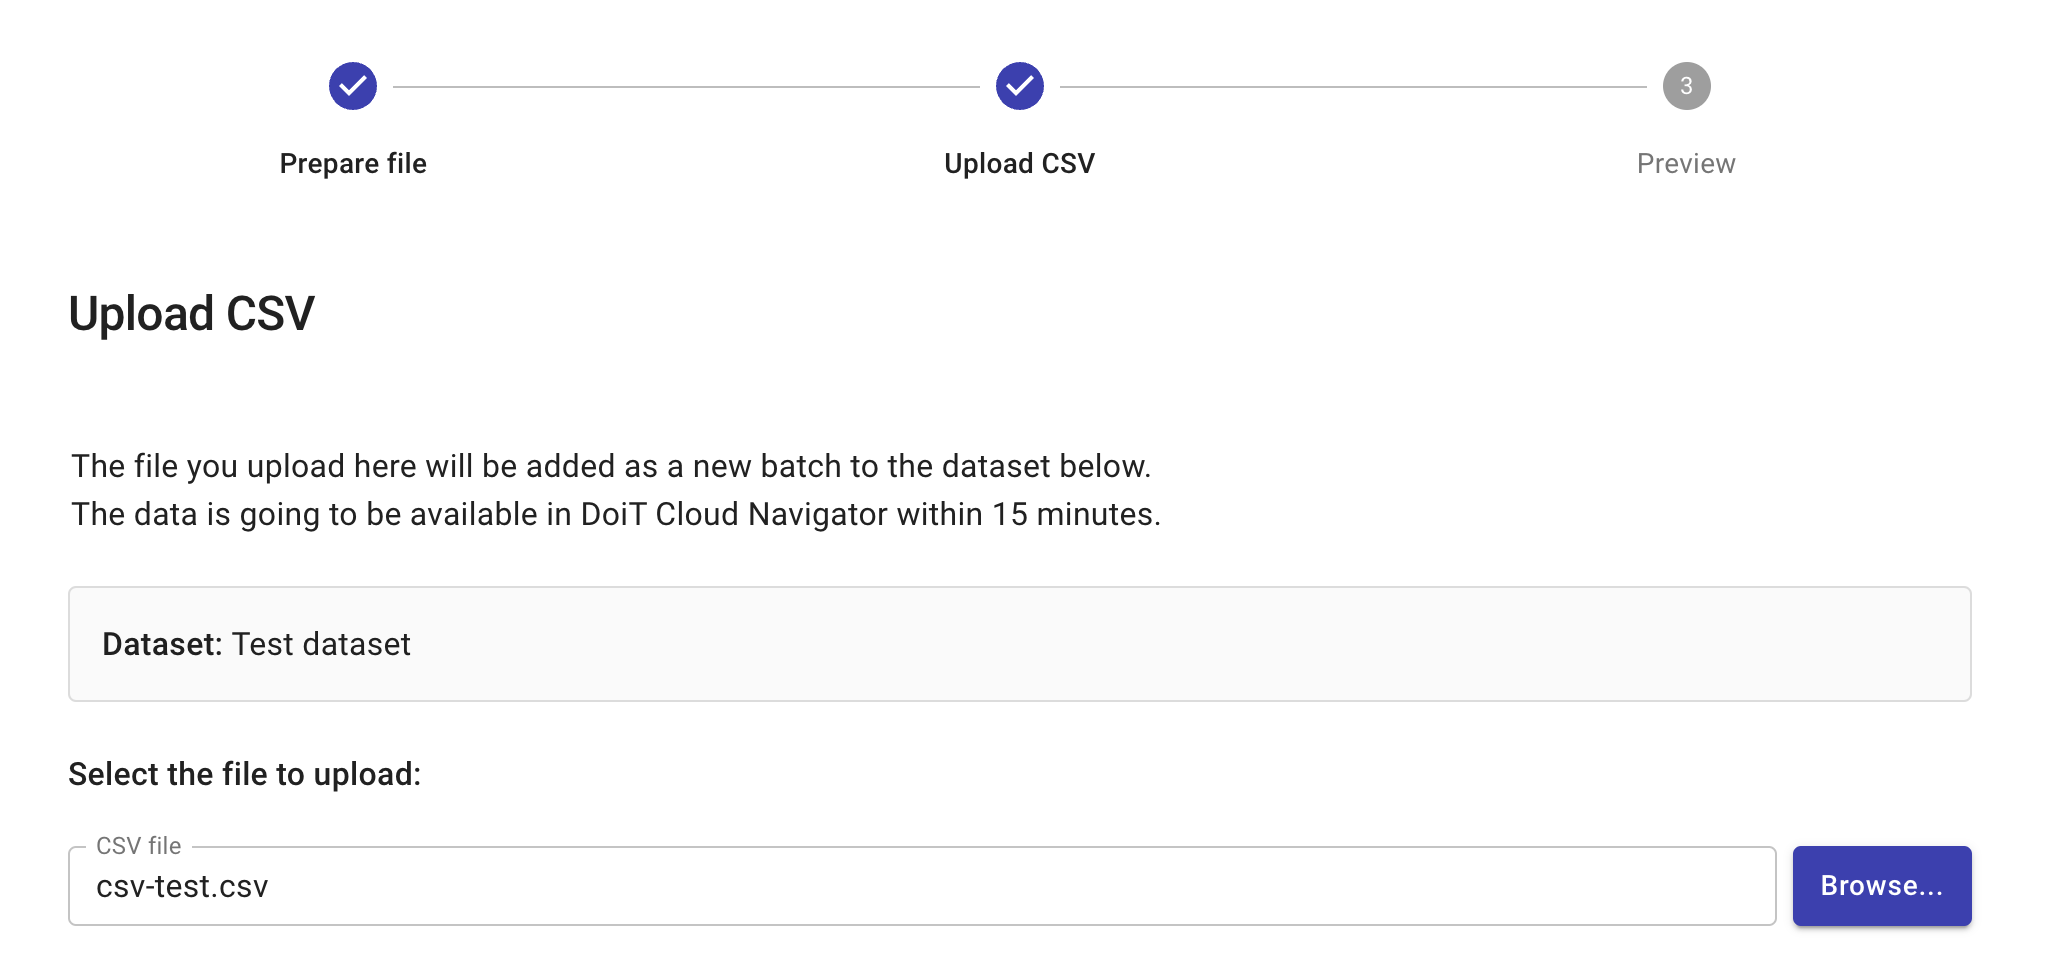
Upload CSV: Select the CSV file to upload. This step also validates the CSV.
-
Preview: In this step, you verify that the data will be ingested with the desired dimensions and metrics.
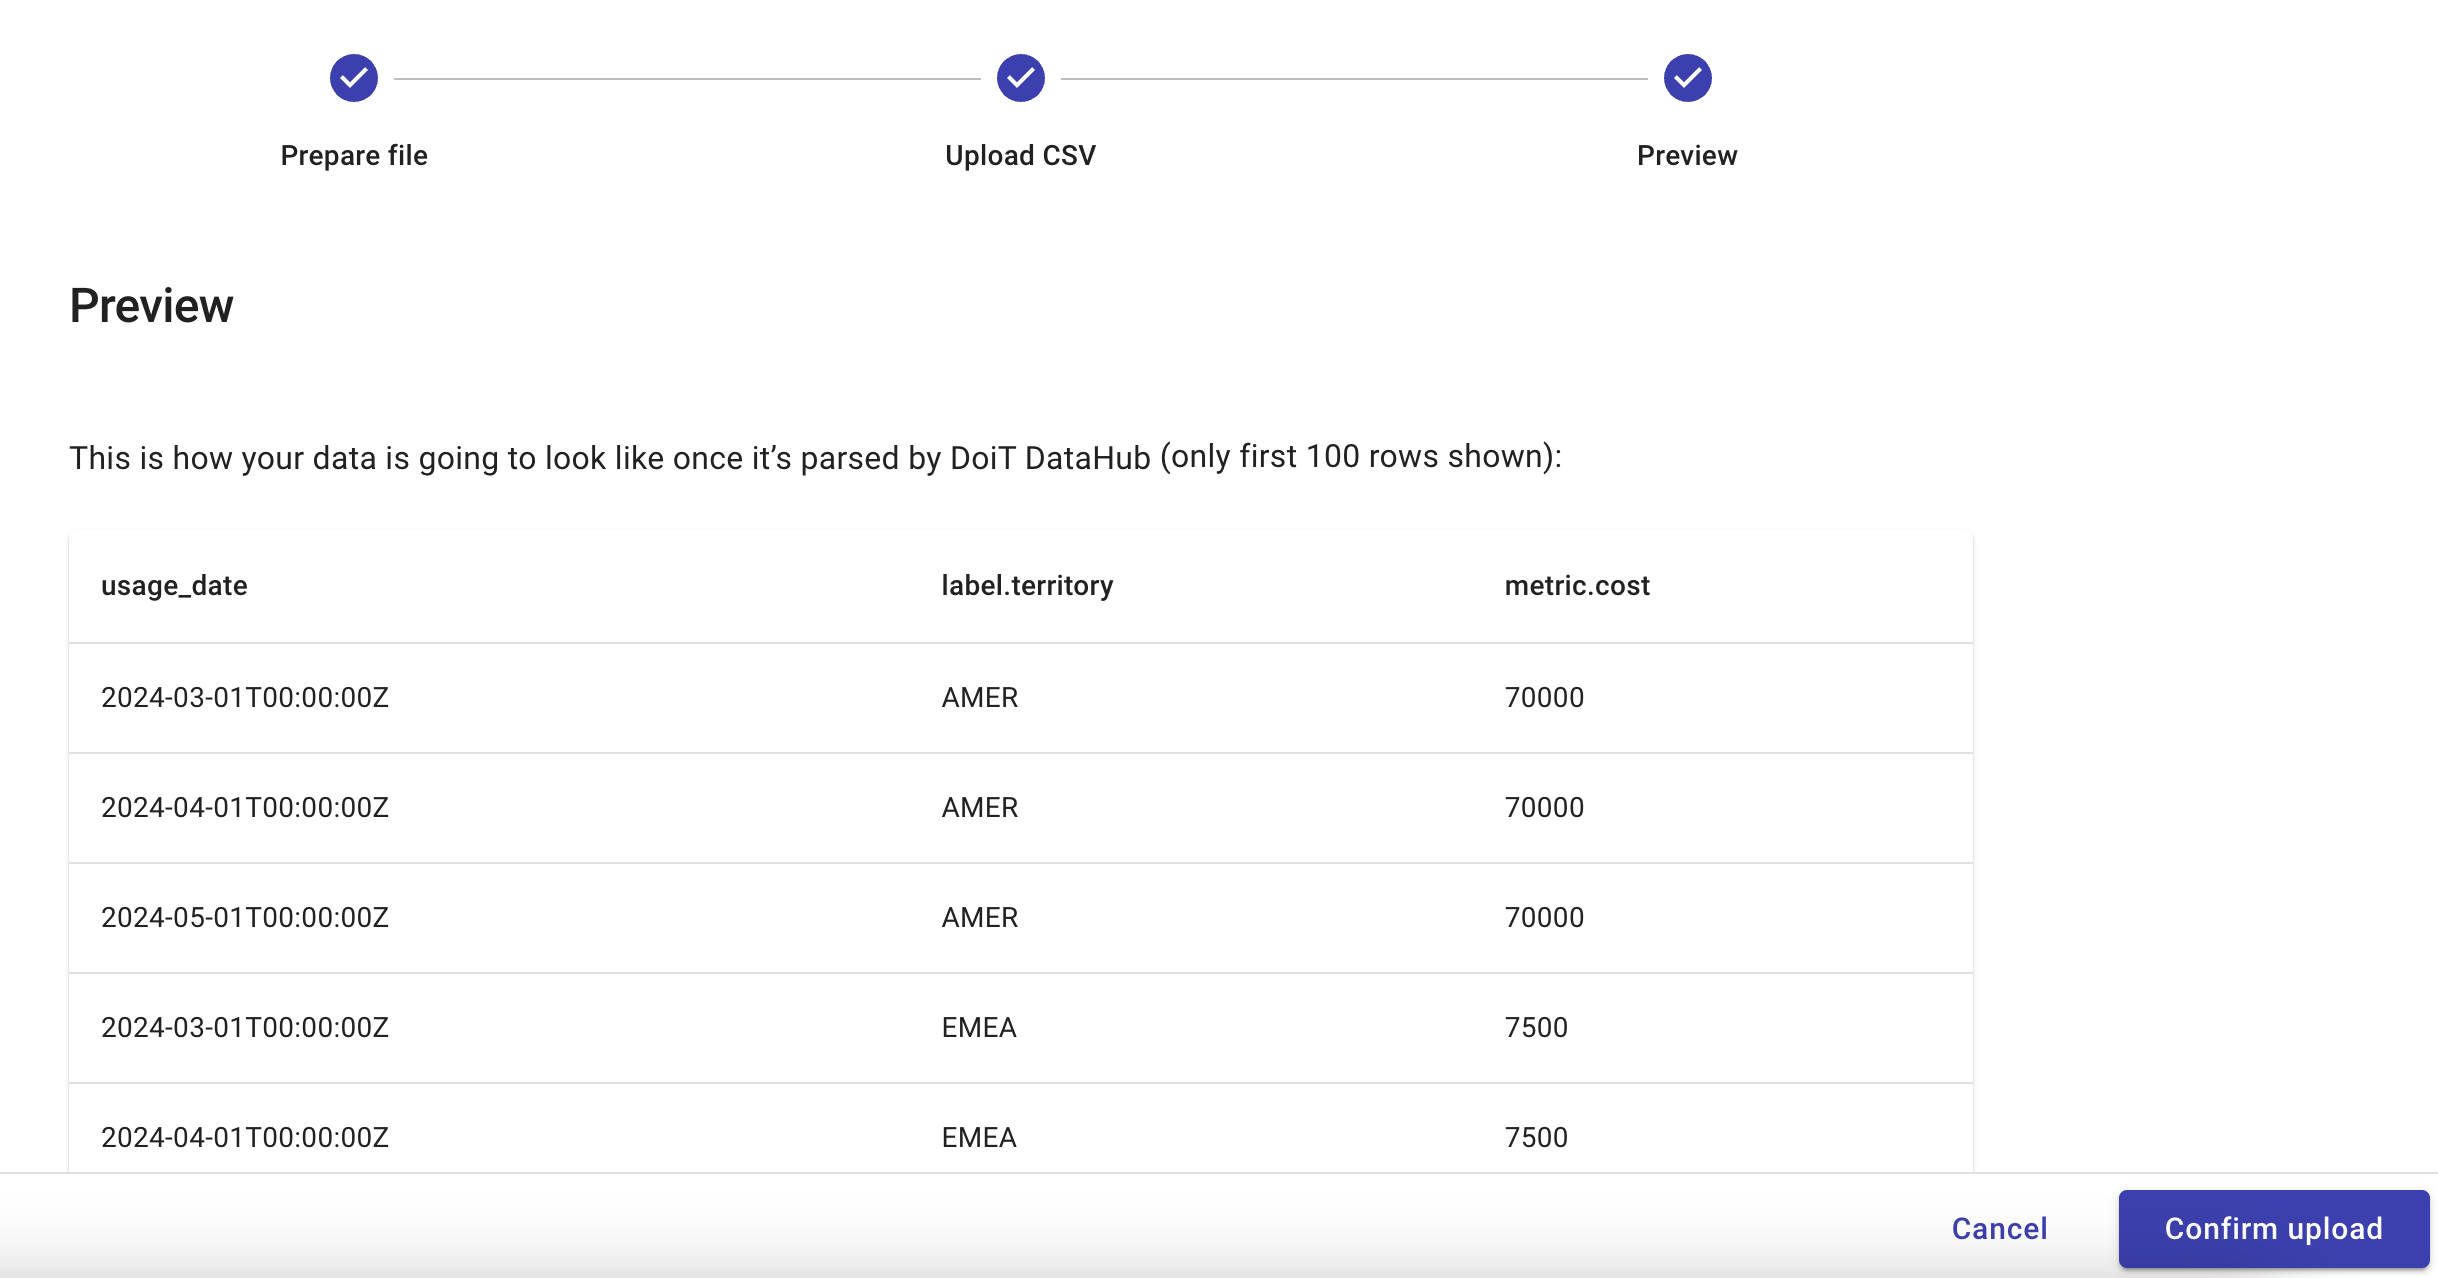
After you select Confirm upload, we start processing the data. When the data has been uploaded successfully, it can take up to 15 minutes for the data to become available in the console.