Single-rule allocations
You can create an allocation rule either from scratch or based on a preset allocation or a custom allocation created by others.
Create from scratch
When creating an allocation rule, you need to choose its dimensions and define the rule logic.
-
In the DoiT console, select Allocation > Allocations from the top navigation mega menu.
-
Select Create allocation.
-
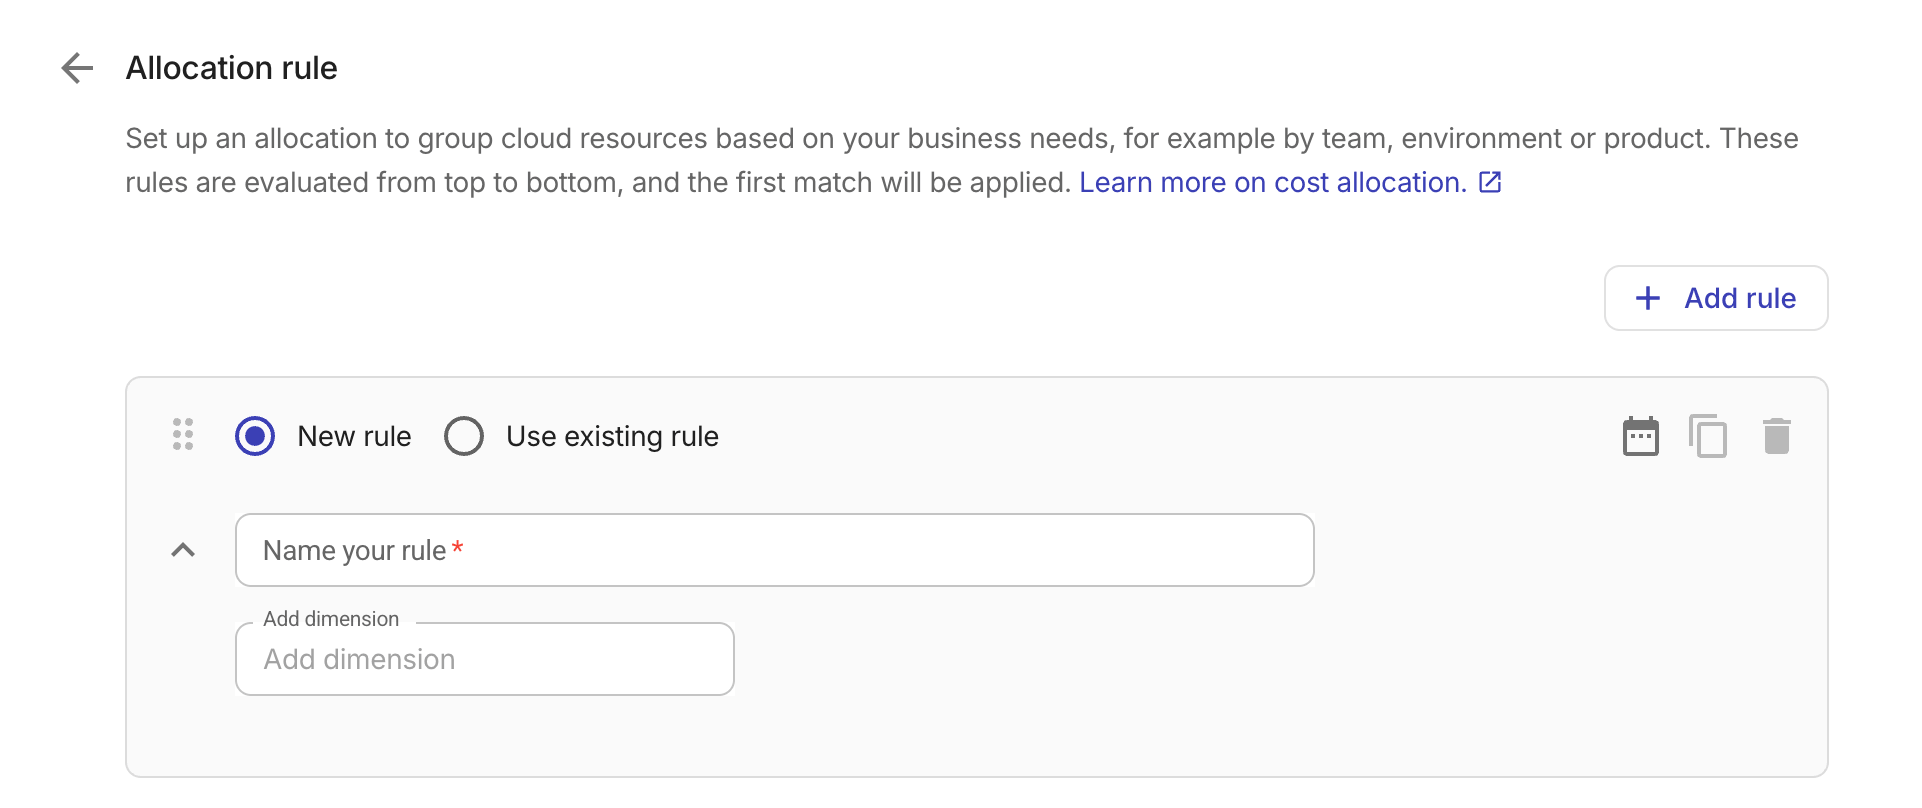
Enter a name for the new rule.
Allowed characters: numbers (0-9), lowercase letters (a-z), uppercase letters (A-Z), underscore (_), dash (-), period (.), comma (,), colon (:), parentheses (()), square brackets ([]), percent (%), ampersand (&), and white space (blank).
-
Select a dimension, label, or tag (including allocation rules) from the dropdown, and filter the results to define the condition of the dimension.
-
You can choose a regex operator (
matches regex,does not match regex) in the Condition dropdown to filter by regular expressions. -
When the condition is set to
isoris not, use Filter by providers, if applicable, to narrow the displayed values. Custom values and values labeled "No X assigned" remain visible regardless of the provider filter.
Repeat the step above to add more dimensions if needed.
注意The maximum reference depth of a nested rule is three. If Rule A refers to Rule B, and Rule B refers to Rule C, then Rule C cannot refer to further rules. Additionally, other rules cannot reference Rule A.
-
-
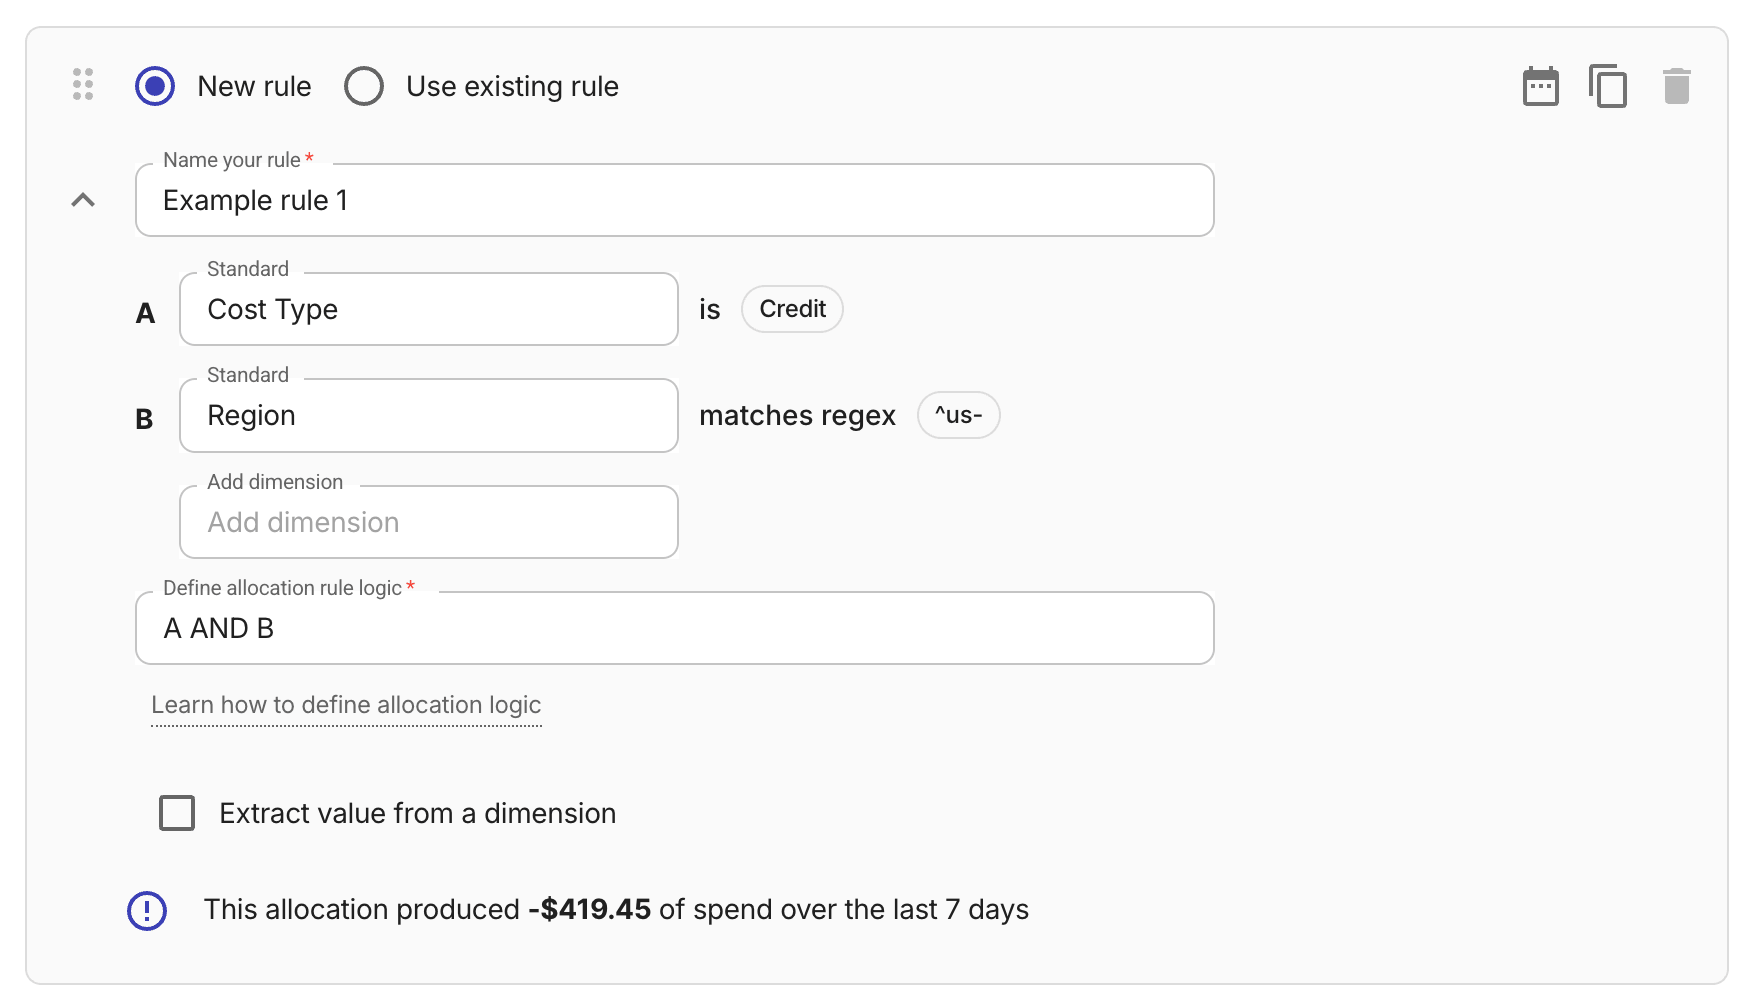
If you've added more than one dimension, define the allocation rule logic.
-
Each dimension and its condition form an operant.
-
Each operant is identified by a capital letter, which also indicates the operant's position in the sequence. If you remove an operant, the identifiers of the following operants are automatically adjusted.
-
By default, operants are joined by the AND operator. Allowed operators: AND, OR, NOT.
-
To reorder condition rows, drag a row by its drag handle (
) to a new position. The formula letters are automatically remapped so that the formula continues to reference the same conditions. If the formula text changes, an info notification confirms the update and offers an Undo option to restore the previous order.
Below is an example allocation rule with two operants.
-
-
(Optional) Define value extraction to use dimension values as grouping names.
-
(Optional) Set validity periods to time bound the rule.
-
Save the configuration to create the single rule.
Create from an existing rule
-
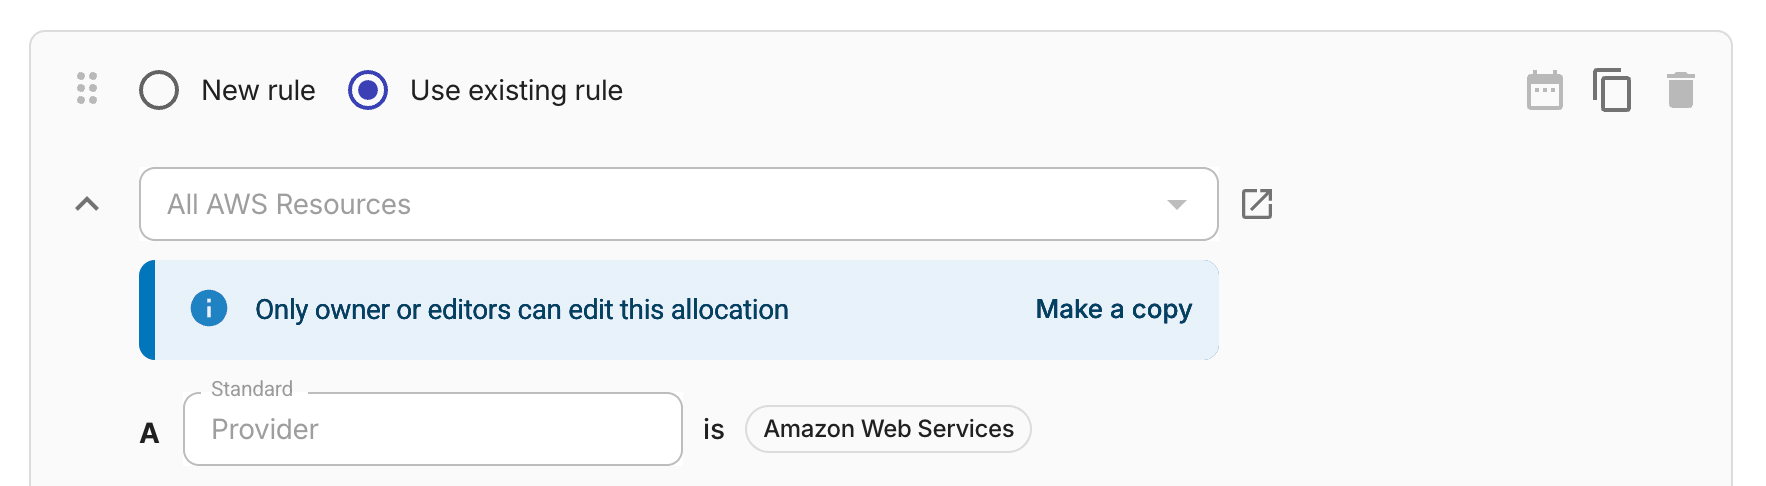
Select Use existing rule.
-
Select a rule from the drop-down list.
You can open the rule in a new tab to view its configuration.
-
Choose one of the following options to proceed:
-
Select the content copy icon to duplicate the chosen rule. This option adds a new rule while keeping the original one unchanged. If you intend to create a single rule, make sure to remove the original one from the allocation.
-
Select Make a copy to turn the chosen rule into a copy of itself so you can edit it without affecting the original one.
-
If you have write permission on the rule, you can update it directly. Be aware that this will affect all other allocations that use this rule.
-
-
Name the updated rule and save your configurations.
Extract value from a dimension
By default, an allocation rule assigns its rule name to all matching items without distinction.
Value extraction lets you assign the value of selected dimensions to matching items, so you can split costs based on resource metadata within a single rule.
To configure value extraction:
-
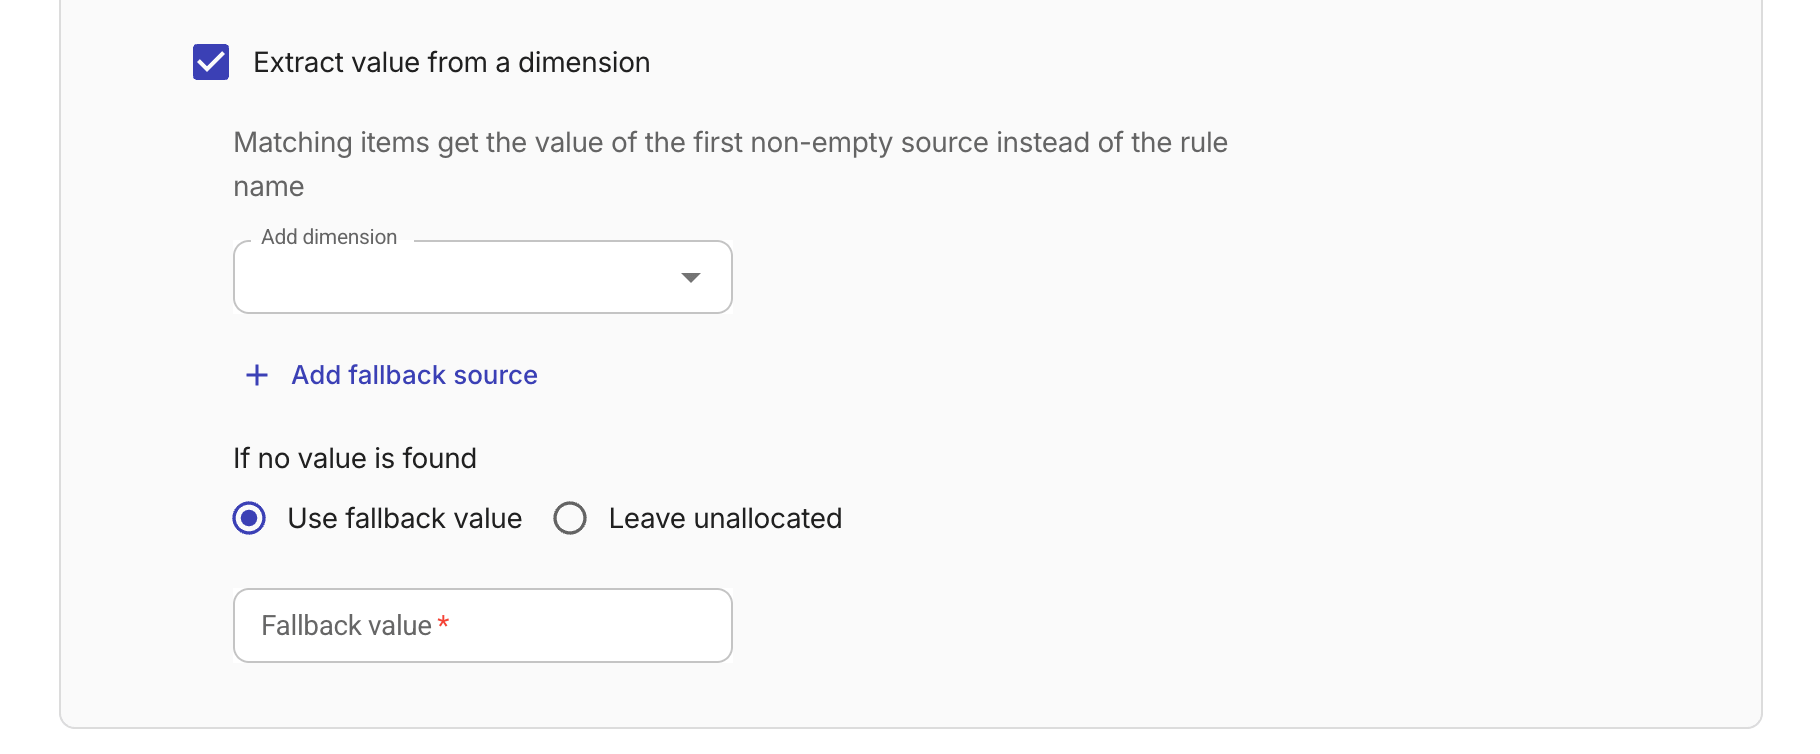
When creating or editing an allocation rule with at least one dimension defined, select the Extract value from a dimension checkbox.
-
Select a dimension to use as the grouping name. To add additional dimensions, select Add fallback source.
-
You can add up to five sources. The system evaluates the sources from top to bottom. The first source that returns a non-empty value is used as the grouping name for that cost item.
-
Fixed dimension sources are limited to raw table columns, such as region, project ID, and service description. Derived dimensions (such as credits) and date dimensions are not available as extraction sources.
-
-
Specify how to handle matching items if no value is found in the dimension sources:
-
Use fallback value: Group the items under the text you specify in the Fallback value field.
-
Leave unallocated (single rule): Group the items under
[Allocation N/A] -
Continue to next rule (group): Skip this rule and evaluate the items by the next one in the allocation.
-
-
Save the changes.
After you save an allocation with value extraction, the extracted values appear wherever the allocation is used as a dimension, such as Cloud Analytics reports, budgets, alerts, and anomalies.
See an example report with value extraction.
Time bound a rule
By default, an allocation rule applies to costs across all dates.
With validity periods, you can restrict a rule to only match costs that fall within specific date ranges. This is useful when a rule should apply only during a defined time window.
To set validity periods:
-
When creating or editing a rule, select the calendar icon (
) to open the Time bound this rule dialog. -
Enter a start date and an end date for the period. Both bounds are inclusive.
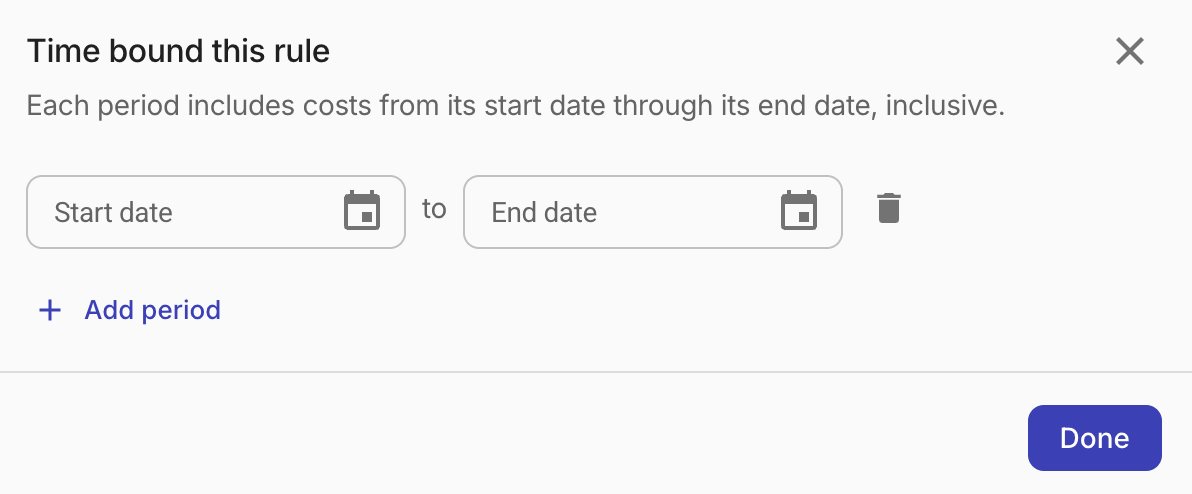
-
To leave the first period open-ended at the start, clear the start date. Only the first period can have an empty start date.
-
To leave the last period open-ended at the end, clear the end date. Only the last period can have an empty end date.
-
-
To add more periods, select Add period. Adjacent periods must not overlap.
-
Select Done to save the periods.
When a rule has validity periods, only costs with dates that fall within one of the defined periods are matched. Costs outside all periods are not affected.