Single sign-on
Single Sign-On (SSO) is a federated identity management mechanism that allows a user to access multiple applications or services with one set of login credentials using a single identity provider (IdP).
The DoiT console application supports SSO through authentication protocols Security Assertion Markup Language (SAML) and OpenID Connect (OIDC).
SSO takes precedence over auth provider settings for end-user sign-in. Once SSO is enabled, end users can no longer sign in with a Google account, Microsoft account, or email and password. Admin users can still use other sign-in options.
Required permission
- Users Manager
Overview
To integrate the DoiT console application with identity providers (IdP), you need to:
- Enable SSO in the DoiT console.
- Create a SAML or OIDC application at the IdP side.
- Configure SSO in the DoiT console.
Enable SSO in the DoiT console
Enable SSO in the DoiT console:
-
In the DoiT console, select the gear icon () from the top navigation bar, and then select Users and access.
-
Select Single sign-on from the left-hand menu.
-
Use the Enable SSO toggle button to enable SSO.
-
Select SAML or OIDC according to your authentication protocol and then select Configure.
-
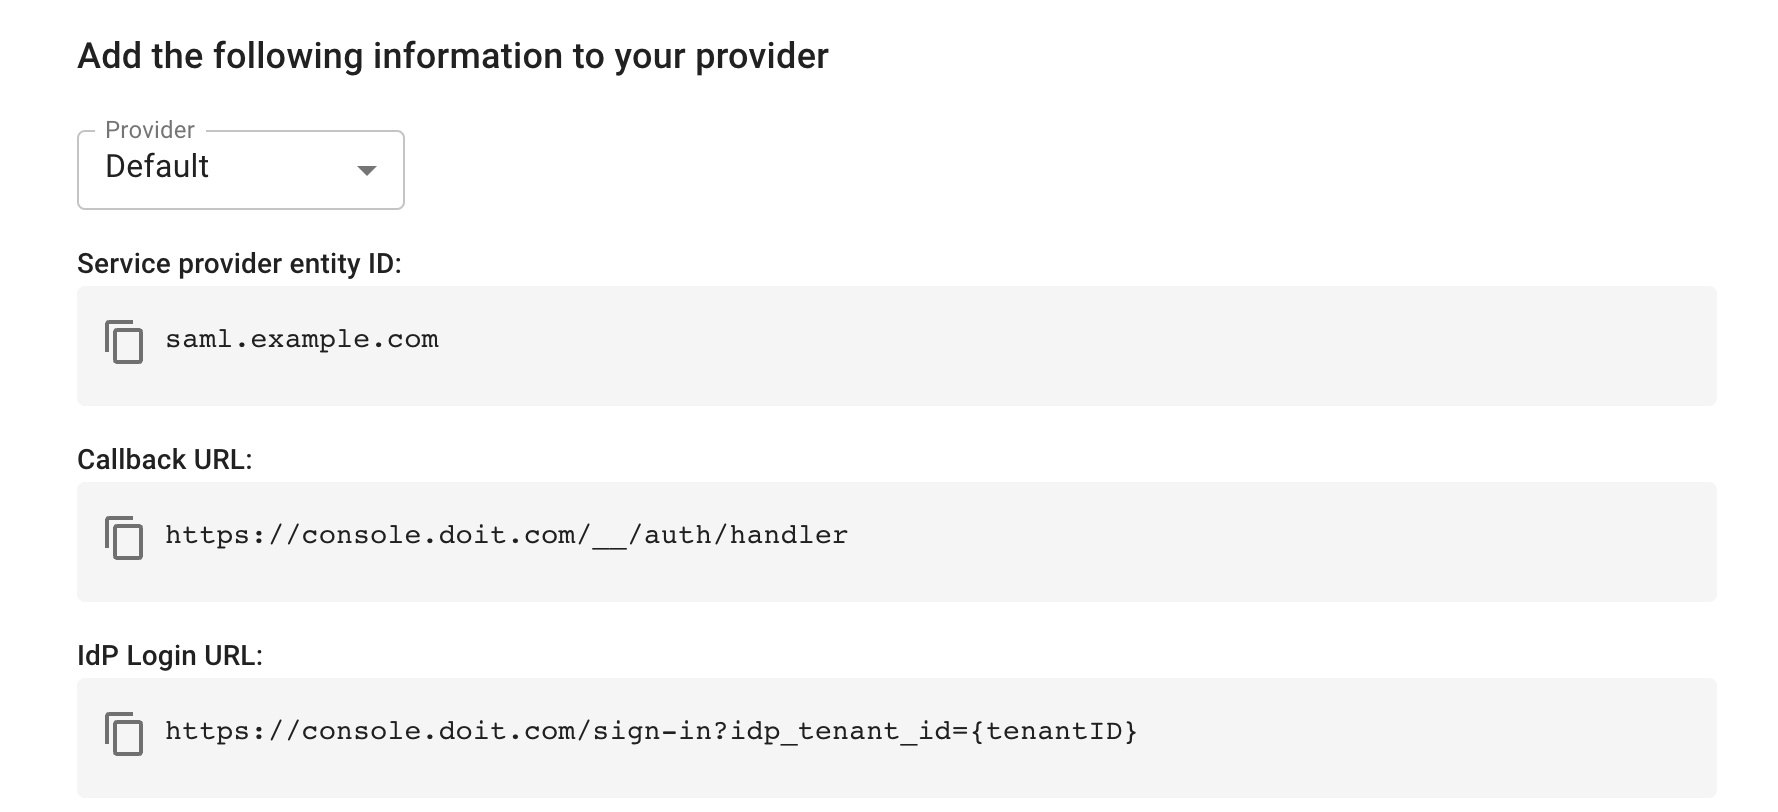
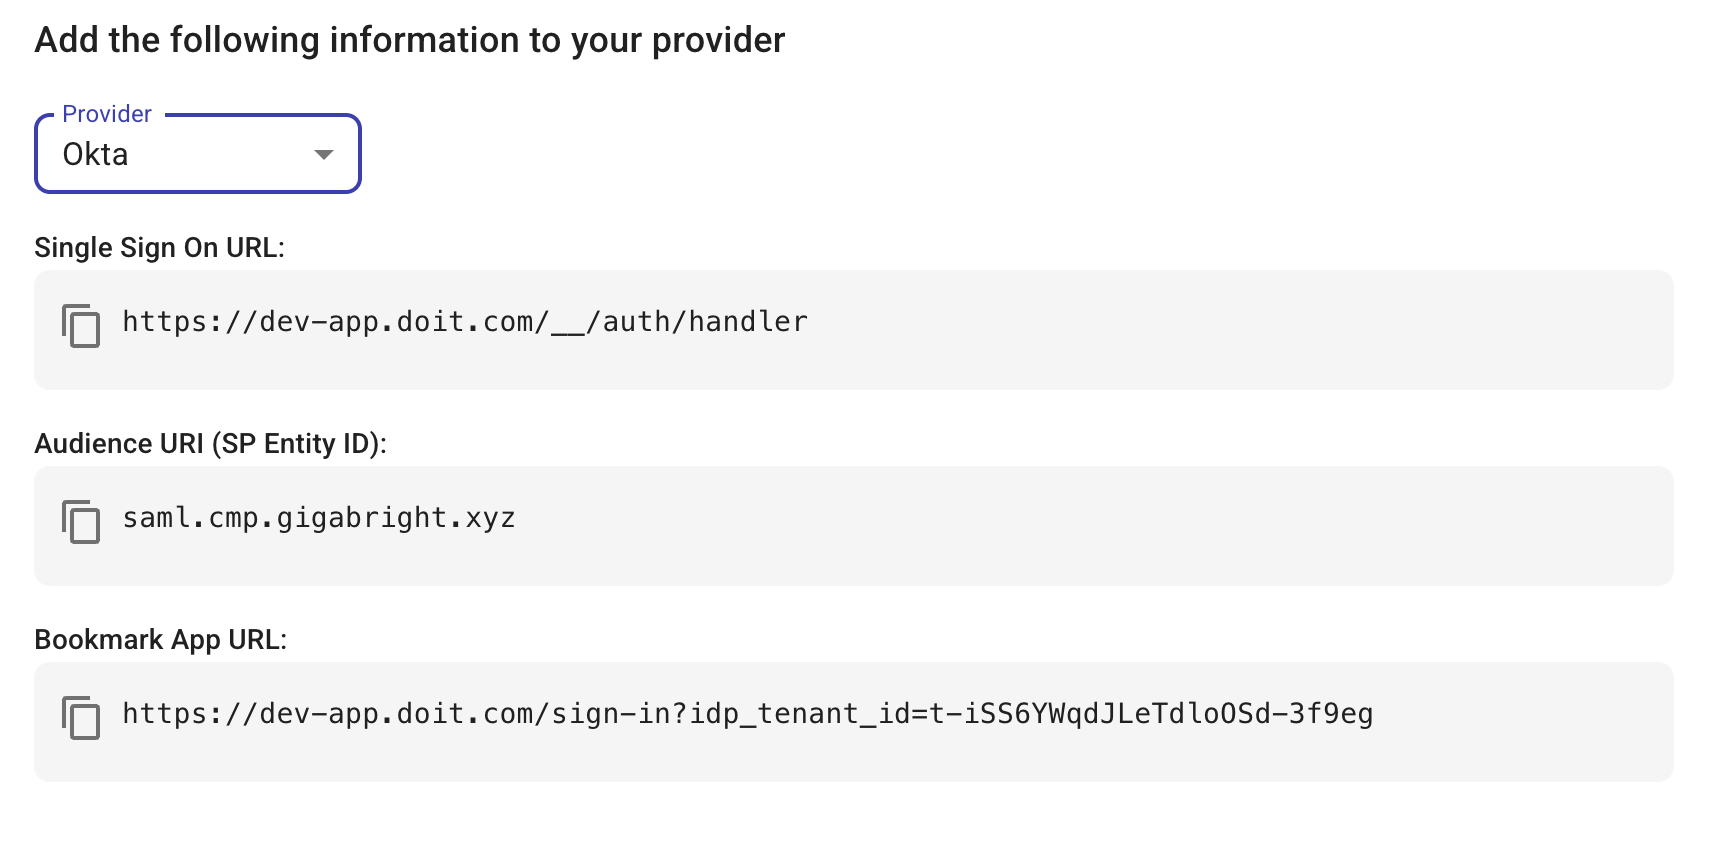
In Add the following information to your provider, select your IdP from the Provider list.
-
Depending on the IdP you choose, the information required by the IdP is displayed. Copy the information as you will need to add this to the custom application you create in your IdP. This is the information that tells your IdP where to send users and who it's talking to. The information required by Azure and Okta is shown below.
-
Azure:
- Service provider entity ID: The unique ID of the DoiT console.
- Callback URL: The address or endpoint of the DoiT console.
- IdP Login URL: This link allows users to bypass the standard login screen and authenticate directly through your organization's Azure portal.
-
Okta:
- Single Sign On URL: The address or endpoint of the DoiT console.
- Audience URI (SP Entity ID): The unique ID of the DoiT console.
- Bookmark App URL: This link allows users to bypass the standard login screen and authenticate directly through your organization's Okta application.
-
Create a custom application
Follow the instructions of your IdP to create a SAML or OIDC application.
You can find IdP-specific instructions on the following pages:
To integrate DoiT console application with other IdPs, please refer to the IdP's documentation. Below are some reference links (the list is not exhaustive):
Configure SSO in the DoiT console
Complete the SSO configuration in the DoiT console:
-
In the DoiT console, select the gear icon () from the top navigation bar, and then select Users and access.
-
Select Single sign-on from the left-hand menu.
-
Select Edit configuration in SAML or OIDC according to your authentication protocol.
-
Enter the configuration values you received from the IdP when creating your application.
-
SAML configuration:
- Entity ID: Your application's Entity ID (also known as Audience URI)
- SSO URL: Your application's SSO URL (also known as the Destination URL)
- Certificate: Your application's signing certificate
-
OIDC configuration:
- Client ID: Your application's Client ID
- Issuer URL: Your application's Issuer URL (also known as the metadata Discovery URL)
- Client secret: Your application's Client Secret
-
-
(Optional) In Group ID Mapping, assign your SSO Group IDs to specific DoiT roles and organizations in the DoiT console. In Group ID attribute key, enter the group unique identifier associated with your application.
-
Group ID: The group ID of a specific group that you want to map to a DoiT role and organization.
-
DoiT Role: The DoiT role to which you want to map this group.
-
Organization: The organization to which you want to map this group.
-
-
Save the configuration. This will automatically enable SSO. You'll be asked to confirm the action before it's executed.
You can also use the toggle switch to enable or disable SSO. If you have configured both SAML and OIDC, you can switch the active protocol by selecting the corresponding radio button.