General settings
To view your organization's general settings in the DoiT console, select the gear icon () from the top navigation bar, and then select General settings.
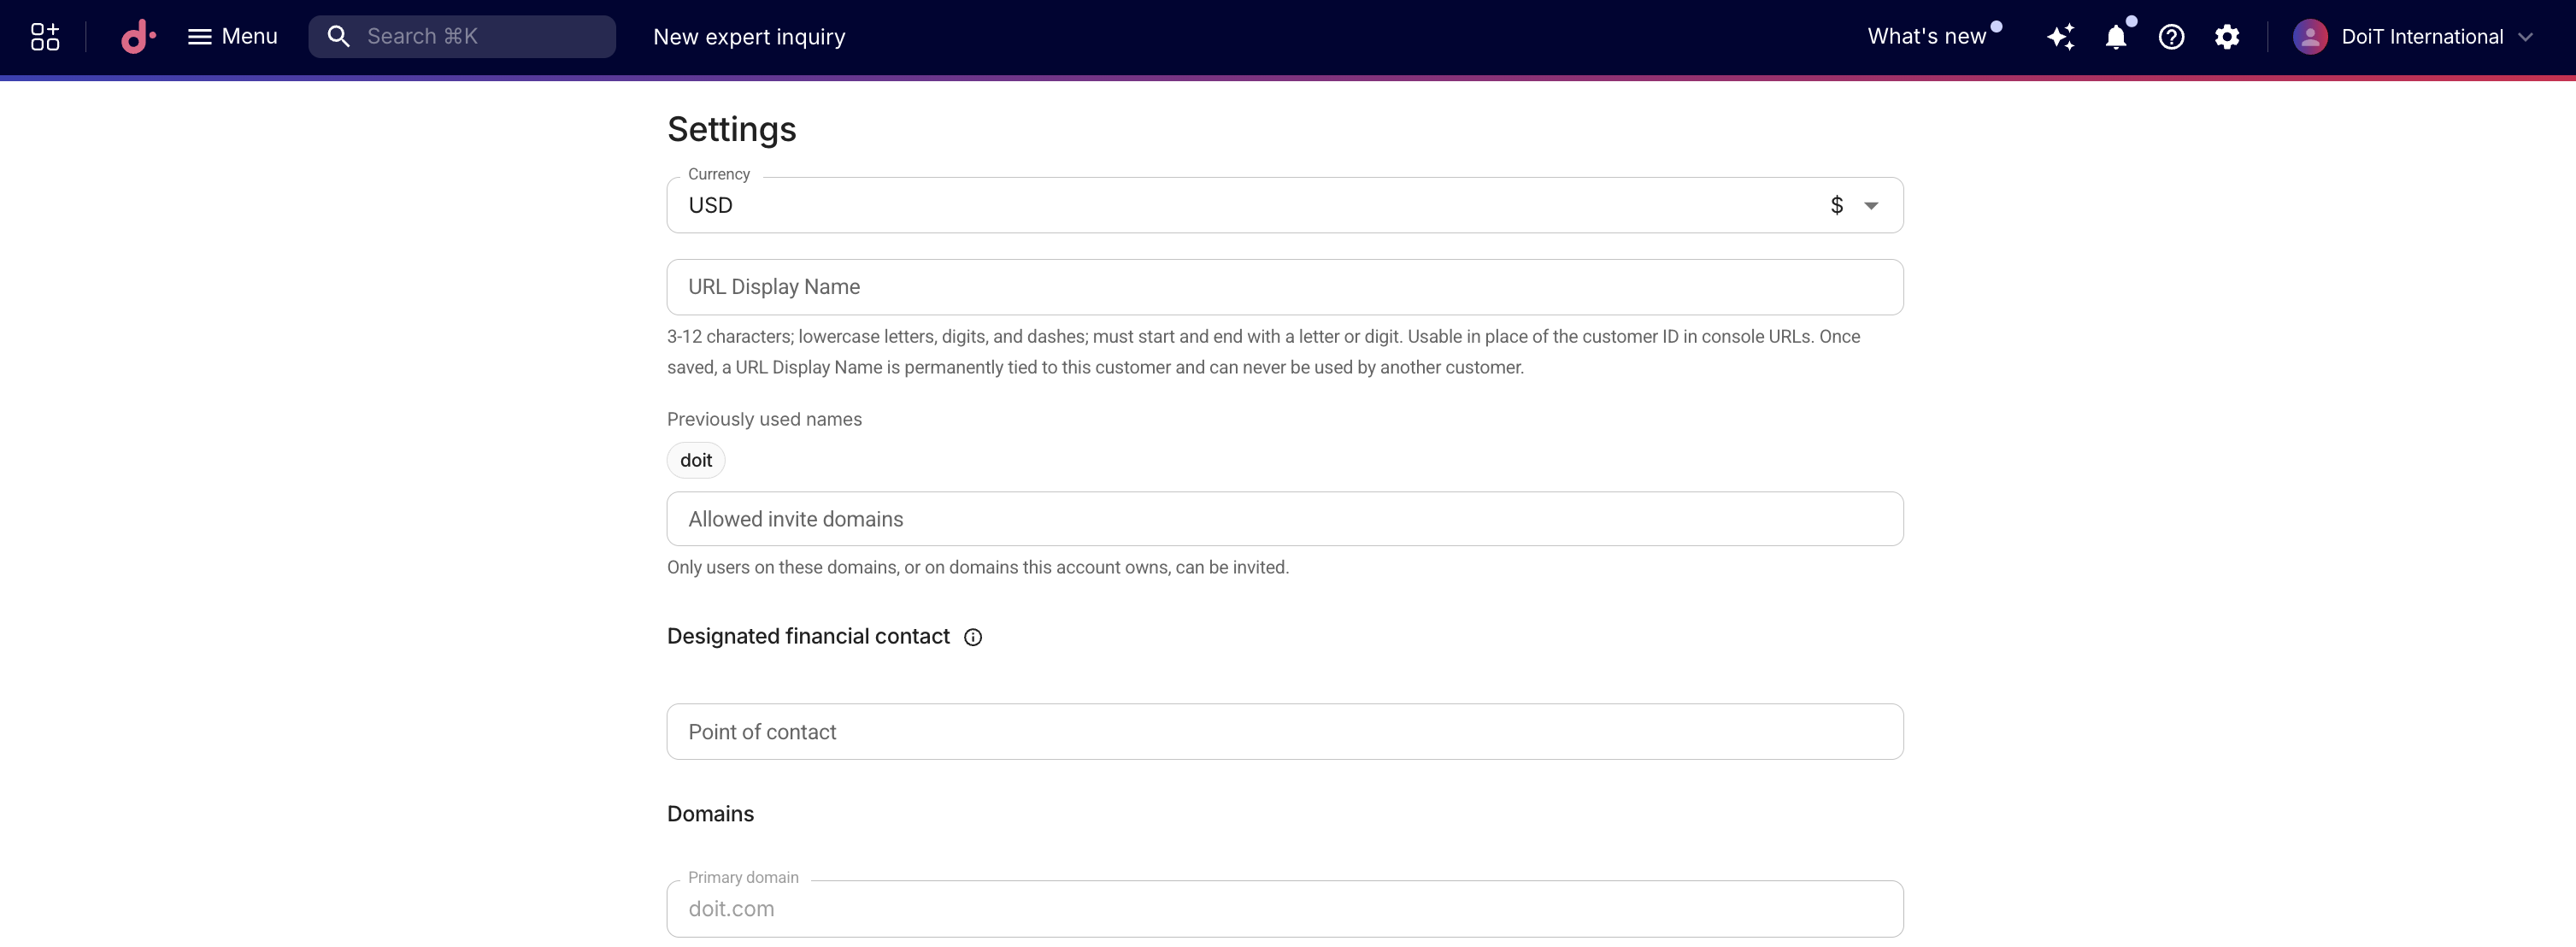
-
Currency: The default currency shown in Cloud Analytics reports and dashboard report widgets. This option is a display preference; it doesn't affect your billing currency.
-
Designated financial contact: The designated financial contact acts as the liaison between the contracting parties.
-
Domains: Your organization's primary domain and additional approved domains.
-
This option mainly controls which email domains you can send report subscriptions to or share reports with.
-
If you've enabled Auto provisioning, users from these domains will auto-join your organization on their first sign in.
-
Approved domains are always included in the effective list of allowed invite domains. To permit invitations to additional email domains, add them to the Allowed invite domains list.
-
-
Allowed invite domains: A list of email domains, in addition to your organization's approved domains, that are permitted when inviting users. Use this to invite, for example, partners or contractors on specific domains without opening invites to every free email inbox. When this list is empty, only your approved domains and other inherited domains are permitted. For details on how the effective domain list is calculated, see Allowed invite domains.
-
You need the Users Manager permission to edit this list. Users without this permission can view the configured domains but cannot make changes.
-
Type or paste a domain (for example,
acme.com) and press Enter to add it. Leading@signs are stripped and entries are lowercased automatically. Duplicate entries are ignored. -
When Allow free email invitees is enabled for your organization, this list is disabled because all domains are already permitted.
-
To add a new domain, you must verify domain ownership through a DNS TXT record.
-
-
URL display name: A human-readable alias for your organization that can be used in place of the customer ID in console URLs. The name must be 3–12 characters long and can contain only lowercase letters, digits, and hyphens. It must start and end with a letter or digit. Each name is globally unique. Users with the Manage Settings permission can add, change, remove, or reuse a URL display name. Once saved, a name is permanently reserved to your organization and cannot be used by another customer. Your organization can keep up to five previous names and reuse them later.
-
Multi-factor authentication: Require all eligible users in your organization to enroll in multi-factor authentication (MFA). This toggle is enabled by default. Changes to this setting are saved immediately. You don't need to select Save.
-
When you turn off MFA, users who have not enrolled are no longer required to set up MFA. Users who are already enrolled keep MFA and still need an authenticator code to sign in.
-
You need the Manage Settings permission to change this setting.
-
Verify domain ownership
Domain ownership verification helps keep Cloud Intelligence secure by ensuring only domains you control can be approved for sharing and access. When you verify a domain, you intentionally grant people with those email addresses access to data you choose to share, for example, Cloud Analytics report shares and subscriptions and, if Auto provisioning is enabled, the ability to join your organization on first sign-in. Verifying example.com allows addresses such as [email protected] to receive that shared access, while preventing another organization from claiming your domain without proof.
You can add a new domain by proving ownership through a DNS TXT record. Only apex (top-level registered) domains are accepted, for example, example.com, not app.example.com. You must have the Manage Settings permission to create, check, and cancel domain verification requests.
To verify a domain:
-
Sign in to the DoiT console, select the gear icon () from the top navigation bar, and then select General settings.
-
In the Verification requests section, select Add domain to open the verification dialog.
-
Enter the apex domain you want to add (for example,
example.com) and select Create verification request.Only the registered root domain is accepted. If you enter a subdomain such as
app.example.comorwww.example.com, the dialog asks you to useexample.cominstead. -
The console shows a unique TXT record. In the DNS settings for your domain, at your domain registrar or DNS provider, such as Cloudflare, GoDaddy, or Amazon Route 53, create a TXT record that matches these details:
-
Record type: TXT
-
Name:
_doit-domain-verification.<your-domain> -
Value: The unique verification string shown in the dialog
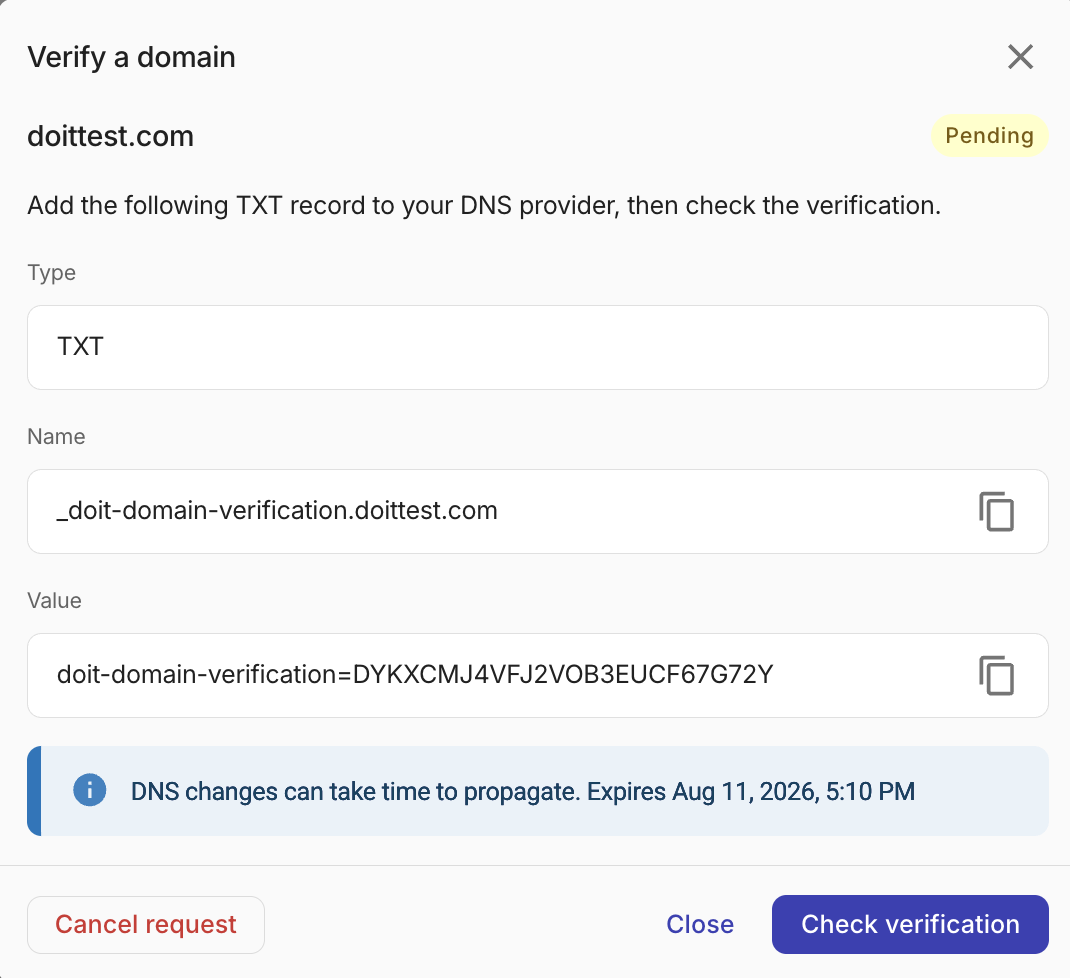
-
-
After the TXT record is saved with your DNS provider, return to the dialog and select Check verification. DoiT looks up the record to confirm it is present. DNS changes can take time to appear worldwide, so you may need to check again later.
-
If the TXT record is missing or does not match, the request stays Pending. Fix the DNS record, then select Check verification again.
-
If the TXT record is found and the domain can be assigned to your organization, the status changes to Verified and the domain is added to your organization's approved domains.
-
If the TXT record is found but the domain cannot be assigned, for example, because of an ownership conflict, the status changes to Rejected. Contact support if this is an error.
-
Verification requests expire after seven days. If a request expires before you complete verification, select Create new request to start again.
Manage verification requests
The Verification requests section shows all current and past requests along with their status: Pending, Verified, Expired, Rejected, or Canceled.
-
To continue checking a pending request, select Resume to reopen its verification dialog.
-
To cancel a pending request, open its dialog and select Cancel request.
-
Verified and rejected requests cannot be modified.