Get started
To get started with Kubernetes Intelligence, enable the Kubernetes core setting on your connected cloud accounts in the DoiT console, and then onboard Kubernetes clusters.
Follow the step-by-step instructions below or check out the ▶️ interactive demo for EKS for a visual walkthrough of the AWS onboarding flow.
Required licenses
Kubernetes Intelligence is included with any DoiT Cloud Intelligence plan. You do not need to be a PerfectScale customer to use it.
However, if you activate a PerfectScale account you get access to the one-click integration into the PerfectScale platform. PerfectScale offers features that transform optimization from manual guesswork to prescriptive recommendations and automated, data-driven workflows, where you can establish governance policies and continuously optimize your environment for the desired results. If you want to try out these features, you can activate a PerfectScale account and start a 30-day free trial without reinstalling the agent.
Enable Kubernetes core
Enabling Kubernetes core on your connected cloud accounts in the DoiT console grants DoiT permissions to discover Kubernetes clusters and use Kubernetes Intelligence features. This is a prerequisite setting in DoiT, not a standalone product capability.
- AWS account
- Google Cloud organization or project
You can enable Kubernetes core when linking a new account or editing a linked account.

See Link your AWS account for detailed instructions; see Kubernetes core for information about the required permissions.
You can enable Kubernetes core when connecting a Google Cloud organization or project, or when editing the connection.

See Connect Google Cloud resources for detailed instructions; see Kubernetes core for information about the required permissions.
Once permissions are granted:
-
DoiT performs a daily scan of the connected AWS accounts and Google Cloud organizations and projects (midnight UTC for AWS, 2 AM UTC for Google Cloud) to uncover Kubernetes clusters in your cloud environment.
-
DoiT synchronizes with PerfectScale for clusters that have onboarded the PerfectScale platform.
Self-managed Kubernetes clusters (for example, clusters running on raw EC2 instances) are not discovered by the DoiT platform daily scan. If you use self-managed clusters, add them manually in the DoiT console before you install the agent.
Onboard clusters
The Kubernetes Intelligence agent is the PerfectScale Exporter. It runs in your cluster, sends utilization metrics to PerfectScale and DoiT surfaces those metrics in Kubernetes Intelligence and related features in the DoiT console.
To onboard a Kubernetes cluster, install the agent or map an existing PerfectScale deployment.
-
In the DoiT console, select Data ingestion and integrations > Integrations from the top navigation mega menu.
-
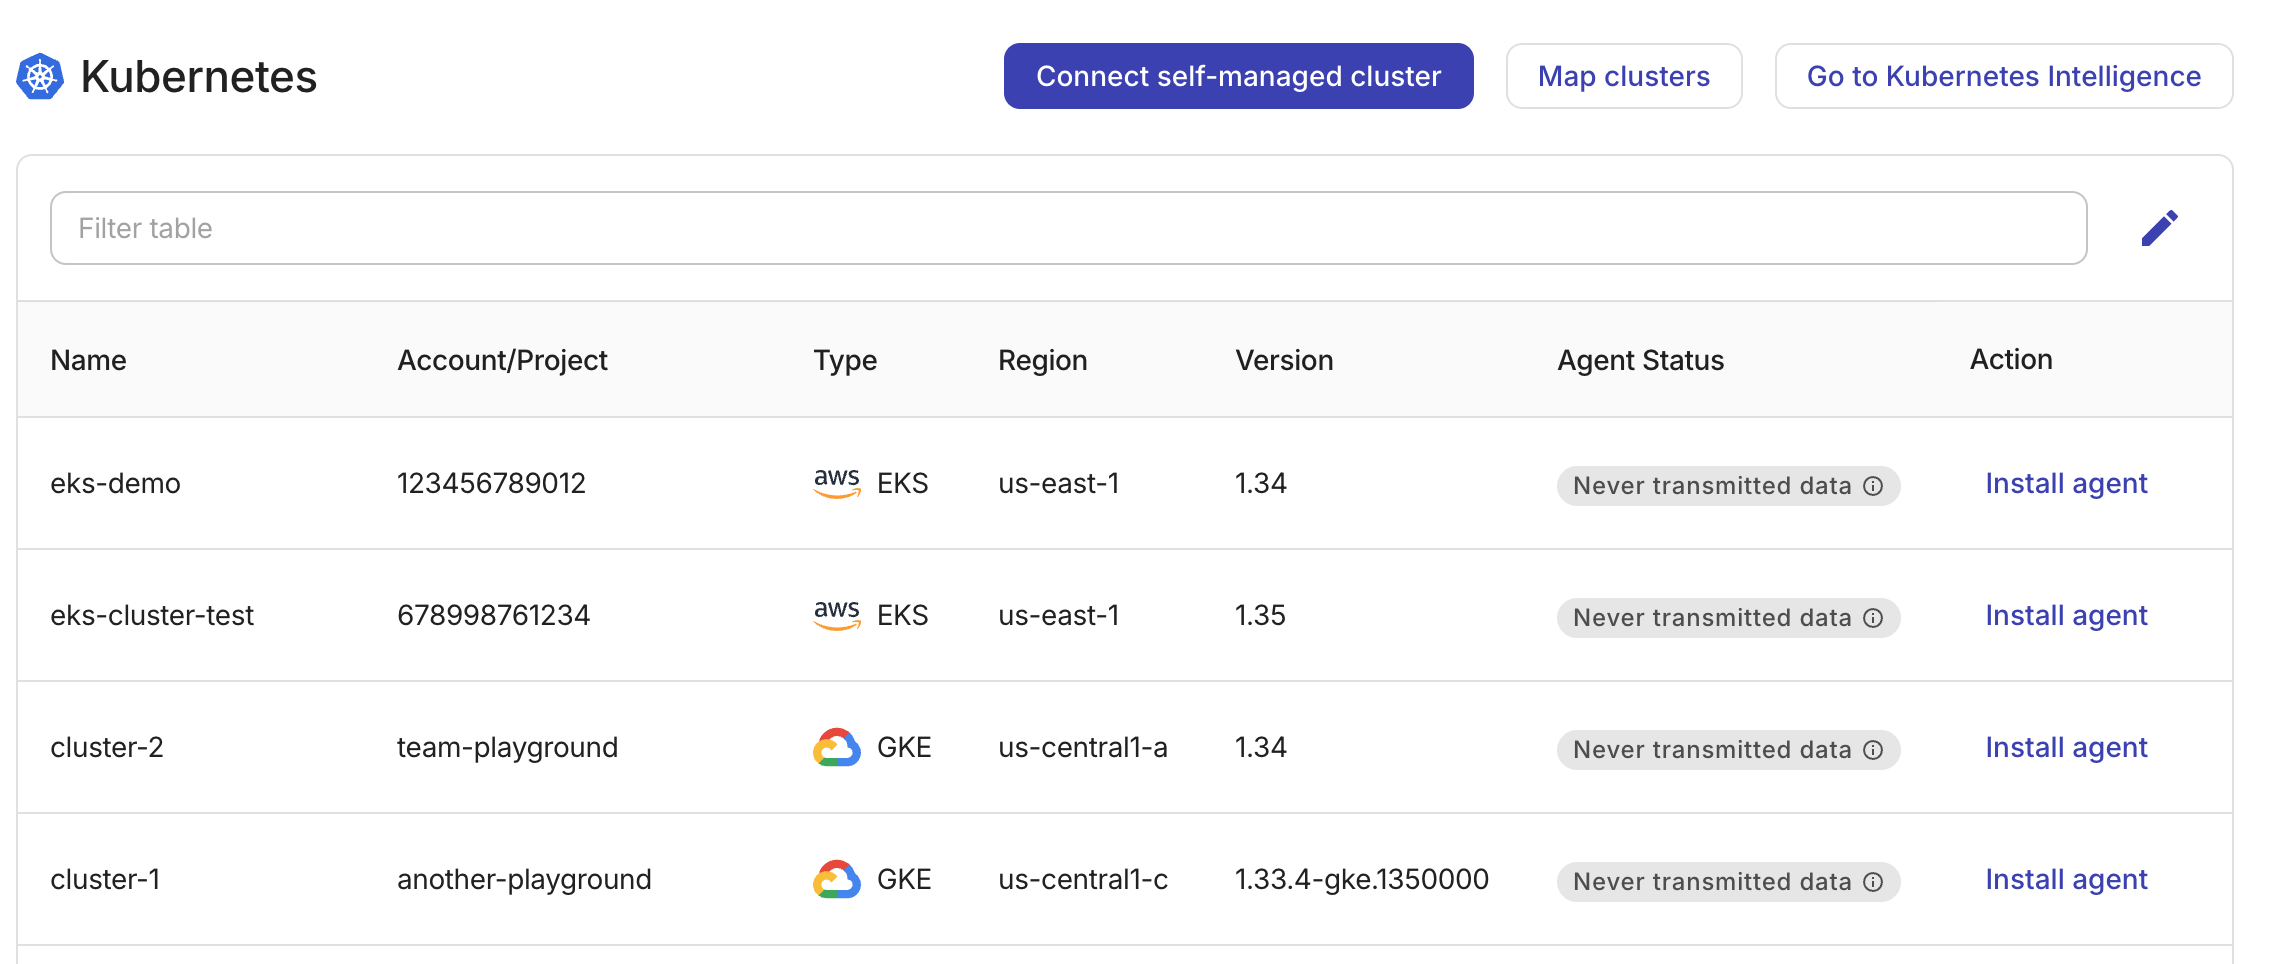
On the Kubernetes integration card, select Manage. Here you'll find all the clusters uncovered via the daily scan by the DoiT platform.
-
If you've onboarded clusters with PerfectScale, proceed to Option 1: Map clusters. Otherwise, go to Option 2: Install agent via Helm chart.
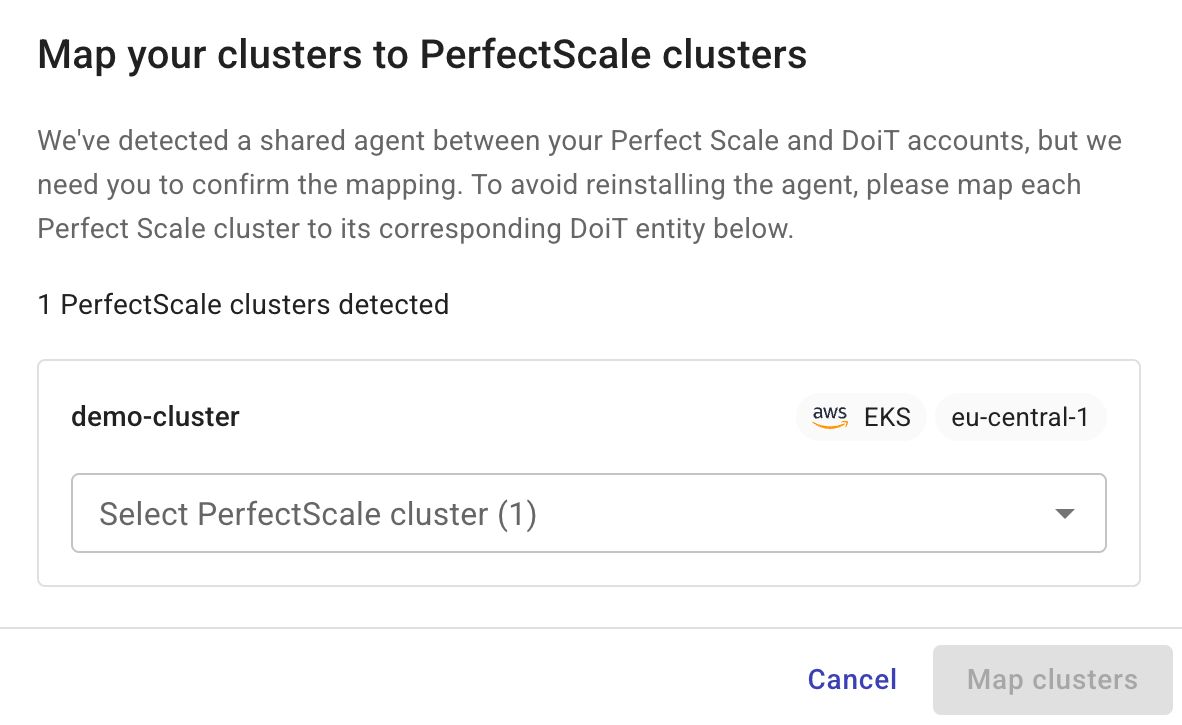
Option 1: Map clusters
This option lets you avoid reinstalling the agent on clusters that already onboarded PerfectScale.
Select Map clusters to specify mappings between PerfectScale clusters and their corresponding DoiT entities.
Option 2: Install agent via Helm chart
-
Install Helm on your local system if you haven't done so.
-
Make sure the
kubectlcommand-line tool is configured to communicate with your clusterThere are multiple ways to point
kubectlto the correct cluster. Here is one approach:- Amazon Elastic Kubernetes Service
- Google Kubernetes Engine
-
Associate your IAM user with the AmazonEKSClusterAdminPolicy access policy for the target cluster.
-
Create a
kubeconfigfile to connectkubectlto the EKS cluster, using the following command in the AWS CLI:aws eks update-kubeconfig --name <eks_cluster_name> --region <region>
-
Set your project property by running the
gcloud config set project <projectID>command. -
Update the
kubeconfigfile to pointkubectlat the GKE cluster, using the following command:gcloud container clusters get-credentials <gkeClusterName> --zone <zone> --project <projectID>
-
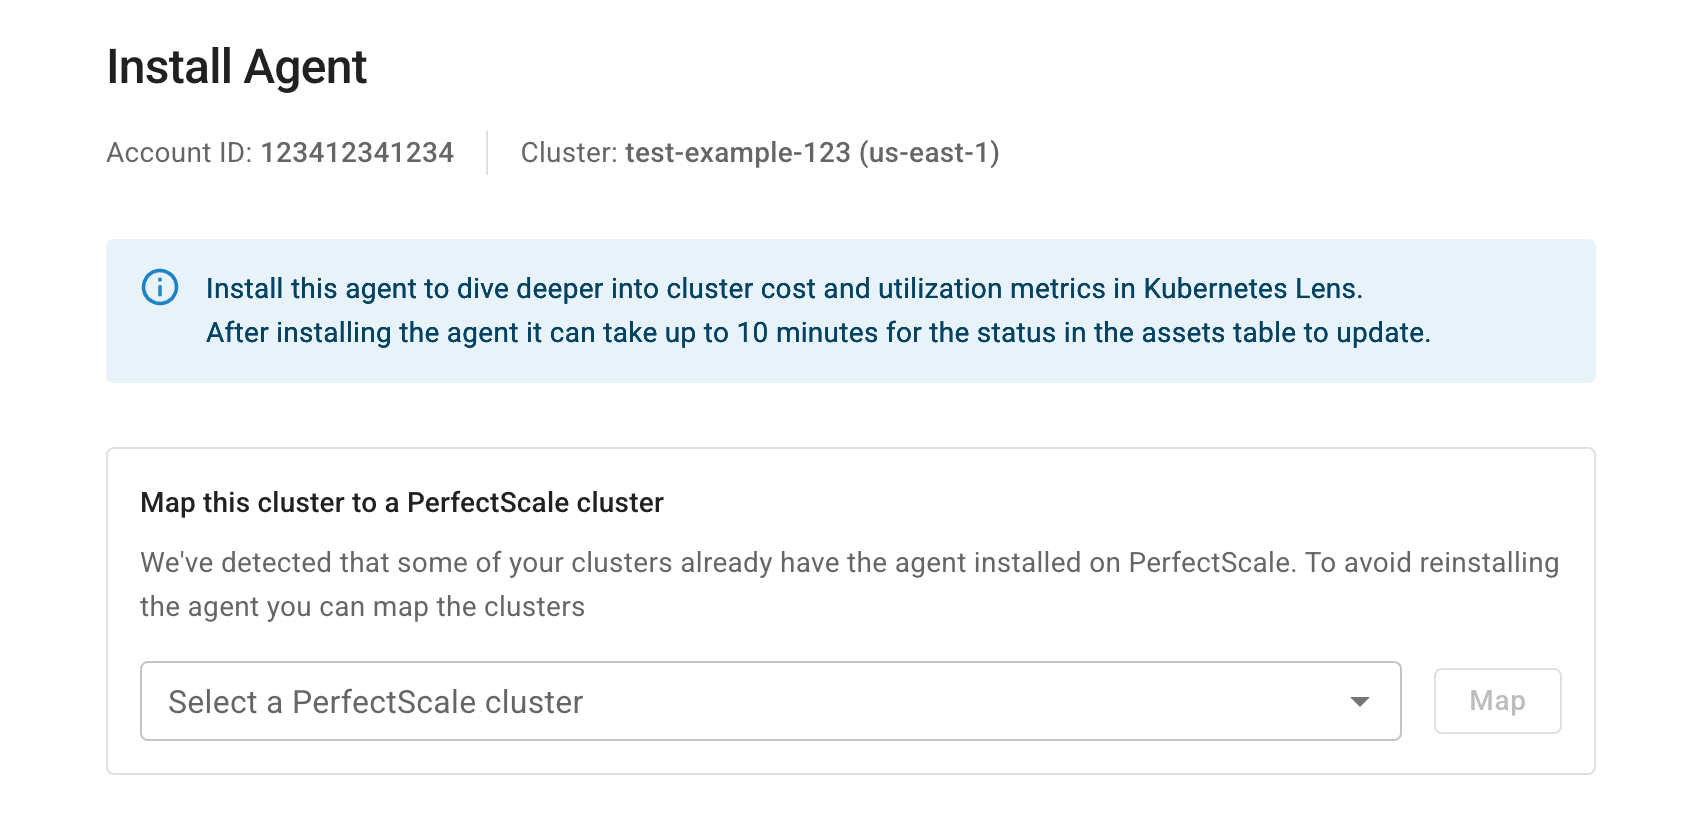
In the DoiT console, navigate to the Kubernetes assets list, locate the cluster of interest, and then select Install agent in the Action column.
If the DoiT platform identifies clusters that have installed the agent on PerfectScale but not mapped yet, you'll have the option to map the cluster and skip the following steps.
-
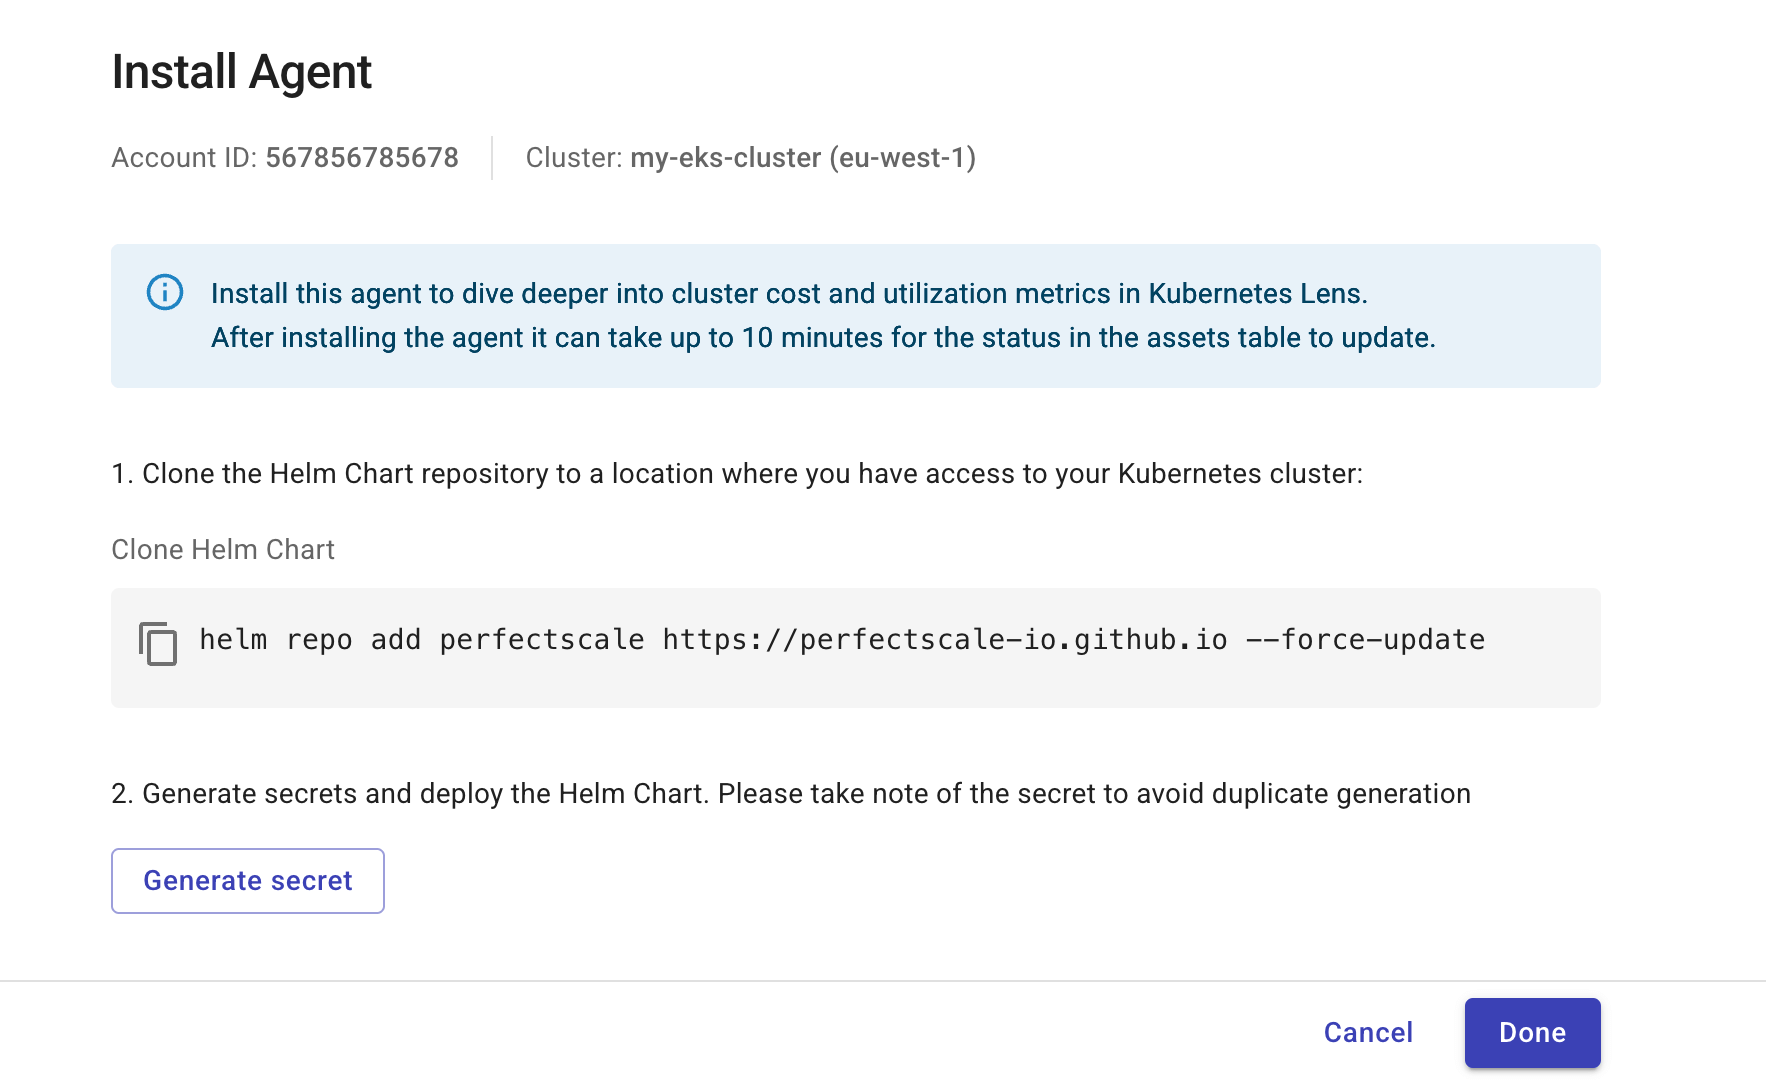
Copy and run the Helm command shown in the DoiT console to add the PerfectScale Helm chart repo.
The Helm chart deploys several components. Ensure your cluster nodes have enough allocatable CPU and memory for the agent pods to schedule. By default, the main exporter requests 200m CPU and 300Mi memory, and the chart also deploys supporting components such as kube-state-metrics that request additional resources.
If you use network policies, firewalls, or a proxy, allow outbound HTTPS access to the destinations required by the agent and Helm chart. See Outbound request ports used by the PerfectScale agent and PerfectScale agent for the full list of hostnames, ports, and proxy configuration.
-
Select Generate secret to generate the Helm deploy command with embedded credentials.
-
Note down the values of
secret.clientIdandsecret.clientSecretin the Helm command displayed in the DoiT console. Avoid generating the command more than once unless you need new credentials. -
Copy and run the Helm command to deploy the chart.
This command registers the cluster with a PerfectScale tenant. DoiT maps that tenant to your organization, so cluster data appears in the DoiT console.
-
-
Select Done when the Helm deployment is completed.
Verify agent status
If the installation or mapping is successful, the Agent status of the cluster on the assets list will show Waiting for data. This status may last three minutes. After that, the status changes to Transmitting Data.
If the Agent status stays at Waiting for data for more than a few minutes and never changes to Transmitting Data, verify that pods in the perfectscale namespace are running:
kubectl get pods -n perfectscale
Insufficient allocatable CPU or memory on cluster nodes is a common cause of scheduling failures. If pods remain in Pending status, check node capacity with kubectl describe nodes or add capacity to the cluster before retrying the installation.
To onboard multiple clusters, repeat the steps above for each one.
It can take up to three minutes for the status in the assets table to update, and up to 24 hours before the data is available in the Kubernetes Intelligence.
(Optional) Enable cost tracking for clusters hosted on AWS EC2
To track costs for self-managed clusters hosted on AWS EC2 instances, you need to manually tag your EC2 instances with a user-defined cost allocation tag, such as eks:cluster-name. Make sure these tags are activated as cost allocation tags in your AWS billing. See Activating user-defined cost allocation tags and AWS cost allocation tags in DoiT platform.
DoiT scans the billing data on a daily basis. If your clusters are newly created (within 72 hours) or have no spend, DoiT will not detect them.
(Optional) Enable cost tracking for clusters hosted on GKE
To take full advantage of GKE Intelligence, enable GKE cost allocation on all the clusters you want to measure. See GKE cost allocation for more information.
Offboard clusters
To offboard a cluster, run the following kubectl command. Deleting the namespace removes the agent from the cluster and stops all data transmission.
kubectl delete namespace perfectscale
You can also find the command in the instructions to Delete agent.
▶️ Interactive demo for EKS
Try out our interactive demo for a hands-on walkthrough of the AWS/EKS onboarding flow.
If the demo doesn't display properly, expand your browser window or open the demo in a new tab.
This demo covers AWS/EKS steps only; GKE users should follow the written instructions above.