Activities

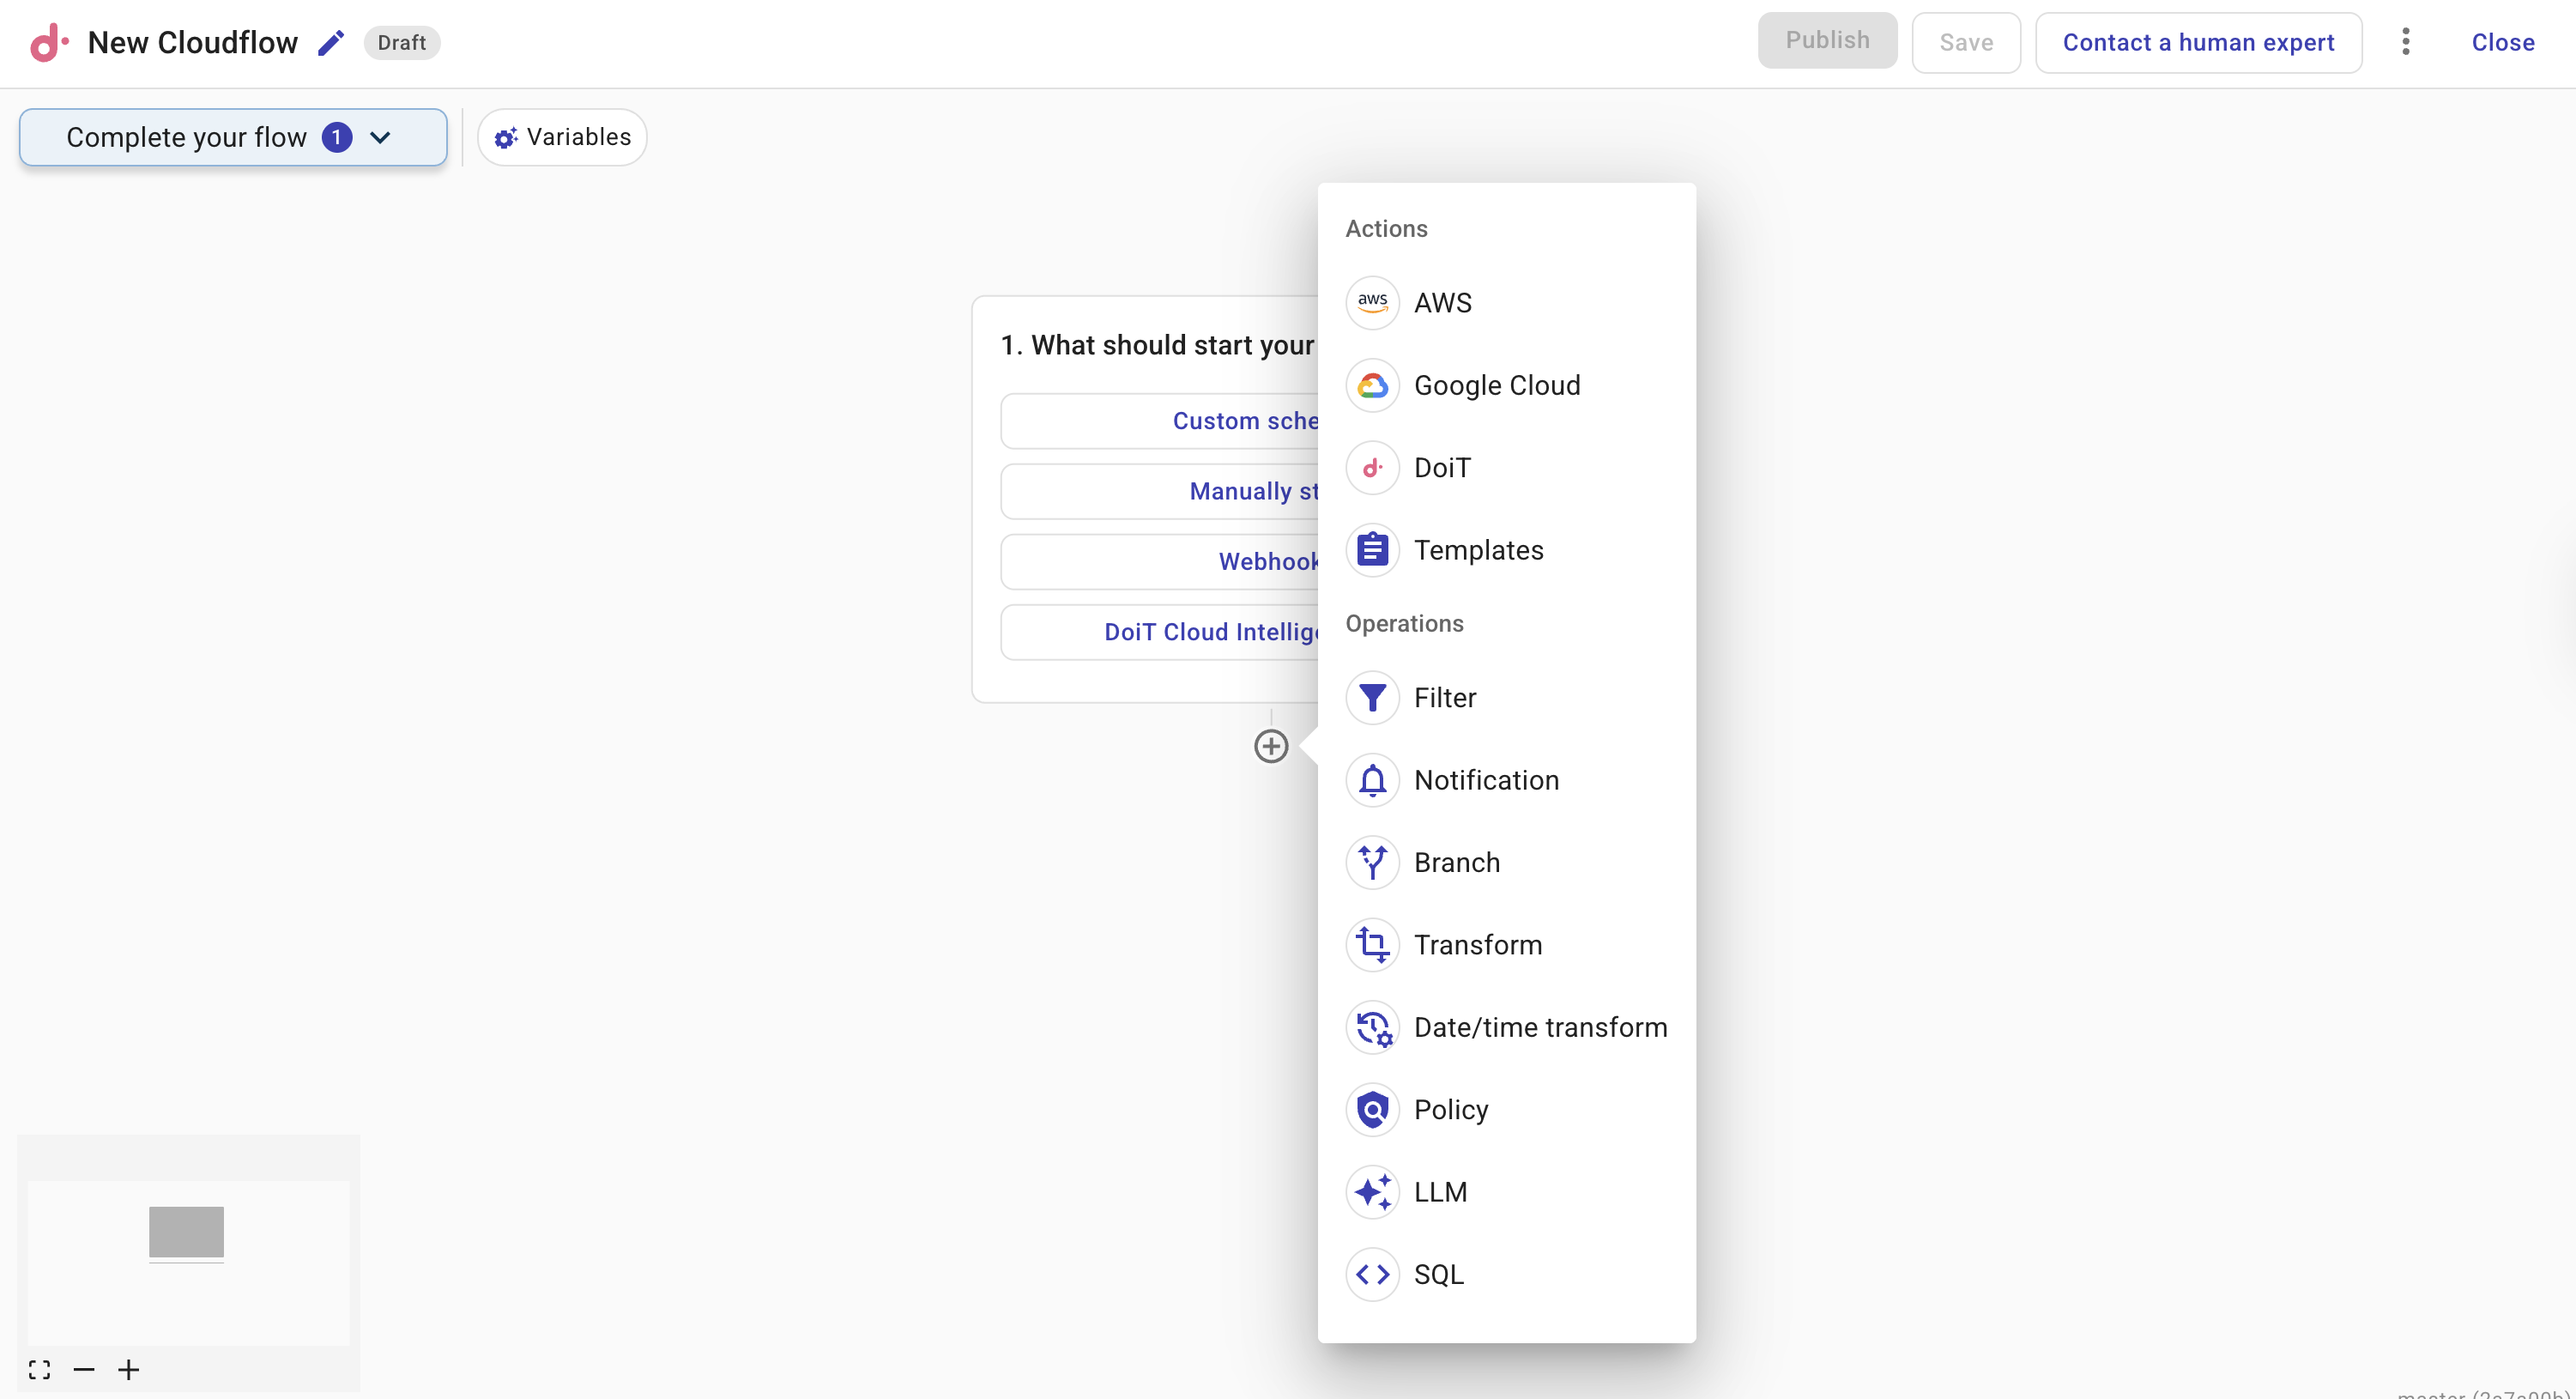
Once you added a trigger node, you can proceed to adding activity nodes using the plus icon (+).

Activity nodes

What should start your flow

A CloudFlow consists of multiple nodes. A trigger node can be followed by any number of activity nodes. There are two types of activity node.

  • Actions. An action node provides a unified interface for interaction with AWS, Google Cloud, and DoiT APIs. The resultant data of an action node serve as the data source for operations nodes. In addition, a blueprint node allows you to add a pre-built group of actions to the current CloudFlow. See Perform an action.

  • Operations. An operation node performs operations on the data provided by an action node. An operation node must be preceded by at least one action node with data output. Operation nodes can control the sequence of your CloudFlow, control the data that moves through a CloudFlow, and apply transformations to data. See Perform an operation.

Perform an action

An action node typically performs two types of action:

  • Fetching data: Retrieves data via AWS, Google Cloud, and DoiT APIs.

  • Asking for approval: Sends a notification message to request approval for an action.

Setting up an action consists of two parts: finding an action, and configuring the operation.

Find an action

Select a provider and then find an action by searching or browsing within that provider's services.

Search all a provider's services for an action

Configure an action

Selecting an action node will open a side panel with three tabs for configuration:

Action configuration

  • Parameters: This tab shows the service and action you've chosen and the option to change. You also configure approval settings on this tab. The parameters available vary with service and action.

  • Permissions: This tab helps you verify whether you have the required permissions to perform the action and provides instructions if you don't. See also APIs in CloudFlow.

  • Test: This tab allows you to perform a dry run to validate the configuration.

Require approval

If an action should be approved before its execution, select Require approval for this action on the Permissions tab.

Require approval for action

  • Notification provider: Specifies whether to notify the approver via Slack or email. For the former, you should have created a shared Slack channel with DoiT.

  • Message (optional): A message for the approver.

  • Reject approval after certain time (optional): Limits for how long the action will wait for an approval. Possible time units are Hours, Days, Weeks, and Months. For example, you can set that an approver must approve/reject the action within 24 hours. If the approver takes no action before the specified time period expires, the action is automatically rejected.

Add a blueprint

A blueprint is a prebuilt group of actions that can be added as a whole to a CloudFlow. If you select Add a blueprint, you'll be asked to choose one from a list. You can customize the blueprint in your CloudFlow once added.

Add a blueprint

Perform an operation

Operation nodes can perform the following operations:

  • Filter node: A filter node controls data that moves through a CloudFlow.

  • Condition node: A condition node uses an IF statement to implement branching logic in a CloudFlow.

  • Transform node: A transform node changes data from one node before it goes into the next.

A filter node, condition node, or transform node must be preceded by at least one action node with data output.

Filter results

A filter node controls the data that moves through a CloudFlow.

Filter configuration

  • Data source: The action node that provides input to the filter node. You can select only an action node positioned before the current node in the CloudFlow.

  • Referenced field: The field to output that contains the filtered data.

  • Filter criteria: The criteria applied by the filter node to determine which data should be included or excluded in the output.

In the example below, the filter node takes the output of the second node in the CloudFlow (2. DescribeInstances) as its data source, applies the filter criteria Reservations.Groups.GroupName == "my-group", and outputs a list of instance Ids (Referenced field: Reservations.Instances.InstanceId) that meet the criteria.

Filter configuration

IF statement

An IF statement is used in a condition node to implement branching logic in a CloudFlow.

IF statement configuration

  • Data source: The action node that provides input to the condition node. You can select only an action node positioned before the current node in the CloudFlow.

  • Field: The field that contains the information of interest.

  • Condition check: A single condition check or a composite check with multiple conditions.

The example below shows a condition node that checks whether an Amazon EC2 instance has stopped.

IF statement example

Transform data

A transform node is used to change data from one node before it goes into the next node.

Transformer configuration

  • Data source: The action node that provides input to the transform node. You can select only an action node positioned before the current node in the CloudFlow.

  • Referenced field: Specifies the field from the data source to be transformed. You can select only one referenced field.

  • Transform action: Defines the action to take for the transformation and save the output to a new field. Below are the supported transformation operations. Note that different transform actions are configured differently.

    • Concatenation: Combines multiple values or fields into a new field.
    • Join: Joins a selected field to the referenced field to form a new field.
    • First item: Retrieves the first item from an array.
    • Last item: Retrieves the last item from an array.
    • Extract: Retrieves a specific part of a field's value using a regular expression written in syntax accepted by RE2. You can further select Regex flags such as case sensitivity, multi-line matching, and whether to return after the first match.
    • Upper case: Converts all characters in a text field to uppercase.
    • Lower case: Converts all characters in a text field to lowercase.

Date/time

A date/time node is used to change timestamp data from one node before it goes into the next node. Date/time transformation is useful when automating time-sensitive processes, analyzing time-based data, and ensuring consistency in date/time representations in your cloud environment. For example, if you want to schedule a backup to run 7 days after a previous one, filter log entries within a specific time window by subtracting the start time from the end time, or convert date/time formats to match the requirements of different APIs.

Note that:

  • The date/time node only accepts timestamp data type fields as input from earlier nodes in a CloudFlow.

  • The date/time node supports input from both a preceding trigger node or other activity nodes in a CloudFlow.

  • Date/time nodes can be chained together.

Date/time transformer configuration

  • Data source: You can select either a manual or custom trigger node or any preceding activity node with a timestamp data type field.

  • Referenced field: Specifies the field from the timestamp field to be transformed. The field must be a timestamp data type field.

  • Transform action: Defines the action to take for the transformation and saves the output to a new field. Below are the supported transformation operations. Note that different transform actions are configured differently.

    • Add: Adds time to a referenced timestamp field.
    • Subtract: Subtracts time from a referenced timestamp field.
    • Format: Changes a referenced timestamp field to a new format. For example, you might change a date from YYYY-MM-DD to MM/DD/YYYY.