Ramp plans
Overview
Spend-based commitment discounts are popular rate optimizations offered by cloud service providers. To take full advantage of commitment discounts, you need to monitor your spend constantly and make necessary adjustments in time.
If your AWS or GCP contract contains spend-based commitments, Ramp plans can help you meet your goal.
Ramp plans visualize your progress against the committed goal, highlight potential capacity planning, and track your progress so you can act in advance by using allocations.
Ramp plans calculation
To understand the numbers displayed in a ramp plan, you must first understand how ramp plans are calculated. DoiT queries the billing data for accounts linked to a selected commitment contract by matching all the account's assets that reference the contract. Ramp plans may display different information from other sources, such as invoices and reports, because invoices and reports reflect your actual spending whereas ramp plans only show the portion of spending eligible for the commitment.
Note that:
-
Marketplace spend per period is limited to a percentage of the total period commitment value.
-
For Amazon Web Services: 25%
-
For Google Cloud Platform:
- For contracts signed before February 2024: 50%
- For contracts signed after February 2024: 25%
-
-
Credits are aggregated and included for each period.
-
The DoiT Cloud Cost Anomaly Detection service costs in 2023 are calculated based on usage and added to the total. While these costs appear as $0 in reports, they are included at a rate of one cent per usage unit in a ramp plan.
Required permissions
-
Create/edit/delete: Contracts Viewer
-
View: Ramp Plans viewer
Access ramp plans
To access Ramp Plans, log in to the DoiT console, select Billing from the top navigation bar, and then select Ramp plans.
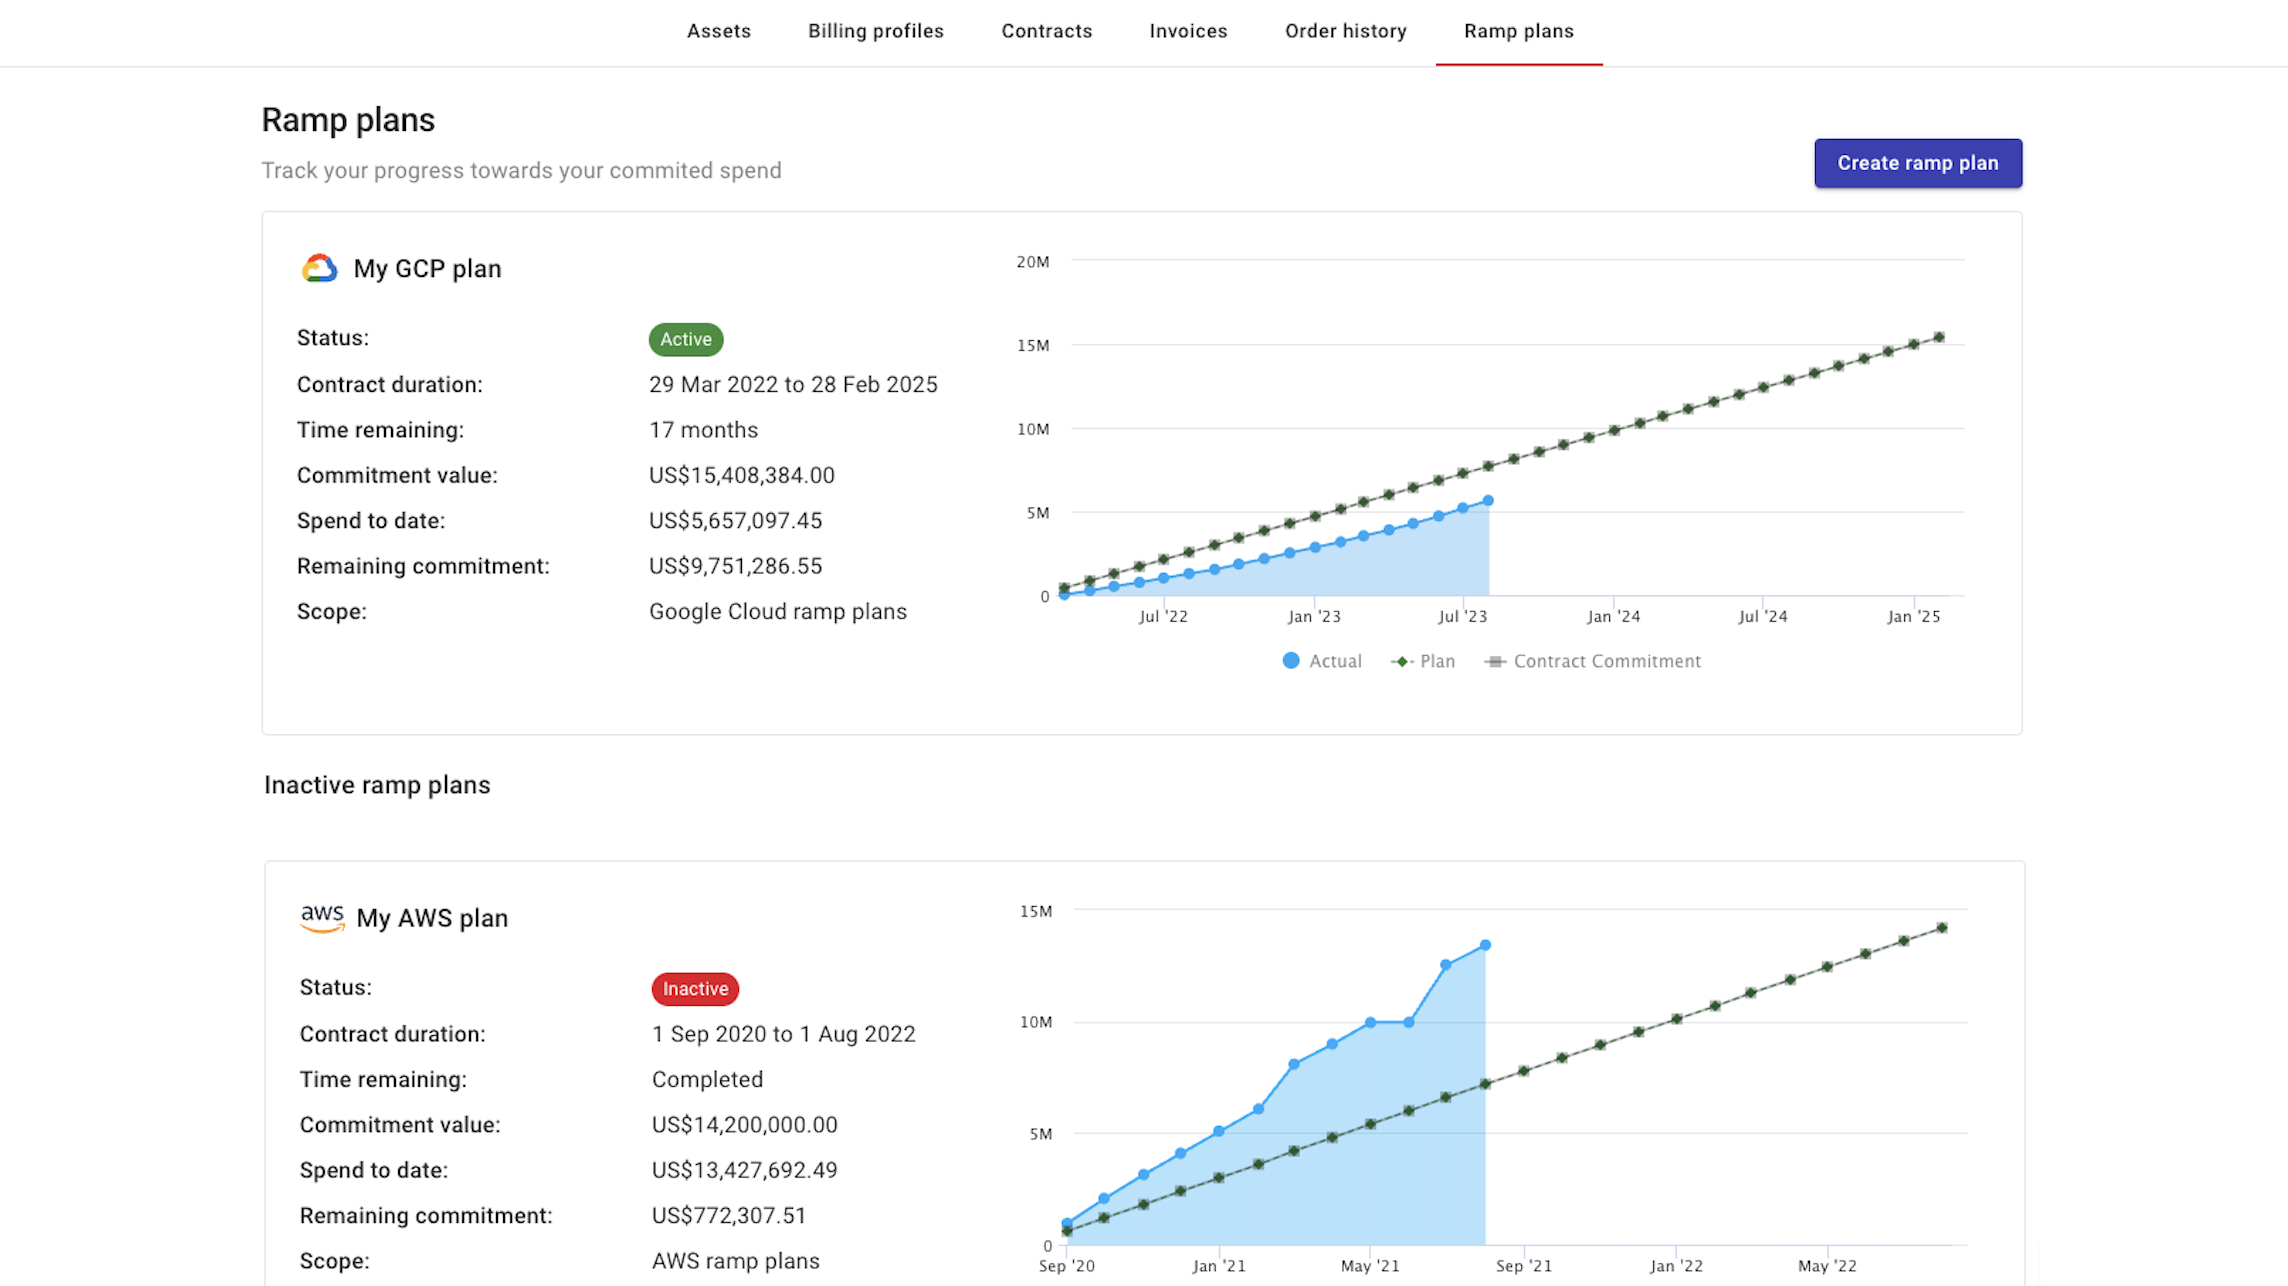
The Ramp plans screen lists both the active and inactive plans.
For each plan, you see some information such as the contract duration, and a preview graphic of its progress. In the preview, you can compare your contract commitment to your actual spend, and see the month you'll reach your contract commitment, if applicable.
By hovering over the graph, you can see your monthly amount of commitment spend, and actual spend.
Create a ramp plan
You can add ramp plans for contracts that have already started and for those that start at a future date.
To create a new ramp plan:
-
Log in to the DoiT console, select Billing from the top navigation bar, and then select Ramp plans.
-
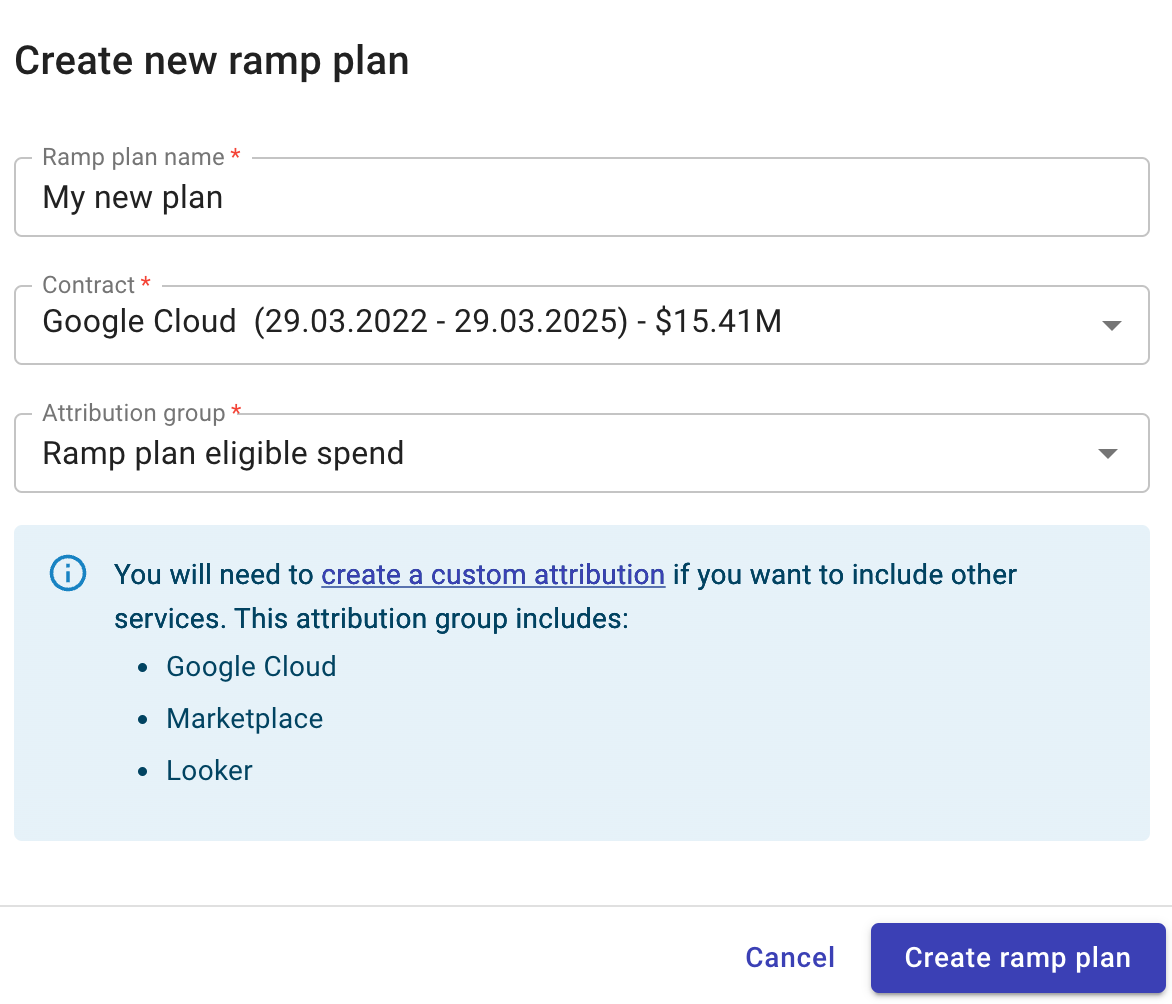
Select Create ramp plan in the upper-right corner on the Ramp plans screen, and:
-
Enter a unique name for the plan.
-
From the Contract drop-down list, choose the contract with a commitment that you want to track.
NoteYou won't be able to change the contract once the plan is created.
-
From the Attribution group drop-down list, select the attribution group you want to use for the plan. Once you're done, select Create ramp plan.
NoteBy default, services are filtered using the Ramp plan eligible spend group allocation, which is defined by the Eligible service consumption allocation rule. If the cloud services consumption included in Eligible service consumption doesn't match your needs, create a new group allocation. Then, create a ramp plan based on it.
-
View a ramp plan
To view a ramp plan, sign in to the DoiT console, select Monitor from the top navigation bar, select Ramp plans, and then select the ramp plan you want to check. Ramp plans are updated once per day at 18:30 UTC.
You'll find the following information on the top of the screen:
-
Contract details: Your contract information.
-
Commitment details: A breakdown of your commitment and spend.
-
Forecast: An estimation on your average monthly spend required until the end of the contract.
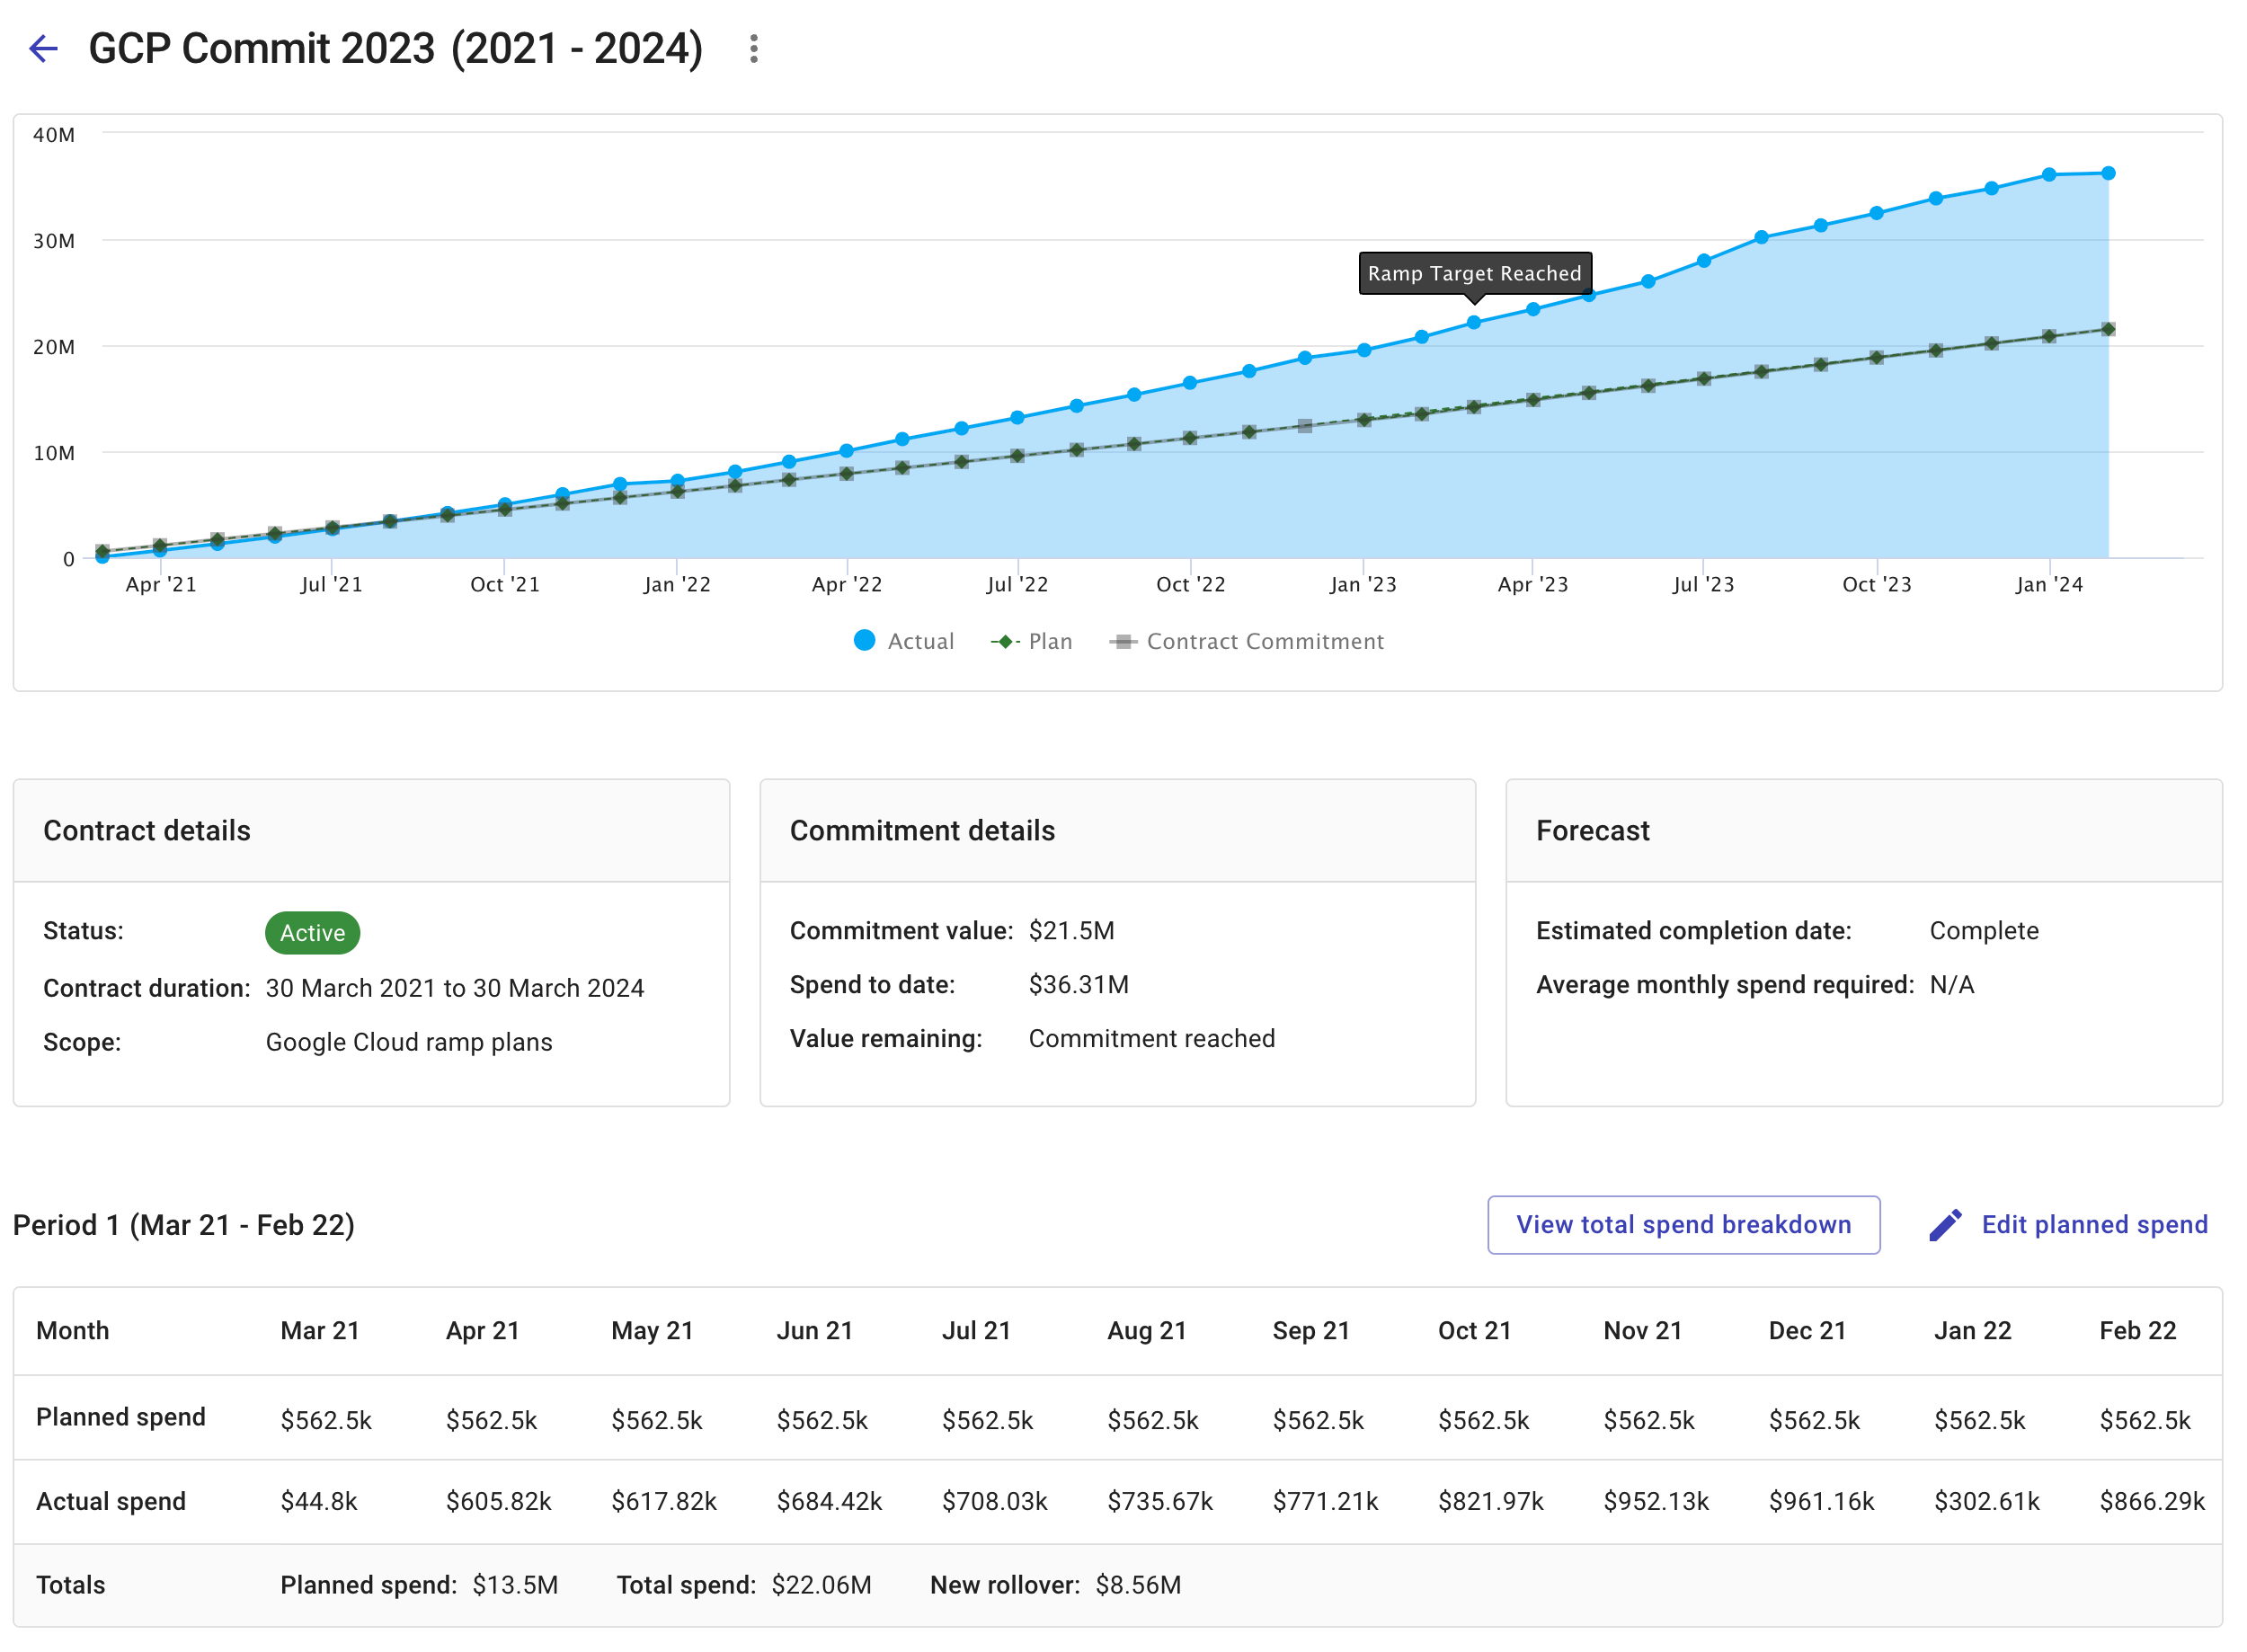
- The total amount of the commitment will be evenly spread out between the months throughout the contract period.
Ramp plans can start or end mid-month. For example, a period from January 15, 2023 to January 15, 2024 should include 13 columns, the first covering the second half of January 2023 and the last covering the first half of January 2024. If a ramp plan is missing the last column for each period, we recommend creating a new ramp plan and deleting the previous version.
Edit a ramp plan
When viewing an existing ramp plan, you can edit the monthly planned spend manually or by uploading a CSV file.
To edit the planned spend manually:
-
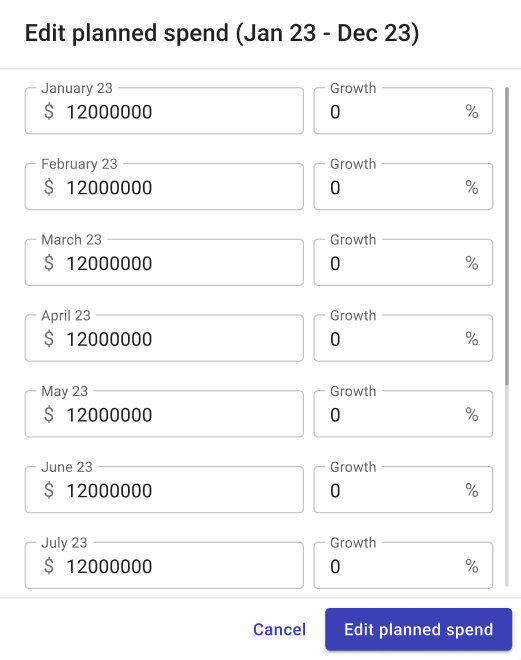
For a specific Period, select Edit planned spend.
-
In the Edit planned spend dialog, modify the spend for the months you want to edit, and select Edit planned spend.
To edit the planned spend by uploading a CSV file:
- When viewing an existing ramp plan, next to the plan name, select the three dots menu.
- Select Upload planned spend CSV and select the CSV file from your machine.
- Select Open.
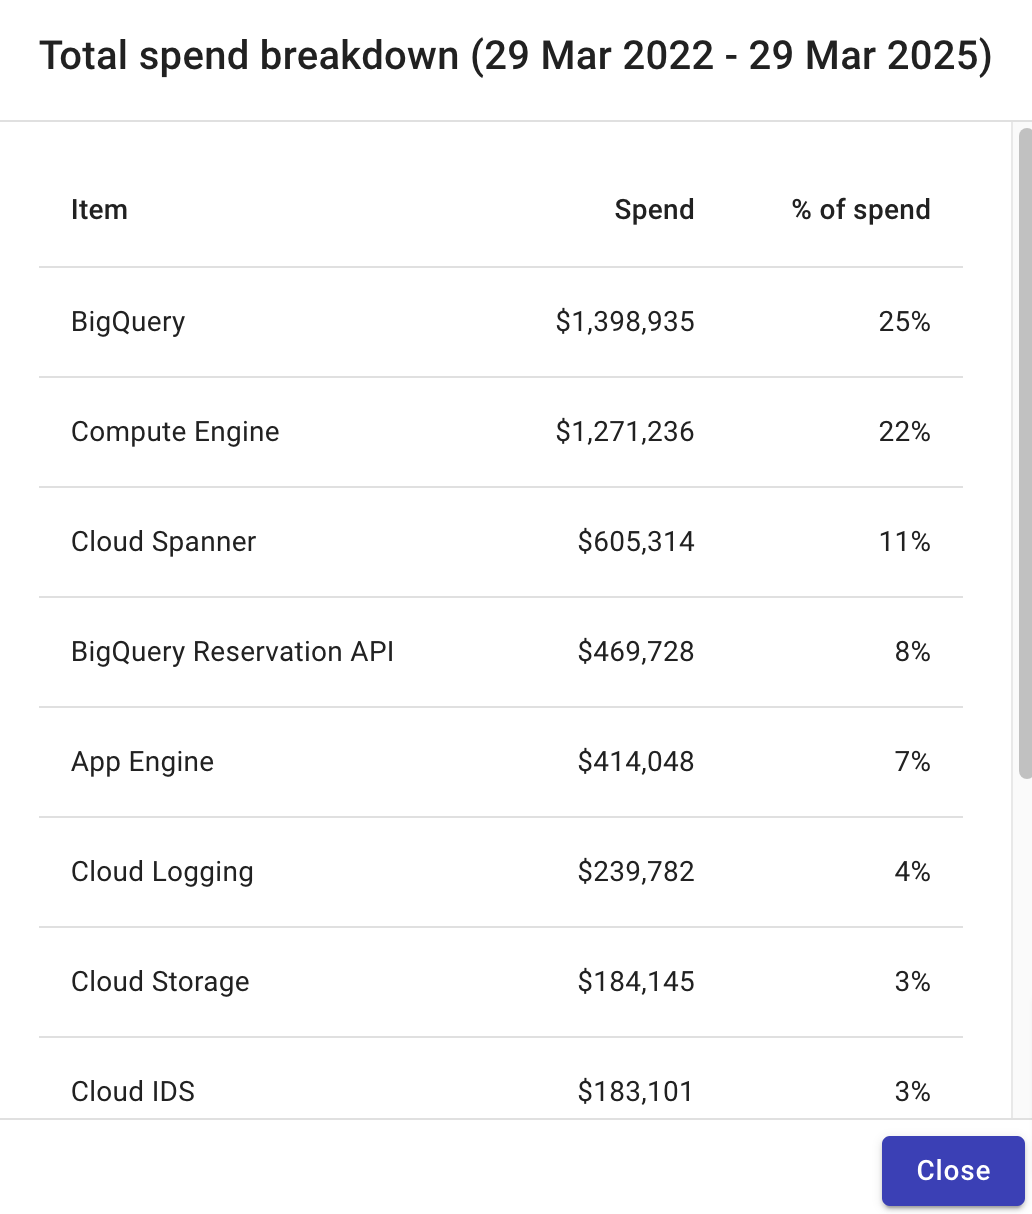
View the total spend breakdown
For each period in your ramp plan, you can see the top 10 services your spend goes to and your promotional credits. To do so, when viewing an existing ramp plan, select View total spend breakdown.
Ramp plan CSV file format
To ensure the planned data is processed correctly, we recommend you to download an existing ramp plan as a template, modify it, and then upload the corrected version.
If you choose to upload your own planned data, use the following conventions:
-
The format of the file must be CSV.
-
For each period, the CSV file must contain a row starting with
Period(case insensitive), followed by the valuePlan(case sensitive). -
The value
Planmust be followed by the planned data for all the period months, while each value represents a monthly data, with a placeholder data for the period total in the row end. The DoiT Platform will calculate the actual period total when creating the ramp plan. -
The data in the Plan row will be processed sequentially until it hits the value
Actual(case sensitive). Each Plan row must have its ownActual, which can be in the Plan row itself or on a separate row.
Download a ramp plan
To download a ramp plan:
-
When viewing an existing ramp plan, next to the plan name, select the three dots menu.
-
Select Download as CSV, and the plan will be downloaded automatically to your machine.
Delete a ramp plan
To delete a ramp plan:
-
When viewing an existing ramp plan, next to the plan name, select the three dots menu.
-
Select Delete ramp plan.