Insights
Below is a tutorial that walks you through the process of creating a flow from an insight.
Goal and objectives
-
Goal: To create a workflow from an insight using the Migrate from gp2 to gp3 template.
-
Objectives: In this tutorial, you'll learn how to:
-
Check the insight data to use in the flow.
-
Interact with AWS services to check and modify EBS volumes.
-
Use filters in the flow.
-
Test an action by a dry run.
-
Start building
To start building it:
-
Sign in to the DoiT console, select Workload optimization from the top navigation mega menu, and then select Insights.
-
Select the Migrate from gp2 to gp3 Insight card on the main Insights page to open the insight detail page.
Noteflows are currently available for a subset of insights, with support for additional insights planned for future releases.
-
In Automate this insight, select Create a flow.
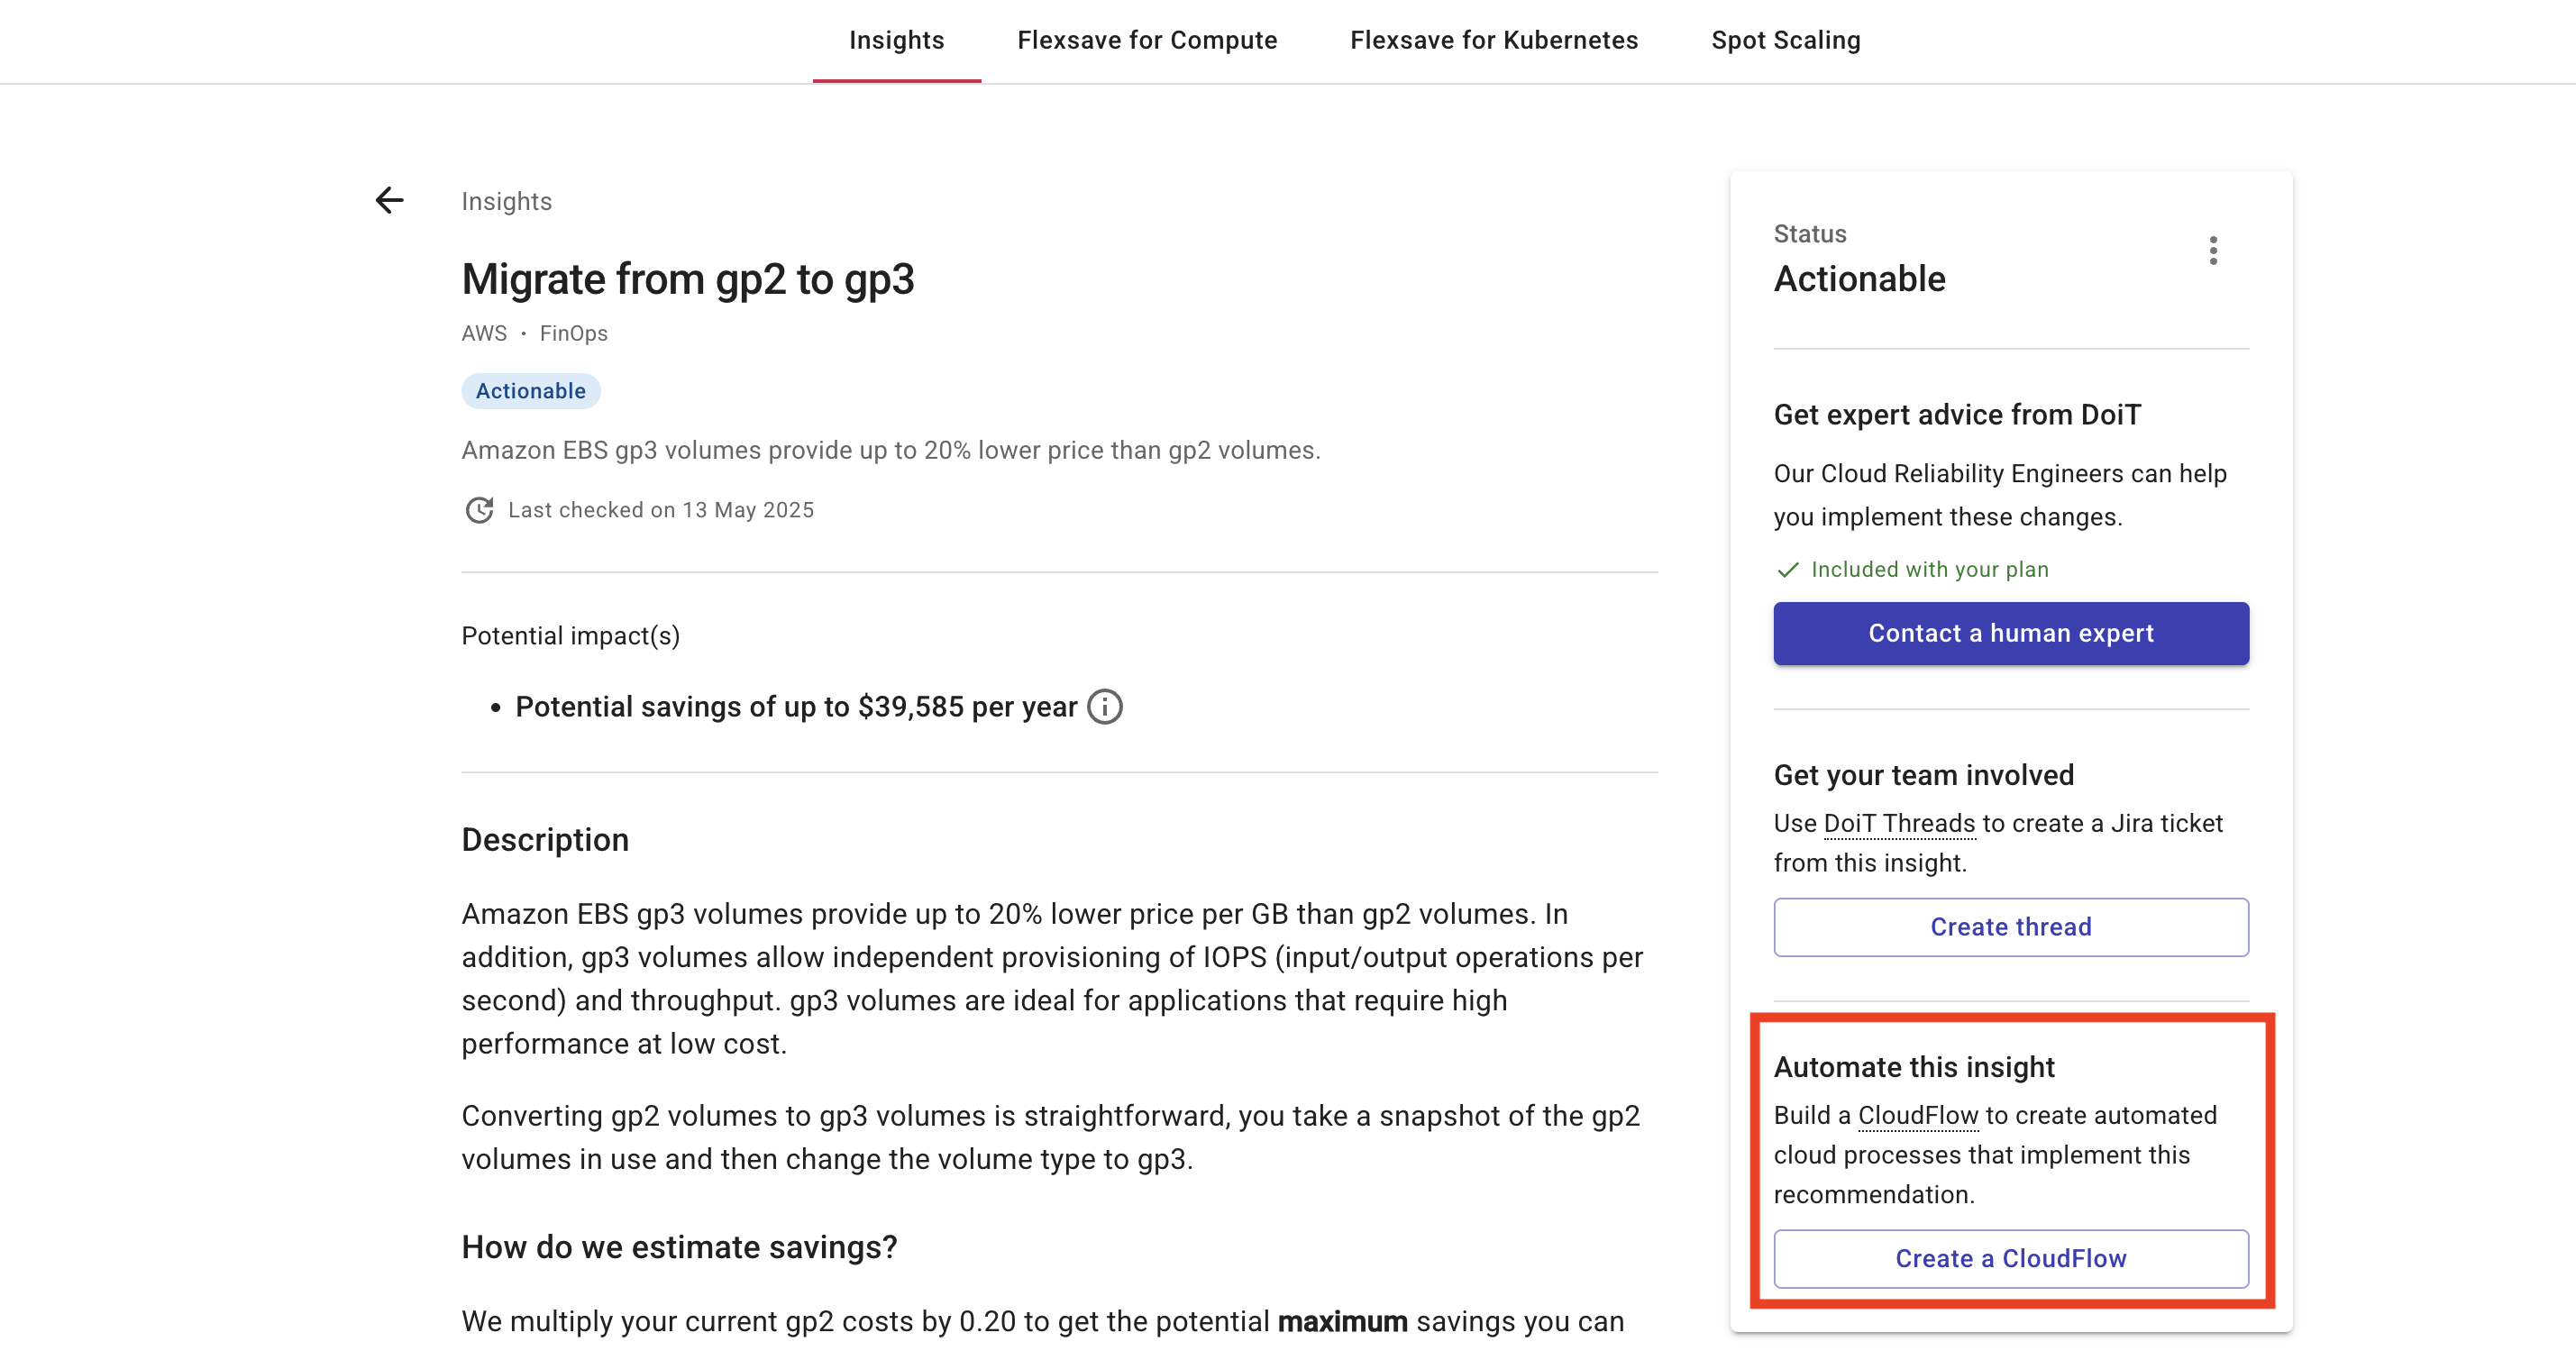
You are taken to your draft CloudFlow template.
Step 1: Configure the trigger
Add a manual trigger to the flow.
-
In the What should start your flow block, select Manually start.
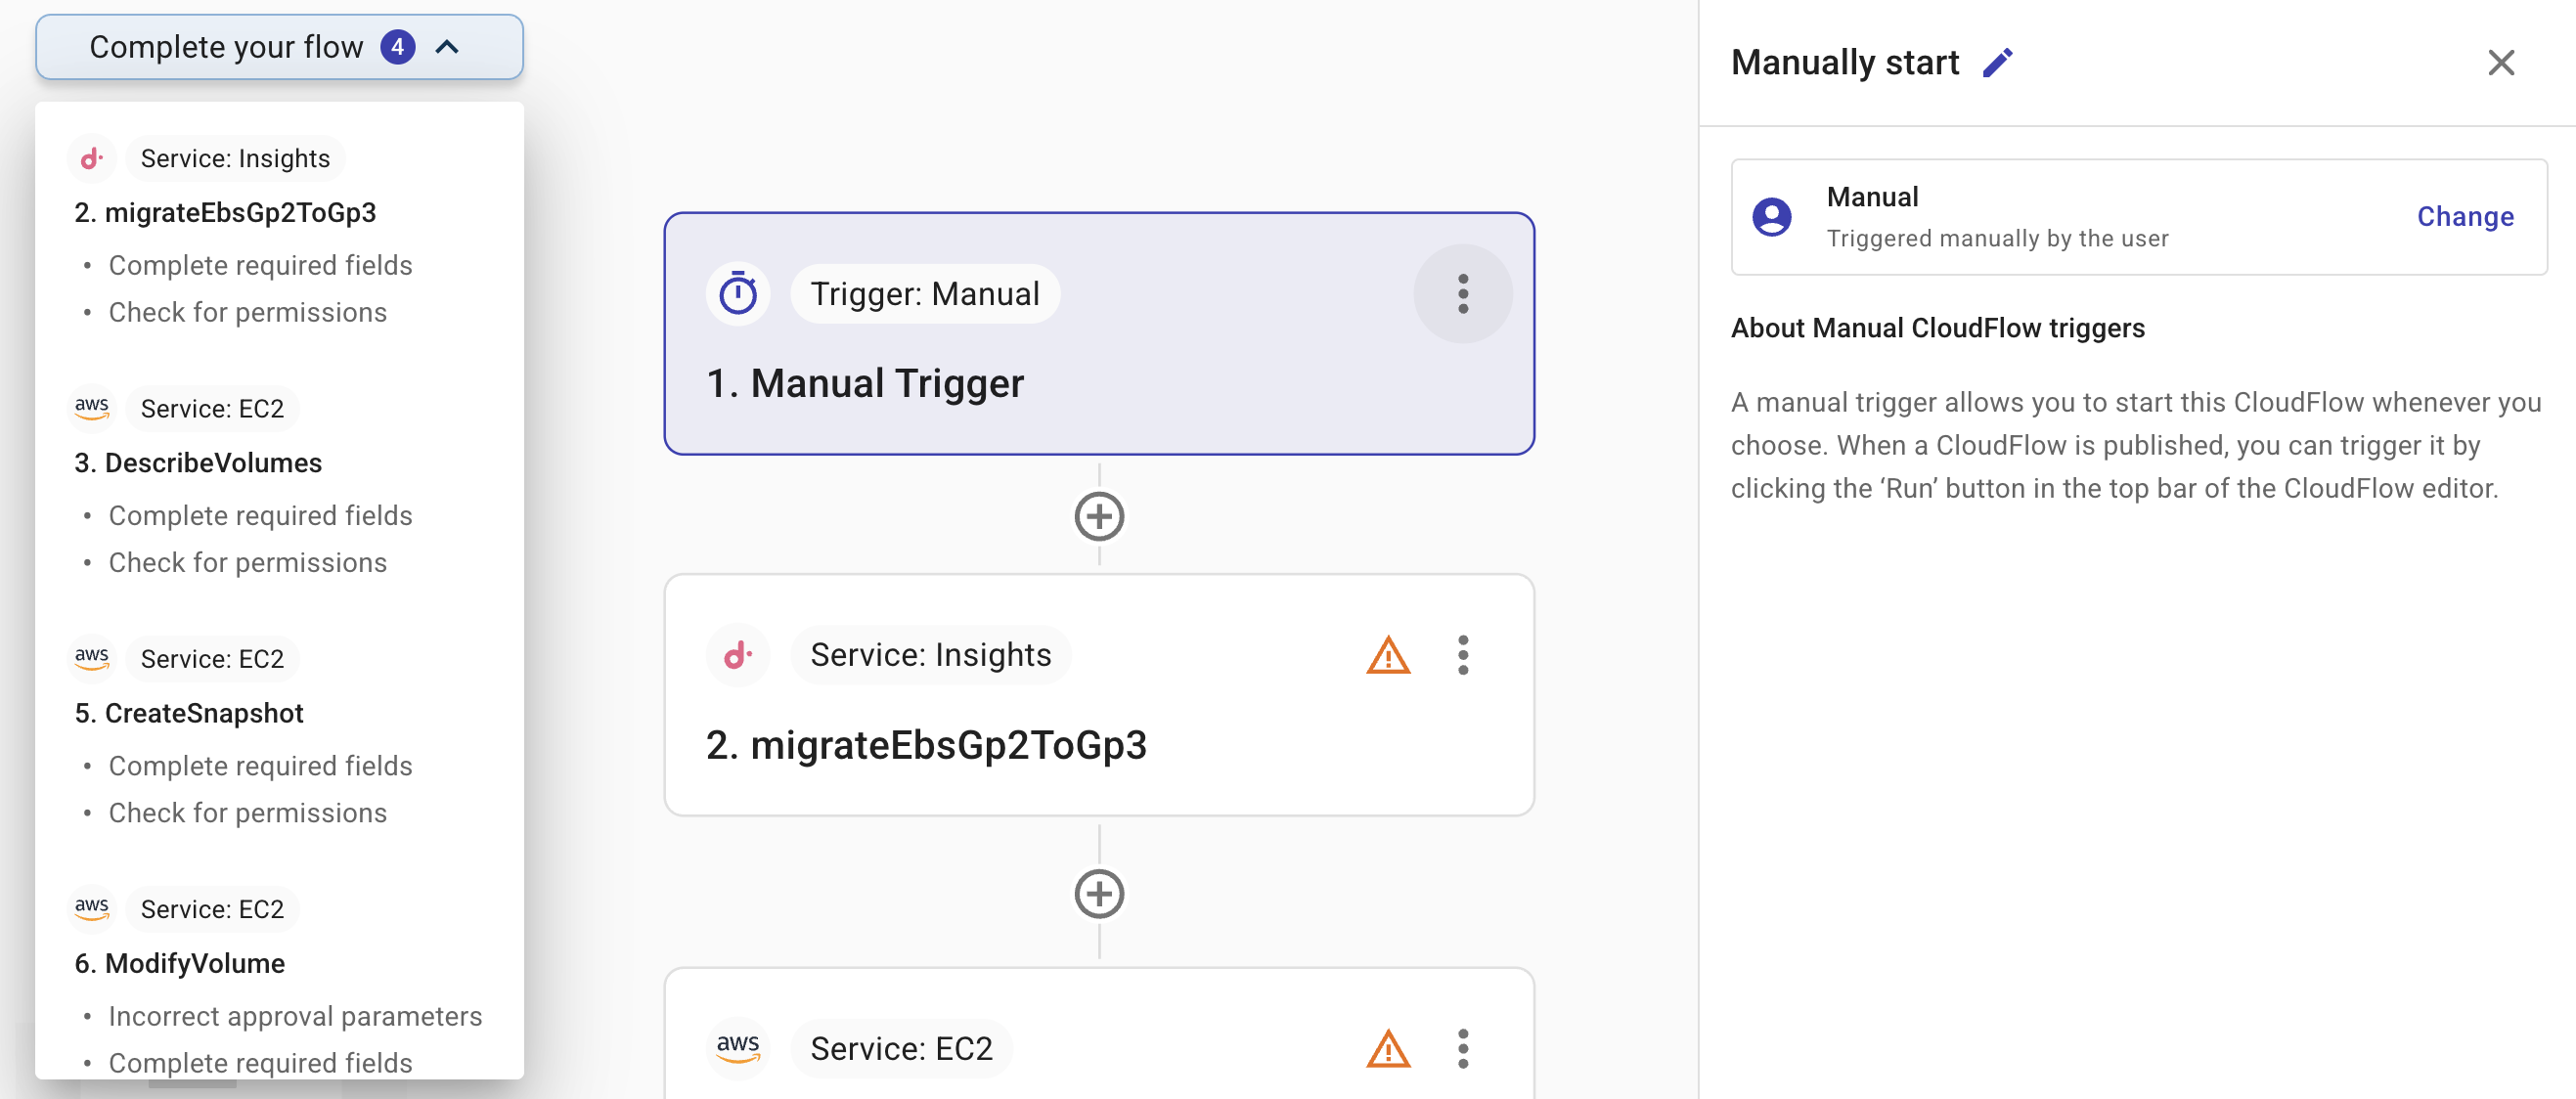 Tip
TipExpand Complete your flow to see a list of nodes that you need to complete before you can publish this flow.
Step 2: Check the insight
An insight node determines the Migrate from gp2 to gp3 insight data to use in the flow.
-
In Service and action, check the flow has been created from the correct insight, in this case, migrateEBSGp2ToGp3.
-
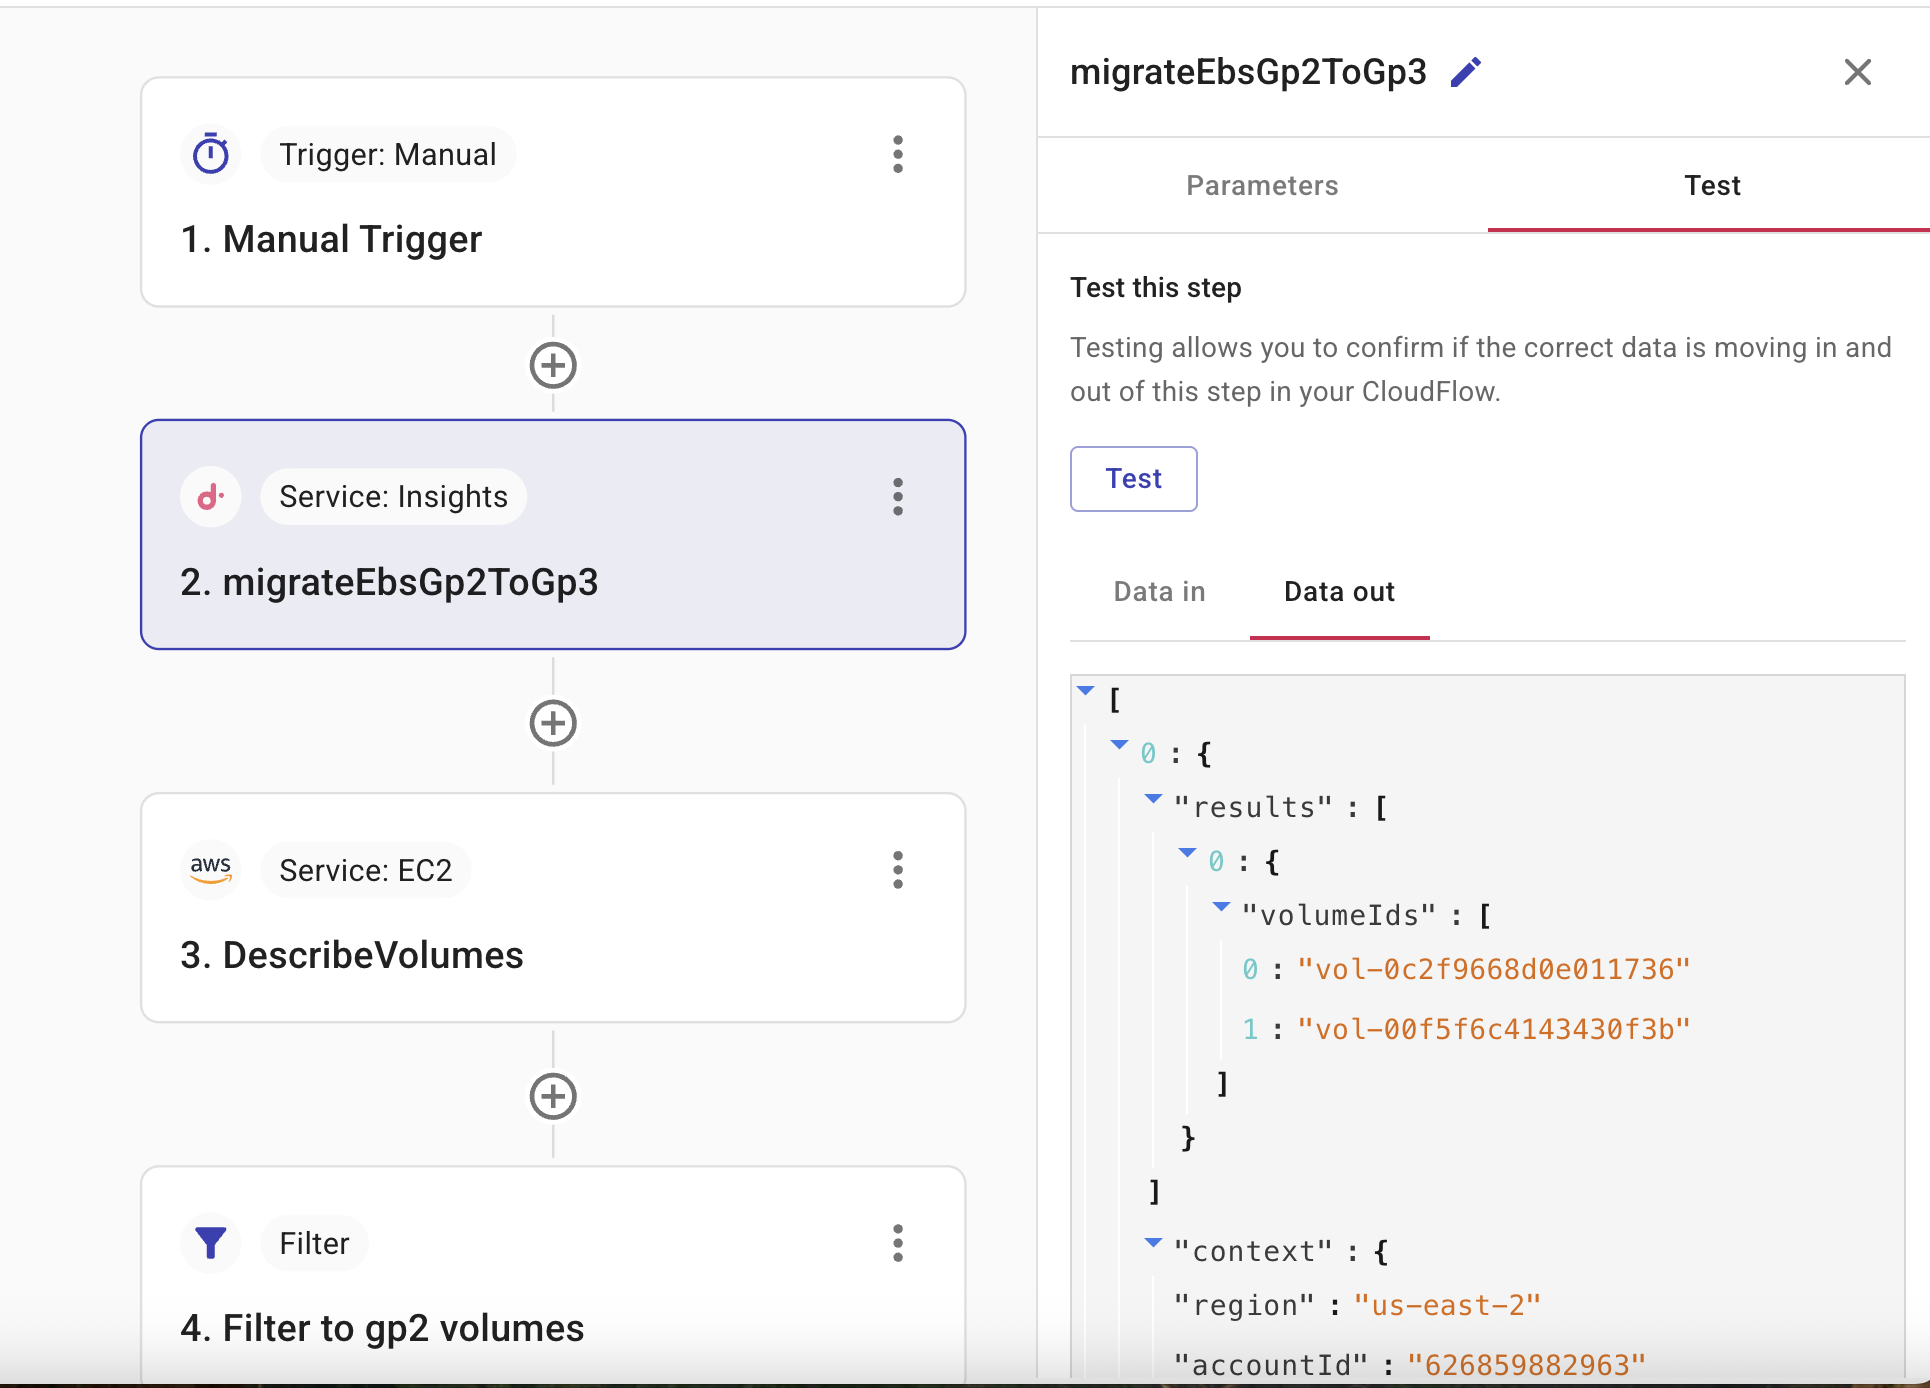
In Test, select Test to ensure the flow can both process the incoming data and access it successfully. In Data out, you can confirm the correct data is moving out of this step.
Step 3: Describe EC2 volumes
The DescribeVolumes action allows you to retrieve information about one or more AWS EC2 volumes on your AWS account.
-
In Service and action, check the correct service and action is specified, in this case, DescribeVolumes.
-
In Parameters, select the accounts and regions whose volumes you want to migrate from gp3 to gp2.
-
In List of VolumeIds, the
2.migrateEbsGp2TGp3.volumeIdsfield contains the list of volume Ids that you have in your cloud environment.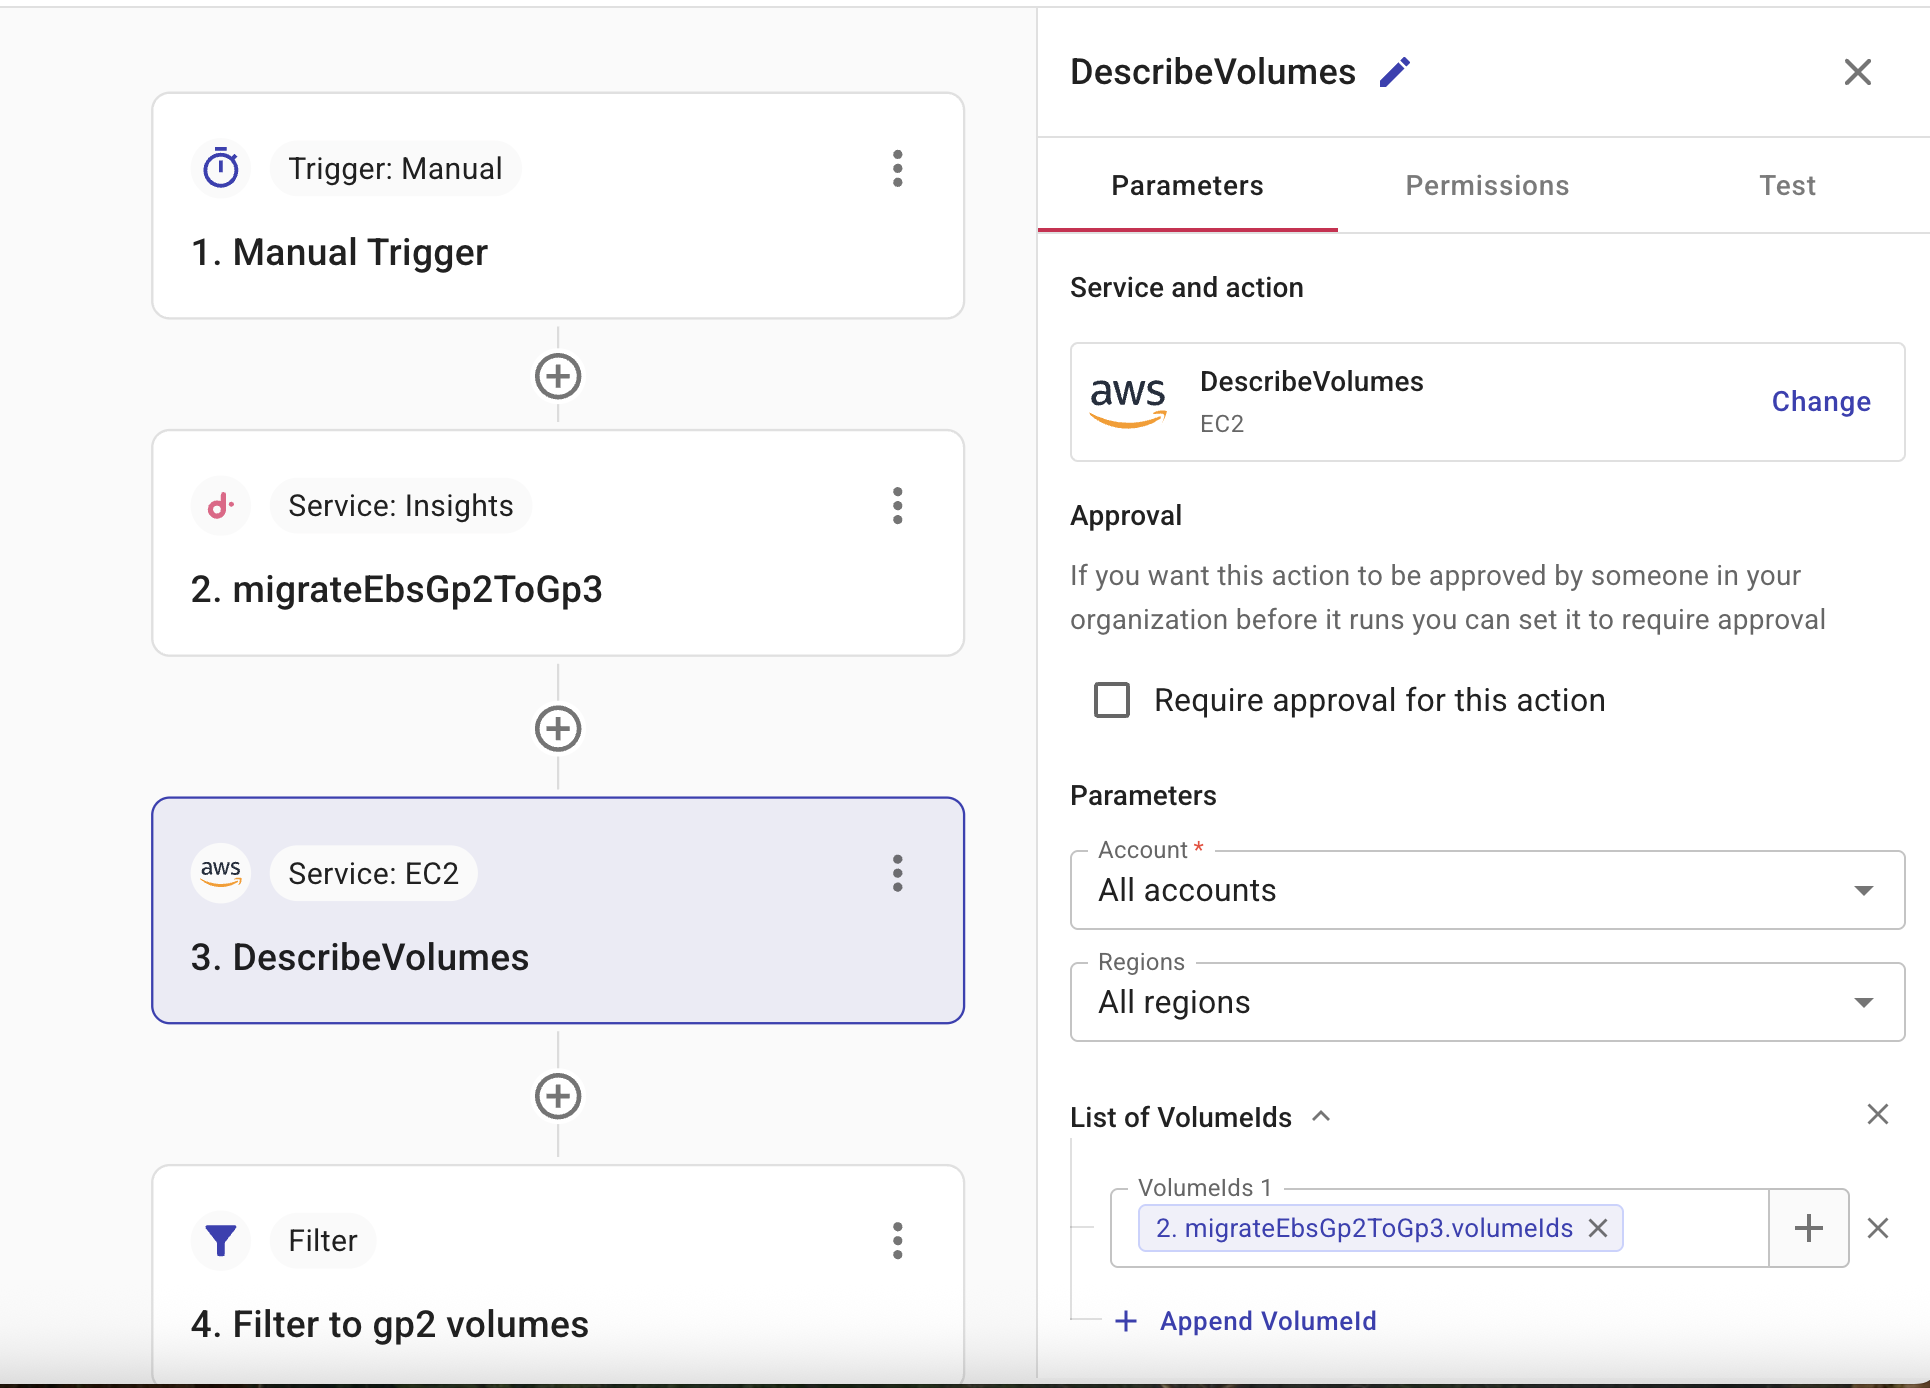
Step 4: Filter for gp2 volumes
Filter your EBS volumes to retrieve volumes whose volume type is gp2.
-
In Data source, check the data source is
3.DescribeVolumes. -
In Field, check the field is
3. DescribeVolumes. This field will store the filtered IDs of the gp2 volumes that you want to migrate to gp3. -
In Filter 1, check the filter is
Volumes.VolumeType = = gp2.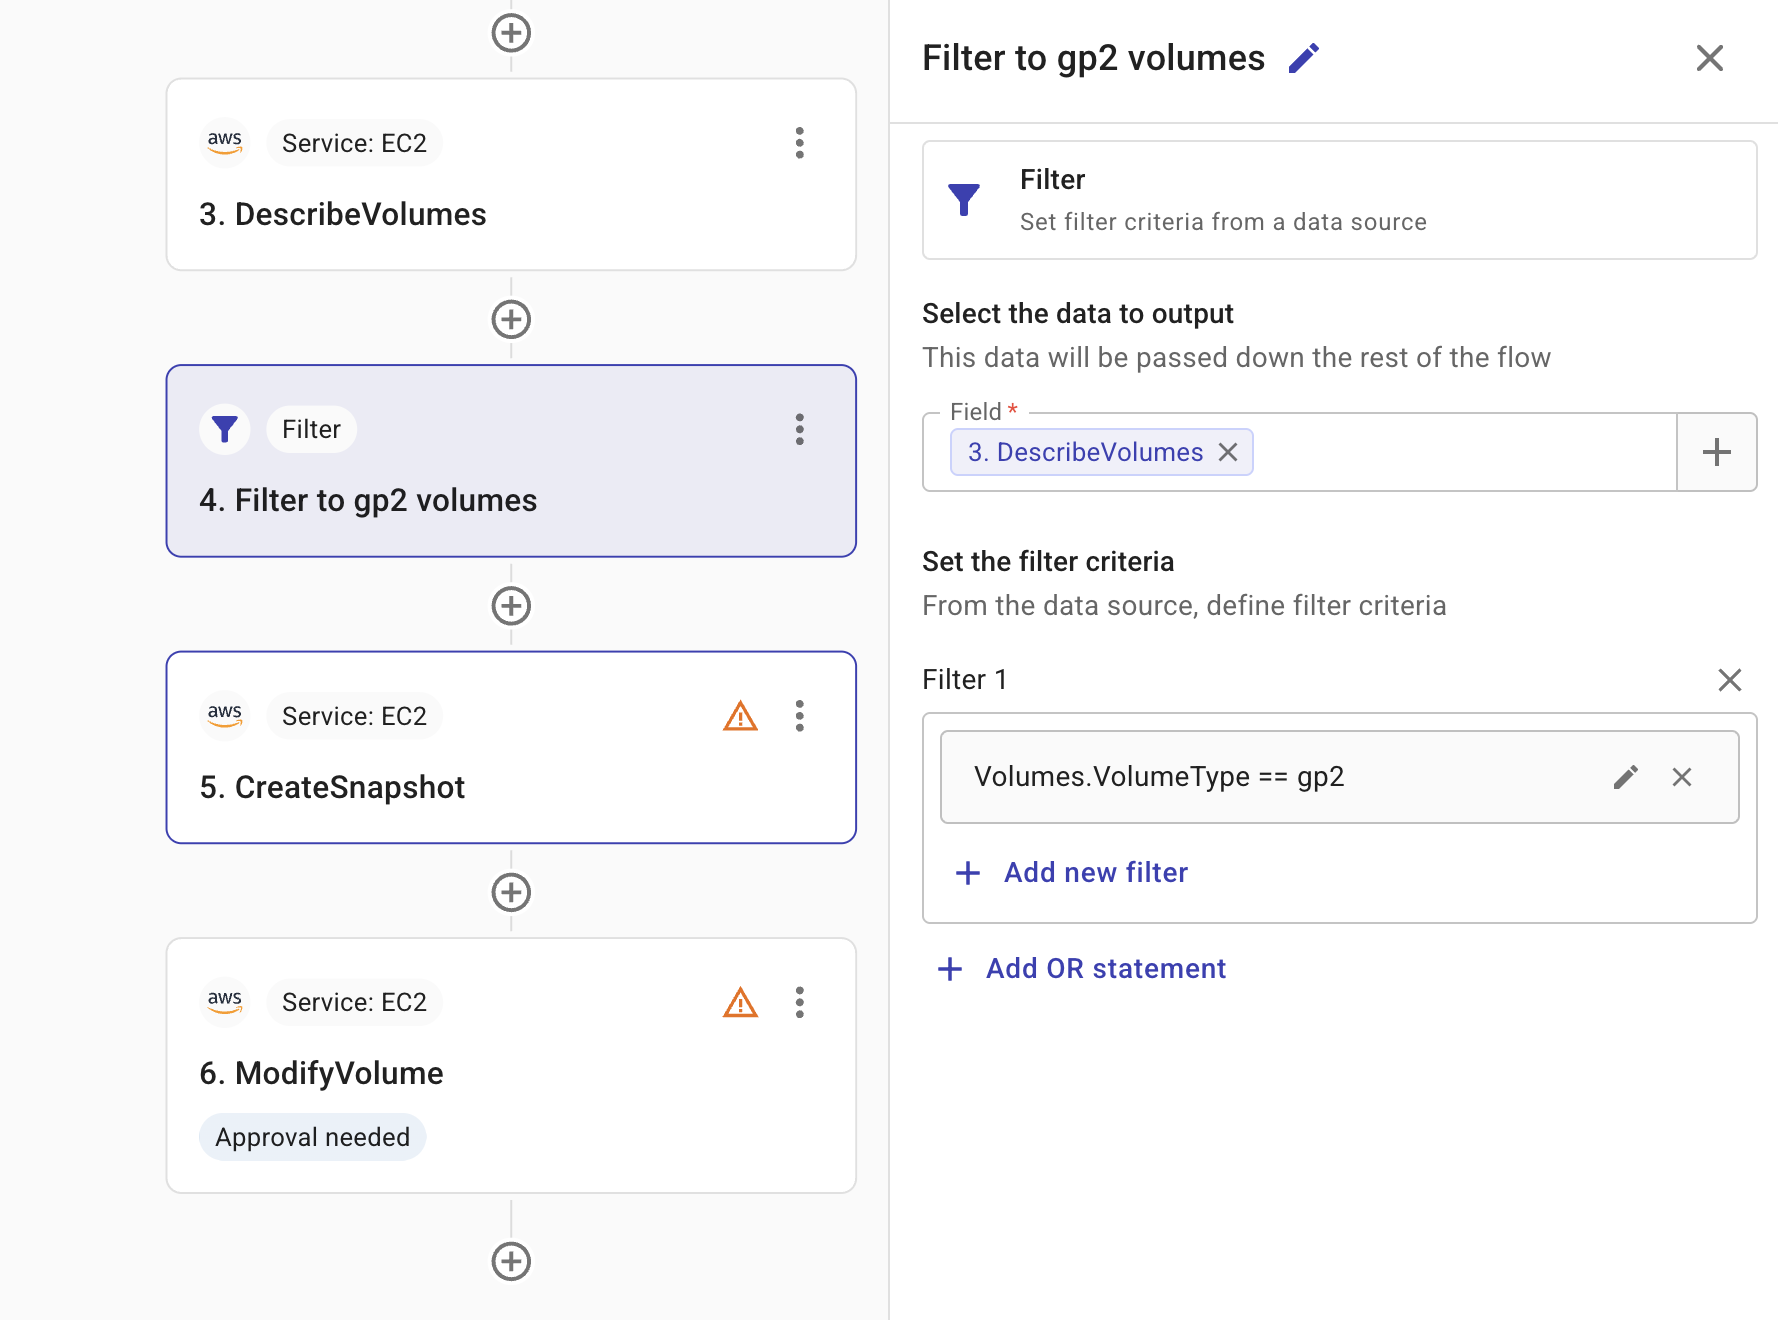
Step 5: Create snapshot
The CreateSnapshot action allows you to take a snapshot of the source volumes.
-
In Service and action, check the correct service and action is specified, in this case, CreateSnapshot.
-
In Parameters, select the accounts and regions whose EBS volumes you want to migrate from gp3 to gp2.
-
In VolumeId check the
filtergp2 volumesfield is specified. This field contains the output from the filter step, which lists the specific gp2 volumes that will be used to create snapshots.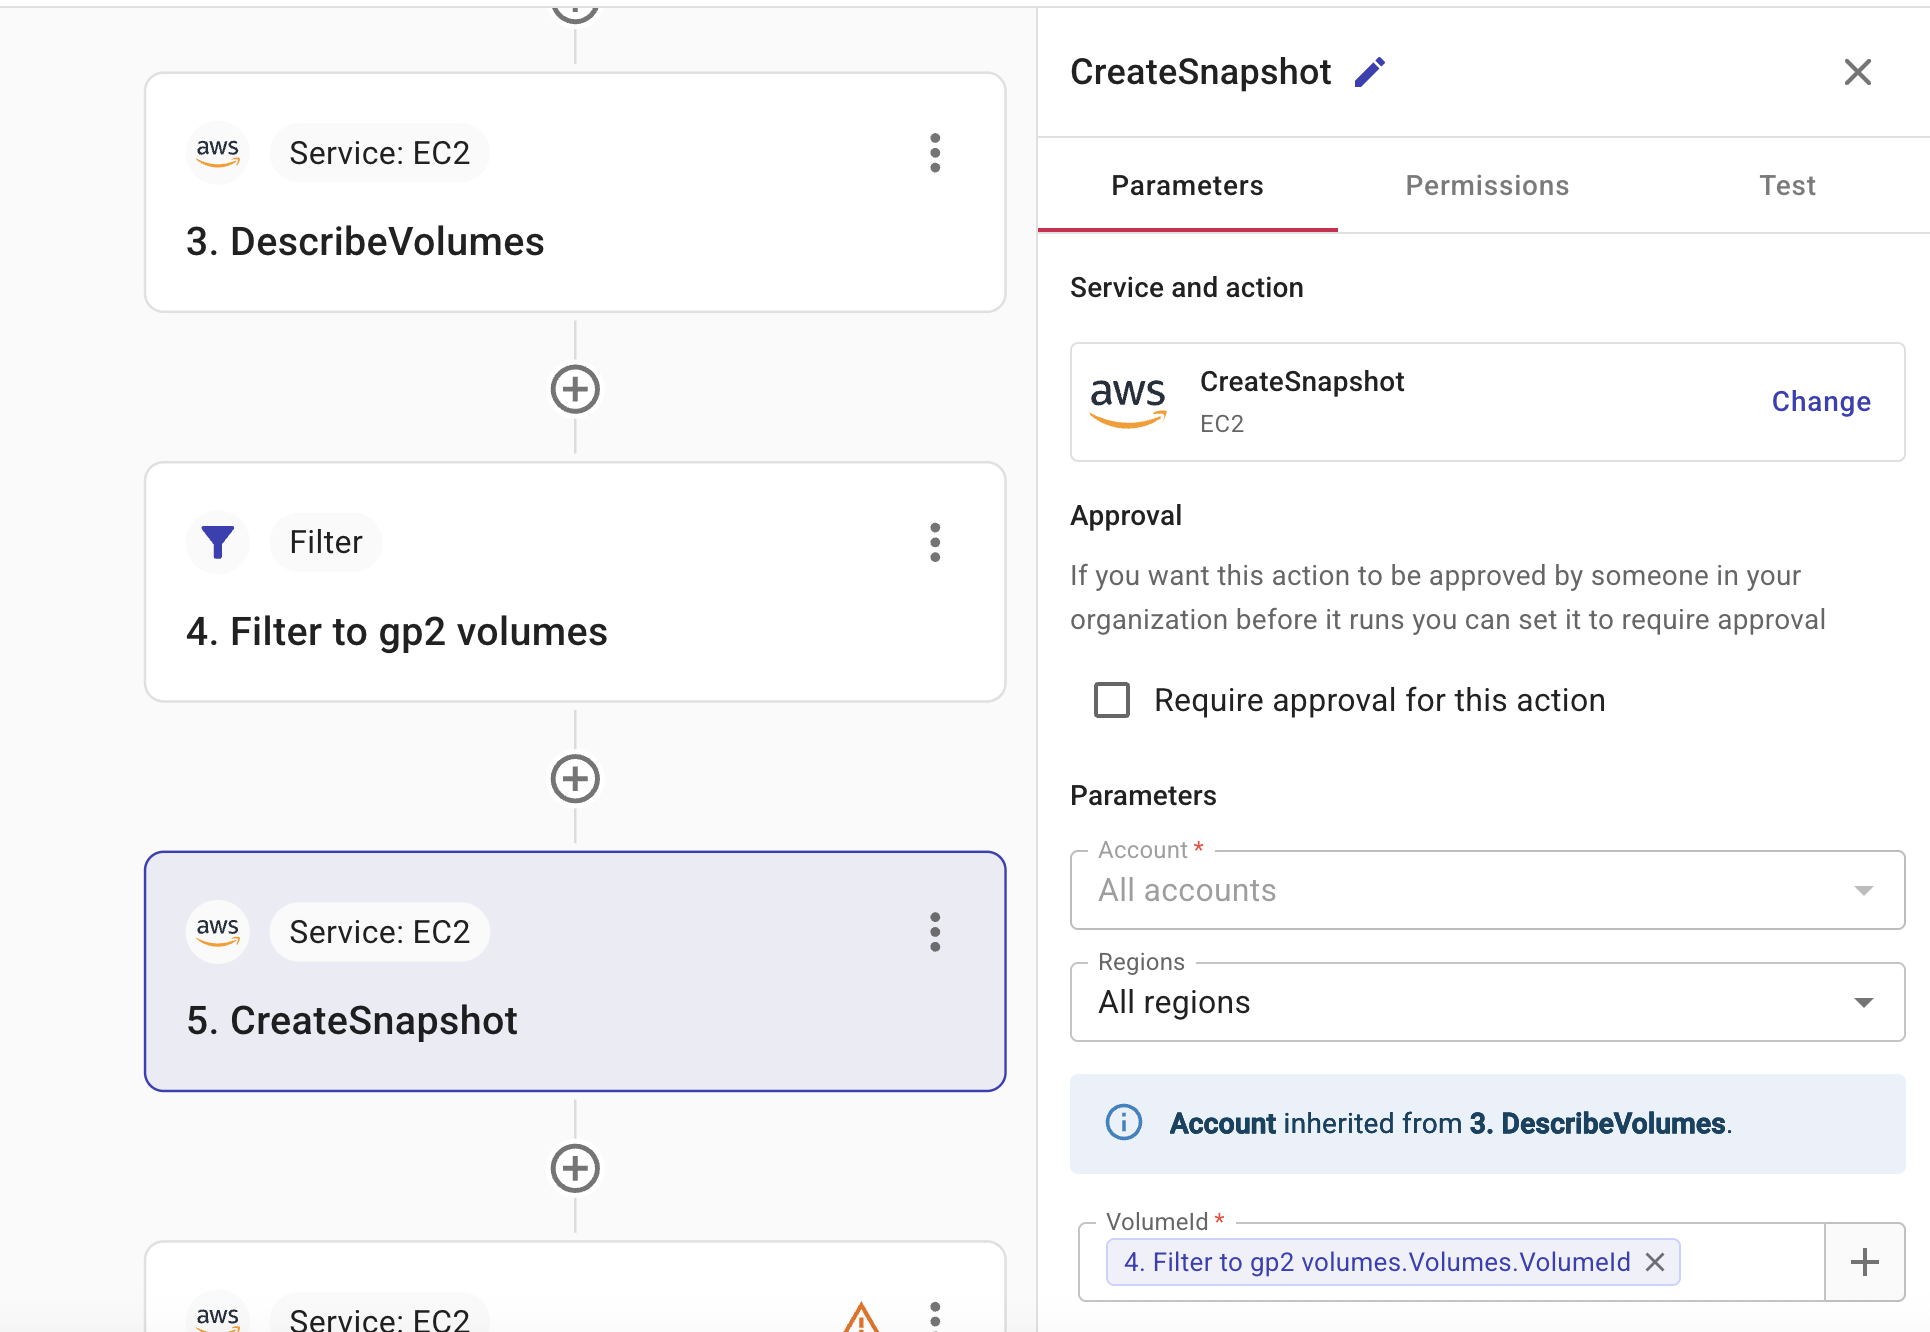
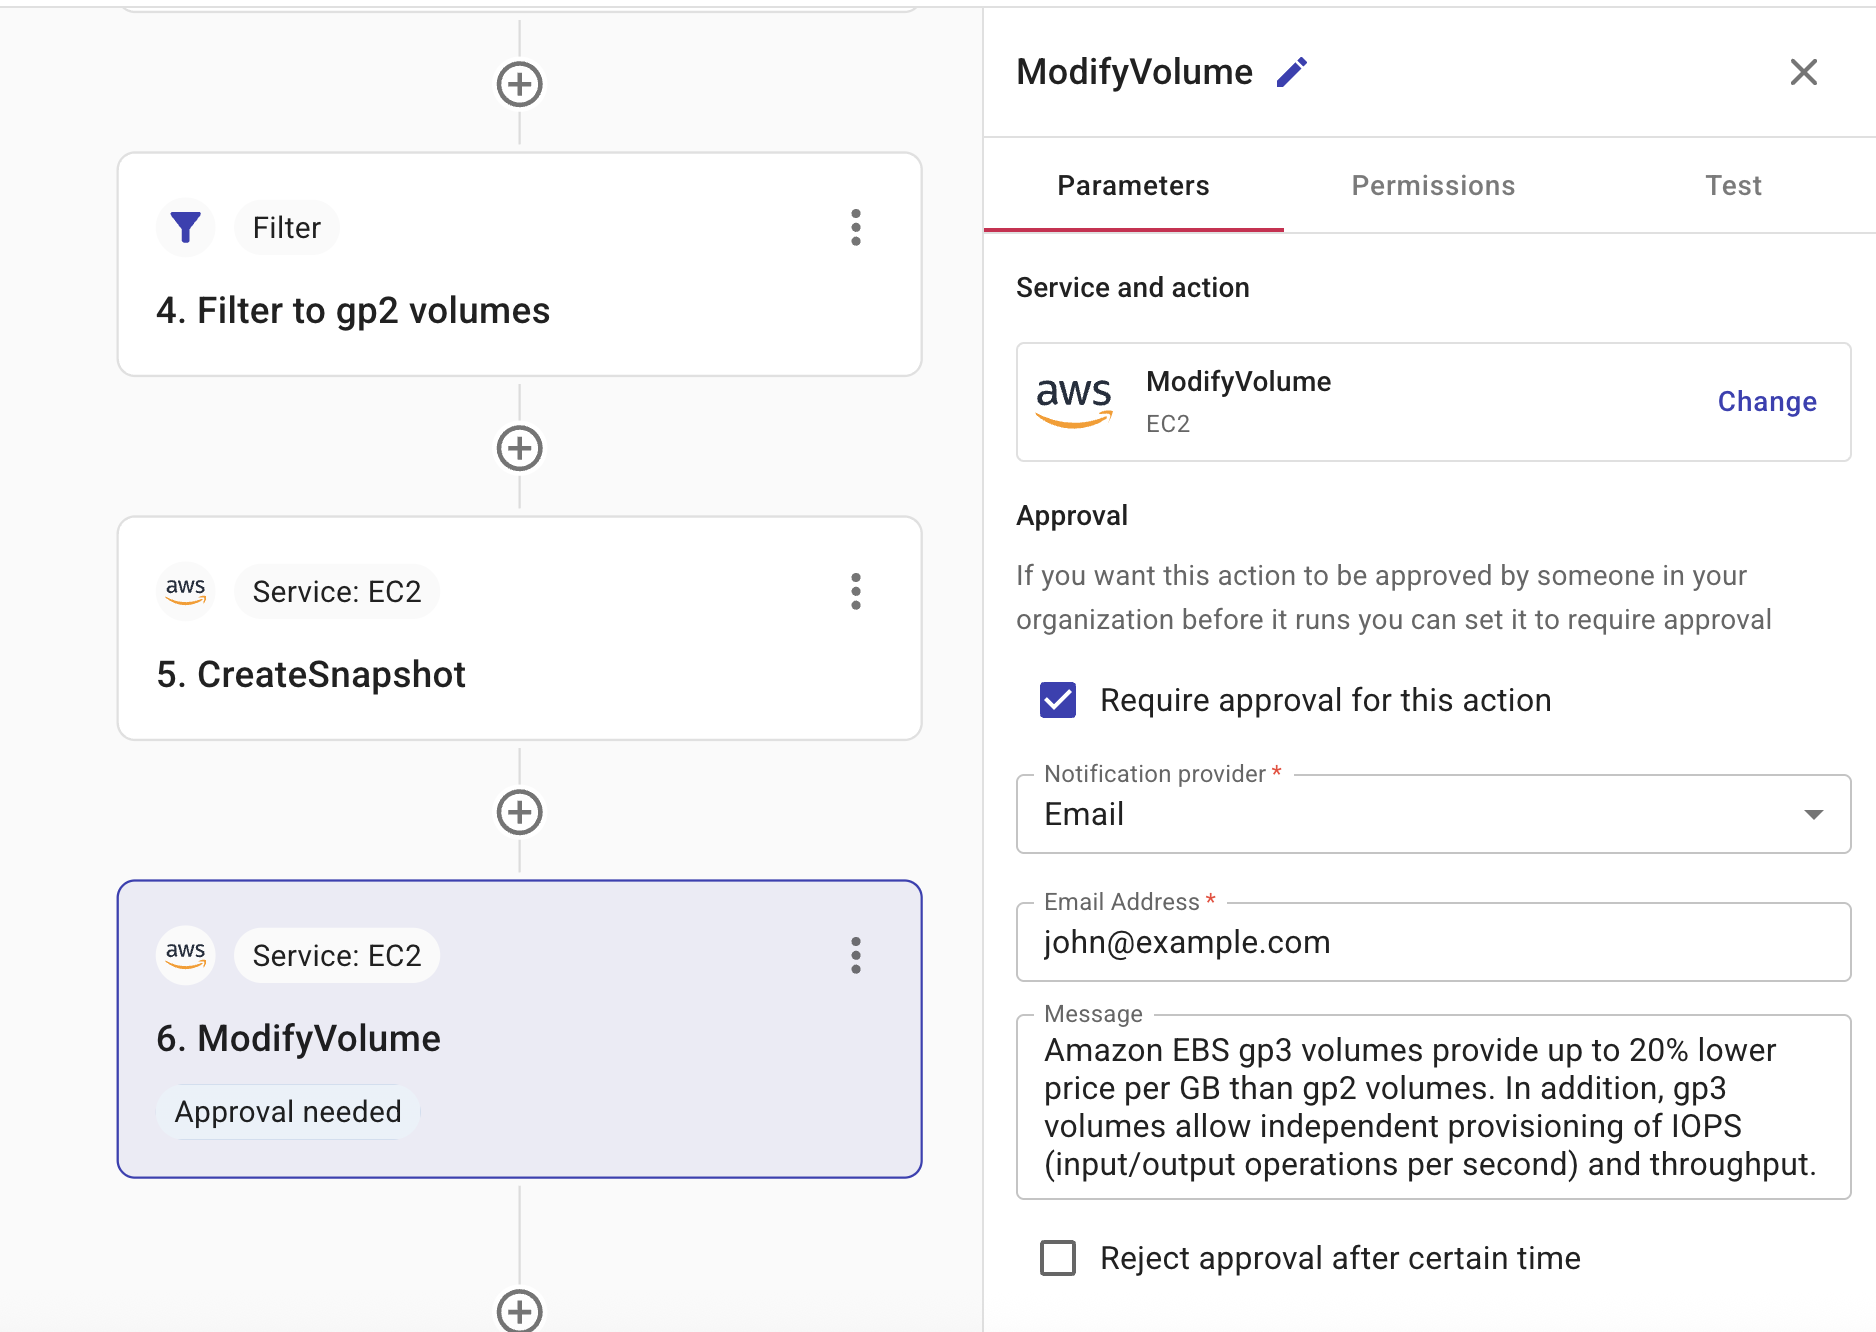
Step 6: Modify volume
The ModifyVolume action changes the gp3 volumes to gp2 volumes.
-
In Service and action, check the correct service and action is specified, in this case, ModifyVolume.
-
In Approval, if the flow requires approval before its execution, select Require approval for this action. See Require approval.
-
In Parameters, select the accounts and regions whose EBS volumes you want to migrate from gp3 to gp2.
-
In VolumeId, check the
5. Filter to gp2 volumes.Volumes VolumeIdfield is specified. This field contains the unique identifiers of the EBS volumes that you want to modify. -
In VolumeType, check that gp3 is specified.
Publish the flow
The last step is to publish the flow.
Once published, you can choose to Edit, Run, or Unpublish a flow on the same screen, or you can choose Close to return to the main screen.