Quick start
Below is a quick start tutorial that walks you through the process of building a flow in the DoiT console.
Goal and objectives
-
Goal: To create a workflow that publishes an Amazon SNS message when a certain Amazon EC2 instance stops running.
-
Objectives: In this tutorial, you'll learn how to:
-
Define a custom schedule to trigger the flow.
-
Interact with AWS services to check EC2 instance status and publish SNS messages.
-
Use conditions in the flow.
-
Test an action by a dry run.
-
Start building
The workflow in this tutorial is straightforward. To start building it:
-
Sign in to the DoiT console, select Automation and operations from the top navigation mega menu, and then select CloudFlow.
-
Select Create CloudFlow.
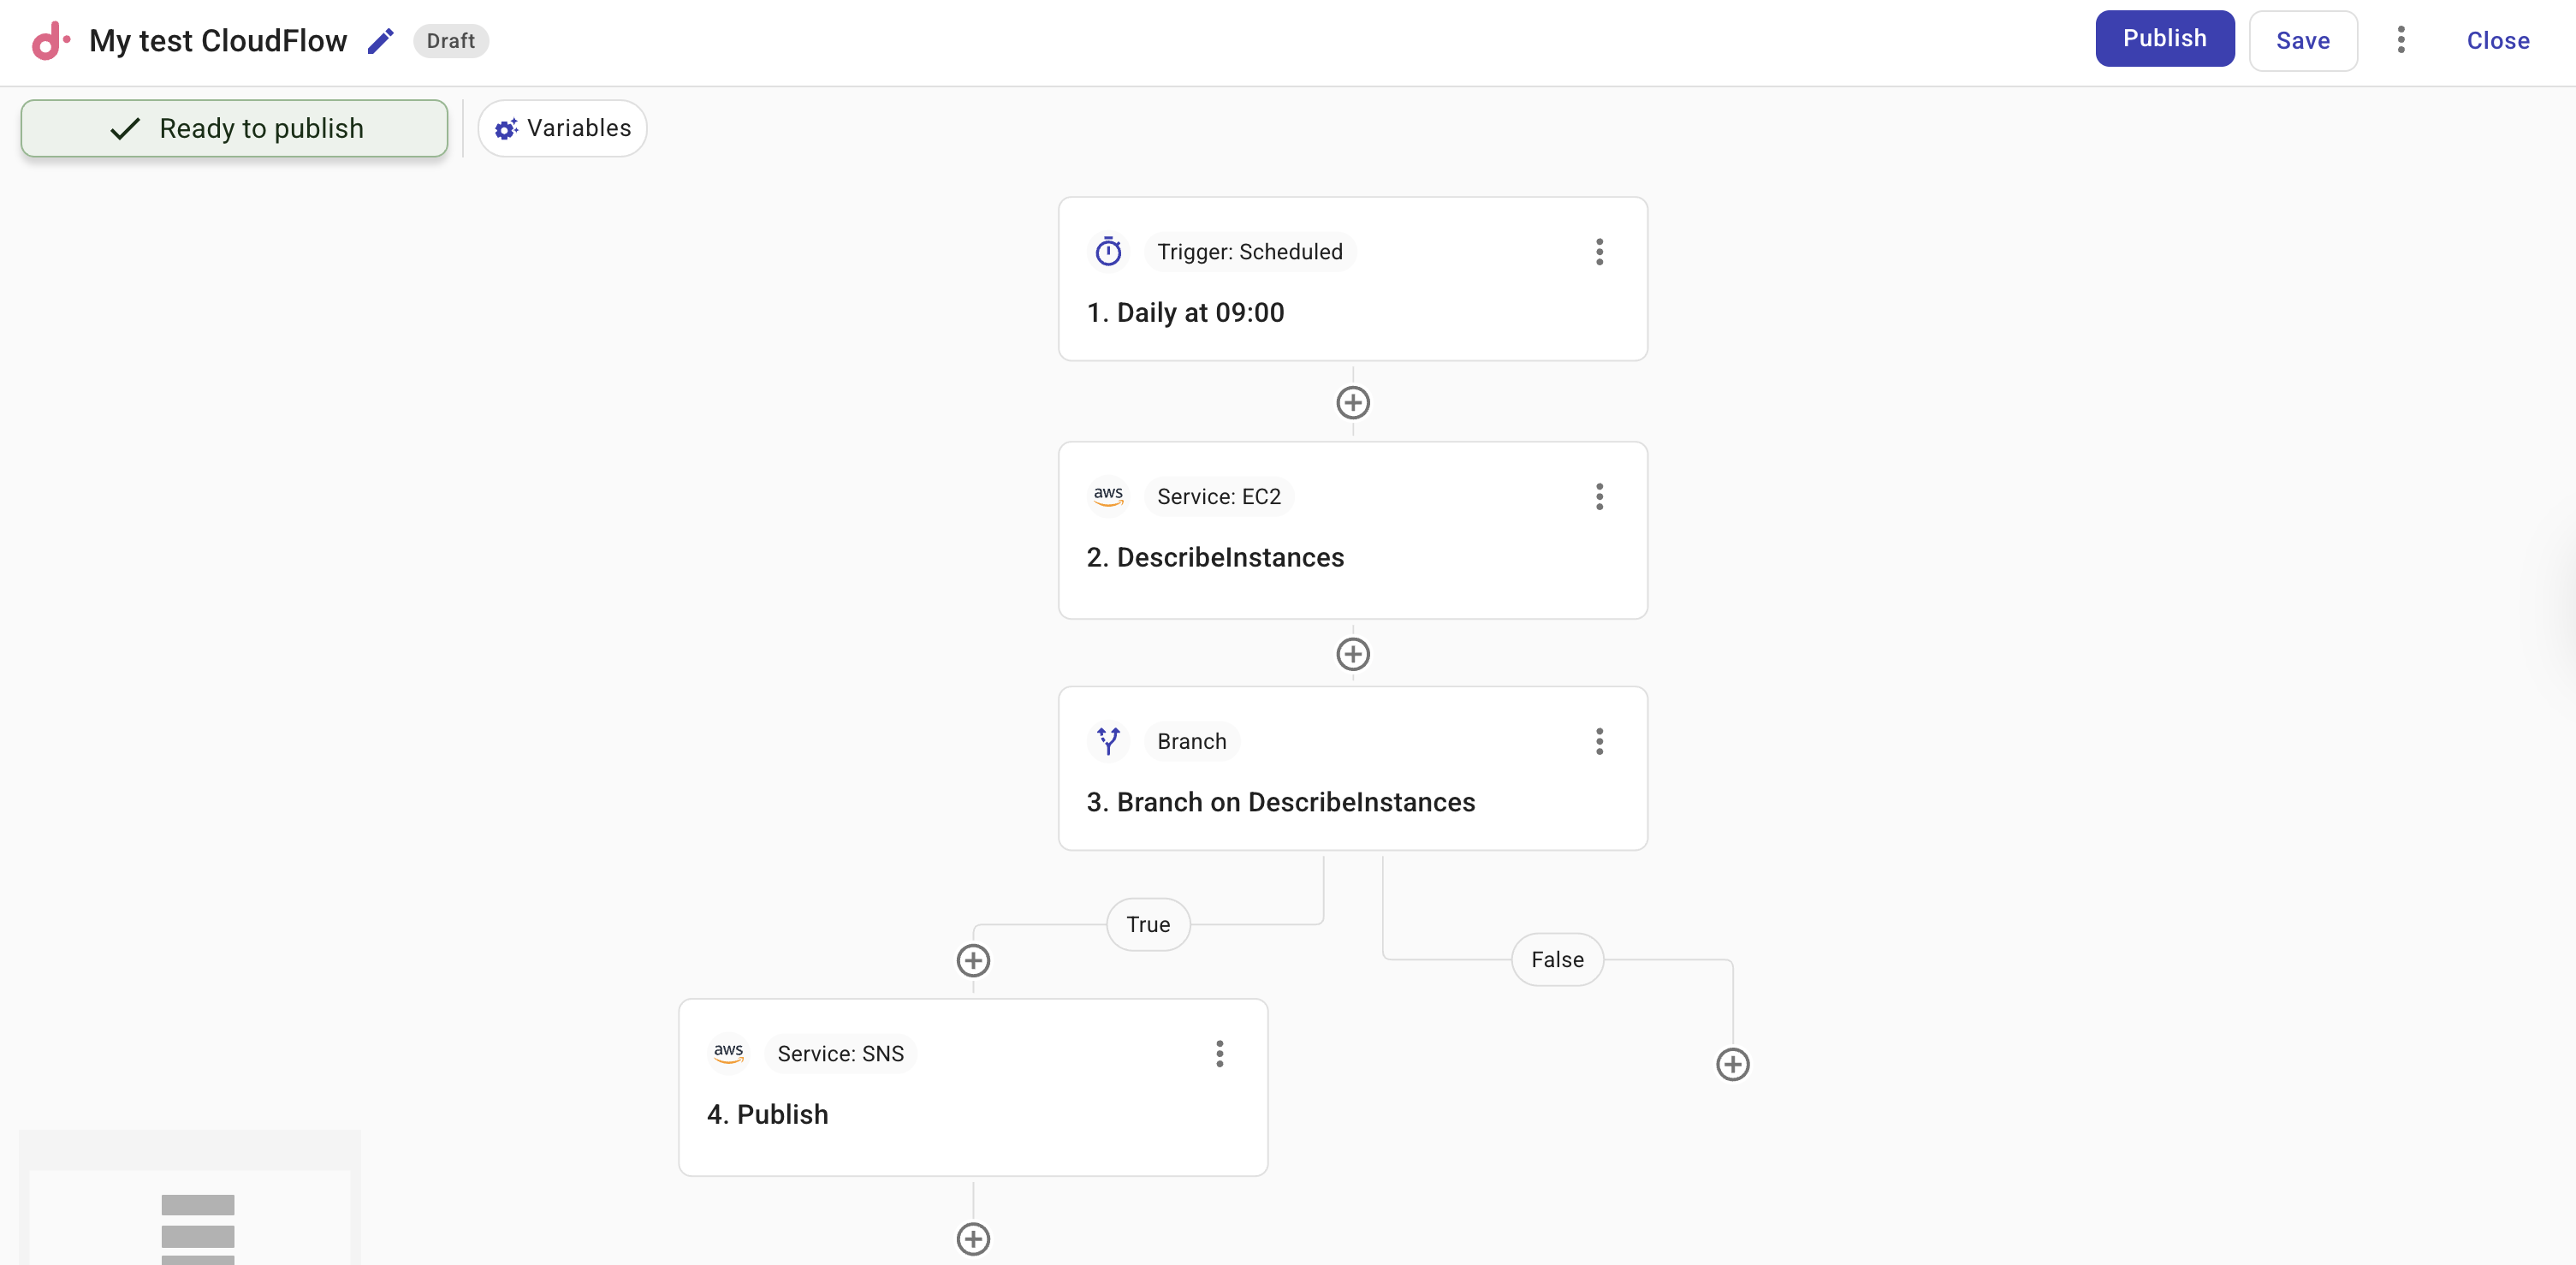
Step 1: Add a trigger
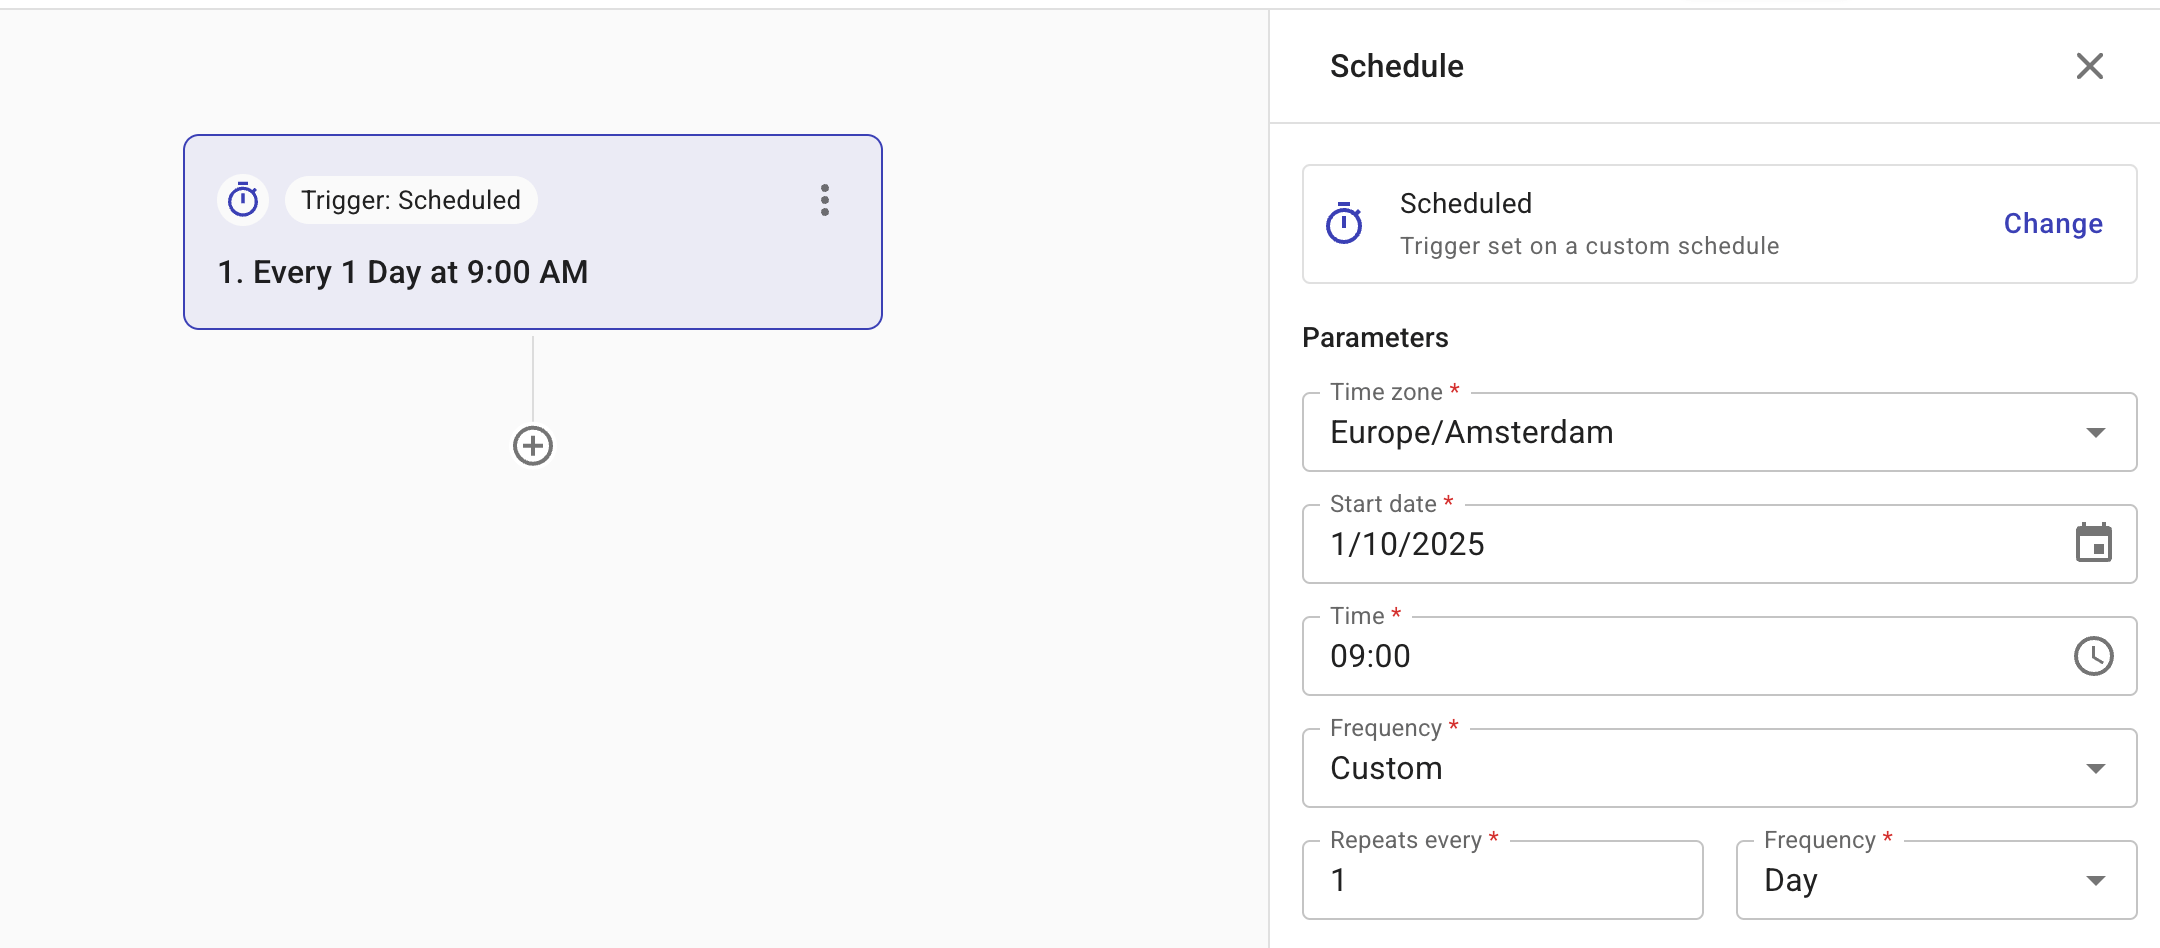
Add a custom schedule as the trigger of the flow.
-
In the What should start your flow block, select Custom schedule.
-
Set the schedule to Daily 9 AM.
Step 2: Describe EC2 instances
-
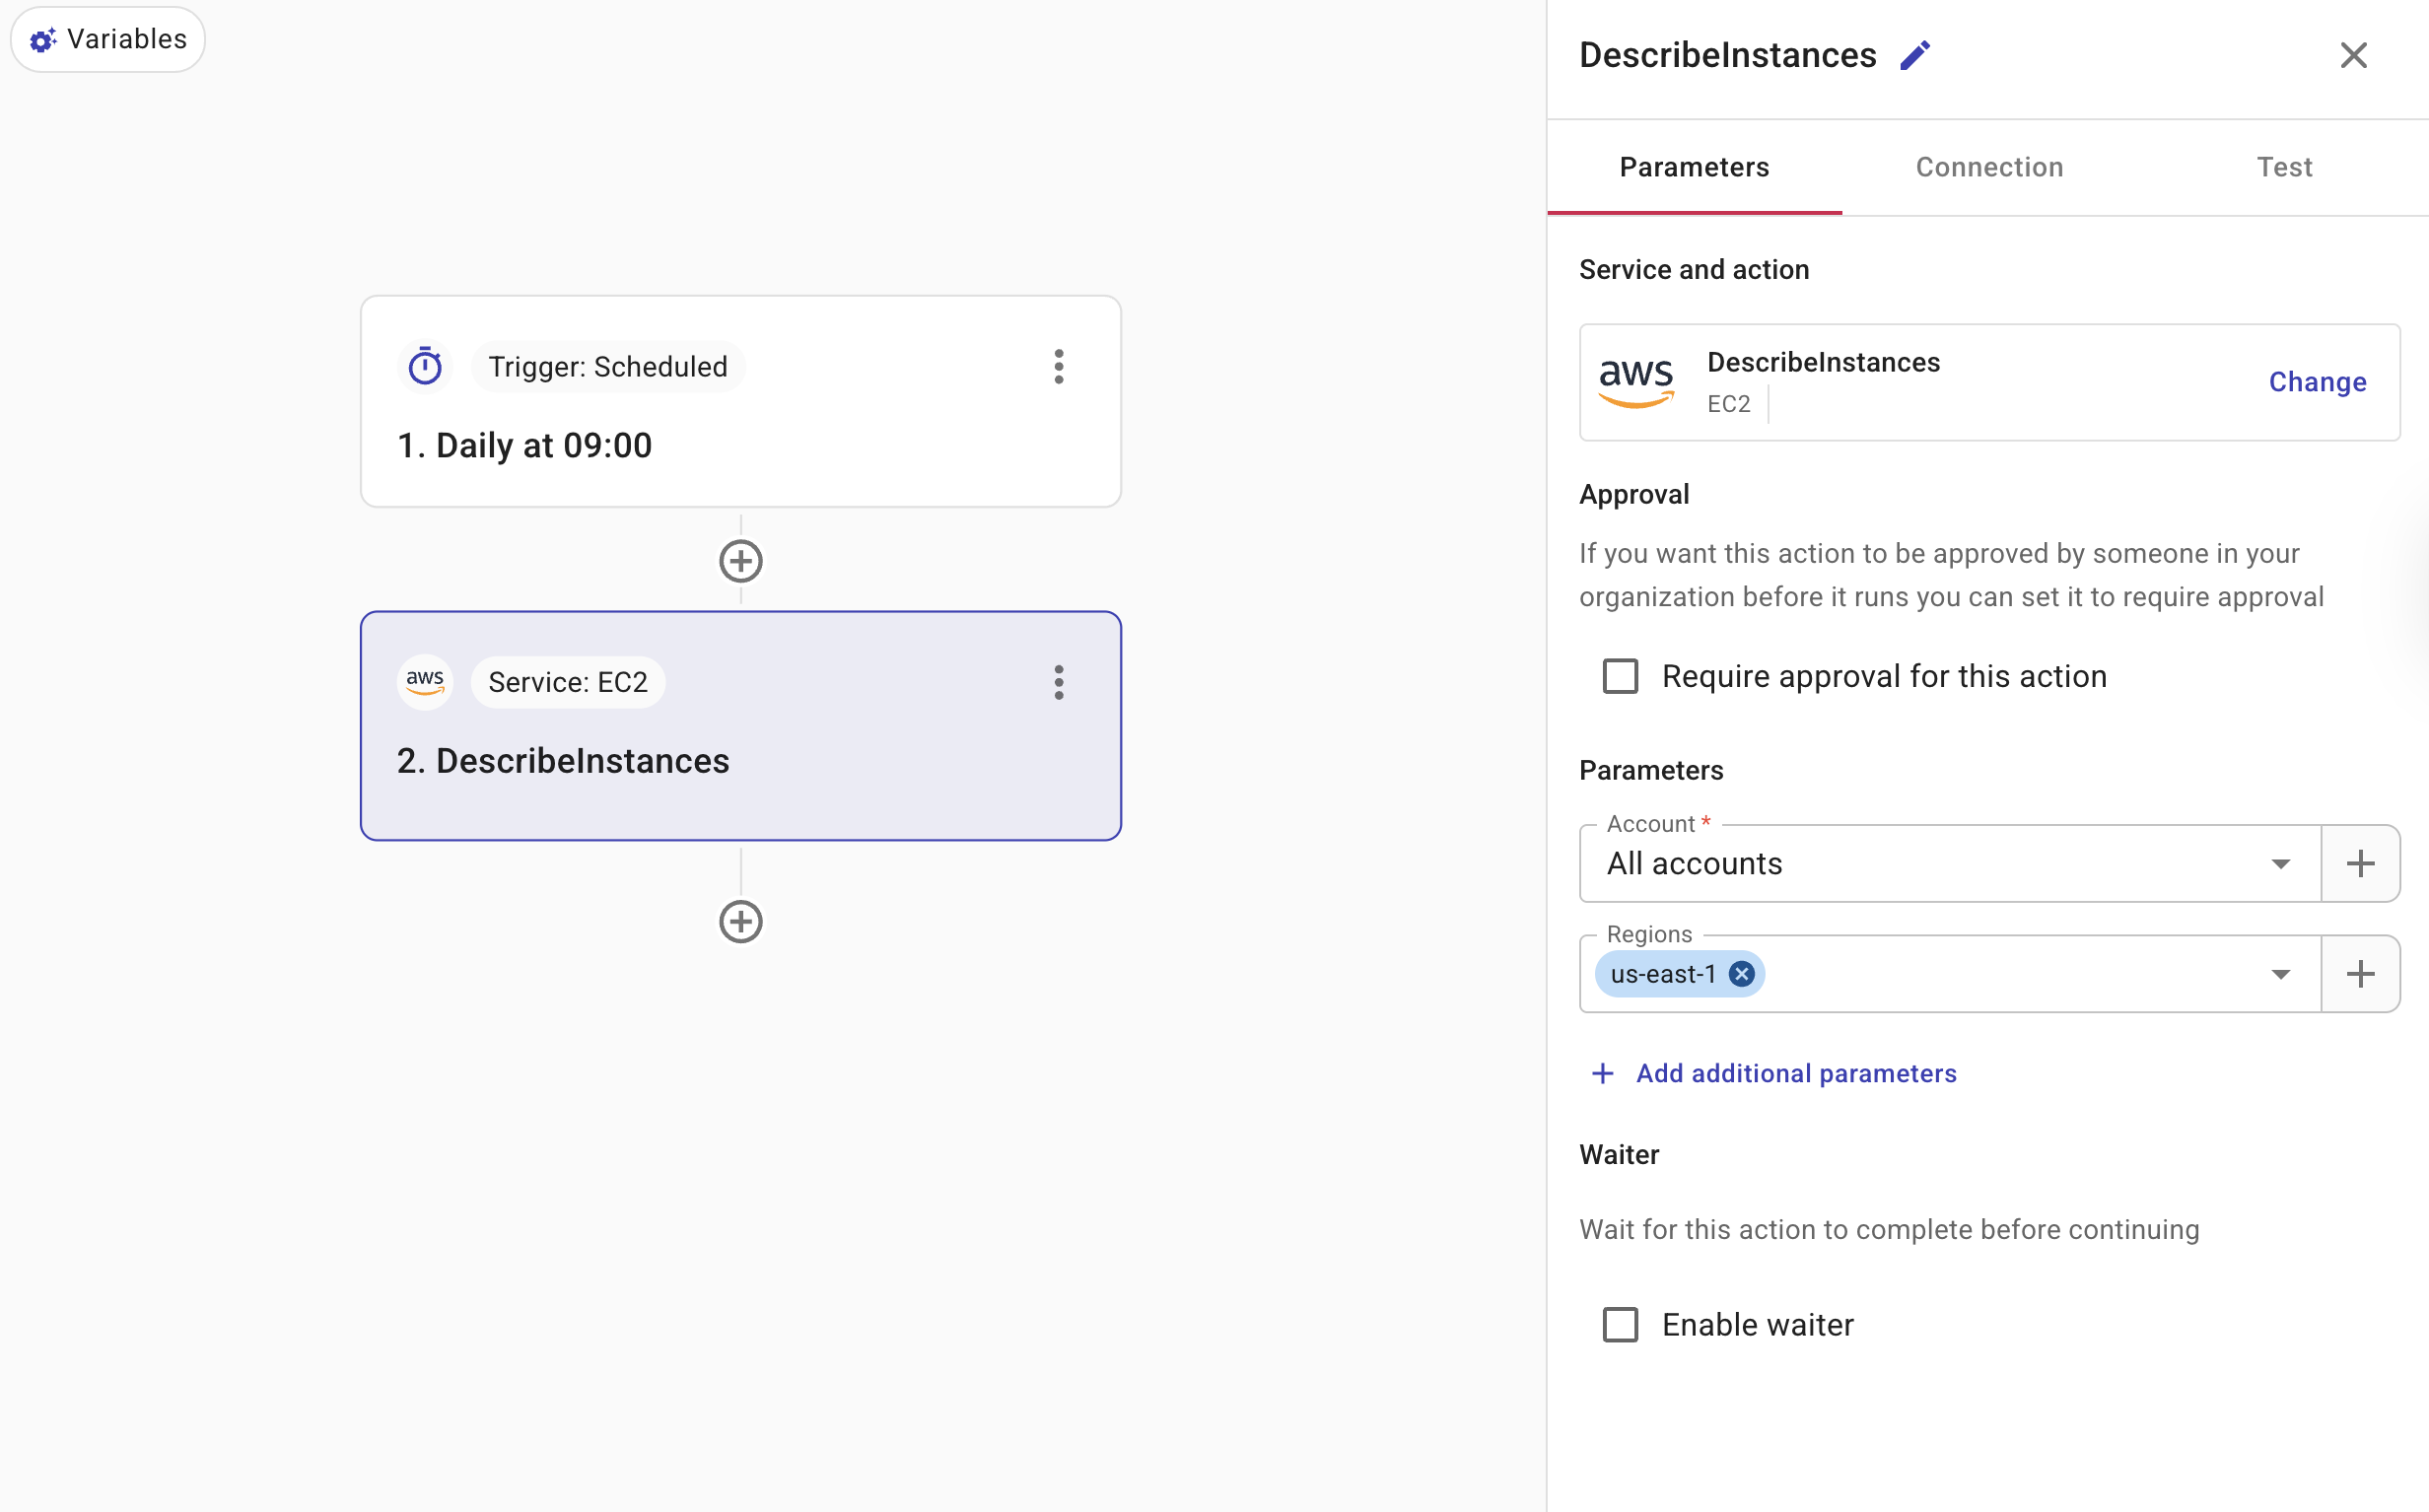
In the What do you want to do block, select Perform an action.
-
Search for AWS EC2 DescribeInstances and choose it as the action to perform.
-
On the Parameters tab, select the AWS account and region.
-
On the Connection tab, select a connection that has the necessary permissions.
If the connection you selected has the necessary permissions, you'll see a successful message; otherwise, you'll see instructions about what you need to do.
-
On the Test tab, select Use Data from Parameters for Data In, and then select Test.
If successful, the response is displayed in Data out. Note down the
InstanceIdin the response for the next step.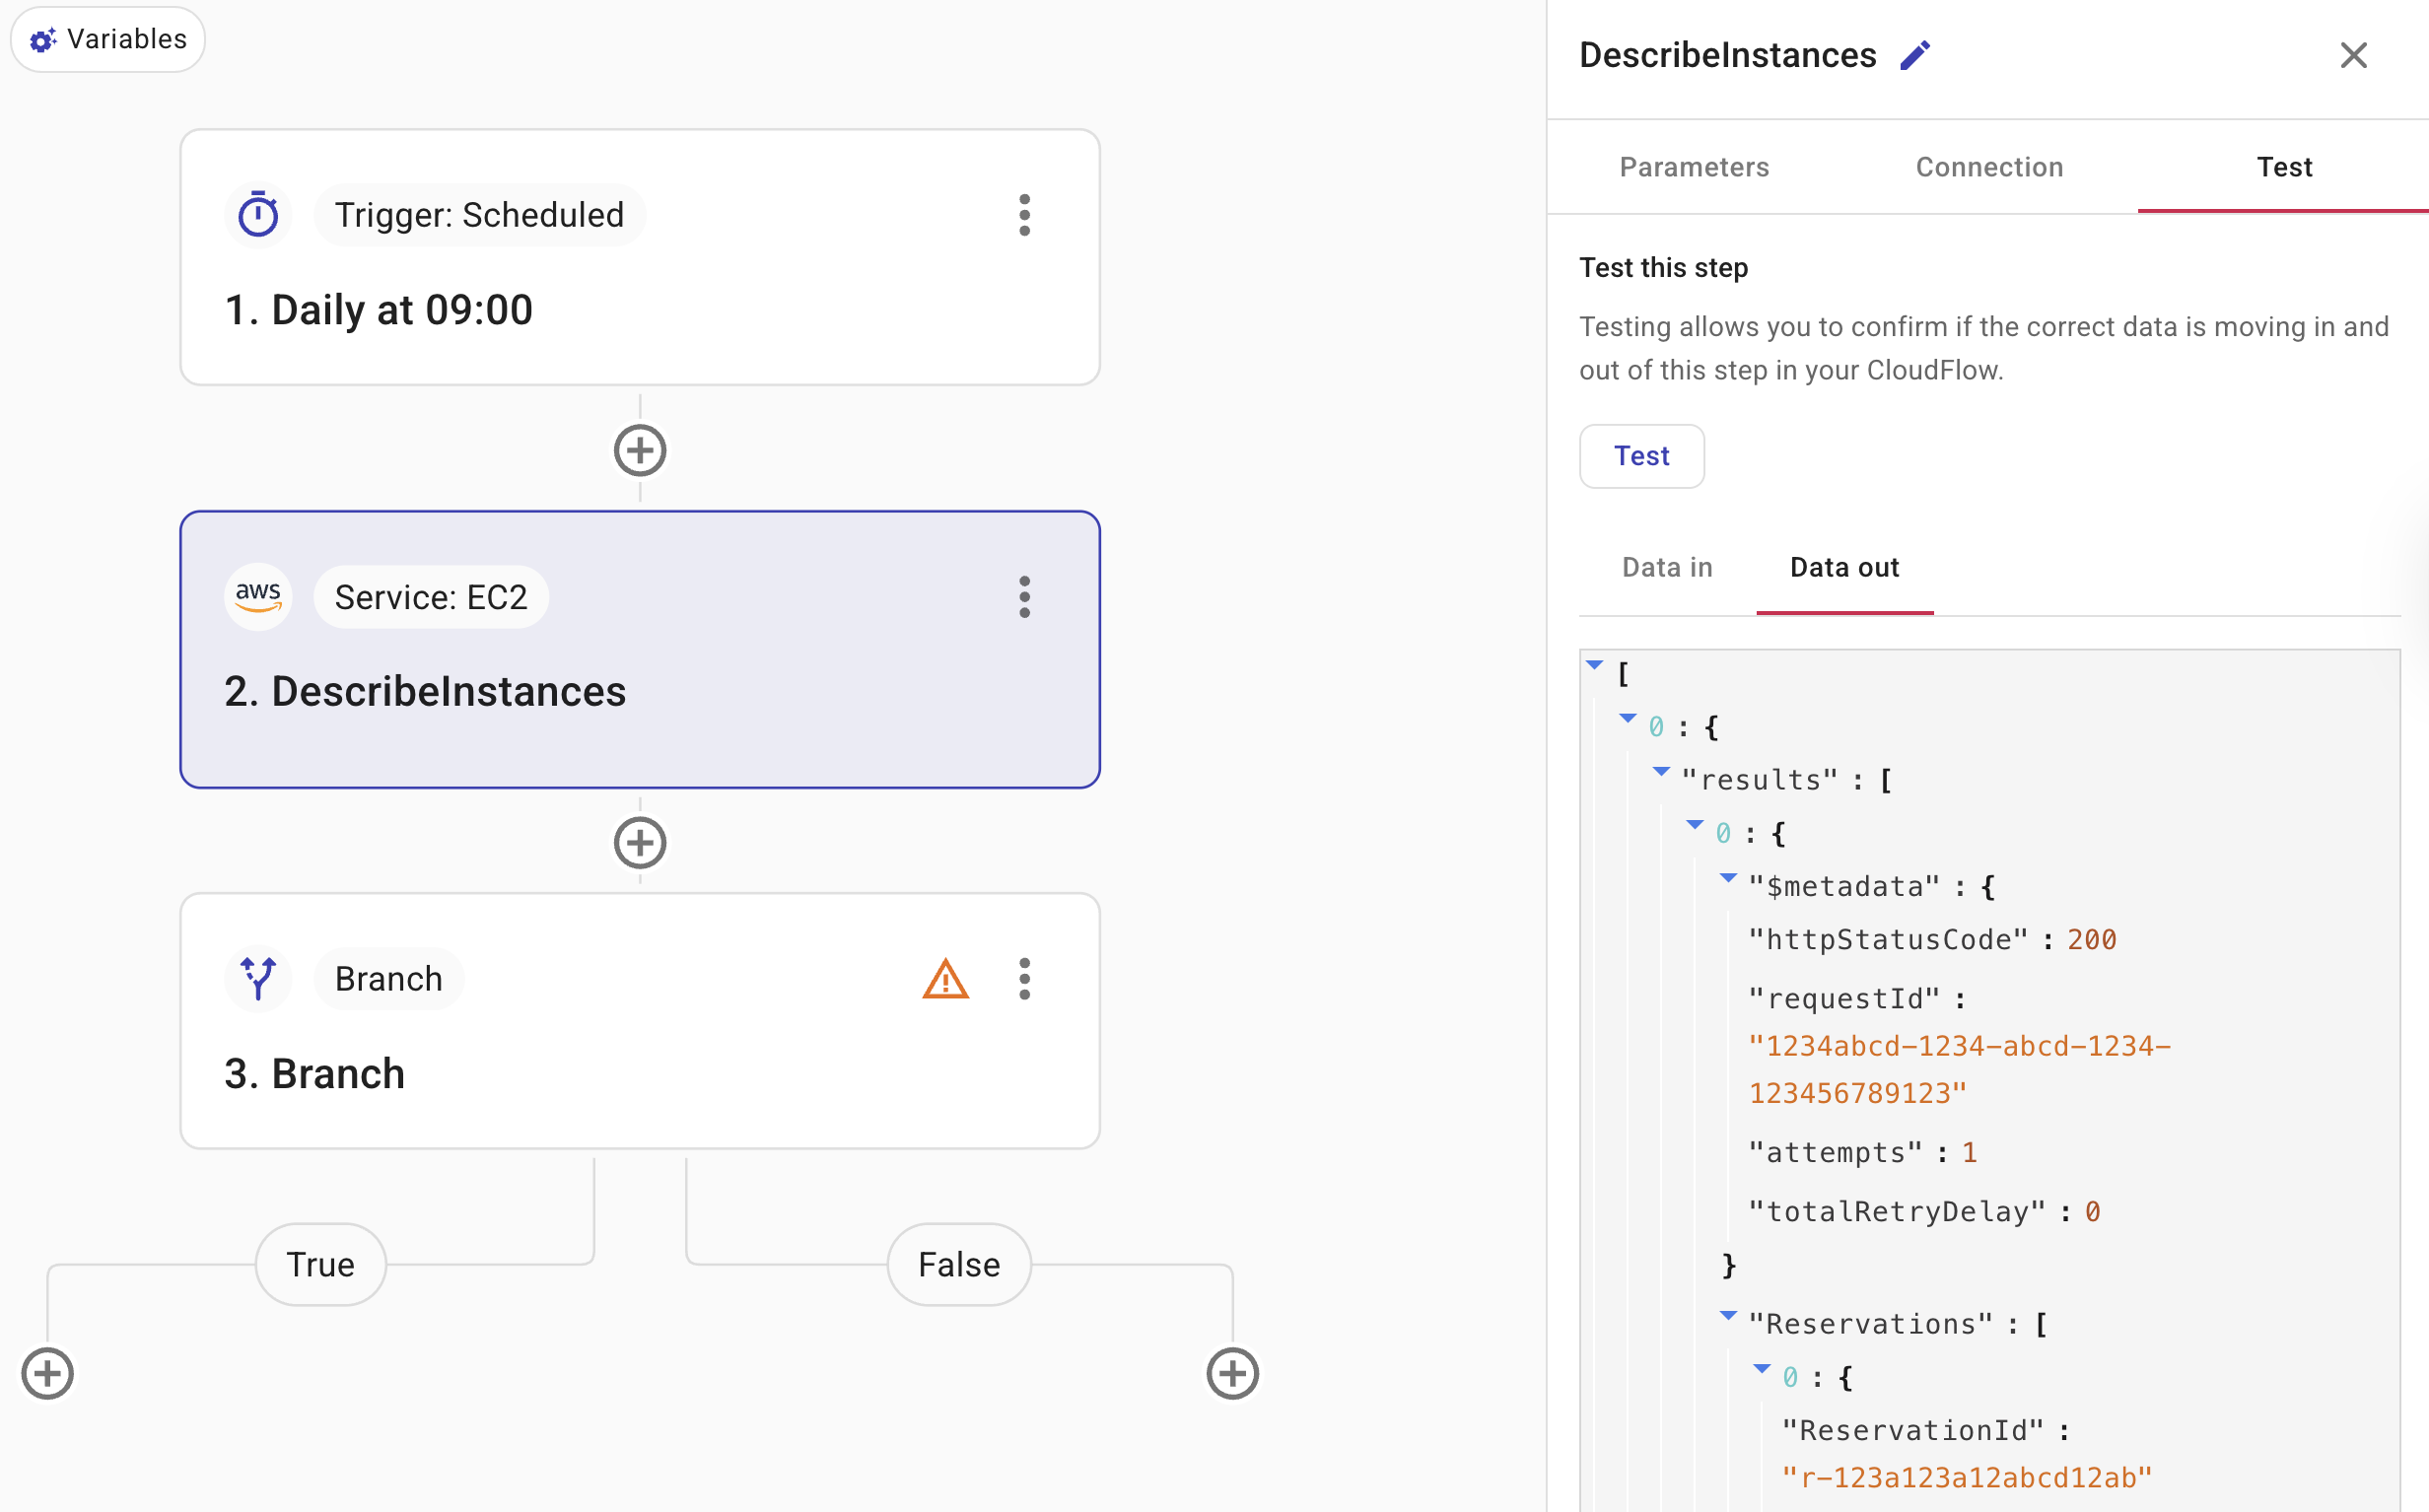
-
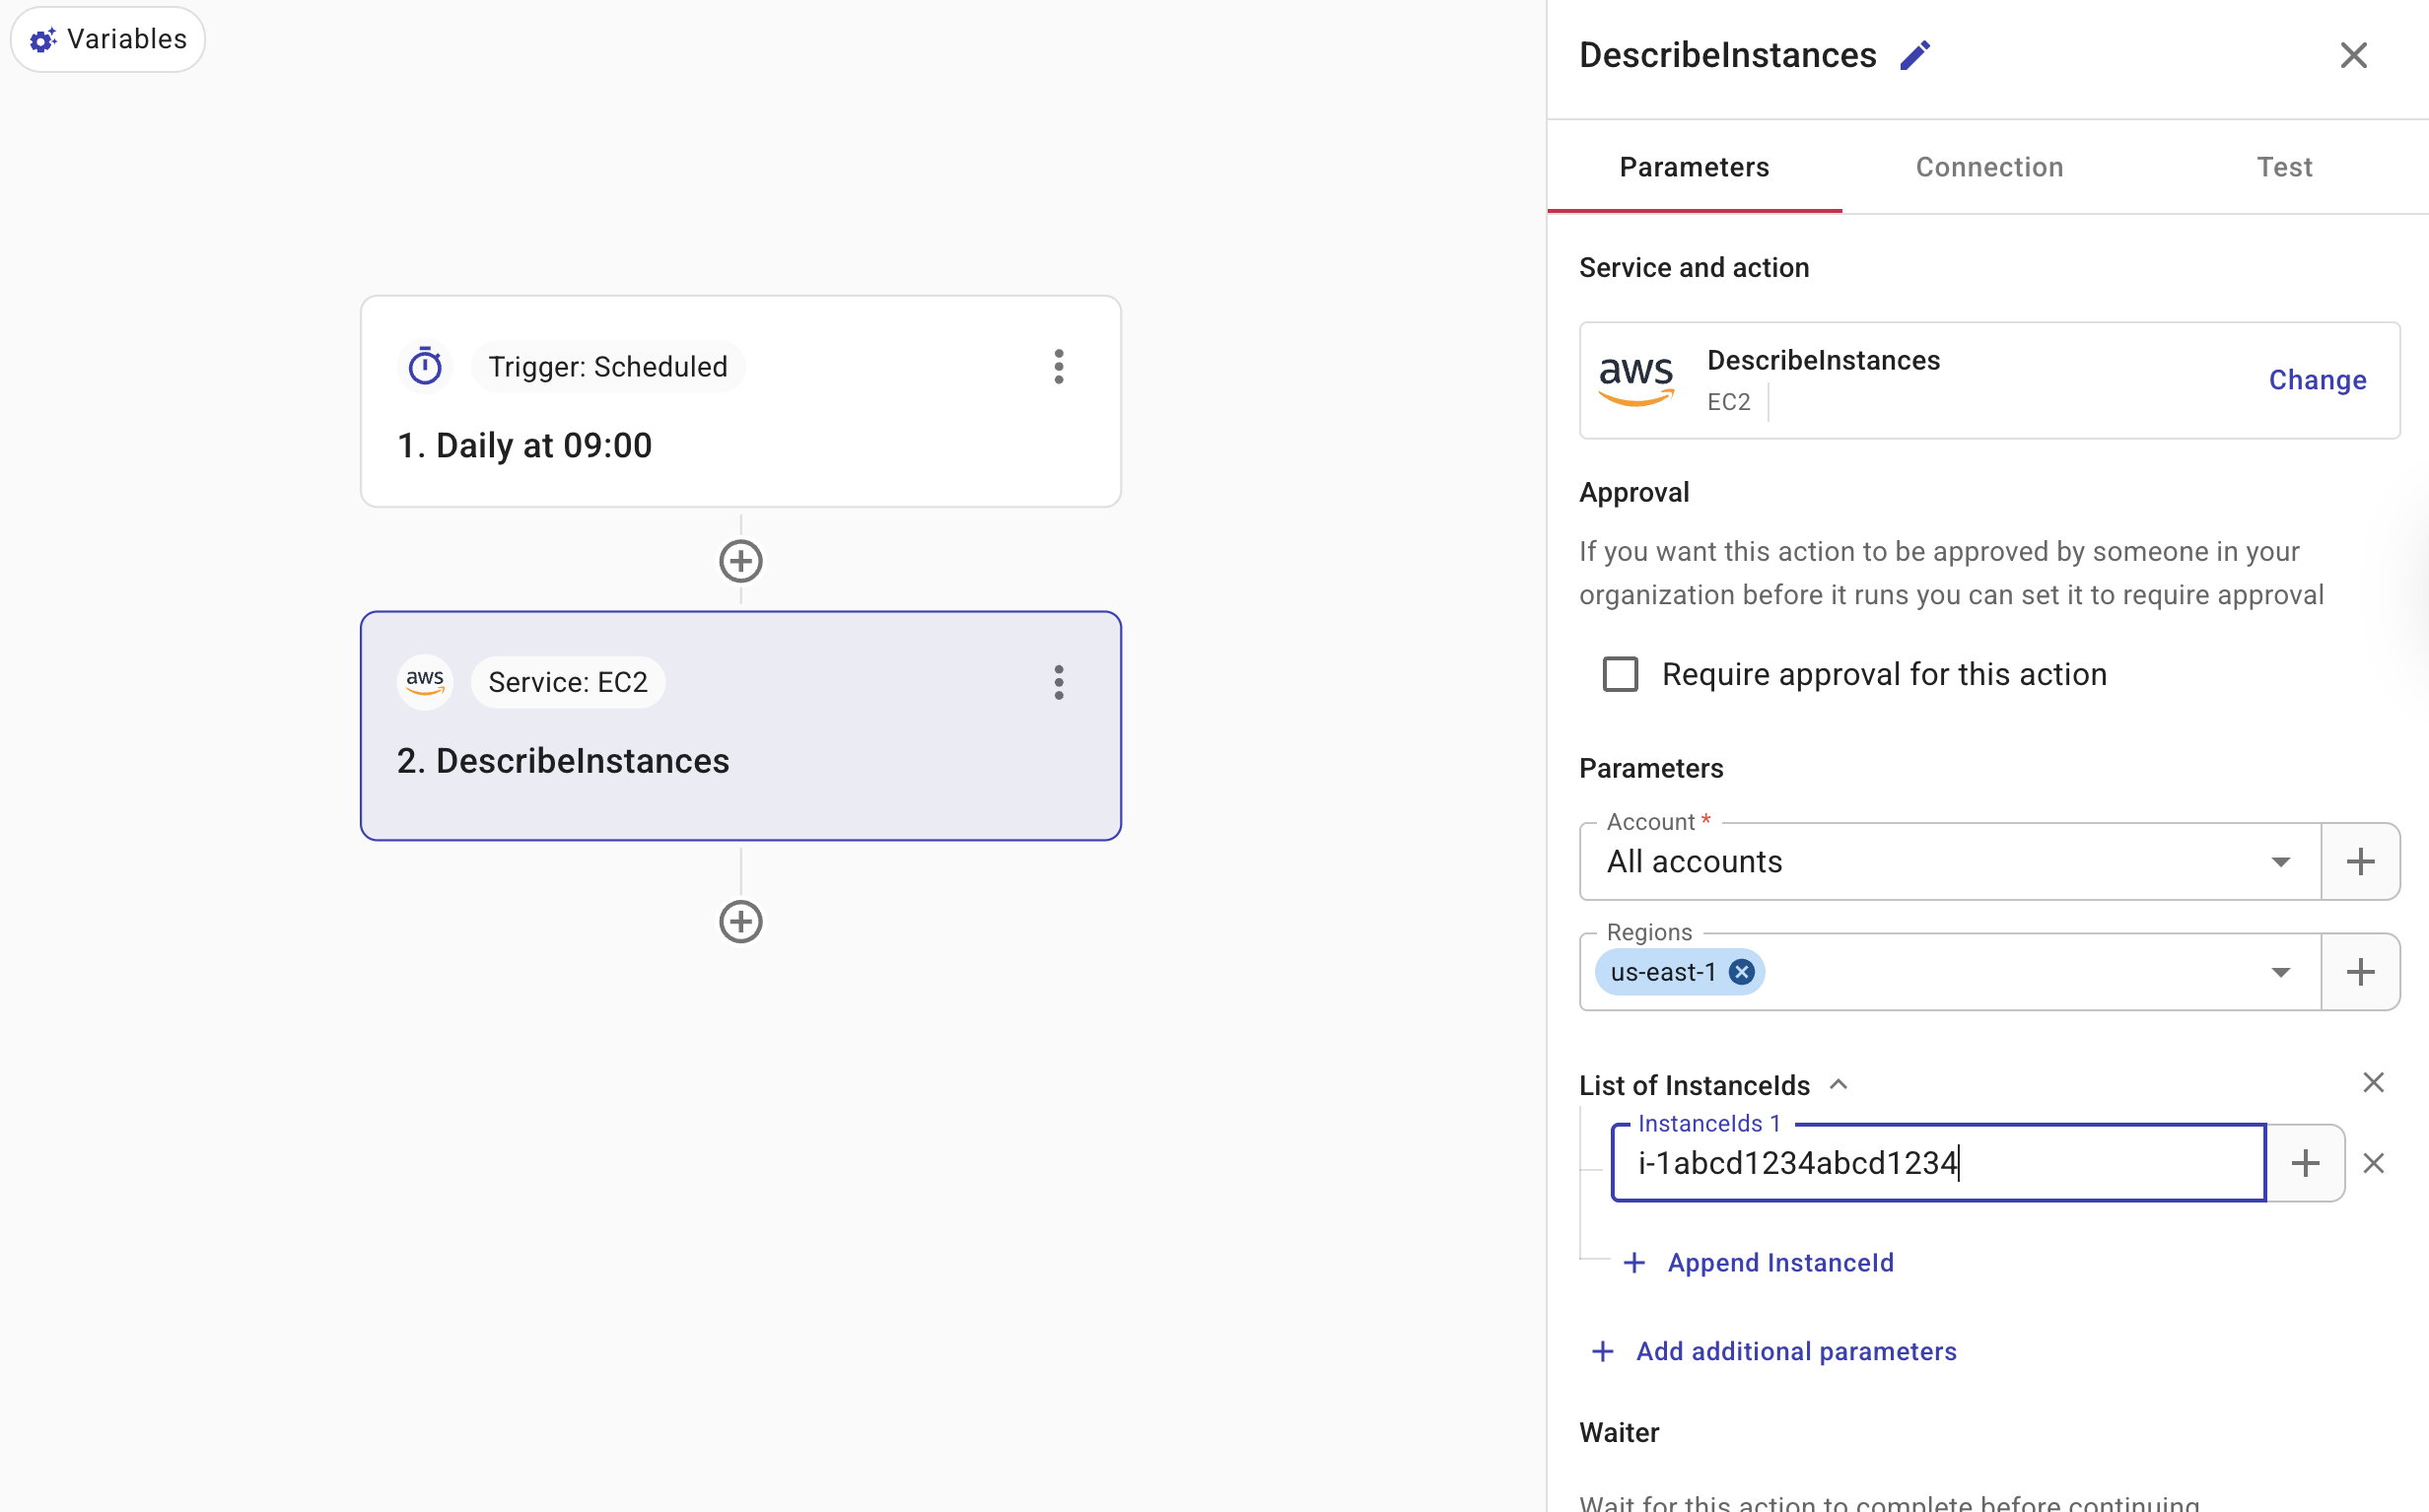
Go back to the Parameters tab, select Add additional parameters, and then select InstanceIds. Paste the Instance ID returned in the previous step.
-
Save the configuration.
Step 3: Check the condition of the instance
-
Add a Branch node.
-
Select the node to open the side panel for configuration.
-
Define the condition check.
-
Select Add new condition.
-
Use the plus button (+) to choose
DescribeInstances.Reservations.Instances.State.Nameas the subject operand, then select the==operator and set the value tostopped.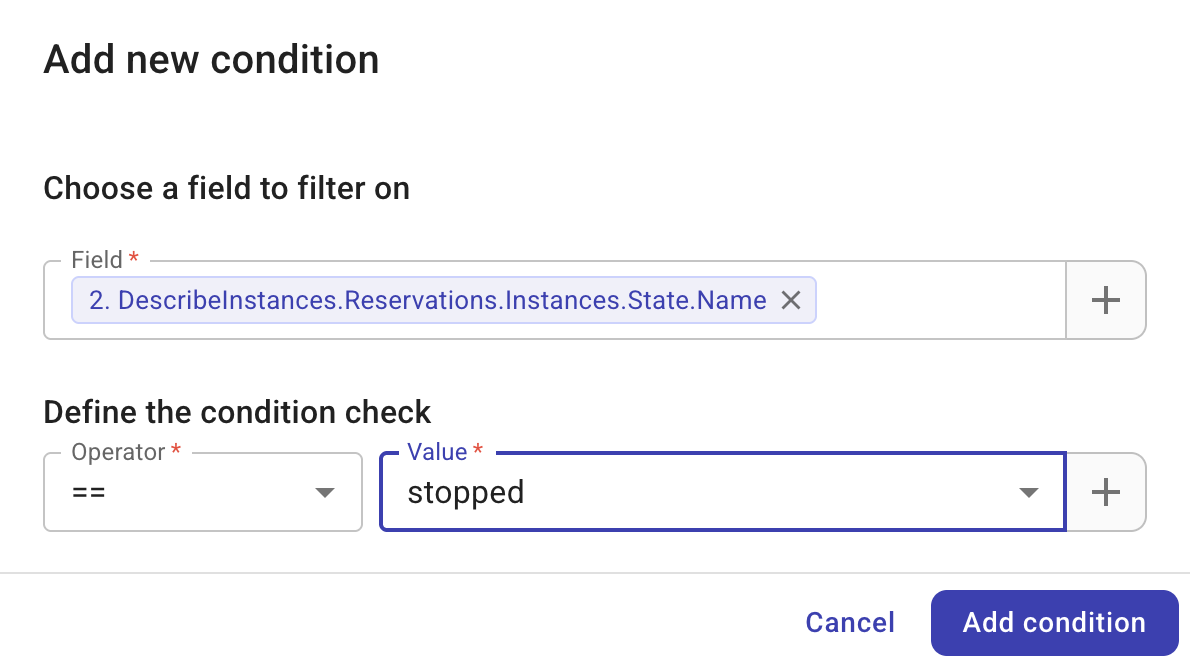
-
Select Add condition.
-
Step 4: Publish an SNS message
Now we need to define activities for the two branches.
-
Under the True branch, add a Perform an action node, search for the Amazon SNS Publish action and add it.
-
Configure the node:
-
On the Parameters tab, select the AWS account and region, and add the message to publish.

-
On the Connection tab, select a connection that has the necessary permissions.
If the connection you selected has the necessary permissions, you'll see a successful message; otherwise, you'll see instructions about what you need to do.
-
On the Test tab, select Use Data from Parameters for Data In, and then select Test.
-
Publish the flow
The last step is to publish the flow.
Once published, you can choose to Edit, Run, or Unpublish a flow on the same screen, or you can choose Close to return to the main screen.