Geographic access and custom regions
Geographic access is available for distributors and resellers with at least one child tenant.
Geographic scope
A user's geographic scope determines which customers the user can access in a multi-tenant hierarchy. You can assign or change the scope using the Geographic access option when performing the following tasks:
-
Invite an admin user when adding customers
Scope types
When configuring geographic access for a user, choose from the following to specify the scope:
-
Access level:
-
No geographic assignment: The user has no geographic scope assigned. -
Global: The user can access all customers across all regions within their hierarchy.
-
-
Custom regions: The user's access is limited to customers in a custom region defined in your tenant.
-
Countries: The user's access is limited to customers in the selected country.
Custom regions
You can create custom regions to group multiple countries together, and then assign the region as a user's geographic access scope.
Required permission
- Users Manager
View custom regions
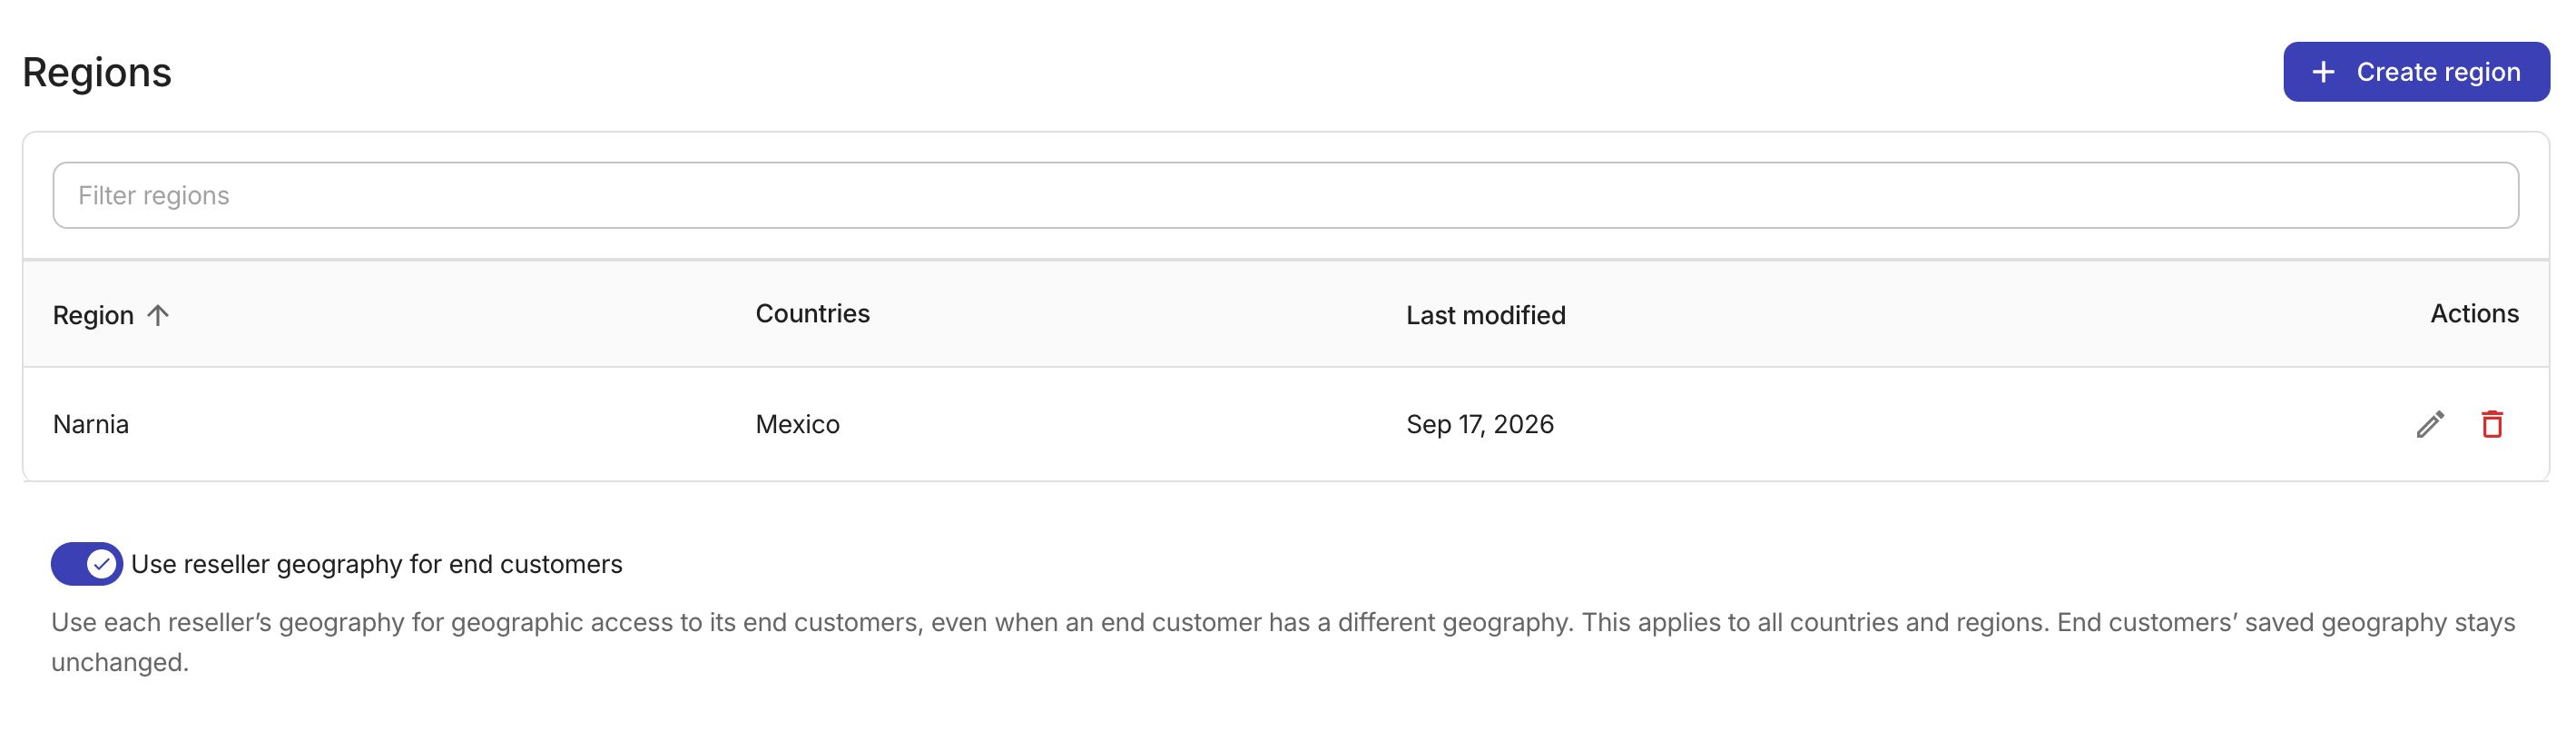
To view custom regions defined in your tenant, sign in to the DoiT console, select the gear icon () from the top navigation bar, and then select Regions.
Regions table
The Regions table displays the following for each custom region:
-
Region: The name of the custom region.
-
Countries: The countries included in the region.
-
Last modified: The date when the region was last updated.
Reseller geography inheritance
The Use reseller geography for end customers toggle below the Regions table is available only for distributors.
-
When enabled, end customers inherit their reseller's geographic scope. Geographic access is evaluated against the reseller instead of each end customer. This is useful when a distributor's access model is organized around resellers.
-
The setting applies to all geographic scope types, including country-based scopes and custom regions.
Create a custom region
To create a new region:
-
On the Regions page, select + Create region.
-
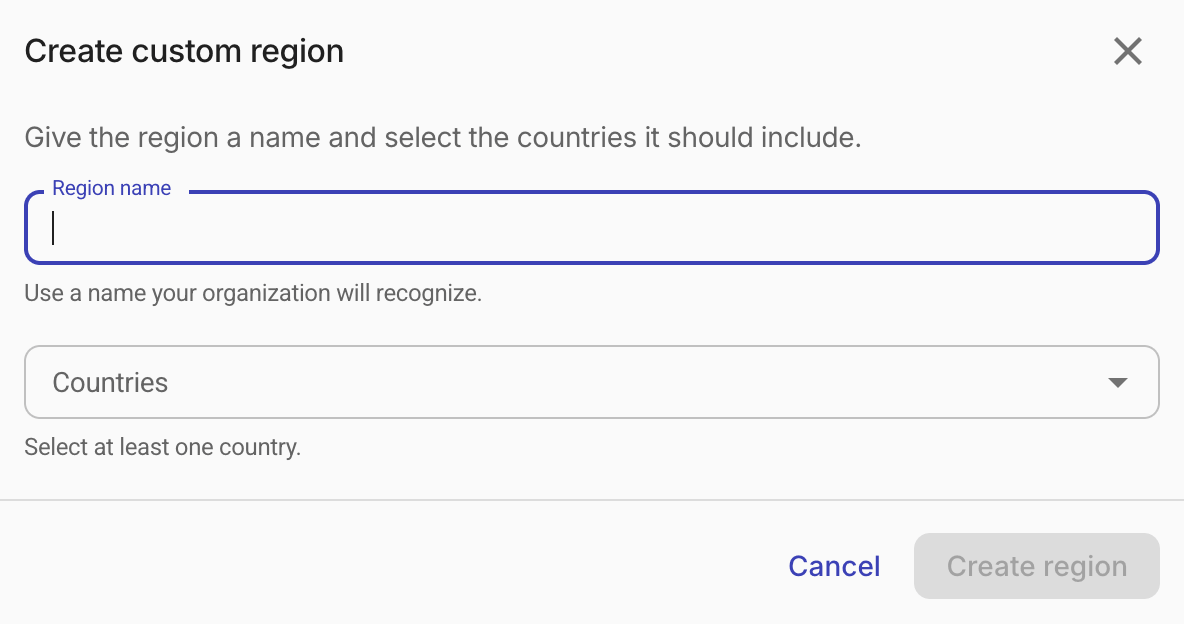
Configure the region.
-
Region name: Specify a region name.
-
Countries: Select one or more countries from the dropdown to include in the region.
-
-
Select Create region.
Edit a custom region
To update a region's name or the countries it includes:
-
On the Regions page, select the edit icon next to the region of interest.
-
Update the region name or change the selected countries.
-
Select Save changes.
Delete a custom region
Regions that are currently assigned to customers cannot be deleted. Remove the region's assignments before deleting it.
-
On the Regions page, select the delete icon next to the region of interest.
-
Confirm the deletion.