Create and manage threads
DoiT Threads connects Insights with your Jira instance to track your progress on actionable items. You can create multiple Jira threads for one insight to manage different aspects of the required work.
Before you begin
Prerequisites
Your Jira Cloud instance should have been connected with the DoiT platform. See Set up Jira integration.
Required permissions
-
Your DoiT account needs the Thread Manager permission.
-
You do not need a Jira account to create threads in the DoiT console.
Limitations
- Support for non-standard Jira configuration options is limited.
Create a thread
To create a Jira thread from an insight:
-
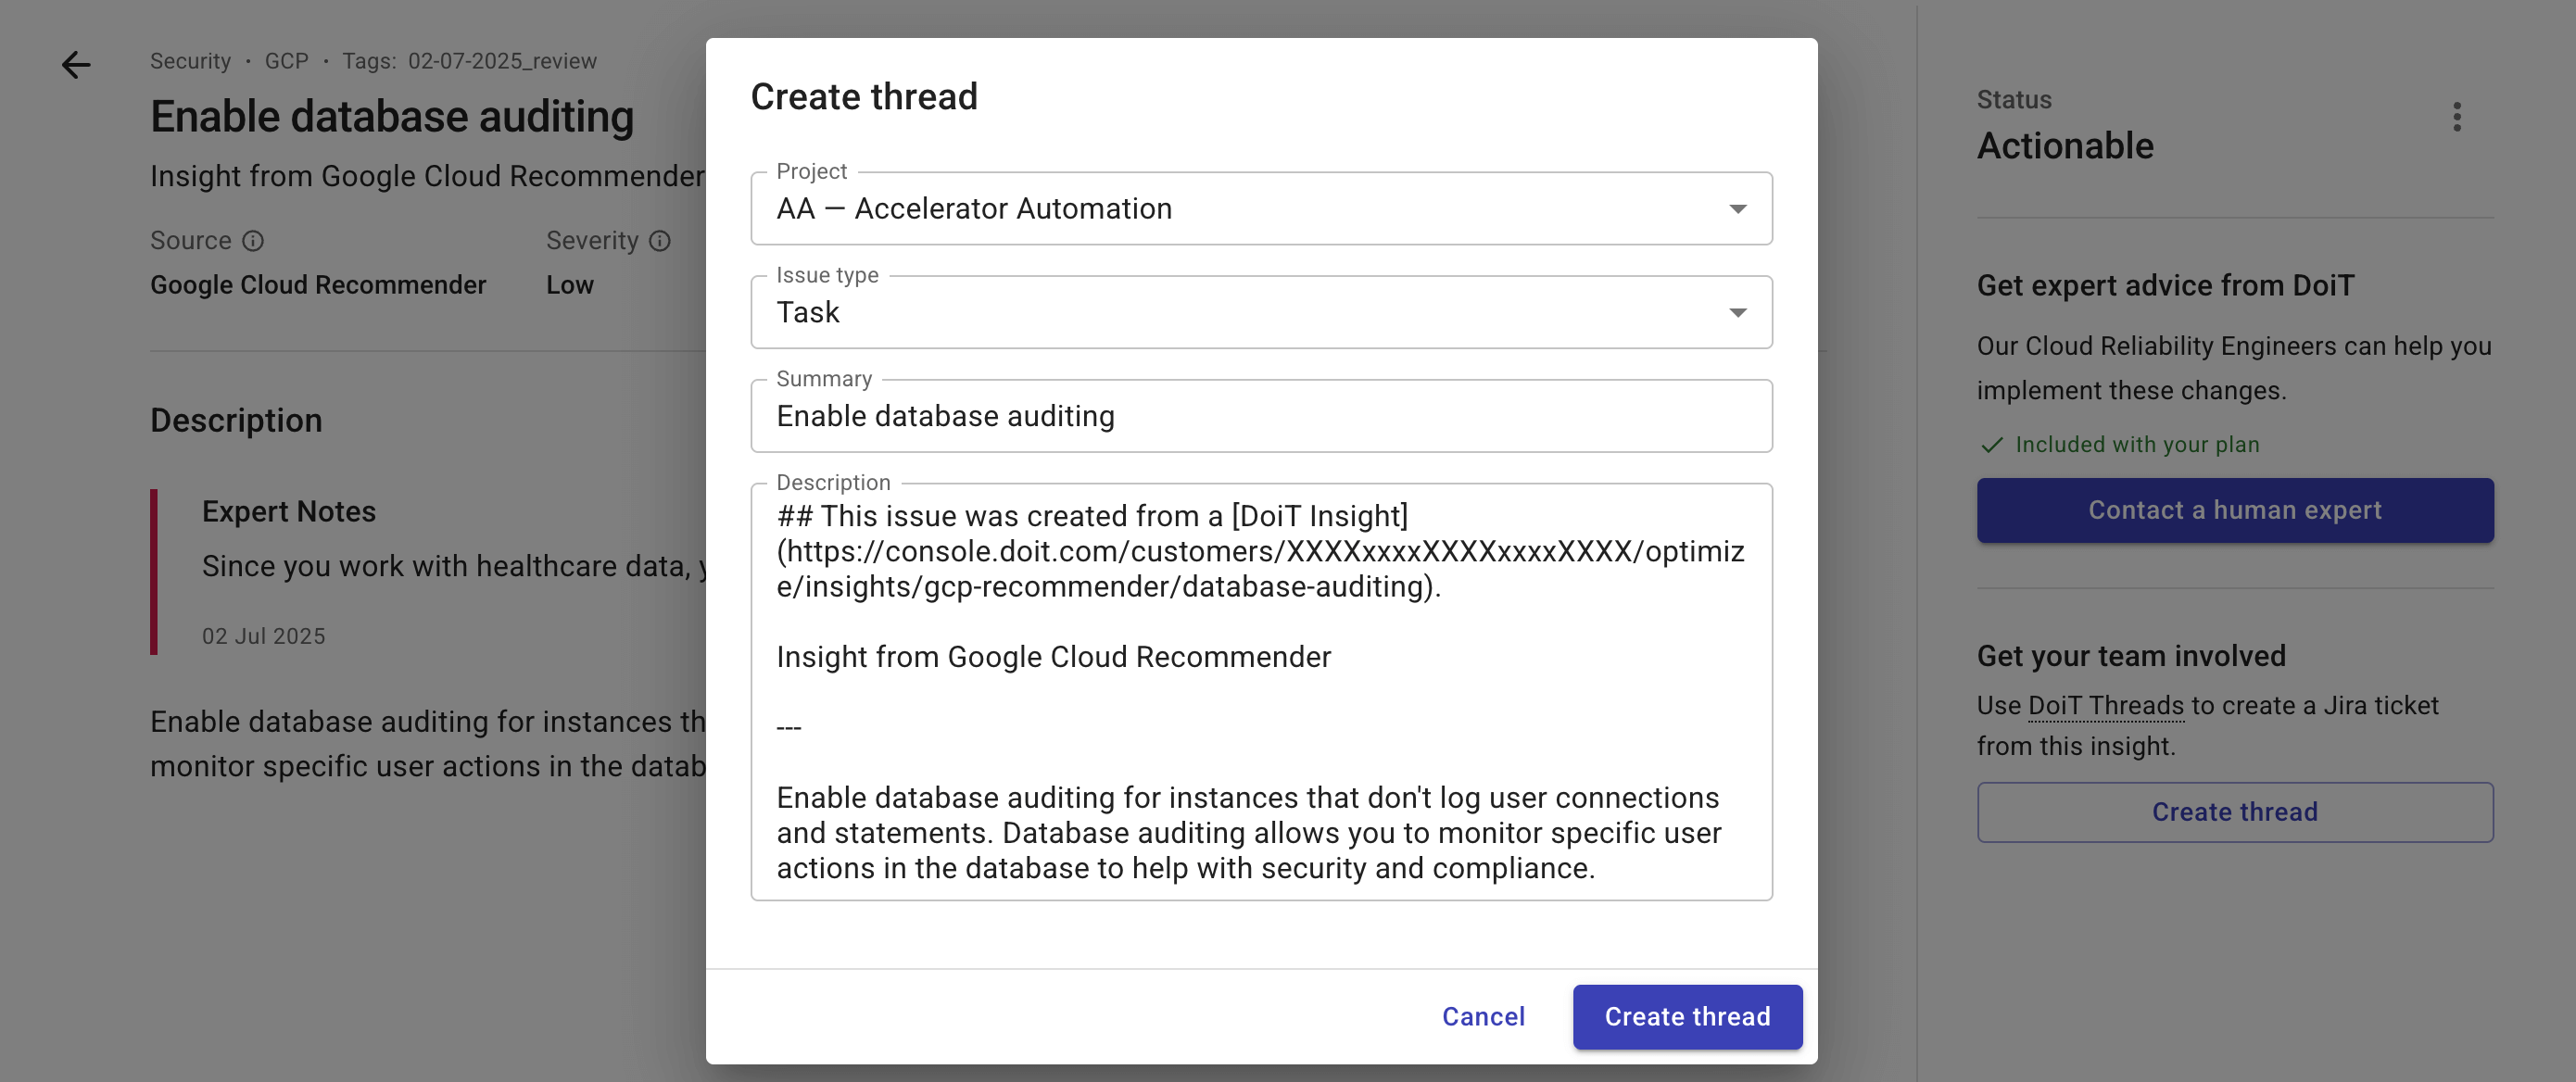
Select Create new thread on the insight detail page.
-
Choose a project from the drop-down. The list of available projects is fetched from your Jira instance.
-
Specify the issue type.
-
Review and edit the issue summary and description if needed, and fill in other fields as required by your Jira instance.

-
Select Create thread.
Manage Jira threads
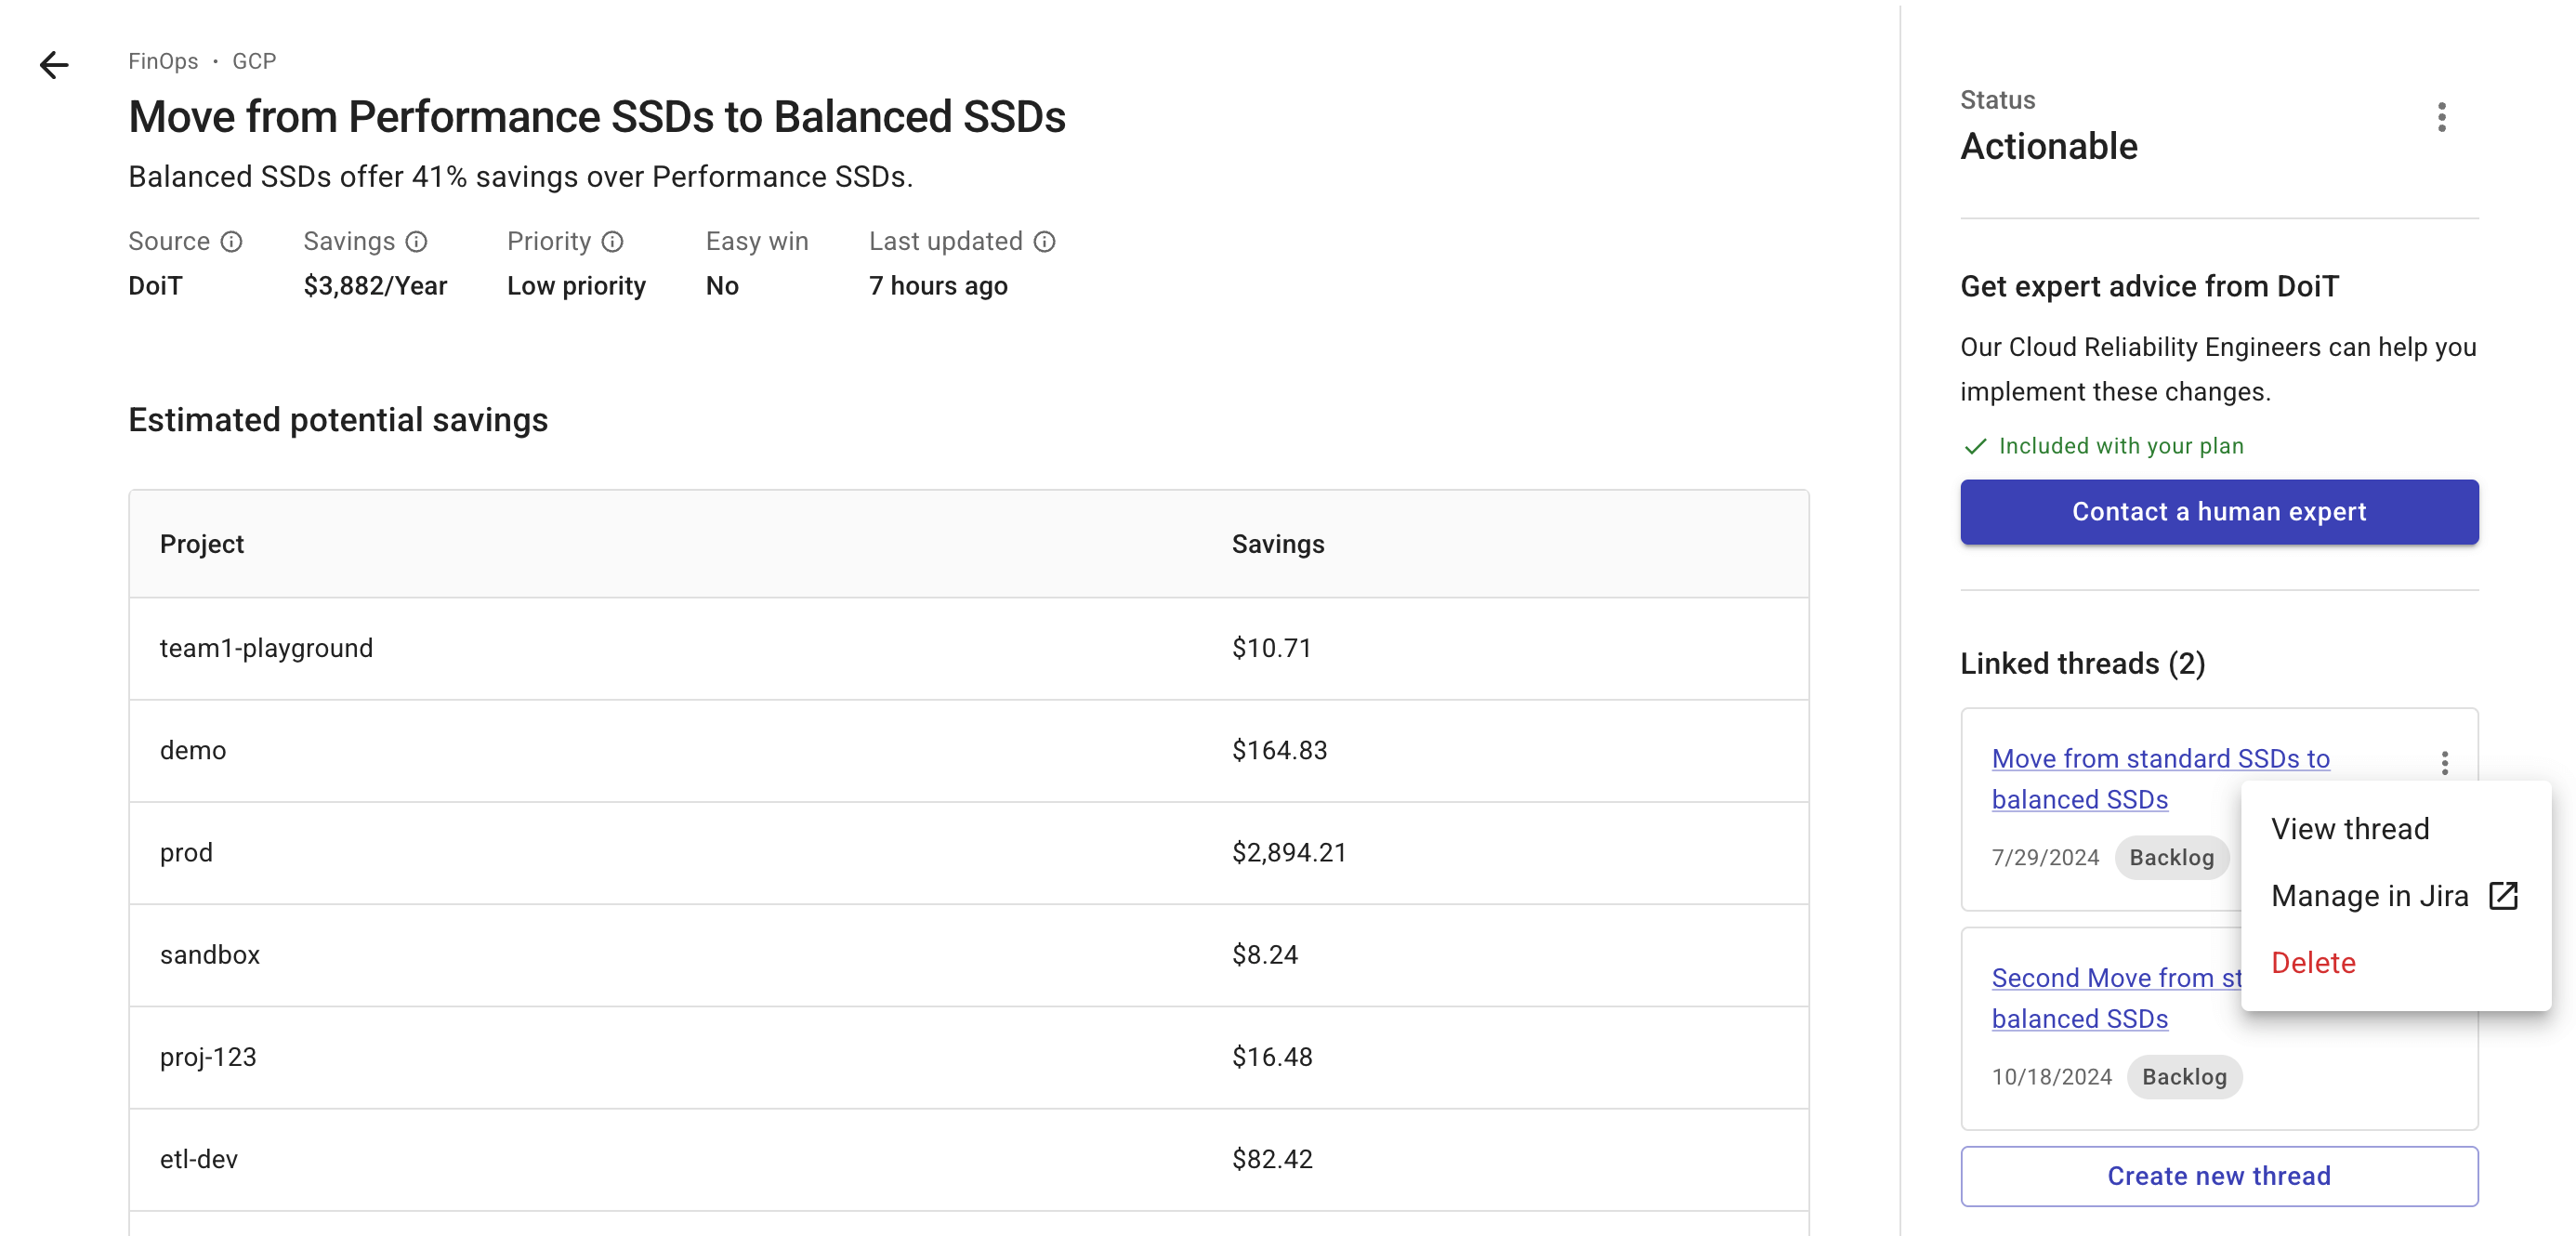
On an insight's detail page, you'll find the following information and options regarding threads:

-
Number of linked threads if there are already threads created for the insight.
-
The option to create a new thread.
-
For each linked thread:
-
Basic information such as the thread name, creation date, and status in Jira. You can also select the thread name to open the thread details page.
-
A three dots menu (⋮) that allows you to:
- View thread: View the thread details.
- Manage in Jira: Launch the issue in Jira. You'll need the relevant permissions in Jira.
- Delete: Delete the thread. You can choose to delete thread only or delete thread and its associated Jira issue; for the latter you'll need the relevant permissions in Jira.
-
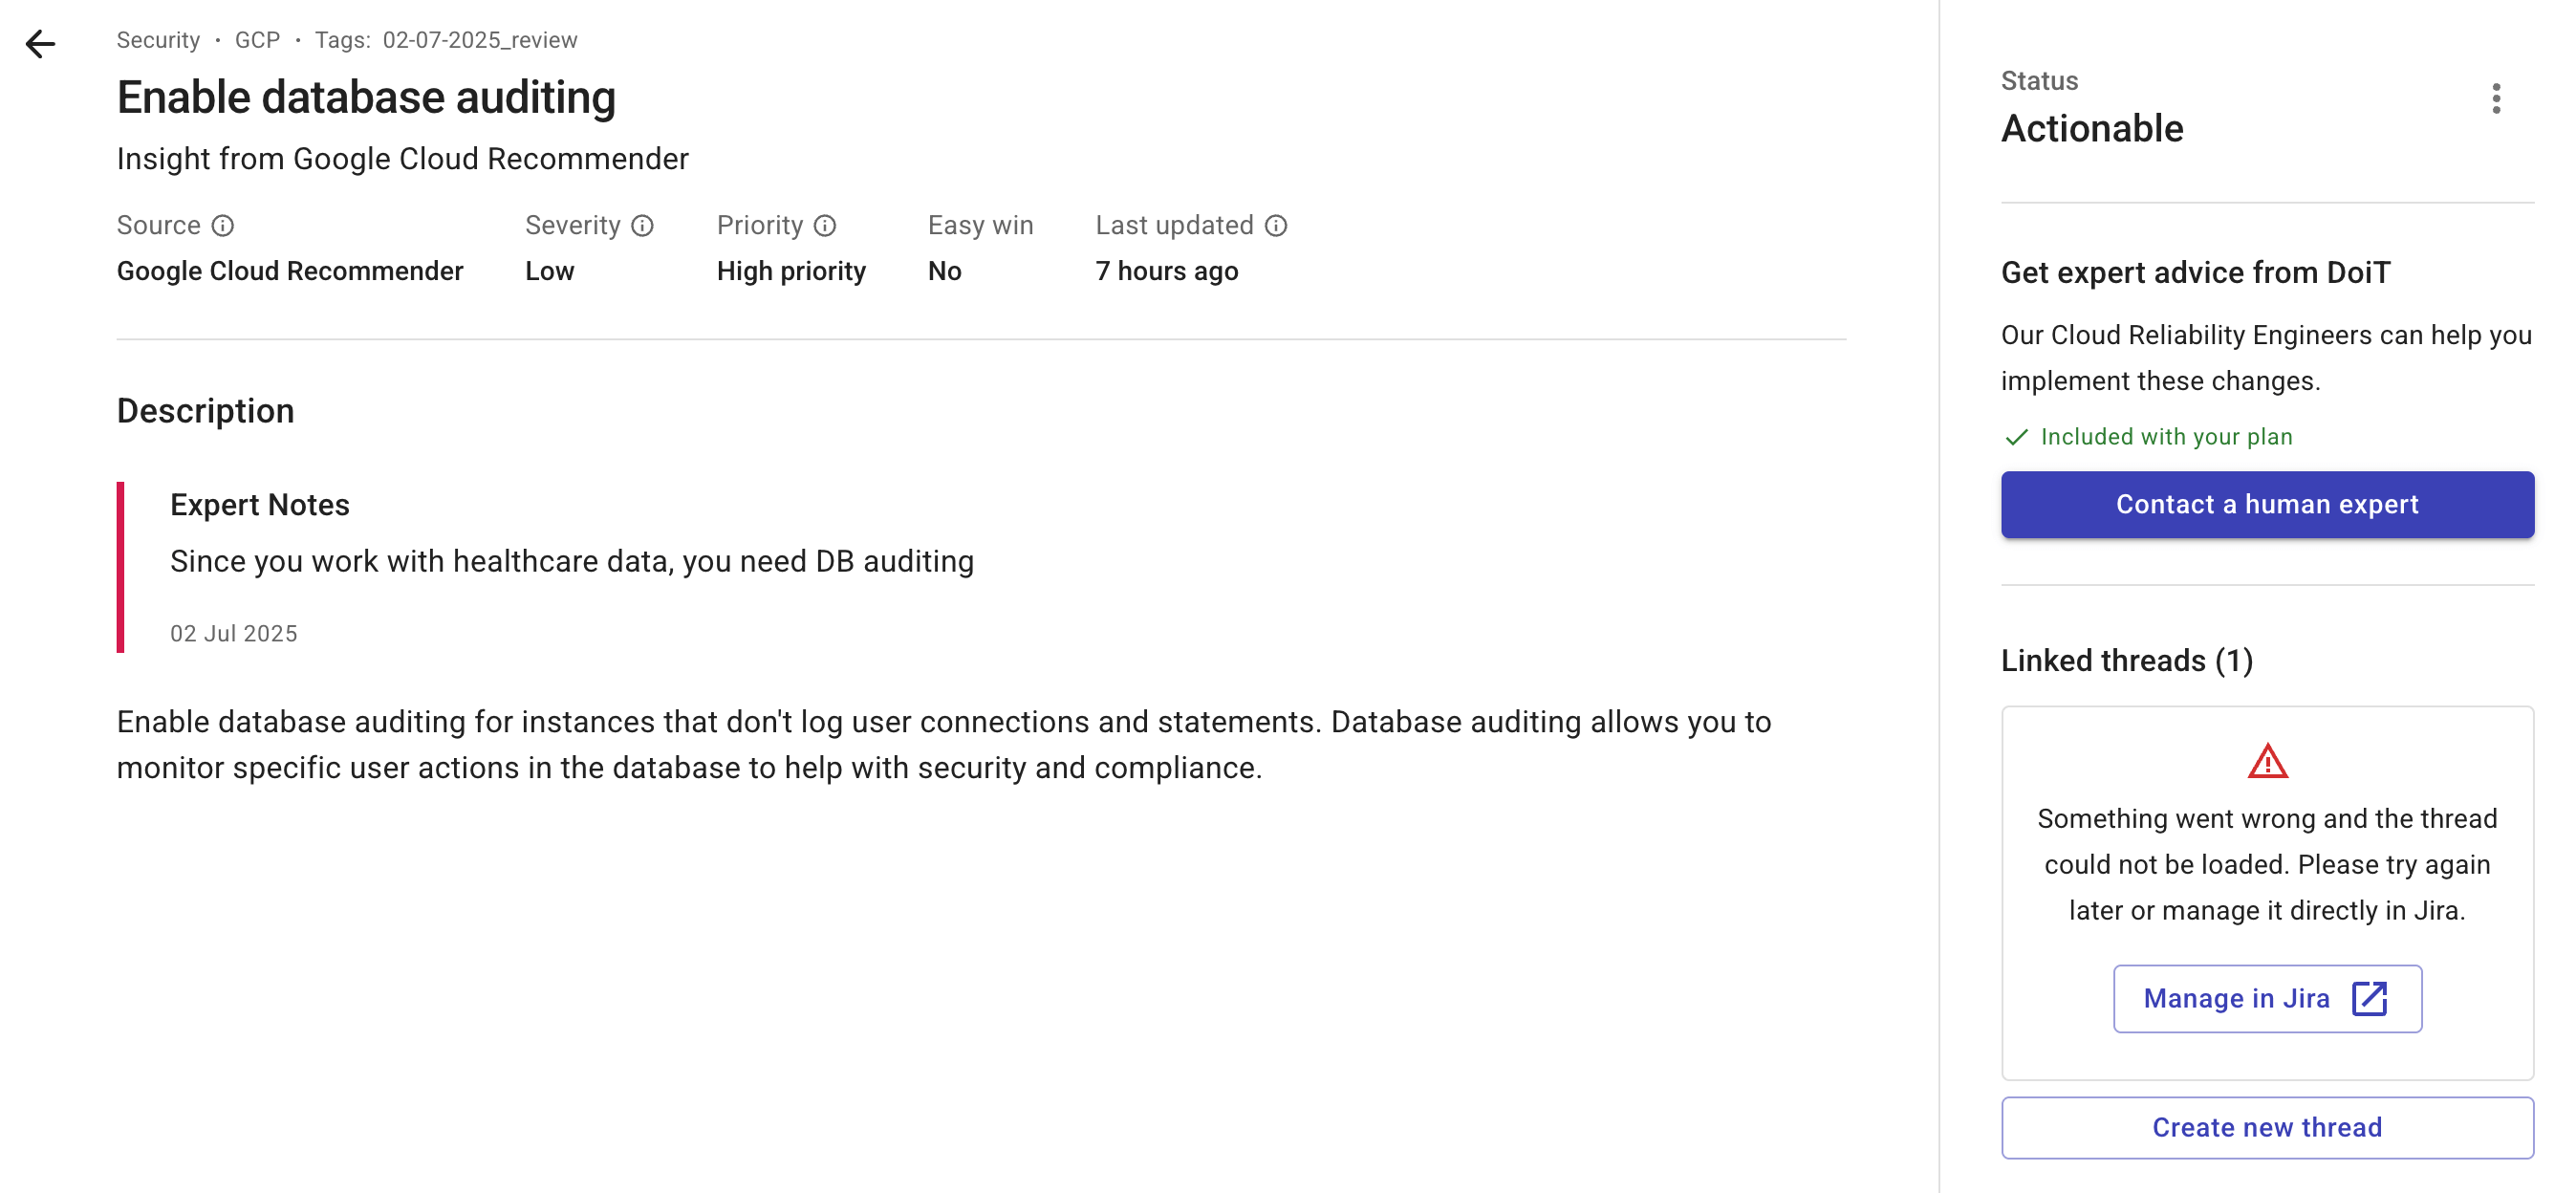
If a Jira issue associated with a thread has already been deleted in your Jira instance or, for some other reason, cannot be loaded, you'll see an error message.

-