Snowflake Integration
Introduction
The Attribute platform can be integrated with different 3rd party cloud services in order to assure consolidated cost view and complete cost attribution.
This document describes the required step to complete the integration with Snowflake billing.
Requirements
To provide detailed information for the entire organization, Attribute requires access to an [organization account].
In order to obtain this access securely the following is required:
- A RSA key pair for authentication.
- A dedicated warehouse to ensure no interruptions to your operations.
- A new role to encapsulate all of the required privileges.
- Assignment of the required privileges for the new role.
- [USAGE] privilege for the new warehouse.
- [ORG_USAGE_ADMIN] application role an organization account.
- A network policy to secure user access.
- A new service user, assigned the new role and network policy.
Integration Steps
- Generating a RSA key pair using openssl.
- Integration using an existing organization account.
- Creating a new organization account.
All of the Snowflake SQL commands can be executed using a Snowsight worksheet, Snowflake's UI web interface:
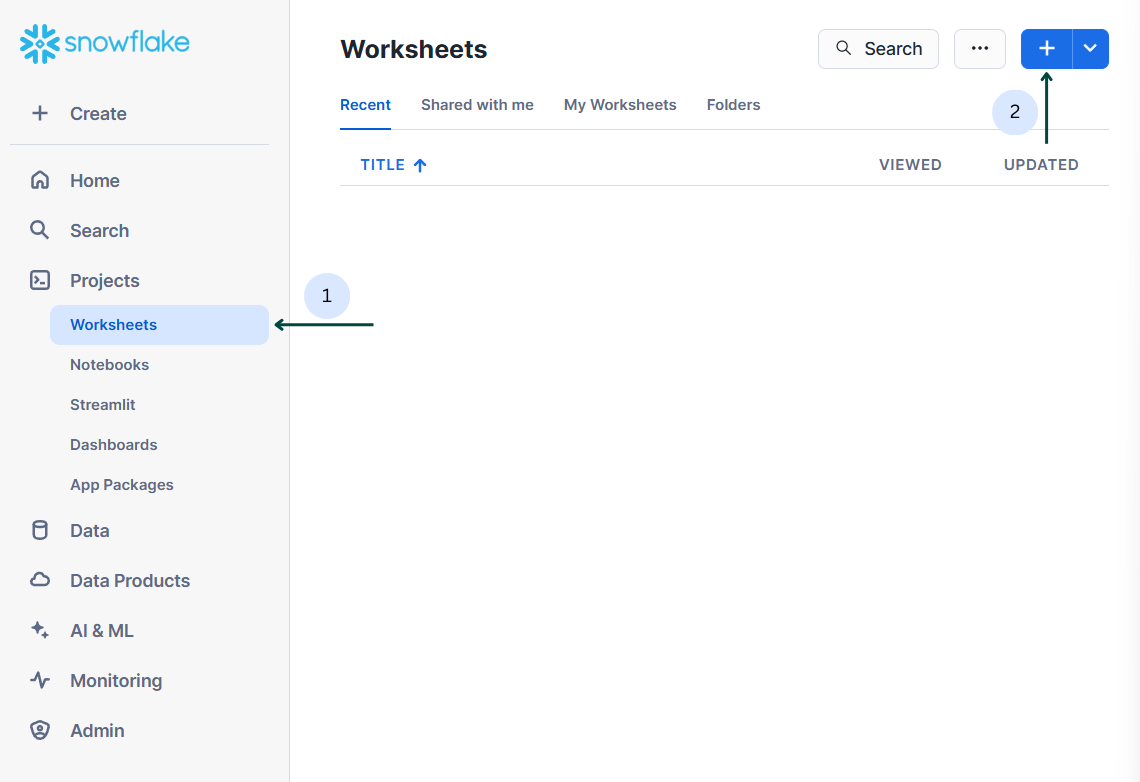
1. Generating a New RSA Key Pair
The following steps will guide you through creating a new RSA key pair and converting it as required by Snowflake.
1.1. Open a command shell where openssl is available.
1.2. Generate a new private key (key.p8) using the following command. Make sure to choose a strong passphrase.
openssl genrsa 2048 | openssl pkcs8 -topk8 -v2 des3 -inform PEM -out key.p8
1.3 Generate a public key (key.pub) using the following command. Make sure to use the private key generated in step 1.2.
Specify the passphrase you used when creating the private key.
openssl rsa -in key.p8 -pubout -out key.pub
Your public key, key.pub, should look something like this:
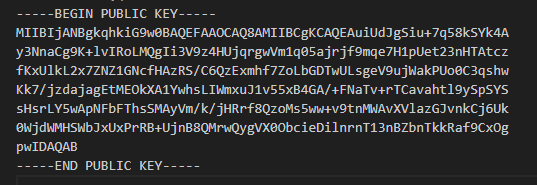
1.4. Convert the public key format to match Snowflake requirements.
Using the public key in Snowflake requires removing the delimiters and line breaks. Convert your public key (key.pub) to snowflake format using the following command:
sed '1d;$d' key.pub | tr -d '\n' > key.snowflake.pub
You will use the public key, key.snowflake.pub, when creating the new user.
To be able to login to the new user, we will need the following:
- The private key.
- The passphrase you've chosen for the private key.
Integration Using an Existing Organization Account
The following walkthrough covers the integration process using an organization account.
Make sure to run the commands using a user under the organization account, and that the user can use both the GLOBALORGADMIN and ACCOUNTADMIN roles.
If you need to create an organization account - refer to appendix B - creating a organization account.
Following are the steps required to complete the integration.
For your convenience, you can find the integration script - Appendix B - Integration script, which can be used as copy / paste.
Make sure to use the role ACCOUNTADMIN for running the commands:
USE ROLE ACCOUNTADMIN;
1. Creating a Warehouse
Creating a new warehouse ensures that Attribute queries do not block any of your operations.
Create a new warehouse which is optimized to minimize costs using the following command:
CREATE OR ALTER WAREHOUSE
    attributeWarehouse WITH
    WAREHOUSE_SIZE = 'XSMALL'
    WAREHOUSE_TYPE = 'STANDARD'
    AUTO_SUSPEND = 30
    INITIALLY_SUSPENDED = TRUE
    COMMENT = "Attribute's Warehouse";
2. Creating a Role
Create a new role which will encapsulate all of the required privileges using the following command:
CREATE ROLE attributeRole
    COMMENT = "Encapsulates privileges required for Attribute's service";
3. Assigning the Required Privileges
You will need to assign the application role ORG_USAGE_ADMIN to the new role created in step 2.
In order to do that, you need to use the role GLOBALORGADMIN.
Additionally, you will need to grant usage privileges on the new warehouse:
USE ROLE GLOBALORGADMIN;
GRANT APPLICATION ROLE ORG_USAGE_ADMIN TO ROLE attributeRole;
USE ROLE ACCOUNTADMIN;
GRANT USAGE ON WAREHOUSE attributeWarehouse TO ROLE attributeRole;
4. Creating a Network Policy
Create a new network policy, enabling access from Attribute IP addresses using the following command:
CREATE OR REPLACE NETWORK POLICY attributeAccess
    ALLOWED_IP_LIST = ('34.41.229.120', '35.224.163.103');
5. Creating a User
Create a new service type user using the following command.
Use the public key in Snowflake's required format (contents of key.snowflake.pub) for RSA_PUBLIC_KEY field, which was created in section 1 - generating the RSA key.
CREATE OR REPLACE USER attributeSVC
    TYPE = SERVICE
    DEFAULT_ROLE = attributeRole
    DEFAULT_WAREHOUSE = attributeWarehouse
    NETWORK_POLICY = attributeAccess
    RSA_PUBLIC_KEY = '<public_key>'
    COMMENT = "Attribute's Service User";
Finally, grant the role to the account:
GRANT ROLE attributeRole TO USER attributeSVC;
Collect the Information Required for the Integration
Along with the private key and its passphrase, include the output for the following query, which displays the account identifier:
SELECT CURRENT_ORGANIZATION_NAME() || '-' || CURRENT_ACCOUNT_NAME();
Appendix A - Organization Account Integration Script
The following script contains all of the commands mentioned above.
Replace the placeholder in RSA_PUBLIC_KEY with the public key, and run the entire script as is.
-- Using the appropriate role
USE ROLE ACCOUNTADMIN;

-- Creating a warehouse
CREATE OR ALTER WAREHOUSE
    attributeWarehouse WITH
    WAREHOUSE_SIZE = 'XSMALL'
    WAREHOUSE_TYPE = 'STANDARD'
    AUTO_SUSPEND = 30
    INITIALLY_SUSPENDED = TRUE
    COMMENT = "Attribute's Warehouse";

-- Creating a role
CREATE ROLE attributeRole
    COMMENT = "Encapsulates privileges required for Attribute's service";

-- Assigning privileges
USE ROLE GLOBALORGADMIN;
GRANT APPLICATION ROLE ORG_USAGE_ADMIN TO ROLE attributeRole;
USE ROLE ACCOUNTADMIN;
GRANT USAGE ON WAREHOUSE attributeWarehouse TO ROLE attributeRole;

-- Creating a network policy
CREATE OR REPLACE NETWORK POLICY attributeAccess
    ALLOWED_IP_LIST = ('34.41.229.120', '35.224.163.103');

-- Creating a user
CREATE OR REPLACE USER attributeSVC
    TYPE = SERVICE
    DEFAULT_ROLE = attributeRole
    DEFAULT_WAREHOUSE = attributeWarehouse
    NETWORK_POLICY = attributeAccess
    RSA_PUBLIC_KEY = '<public_key>'
    COMMENT = "Attribute's Service User";

GRANT ROLE attributeRole TO USER attributeSVC;

-- Retrieving account identifier
SELECT CURRENT_ORGANIZATION_NAME() || '-' || CURRENT_ACCOUNT_NAME();
Appendix B - Creating a New Organization Account
The following walkthrough covers creating a new organization account.
Replace the placeholders in the command and execute it in order to create the account.
Make sure to run the queries using a user under an ORGADMIN-enabled account, and that the user can use the ORGADMIN role.
USE ROLE ORGADMIN;
CREATE ORGANIZATION ACCOUNT <new_account_name>
    ADMIN_NAME = <admin_username>
    ADMIN_PASSWORD = '<admin_password>'
    EMAIL = '<admin_email>'
    EDITION = enterprise;
Contact
If you require any additional assistance, please contact Attribute's support at [email protected].
Alternatively, you can request to join a shared Slack channel for support. To request access, email [email protected] with your details.
Trademarks: Snowflake is a registered trademark of Snowflake Inc. All other trademarks are the property of their respective owners.