User groups
A user group consists of users who share a single role and inherit its permissions. User groups in Cloud Intelligence let you assign a shared role to multiple users at once, reducing administrative overhead and ensuring consistent permissions.
-
One role per group: Each group can have only one role. If users need permissions from several roles, add them to all relevant groups or create a custom role with the required permissions.
-
Role assignment limits: When you assign a role to a group, every permission in that role must be part of your cumulative permissions — the combined permissions from your directly assigned role and any roles you inherit through group memberships. Roles that include a permission you do not hold are not available to assign.
-
Additive permissions: Joining a group grants extra access without overriding a user's individual role. Members inherit the group's role in addition to any roles assigned directly to them.
-
Single-point management: Instead of updating individual accounts, add users to a group or update the group's role to change permissions team-wide.
-
Groups without roles: A group with no assigned role acts solely as a member list and grants no additional access.
-
Imported groups: Google Workspace imports are available only to DoiT employees. Google Workspace manages an imported group's name and membership.
Required permission
- Users Manager
Access user groups
To access user groups:
-
Sign in to the DoiT console, select the gear icon () from the top navigation bar, and then select Users and access.
-
Select Groups from the left-hand menu.

Each group shows the following information:
-
Group name: The name of the group.
-
Member count: The number of users in the group (for example,
3 users). -
Role: The role assigned to the group, or one of the following:
No role assigned: The group has no assigned role and does not grant extra access.Role unavailable: The role cannot be resolved.
-
You can select a group to view its details.
Import groups from Google Workspace
Google Workspace imports are available only to DoiT employees through the DoiT Google groups tab. Customer users can create a group manually.
Create a group manually
To create a user group in Cloud Intelligence:
-
On the Groups page, select Create group.
-
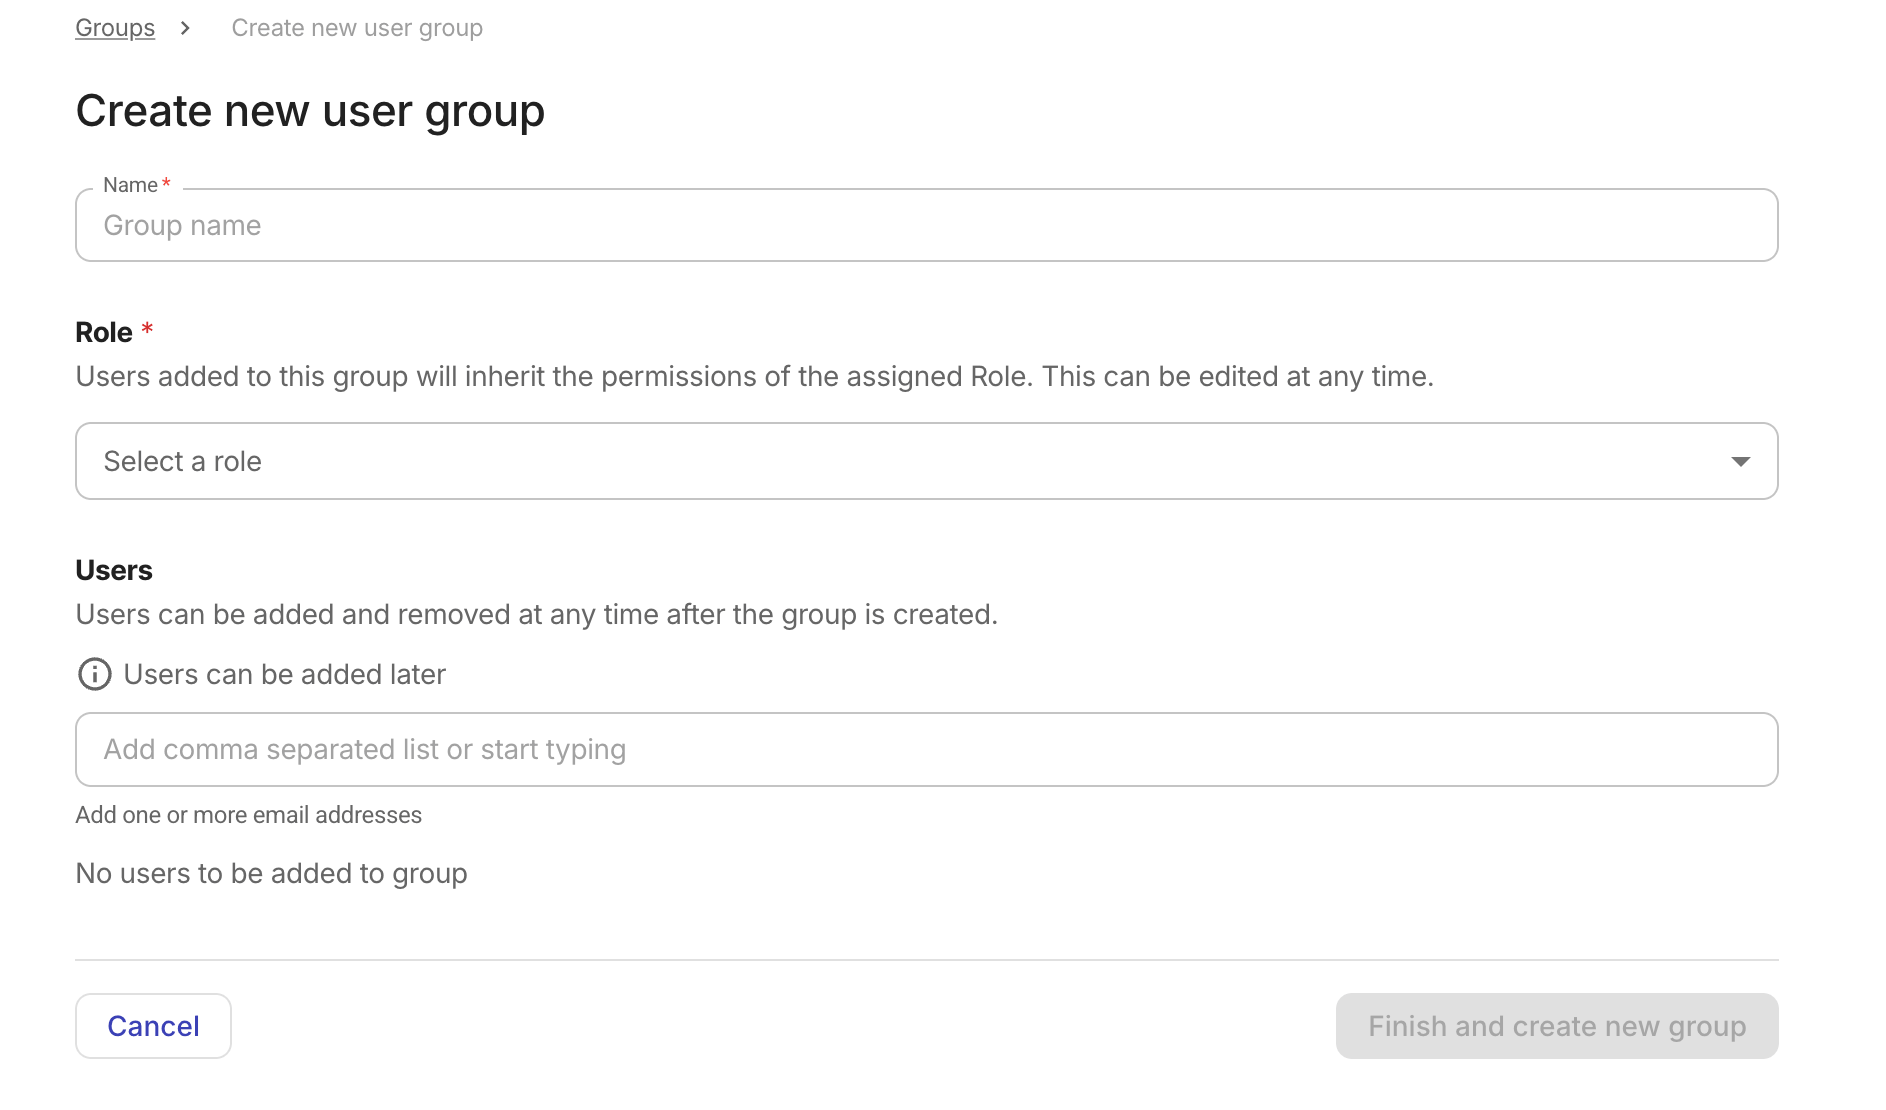
Configure the new group.
-
Name: Enter a unique group name.
-
Role (optional): Select a role for the group, or select No role to create a group without one. A group can have only one role. The dropdown only shows roles whose permissions are all included in your cumulative permissions, preventing you from delegating permissions you don't have. Roles are grouped into Preset and Custom, and each role displays its permission count. You can change or remove the role after creating the group.
After you select a role, a summary panel appears with the role name, permission count, and a description. Expand the panel to view the individual permissions.
-
Users (optional): Enter one or more email addresses. You can only add users who have accepted their invite and have an active account. You can add up to 100 users at a time. Unrecognized email addresses and duplicates do not count toward this limit. To add more than 100 users, create the group first and then add additional users in separate batches.
-
-
Select Finish and create new group.
Edit a group
You can change a group's role when editing it. For a group created in Cloud Intelligence, you can also change its name. For an imported group, the name is managed in Google Workspace and cannot be changed.
-
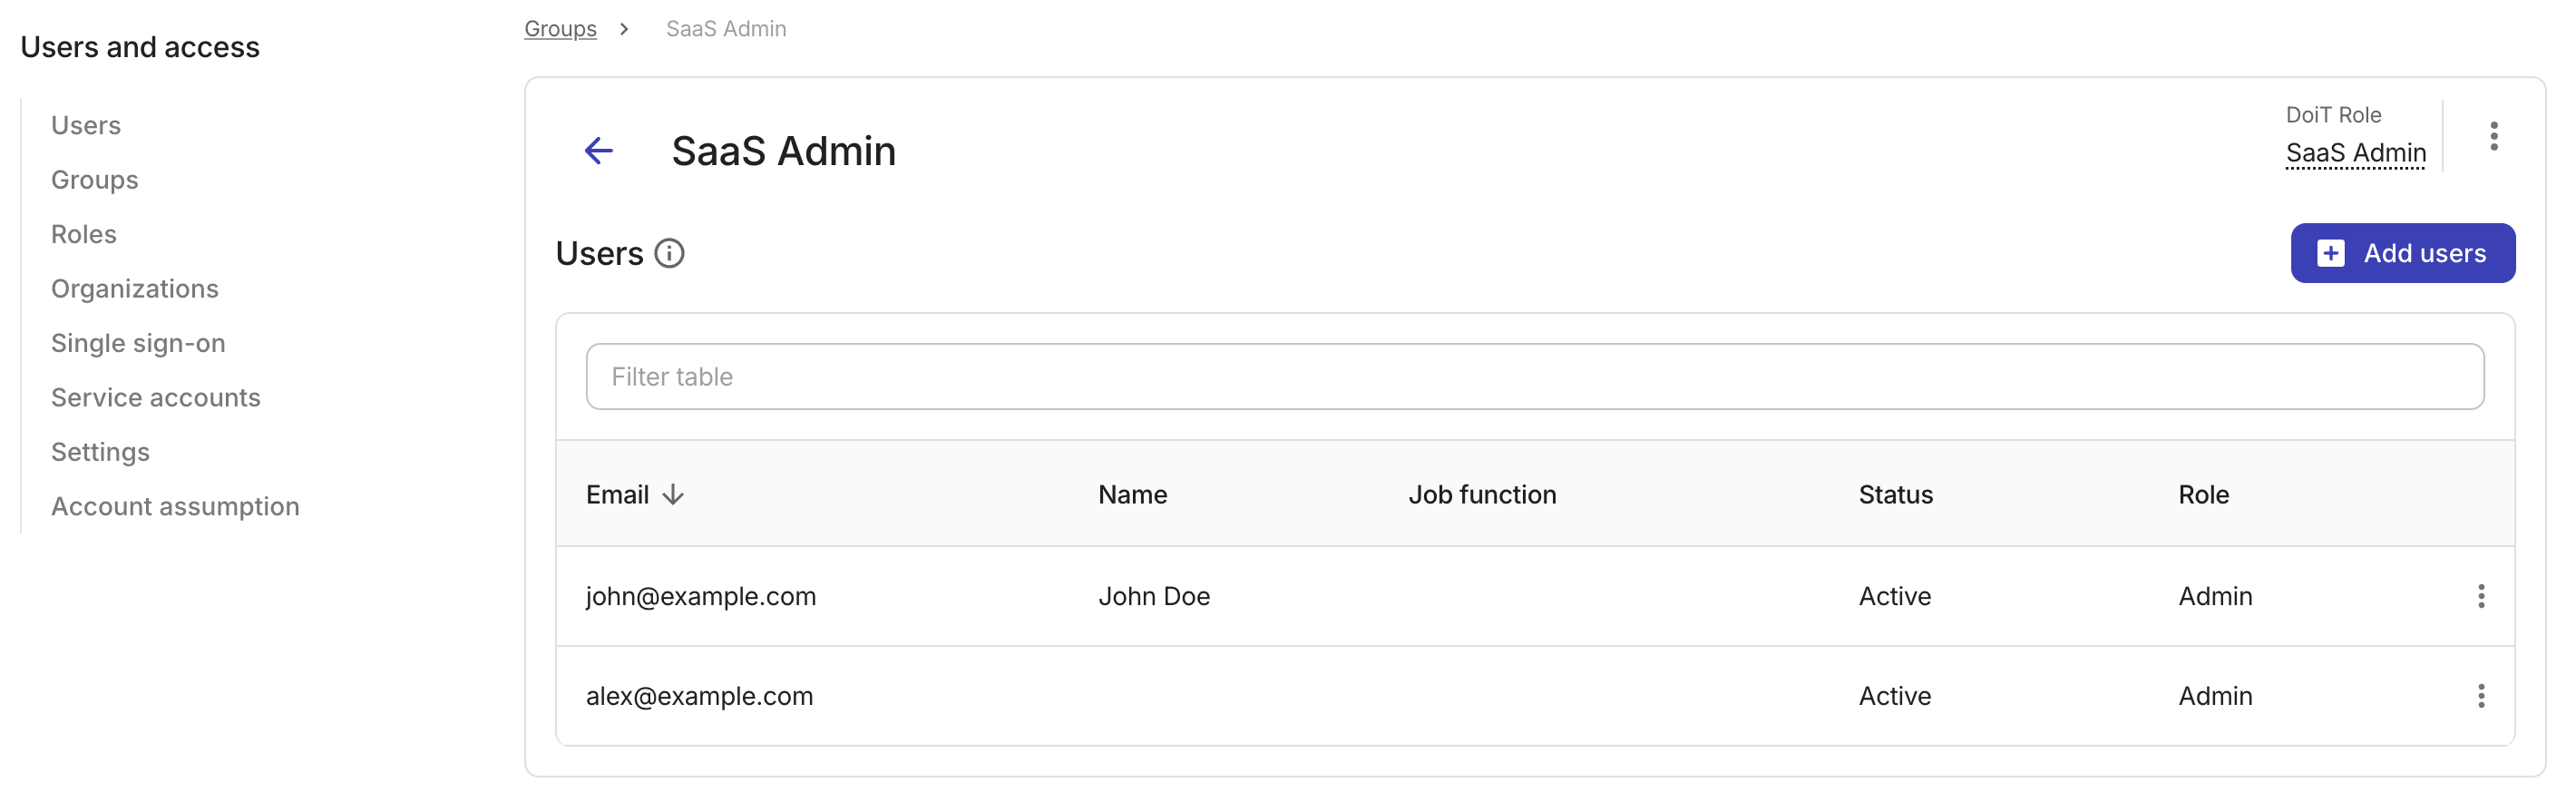
On the Groups page, select the group you want to edit.
-
On the group's detail page, select the kebab menu (⋮), and then select Edit group details.
-
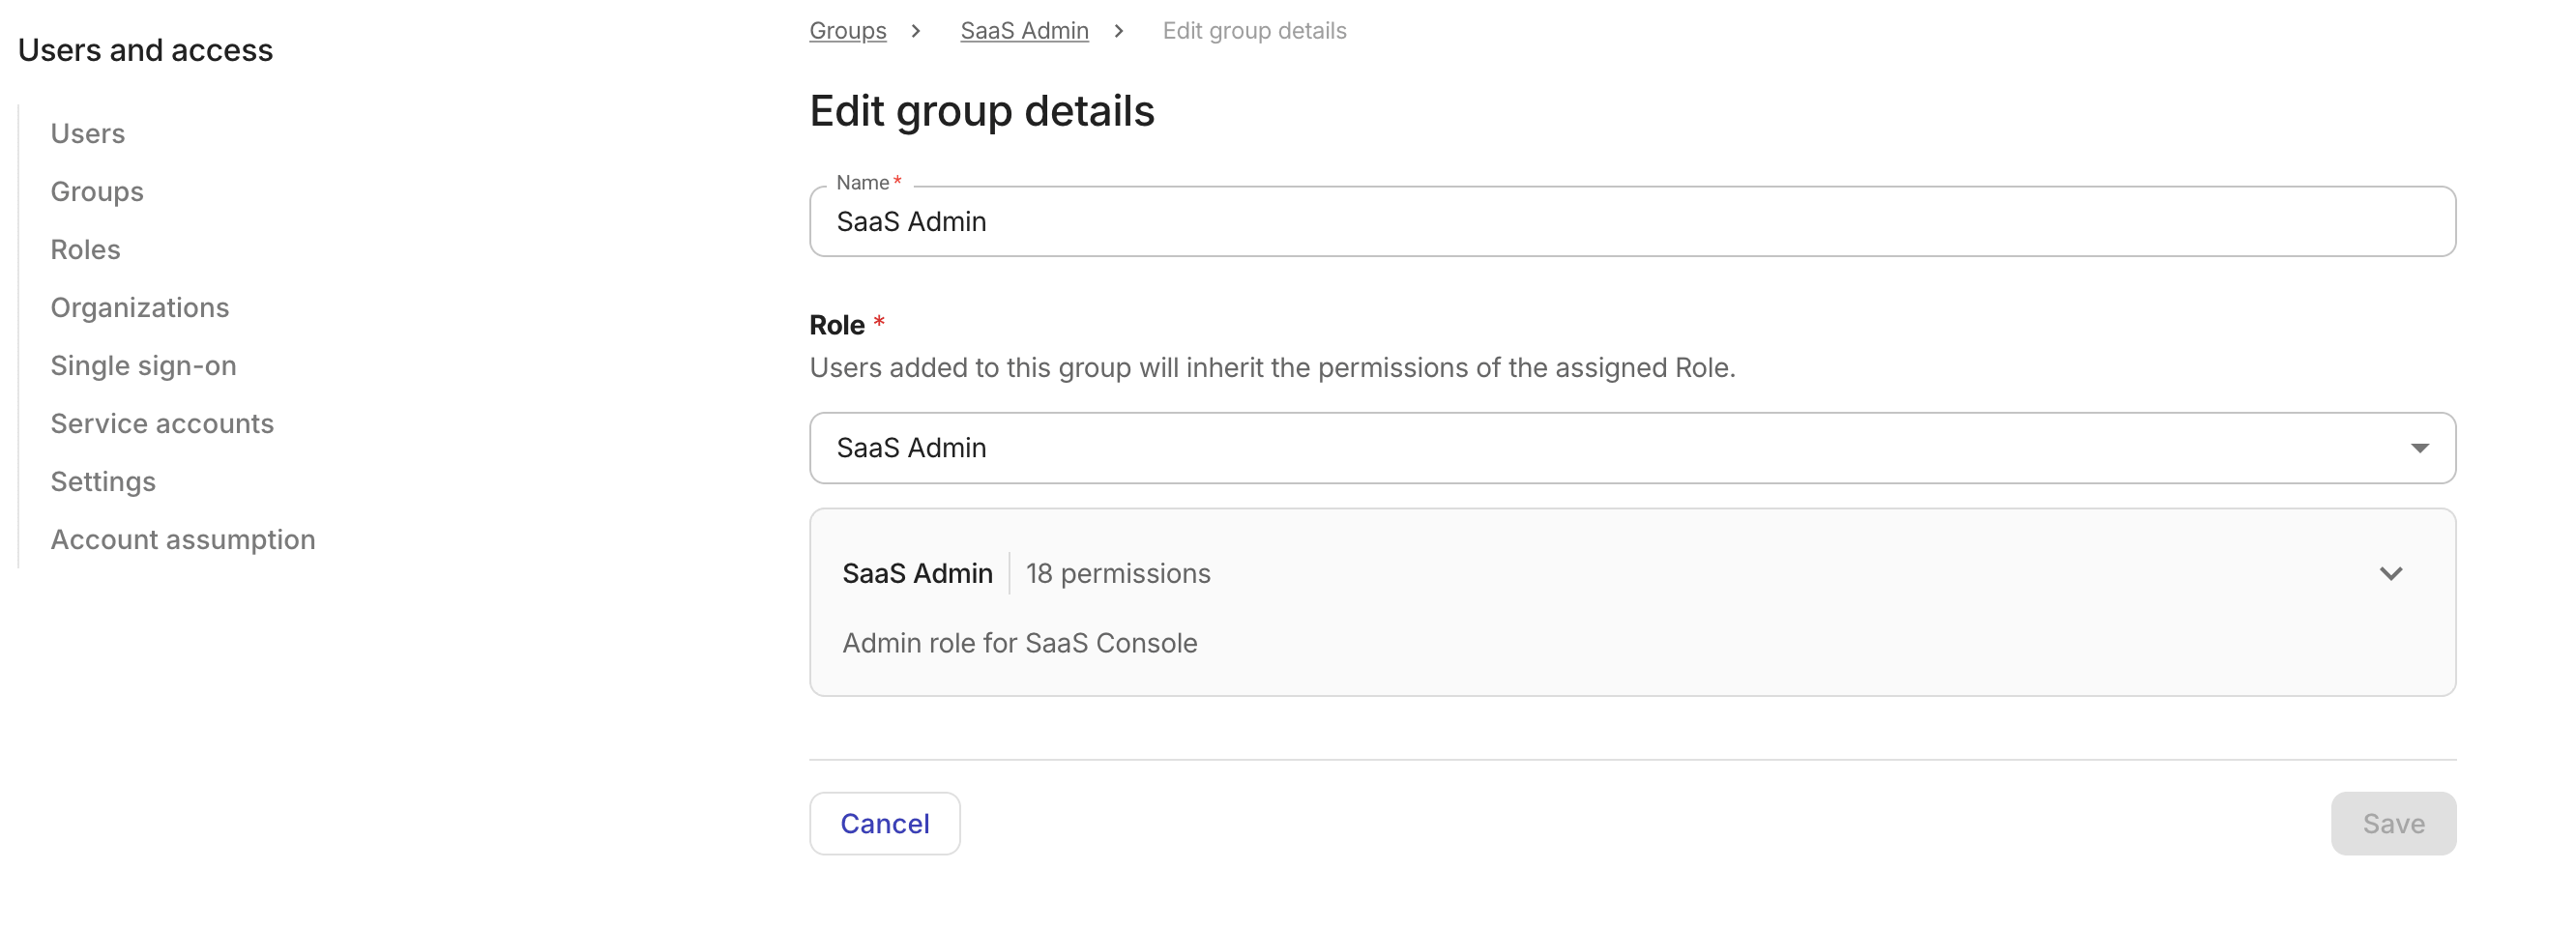
Update the following settings as needed:
-
Name: The display name for the group. For a group created in Cloud Intelligence, this field is required and cannot be left empty. For an imported group, this field is disabled.
-
Role: The role assigned to the group. The dropdown lists roles whose permissions are all included in your cumulative permissions. To remove the group's current role, select No role. If the group's previously assigned role is no longer available, the field displays Role unavailable. If the group's current role grants permissions outside your cumulative permissions, that role appears in the dropdown as disabled — you can remove it or replace it with an available role, but you cannot reassign it once changed.
-
-
Select Save.
Add members
These steps apply to groups created in Cloud Intelligence. To update the membership of an imported group, see Synchronize imported groups. You can add members to a group only if every permission the group grants, including its role and any permission granted directly to the group, is included in your cumulative permissions.
To add members to a group:
-
On the Groups page, select the group of interest.
-
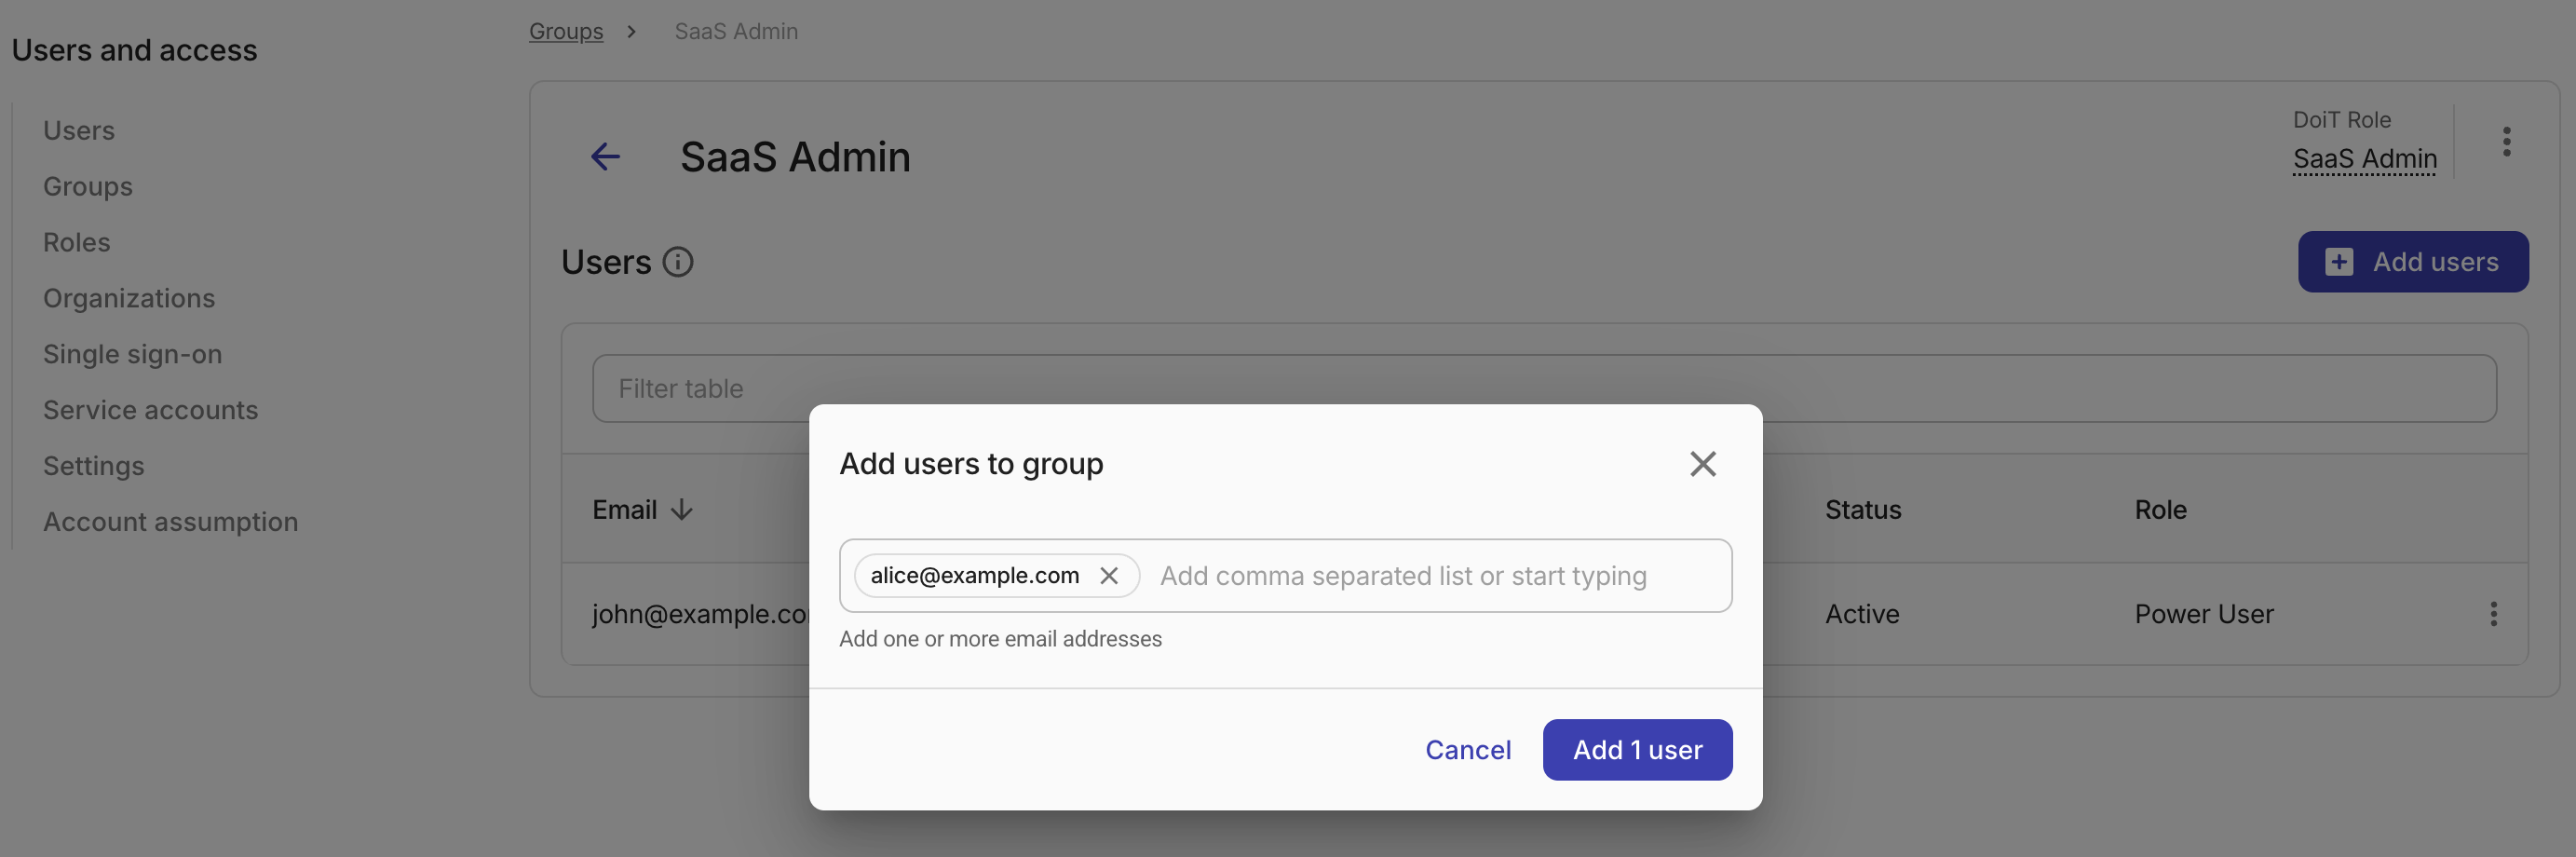
On the group's detail page, select Add users.
-
In the Add users to group dialog, enter one or more email addresses.
You can only add users who have accepted their invite and have an active account. You can add up to 100 new users at a time. Existing group members, unrecognized email addresses, and duplicates do not count toward this limit. To add more than 100 users, save the current batch and then repeat these steps.
-
Select Add N users to confirm. The count reflects new users that will be added.
Remove a member
These steps apply to groups created in Cloud Intelligence. Removing a member revokes the access they inherit from that group. Roles assigned to the user individually or through other groups are unaffected.
To remove a member:
-
On the Groups page, select the group of interest.
-
On the group's detail page, locate the member in the Users table.
-
Select the kebab menu (⋮) at the end of the row, and then select Remove from group.
-
Select Remove to confirm.
Synchronize imported groups
Membership for an imported group is managed in Google Workspace. DoiT employees can select Sync now to update the user group with membership changes made in Google Workspace. Only members with an active DoiT account are included.
To synchronize an imported group:
-
On the Groups page, select the imported group.
-
On the group's detail page, select Sync now.
Delete a group
Deleting a group is permanent. Members are removed from the group and lose any access granted by the group's role. Deleting an imported group removes it from Cloud Intelligence only. The Google group and its membership are not changed.
To delete a group:
-
On the Groups page, select the target group.
-
On the group's detail page, select the kebab menu (⋮), and then select Delete group.
-
Review the displayed information. Select Delete group to confirm.
View group-derived permissions
You can see which permissions each user inherits from their group memberships in two places: the Users list and individual user profiles.
Users list
The Users page in Users and access includes a sortable Group permissions column. For each user, this column shows a summary such as 3 permissions from 2 groups. Hover over the summary to see a tooltip listing the contributing group names (up to five groups are shown; additional groups display as a count).
Users who have not yet accepted their invite show Pending invite in this column. If group permission data cannot be loaded, the column displays Couldn't load.
User profile
On an individual user's profile, the Permissions tab is divided into two sections:
-
Direct access: The role and permissions assigned directly to the user.
-
Group-derived permissions: The permissions the user inherits through group membership. Each group is listed by name, along with the individual permissions it contributes. Each permission shows its source:
- Granted by the group's role: The permission comes from the role assigned to the group.
- Granted directly to the group: The permission was granted directly to the group.
- Granted by the group's role and directly to the group: Both sources apply.
If a user belongs to more than 20 groups, select Show more to reveal additional groups.