エンドカスタマーのオンボーディング
ディストリビューターとリセラーは、DoiT コンソールでエンドカスタマーのオンボーディングを開始できます。
必要な権限
-
ディストリビューター/リセラー/エンドカスタマー: DoiT アカウントに Admin ロールが付与されている必要があります。
-
エンドカスタマー: 接続したい AWS Management Account 上で、次の権限が必要です。
iam:CreatePolicy
iam:CreateRole
iam:AttachRolePolicy
iam:GetRole
cloudformation:CreateStack
cloudformation:GetTemplateSummary
sns:Publish
また、上記の権限をすべて含み、より広範なアクセス権を付与する AWS 管理ポリシー AdministratorAccess を、ユーザーまたはロールにアタッチすることもできます。
顧客をオンボーディングする
エンドカスタマーのオンボーディングプロセスは 3 つのパートで構成され、階層に沿って Admin ロールを持つユーザーによって実施されます。
パー��ト 1: 顧客を追加する
このパートはディストリビューターまたはリセラーが実施します。
-
DoiT コンソール にサインインします。
-
顧客を追加します。顧客プロファイルを設定する際に、正しいリセラーを親として選択していることを確認してください。
パート 2: 契約を作成する
ディストリビューターまたはリセラーの管理者ユーザーは、エンドカスタマーがクラウドアカウントの接続を開始できるようになる前に、エンドカスタマー向けの契約を作成する必要があります。
パート 3: AWS オンボーディング
このパートはエンドカスタマーが実施します。
-
ウェルカムメールを受信したら DoiT アカウントを有効化し、新規登録プロセスを完了します。
-
DoiT コンソール にサインインし、上部ナビゲーションのメガメニューから Home を選択します。
-
最初の Management Account を接続する場合は、Connect your AWS Management Account を選択します。
-
すでに Management Account を接続済みの場合は、Manage AWS integrations を選択し、続いて Connect new account を選択します。

-
-
DoiT コンソールに表示される情報を確認します。
-
接続したい AWS Management Account を入力します。
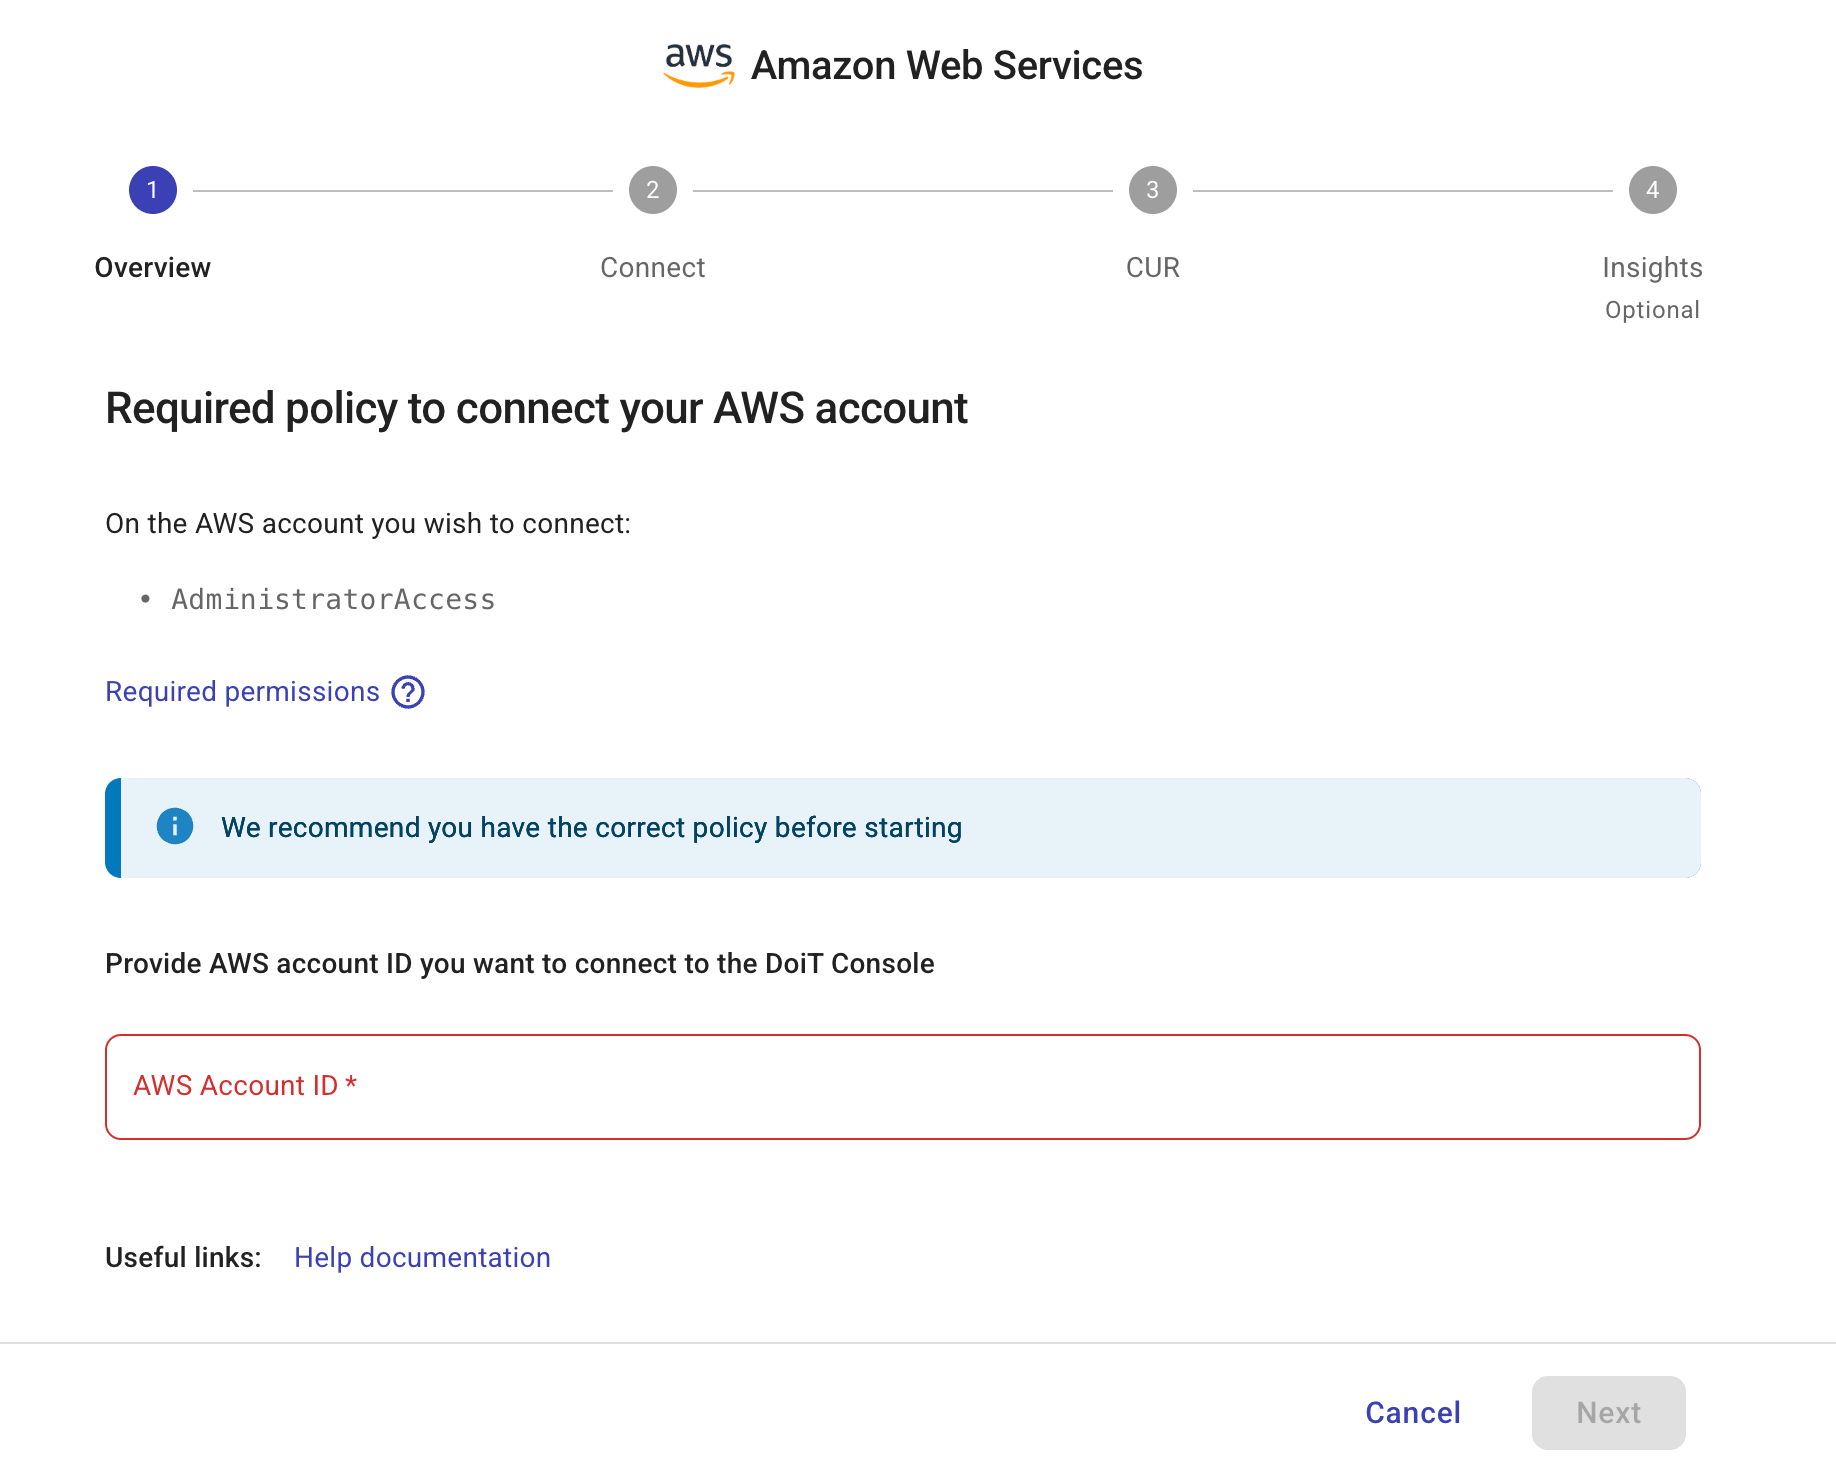
-
Next を選択します。
-
DoiT コンソールの指示に従ってください。
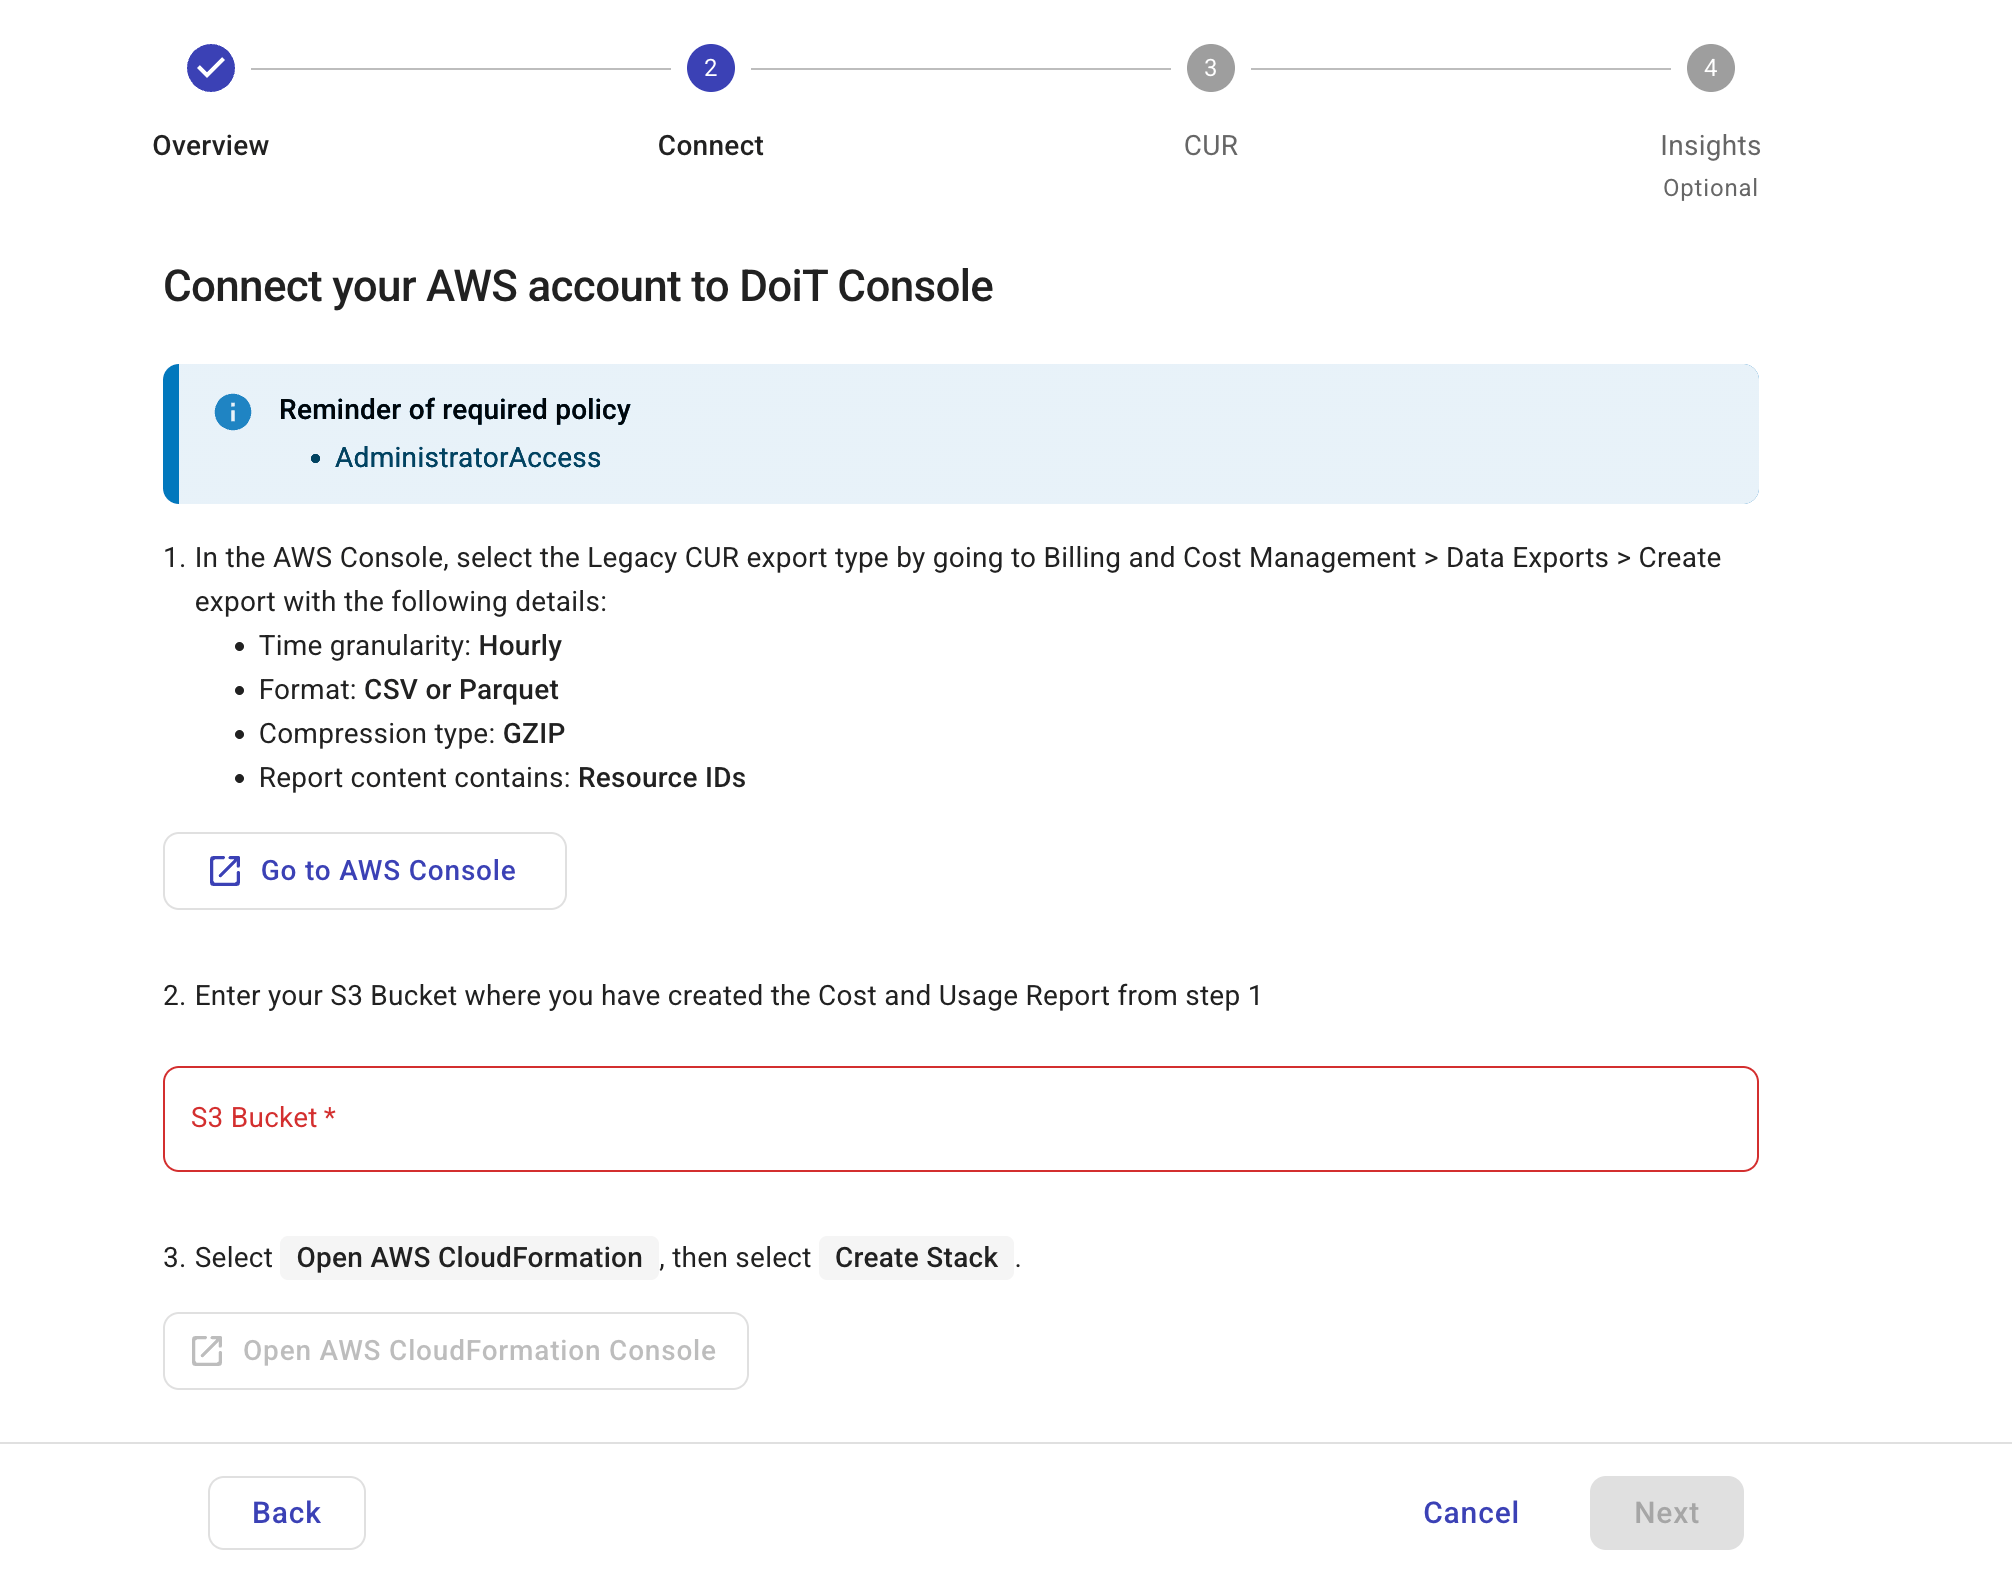
注意現在、DoiT PartnerOps がサポートしているのはレガシー CUR のみです。
-
AWS Billing and Cost Management コンソールにサインインします。
-
次の設定でレガシー CUR エクスポートを作成します。
-
Export type: Legacy CUR export
-
Export content: Additional export content で Include resource IDs を選択します。Split cost allocation data を選択します。
-
Data table delivery options: Time granularity で Hourly を選択します。
-
Compression type and file format:
Parquet(推奨) またはgzipを選択します。 -
Configure S3 bucket: 新しい S3 バケットを作成するか、既存のものを選択します。
-
-
DoiT コンソールに戻り、CUR を作成した S3 バケットの名前を入力します。DoiT は指定されたバケットからのみ CUR ファイルを読み取り、そのバケット内の新しい CUR ファイルを自動的に検出します。
-
DoiT コンソールで Open AWS CloudFormation Console を選択します。
-
AWS CloudFormation コンソールで、DoiT テンプレートを使用してスタックを作成します。
-
続行するには Next を選択します。
-
-
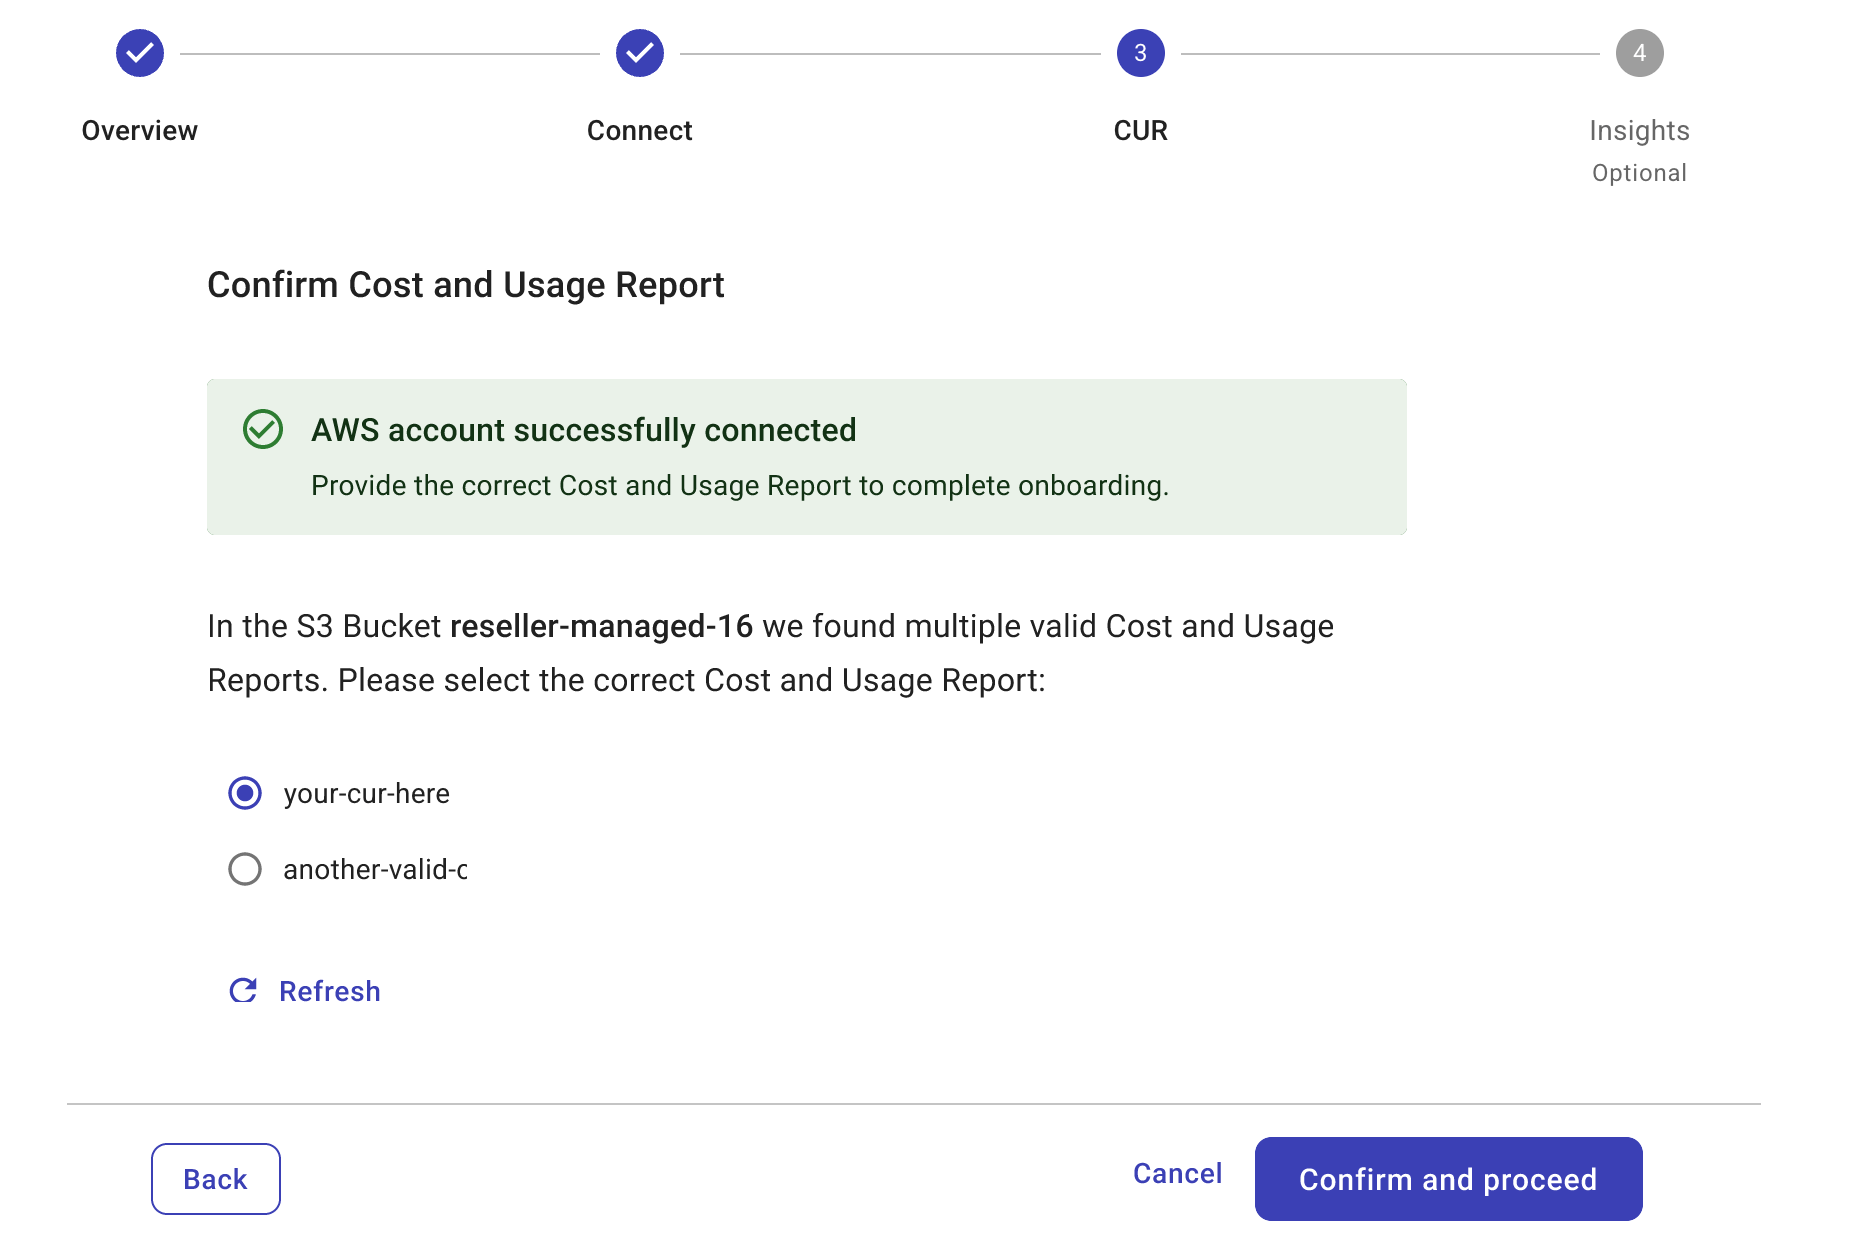
AWS アカウントが正常に接続されると、S3 バケット内の CUR ファイルが検証されます。
-
有効な CUR はページに一覧表示されます。現在、サポートされる CUR は 1 つのみです。
-
いずれの CUR も有効でない場合、DoiT コンソールに無効な理由が表示されるため、修正できます。
いつでも Refresh を選択して、S3 バケット内の CUR を再度検証できます。
-
-
Confirm and proceed を選択します。
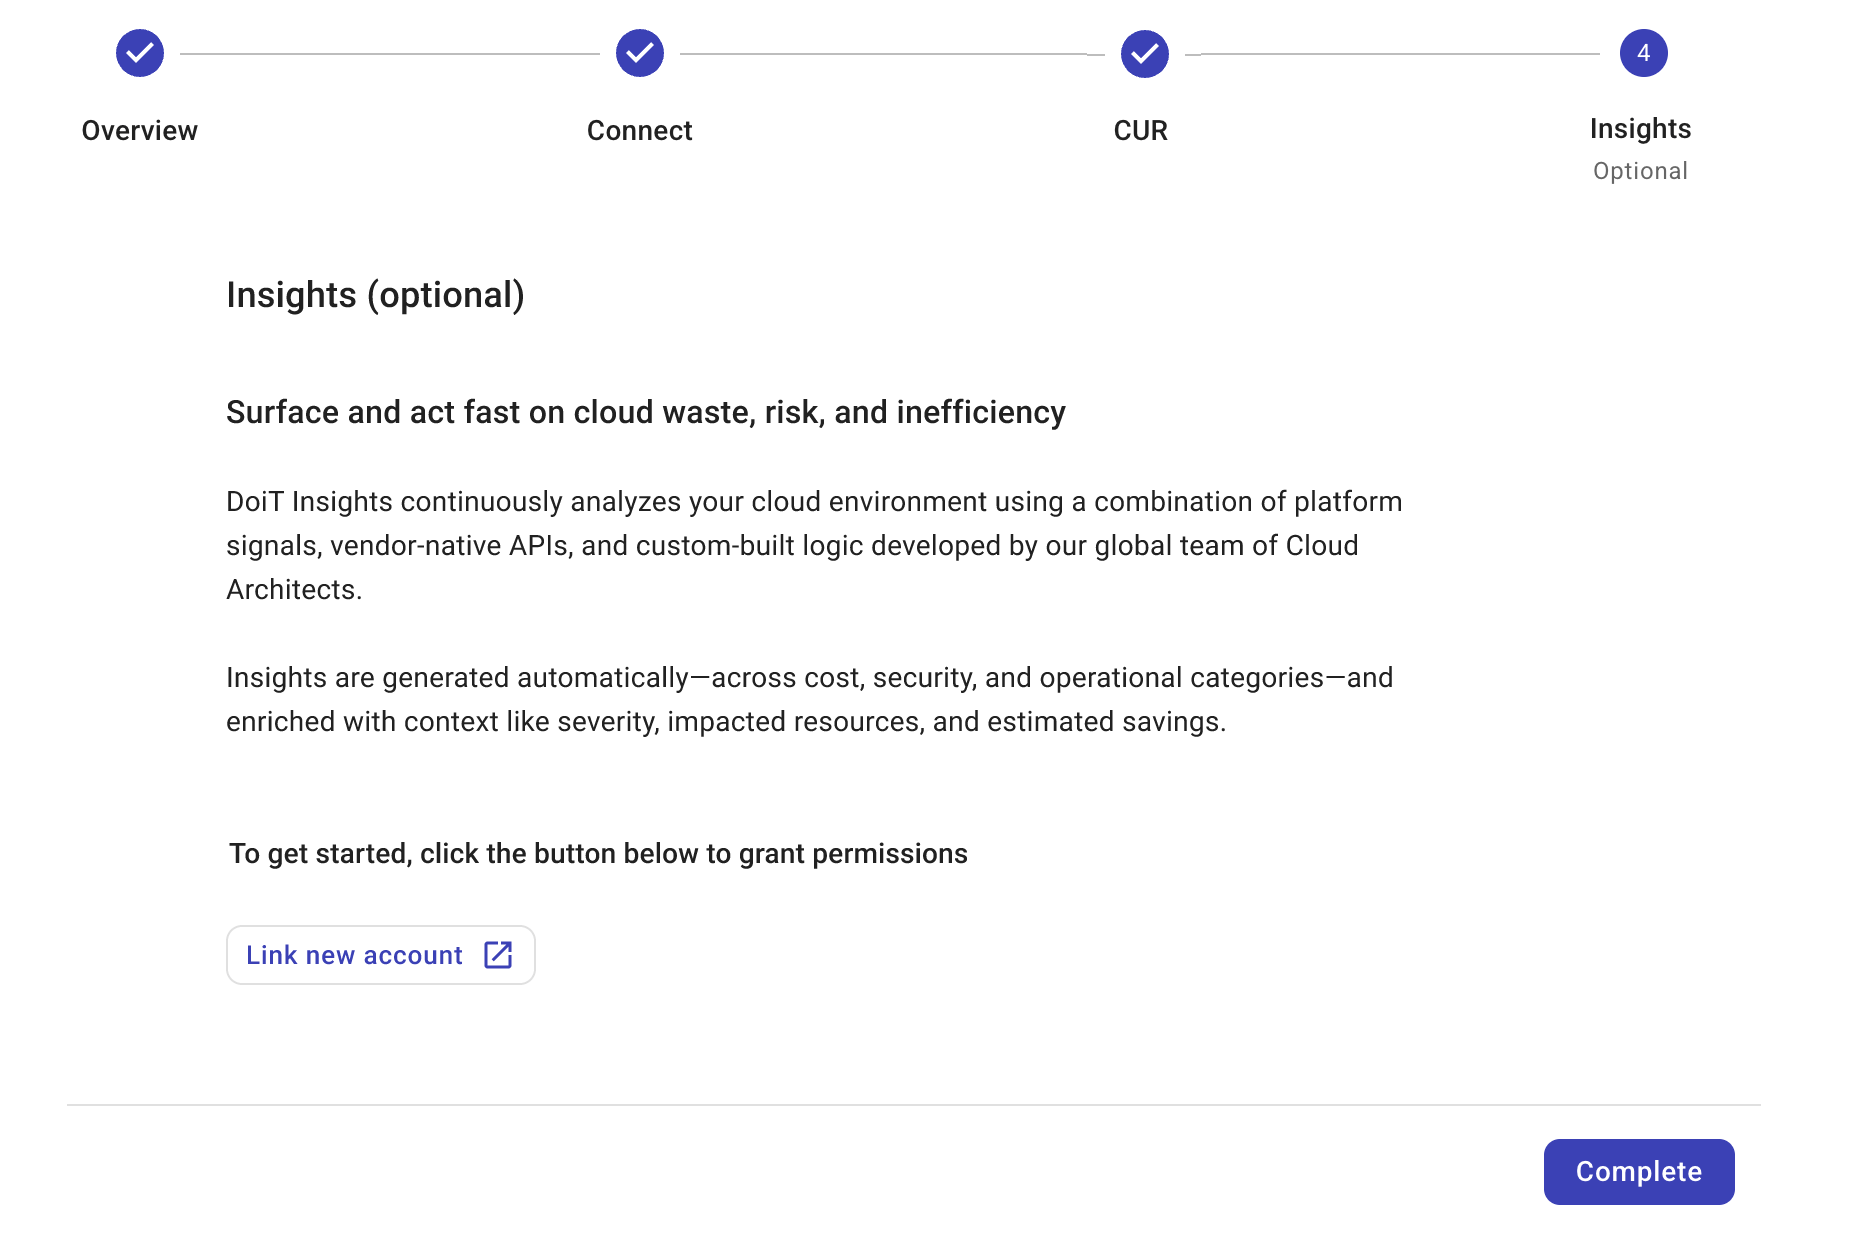
(オプション)インサイトを有効化する
接続ウィザードの最後のステップは任意です。
Link new account を選択して、AWS Trusted Advisor Insights、AWS Cost Optimization Hub insights、および AWS Security Hub insights を有効化し始めることができます。または、Complete を選択してオンボーディングプロセスを完了し、これらのインサイトは後から有効化することもできます。
検証
オンボーディングの進捗を確認し、必要な対応を行ってください。