Connect OCI tenancies
A tenancy is a partition of Oracle Cloud Infrastructure (OCI) where you create, organize, and administer your cloud resources.
-
You must have a Cloud Intelligence Enhanced or Enterprise plan to connect OCI tenancies to DoiT.
-
You'll be charged a percentage of your monthly cloud spend, subject to the terms of your agreement.
Required permissions
You need administrator access to your OCI tenancy to create the IAM role, group, and policies for DoiT to access your billing data:
-
A dedicated IAM user for DoiT
-
An IAM group with billing read permissions
-
Your Tenancy OCID and Home Region
Connect your OCI tenancy
The connection wizard consists of two parts: setting up the OCI connection and adding an API key.
Launch the wizard
-
Sign in to the DoiT console.
-
Navigate to the integrations catalog dashboard.
-
On the Oracle Cloud Infrastructure integration card, select Assets.
-
Select Connect new tenancy.
Set up connection
In this part, you create the required OCI resources and provide your tenancy details.
The script is omitted from the screenshot below for brevity. View the full version in the DoiT console.
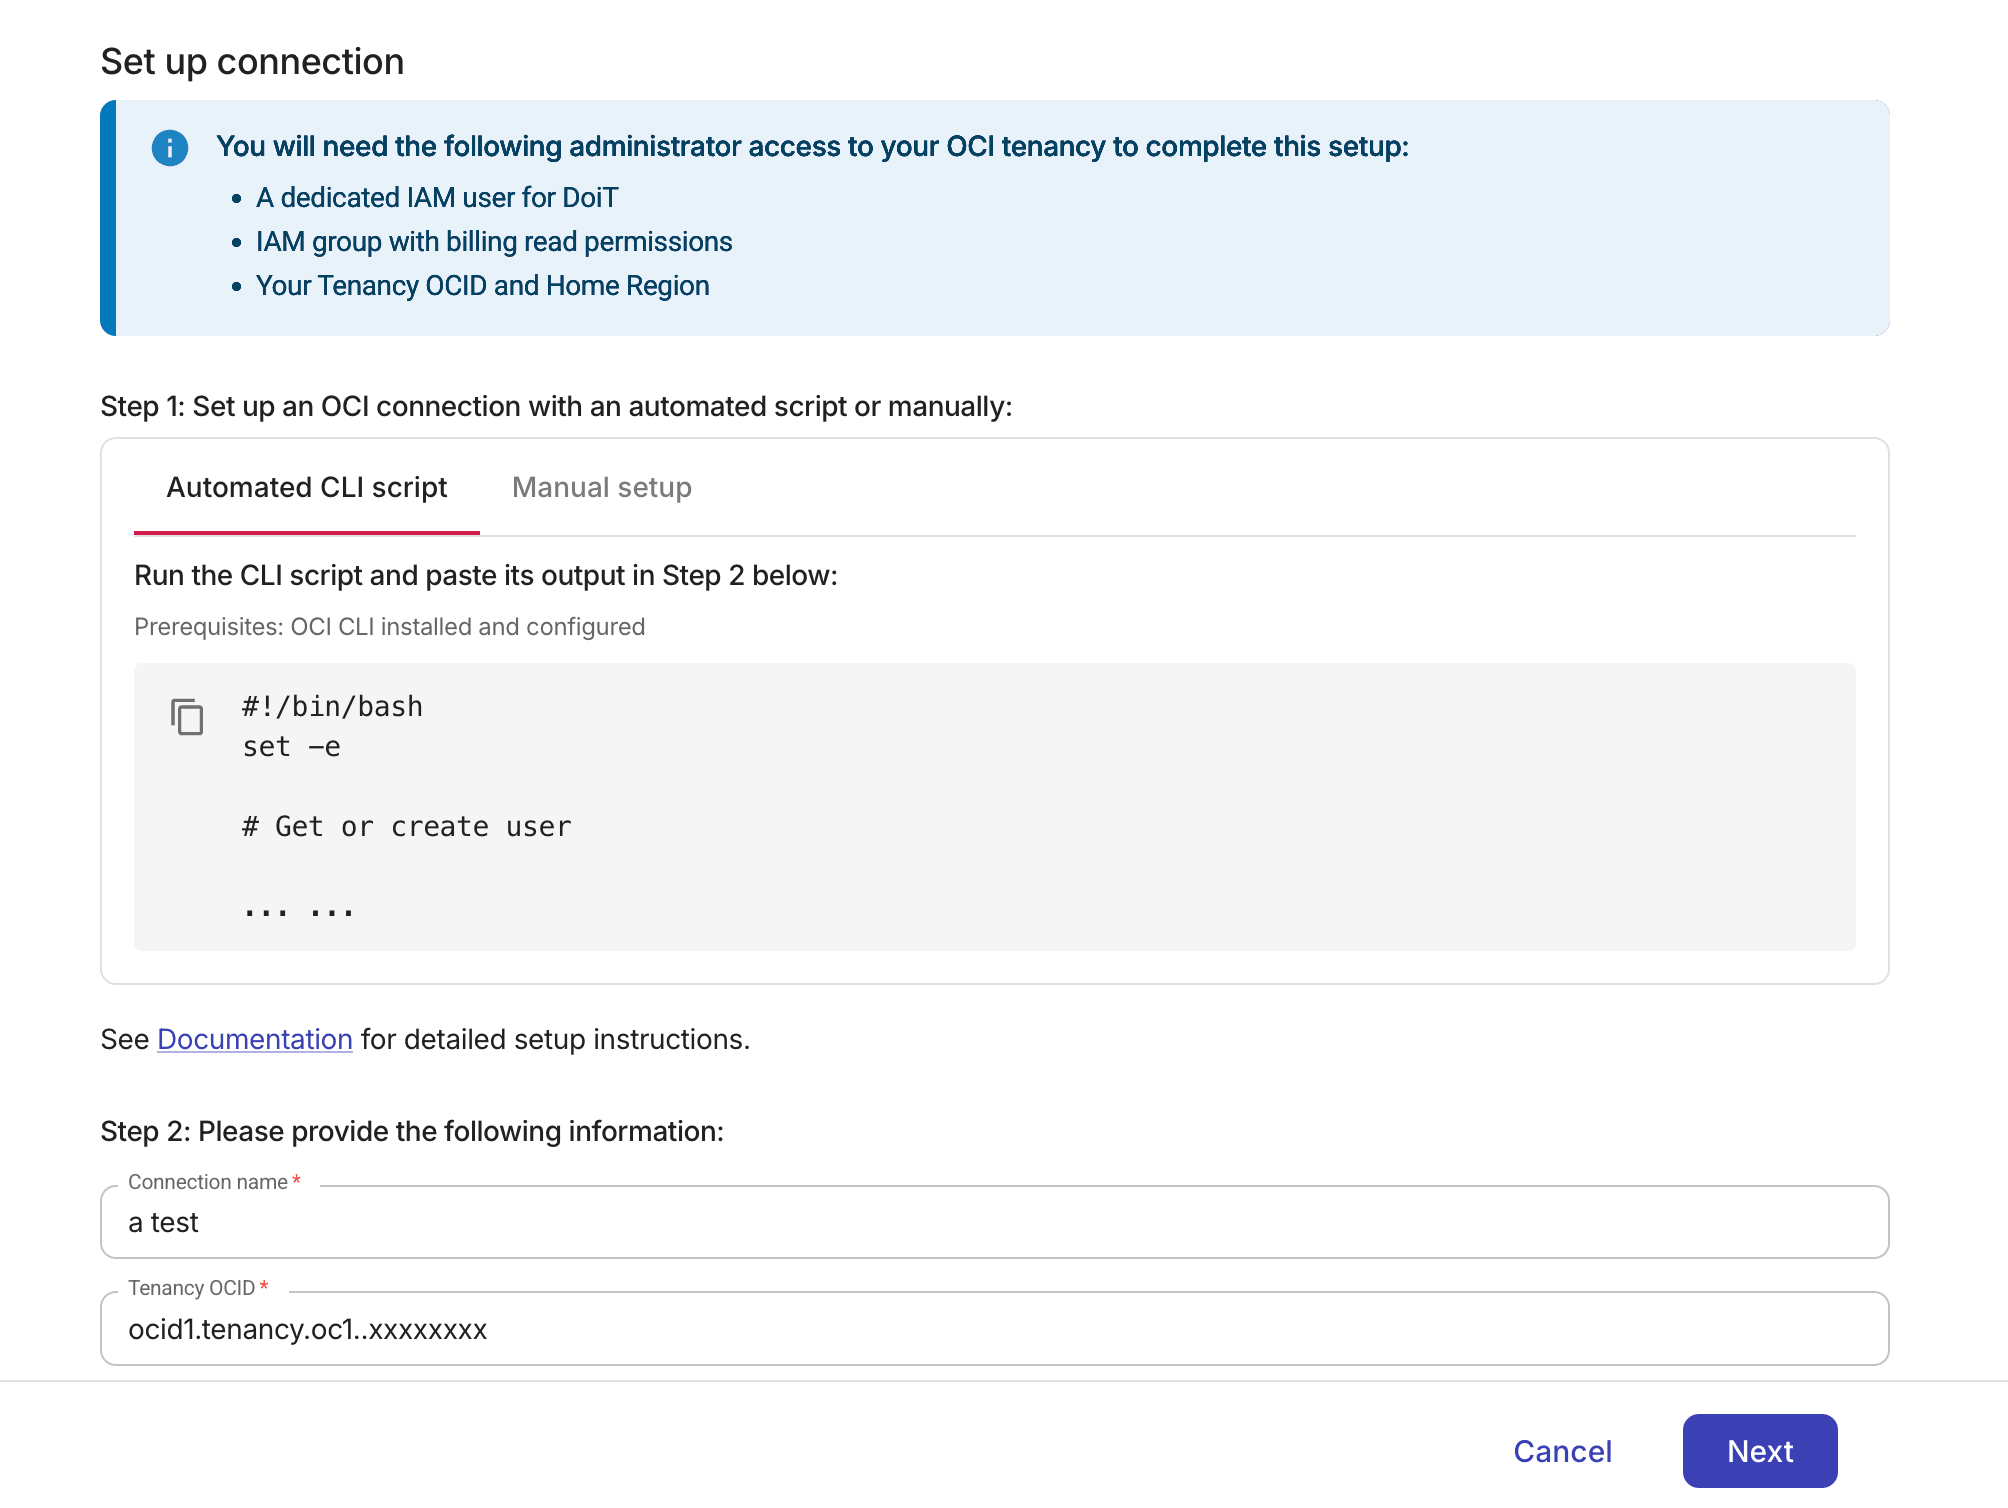
Step 1: Set up an OCI connection
If you have installed the OCI CLI, you can use an automated CLI script. Alternatively, follow the manual setup instructions.
- Automated CLI script
- Manual setup
The script requires the OCI CLI to be installed and the configuration file to be located at ~/.oci/config.
-
Copy the script provided in the DoiT console and run it in your terminal.
-
Copy the output values (Tenancy OCID, User OCID, and Home Region) for the next step.
-
Create a new IAM user named
doit-saas-reader. -
Create a new IAM group named
doit-saas-readers. -
Add the user to the group.
-
Create a policy with the statements provided in the DoiT console.
-
Copy the User OCID, Tenancy OCID, and Home Region for the next step.
Step 2: Provide tenancy details
Fill in the following fields:
-
Connection name: A descriptive name for the OCI connection.
-
Tenancy OCID: Your OCI tenancy identifier. You can find this value at cloud.oracle.com/tenancy. The expected format is
ocid1.tenancy.oc1..<unique_id>. -
User OCID: The OCID of the IAM user you created for DoiT. You can find this value at cloud.oracle.com/identity/domains. The expected format is
ocid1.user.oc1..<unique_id>. -
Home Region: Your OCI home region. For example,
us-ashburn-1.
Add API Key
In this step, DoiT automatically generates a temporary API key pair. You need to upload the public key to your OCI user.
OCI users can have a maximum of three API keys by default. If you've reached this limit, delete an existing key in the OCI console before adding the new one.
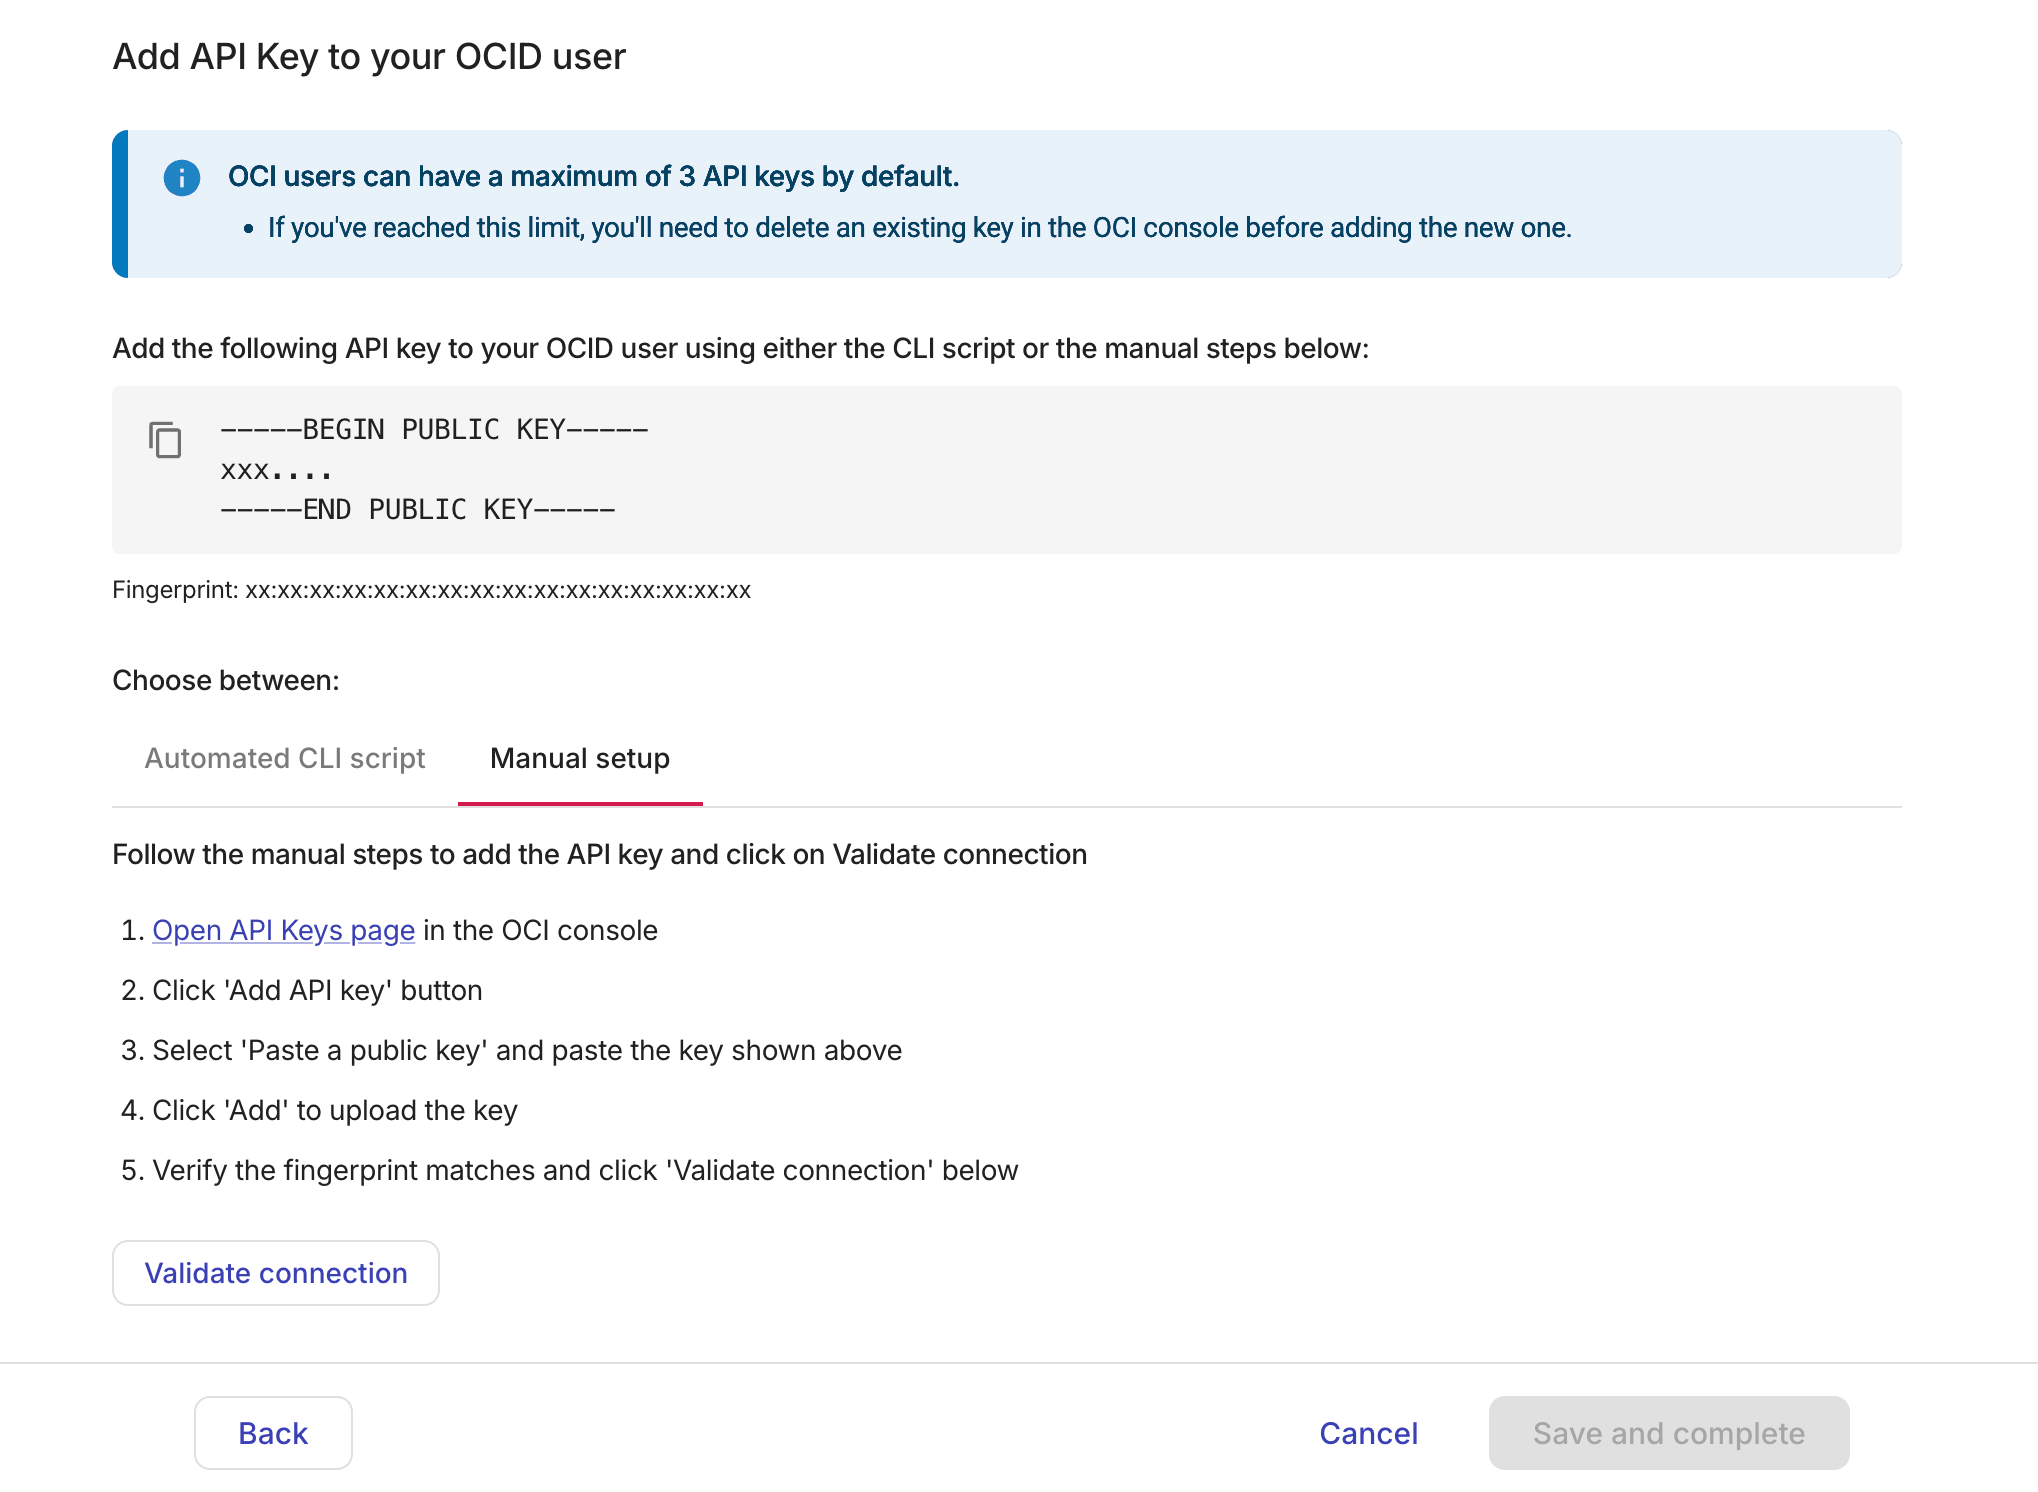
If you have installed the OCI CLI, you can use an automated CLI script. Alternatively, follow the manual steps.
- Automated CLI script
- Manual setup
Copy the CLI script provided in the DoiT console and run it in your terminal. The script uploads the generated public key to your OCI user.
-
Open the API Keys page in the OCI console.
-
Select Add API key.
-
Select Paste a public key and paste the key displayed in the DoiT console.
-
Select Add to upload the key.
-
Verify that the fingerprint shown in the OCI console matches the fingerprint displayed in the DoiT console.
Validate and save
-
Select Validate connection to verify that DoiT can access your OCI billing data.
-
If the validation succeeds, select Save and complete to finalize the connection.
Billing update frequency
OCI cost reports are generated every six hours (see OC Cost Report Types for details); DoiT data pipeline fetches the OCI billing data every eight hours.