Add a customer
To add a single customer (reseller or end customer):
-
Sign in to the DoiT console, select Customers from the top navigation mega menu.
-
On the Customers page, select Add customer > Add customer.

Step 1: Customer profile
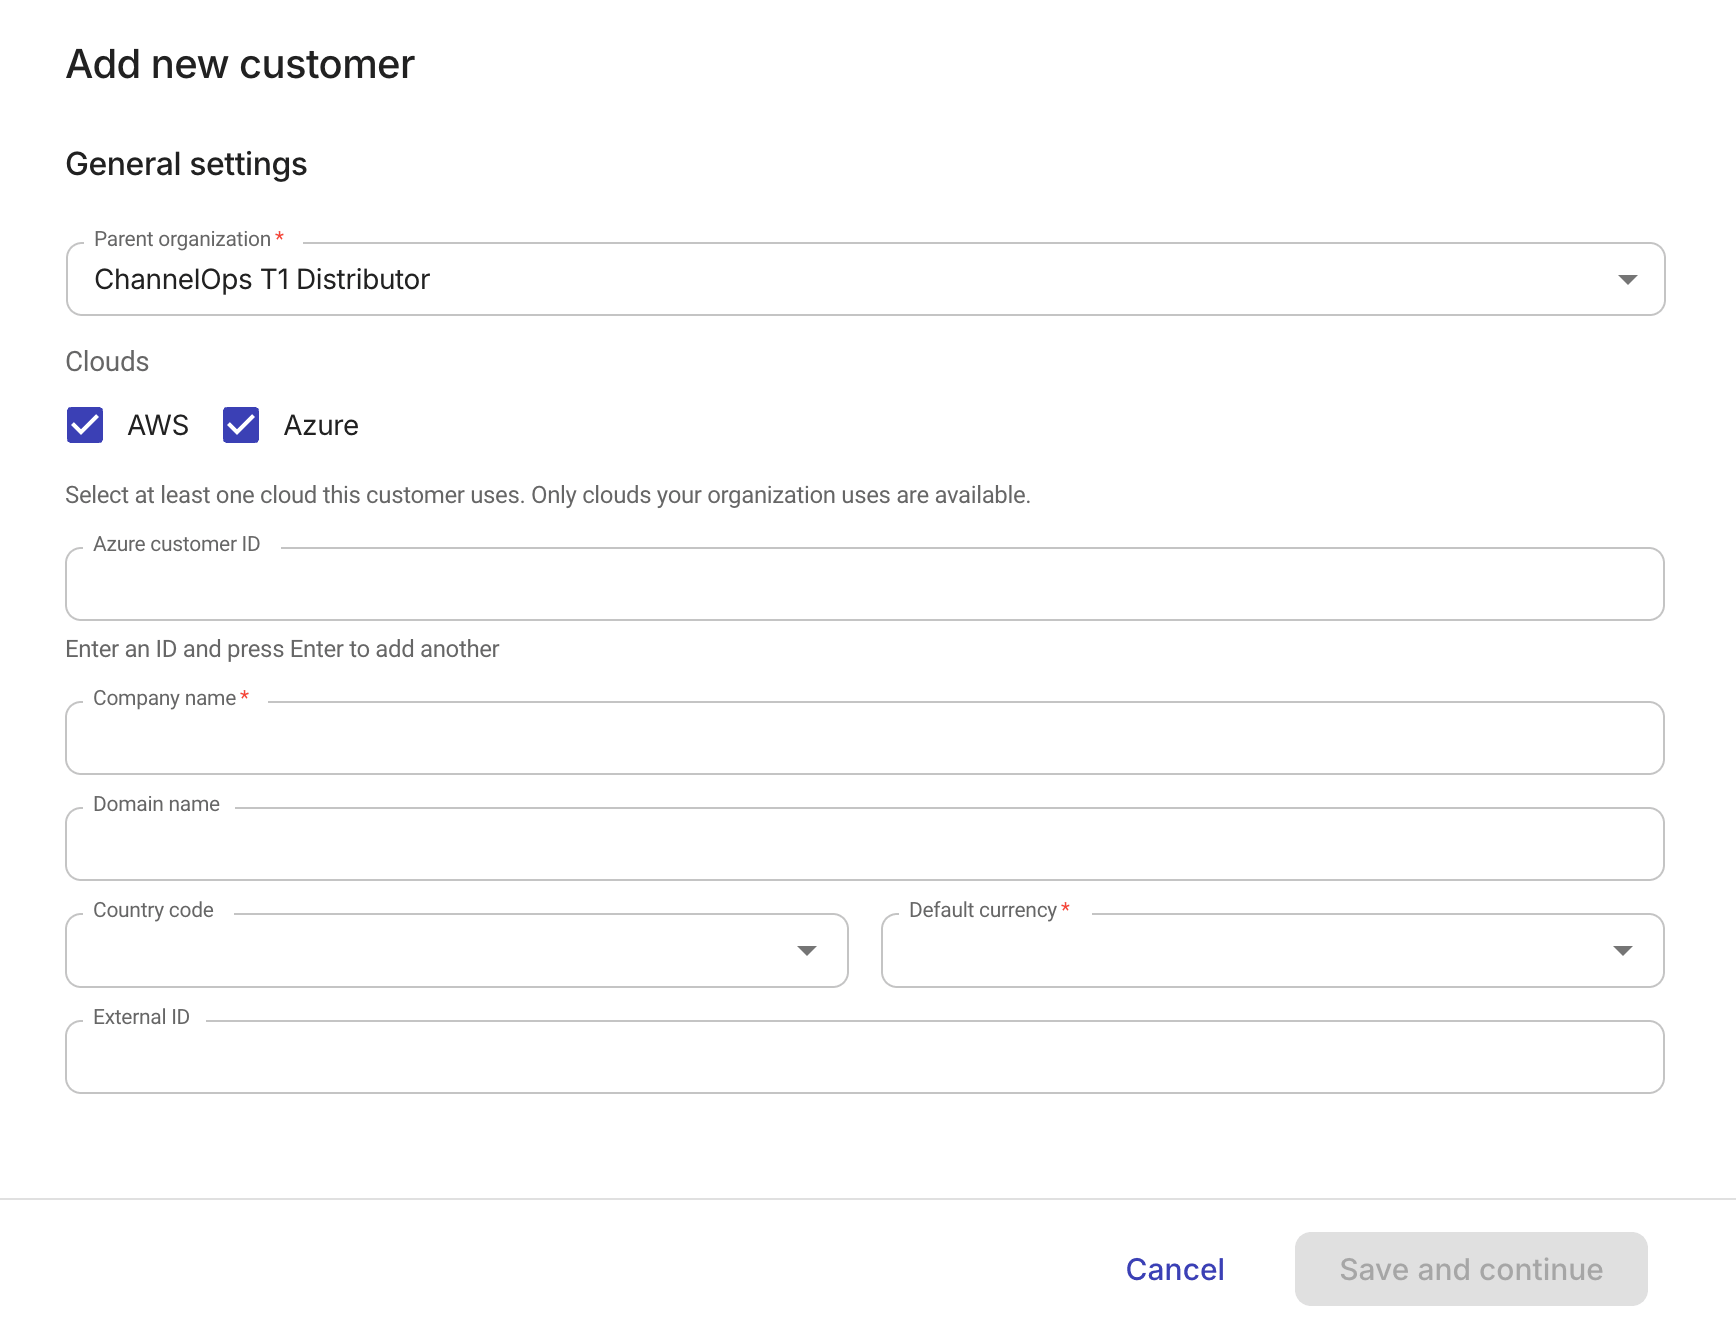
In this step, you configure the general settings of the customer.
-
Select the Parent organization in the hierarchy.
-
To add a reseller, choose its distributor as the parent.
-
To add an end customer, choose its reseller as the parent.
-
-
Select the Clouds this customer uses. The selection defaults to all clouds the parent organization uses.
-
The Clouds option is not available for trial or demo customers.
-
If Azure revenue management is enabled for the account and you have the Azure Tenant Mapper permission, selecting Azure will show an Azure identifier field. You can enter the value here or configure it later.
-
Microsoft Partner ID: Shown when you are adding a reseller.
-
Azure customer ID: Shown when you are adding an end customer.
-
-
-
Provide other basic information of the customer.
-
Company name: The customer's company name.
-
Domain name (optional): The customer's primary domain. Multiple customers can share the same primary domain. You can leave this empty during creation and set it later when editing customer information. The primary domain can only be set once. Make sure the domain is correct before saving.
-
Country code (optional): The customer's country. Select from a list of ISO 3166-1 country codes. You can set, update, or clear it later from the Overview tab. This field is necessary for geographic access.
-
Default currency: The default billing currency for the customer.
-
External ID (optional): An alphanumeric identifier for the customer from an external system. You can also set or update it later from the Overview tab.
-
-
Select Save and continue.
Step 2: Invite admin user
A customer must have at least one active Admin user to complete the onboarding process.
-
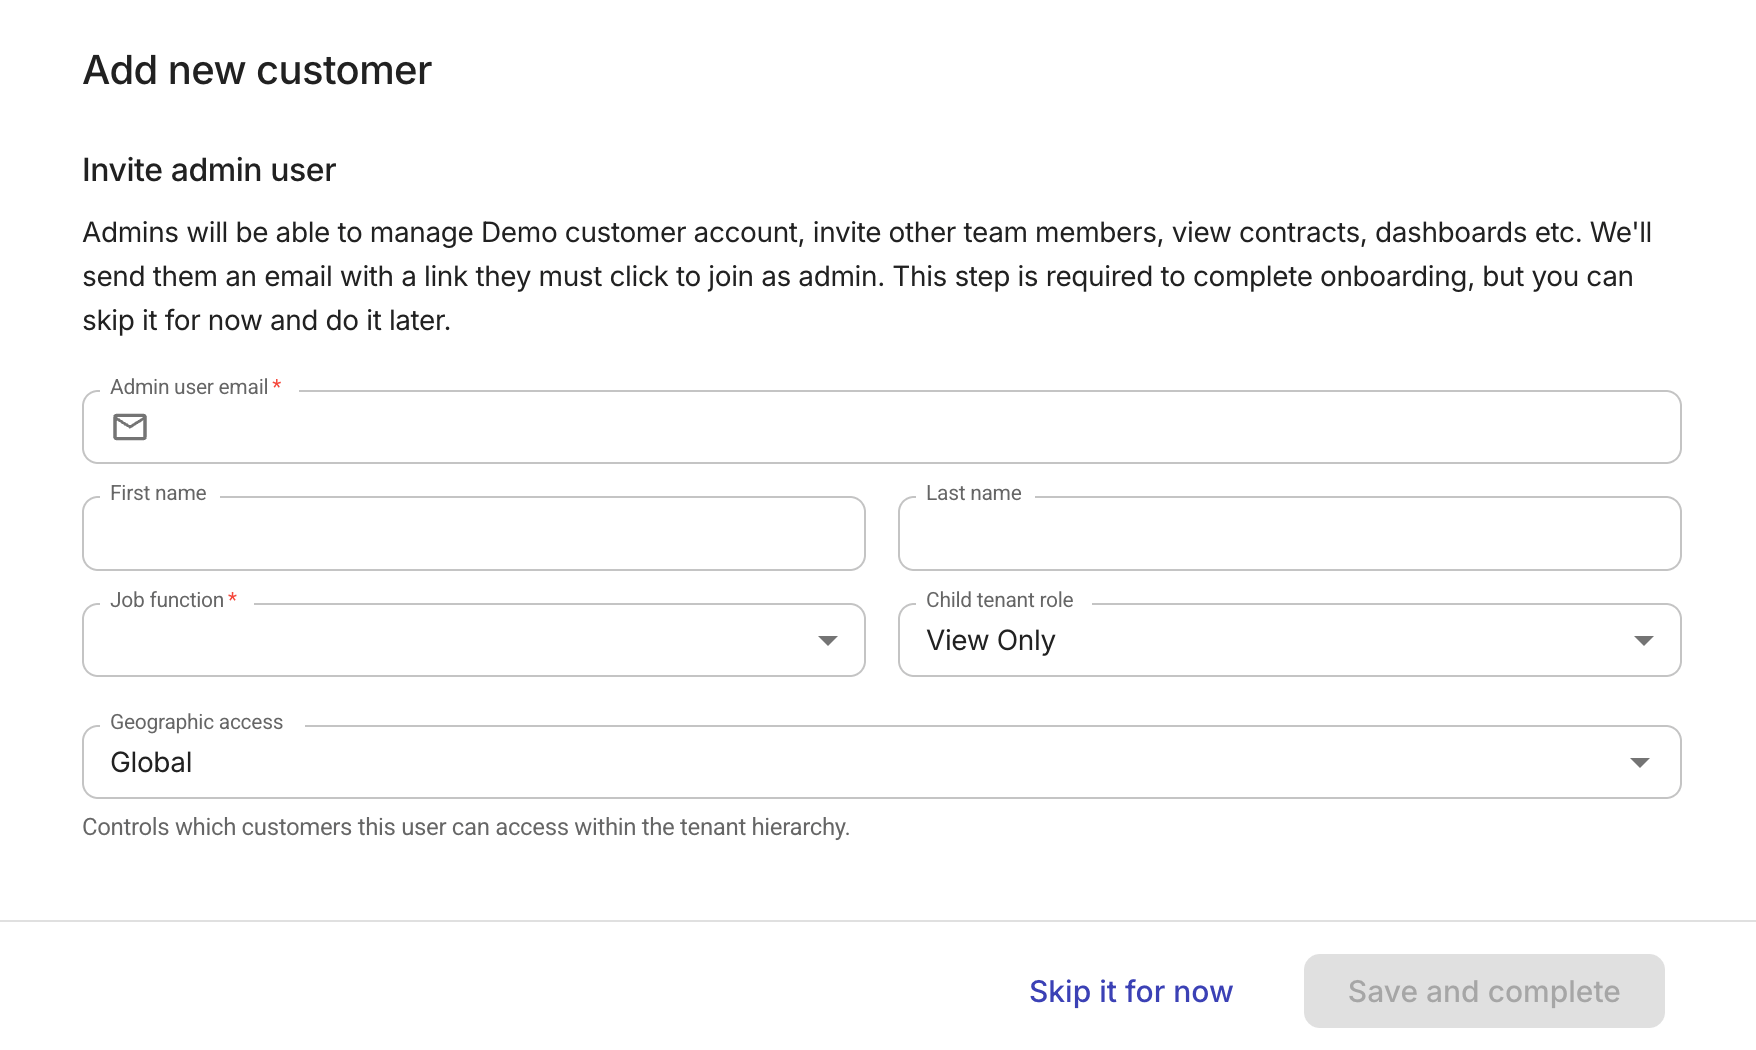
Fill in the required information for the Admin user.
-
Basic information: email, first and last name (optional), job function.
-
Child tenant role (available when inviting a user into a distributor/reseller tenant): Specify the role the admin user gets when accessing downstream tenants. Select None to explicitly deny child tenant access to the new user. See Child tenant role.
-
Geographic access: Set the geographic scope for the admin user. This controls which customers the user can access within the tenant hierarchy based on geography.
The scope defaults to the customer's country (specified by the country code in the customer profile, set in Step 1), or
Globalif no country code is defined. See Scope types for details.
-
-
Select Save and complete.
If you choose Skip it for now, you'll have an Invite admin user task in the onboarding process. You can resume the configuration from there.
If successful, the invited user will receive a welcome email with an activation link.