Configuring Automation via UI — SaaS
Configuration automation via the UI is supported in autoscaler version 1.0.43 and above.
UI-based automation is designed for teams who want to get started quickly without configuring CRs. It provides a simple, guided way to set up and manage automation directly in PerfectScale, removing friction for new users or teams less familiar with declarative setups.
UI automation provides a simplified experience and supports only part of the features. Full functionality and advanced configuration are available via CR.
You can start with the UI to quickly set up and validate automations, and later move to CRDs for more advanced customization and granular control.
☝🏼 If automation is configured via CR in addition to UI-based settings, the UI-based automation will be disabled.
Once the Automation Agent is installed, you can easily configure automation for your clusters and workloads using a guided UI flow.
Only Admin users can configure automation via the UI. Other users can view the list of automated workloads but cannot create, edit, or disable automation.
To automate an entire cluster or specific workloads via the UI, go to the Overview screen, hover over the desired cluster, and click the Automate button in the Automation column.
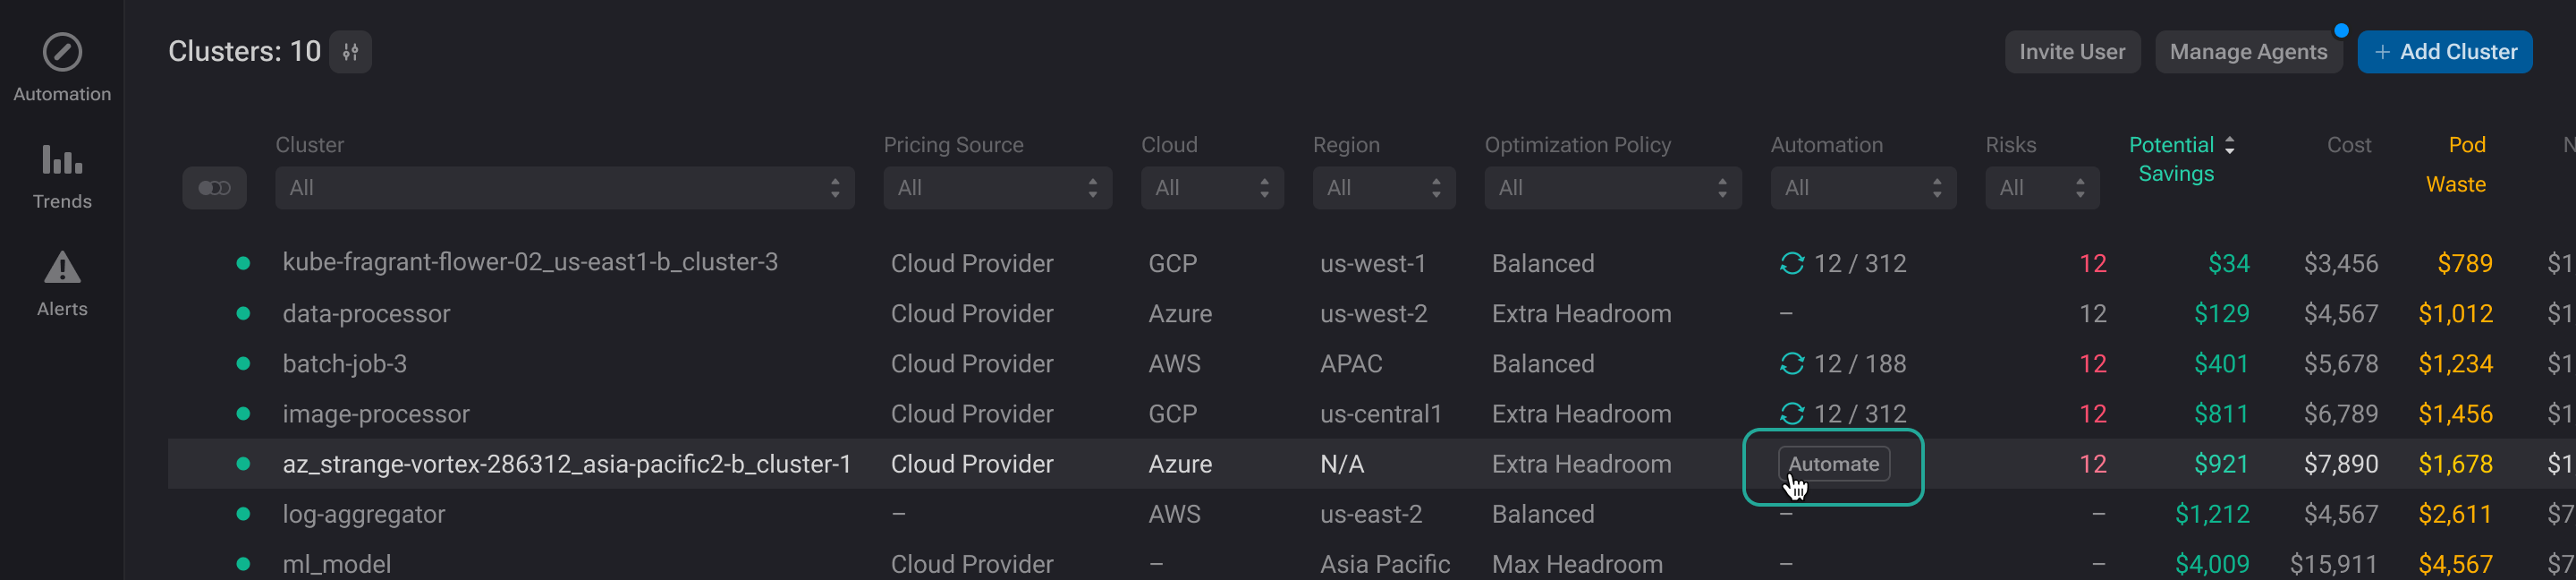
Configuring automation via UI
Clicking the Automate button opens the Automation configuration screen. You have a few options:
- Enable Cluster Automation - enables the automation configuration, but no workloads are automated yet.
This step is required to proceed with automation configuration.
- Automate the entire cluster - autonomous optimization is applied to all workloads within the cluster.
- Automate specific workloads - autonomous optimization is applied only to the workloads you select within the cluster.
UI automation settings overview
This approach is designed to help teams quickly set up automation without the need to dig in and configure automation CR. While it offers less flexibility than a CR-based configuration, it provides everything you need to start optimizing your workloads autonomously.
Automating a cluster
To automate the entire cluster, enable the Cluster Automation toggle. Once done, the Enable button next to the number of workloads in the cluster becomes active. Clicking Enable will turn on all toggles for the workloads automatically. Finally, click Save Changes. Within a few minutes, PerfectScale will begin optimizing the cluster autonomously.
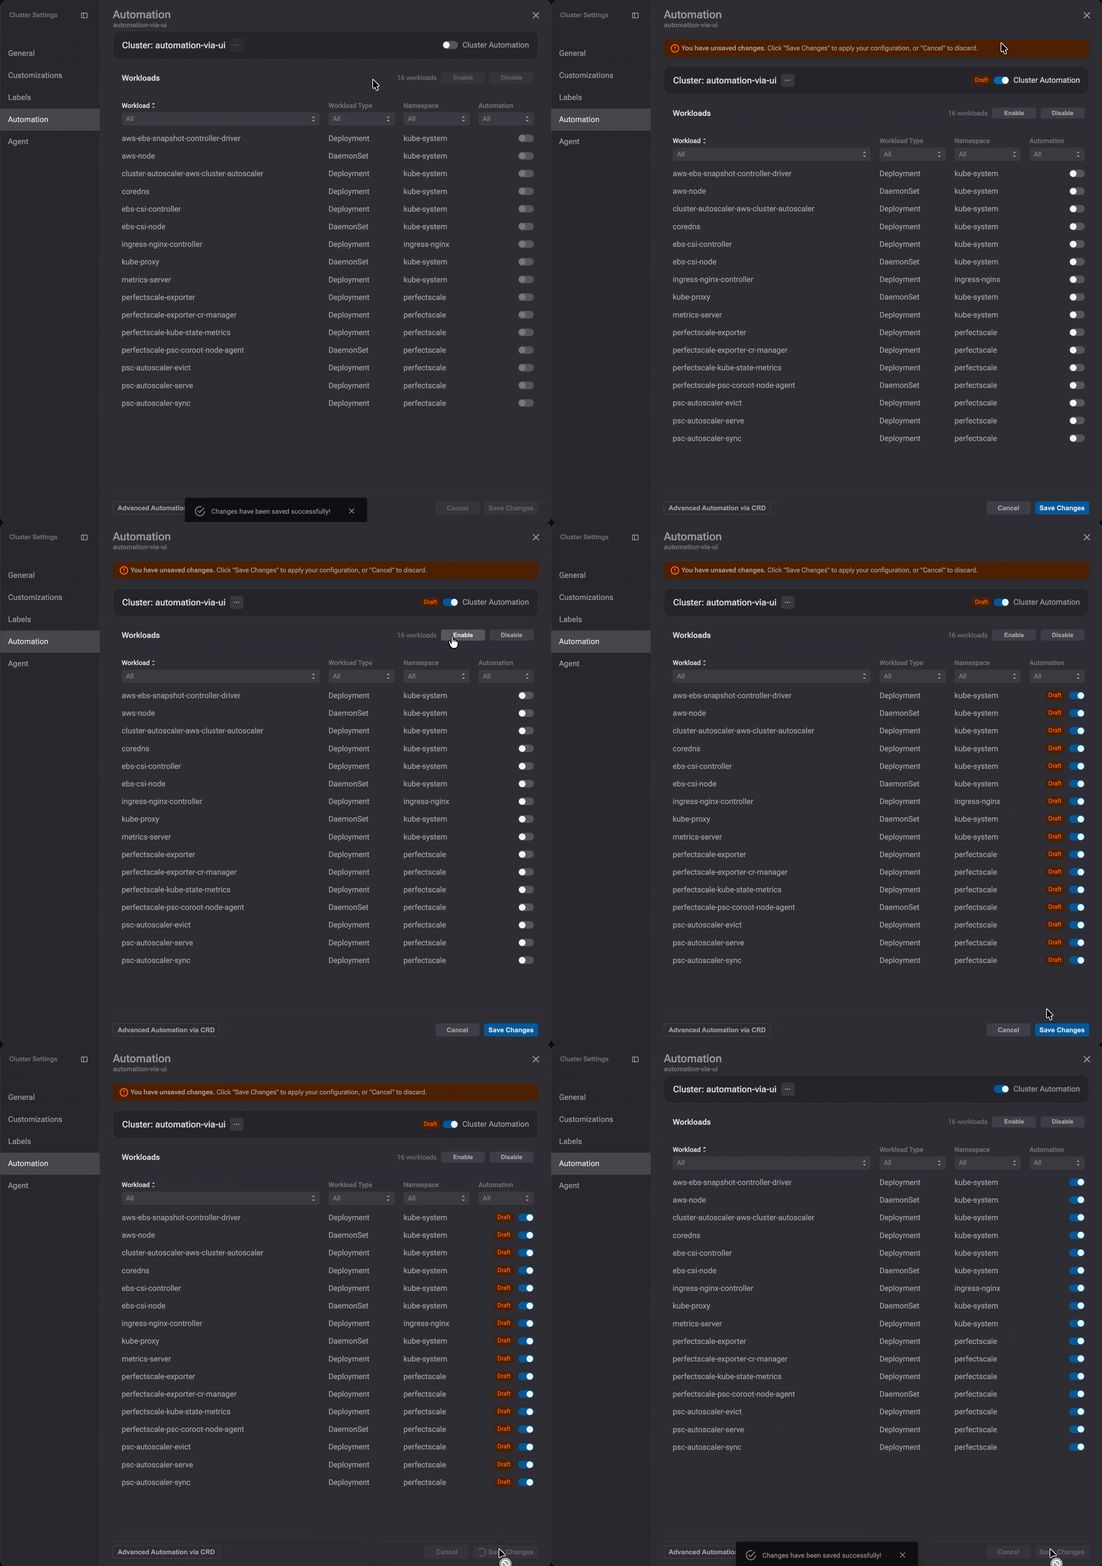
Automating a cluster via UI
Automating specific workloads
To enable automation for specific workloads, first turn on the Cluster Automation toggle. Once enabled, the toggles for individual workloads become active, allowing you to select the ones you want to automate. Click Save Changes, and within a few minutes, PerfectScale will start optimizing the selected workloads autonomously.
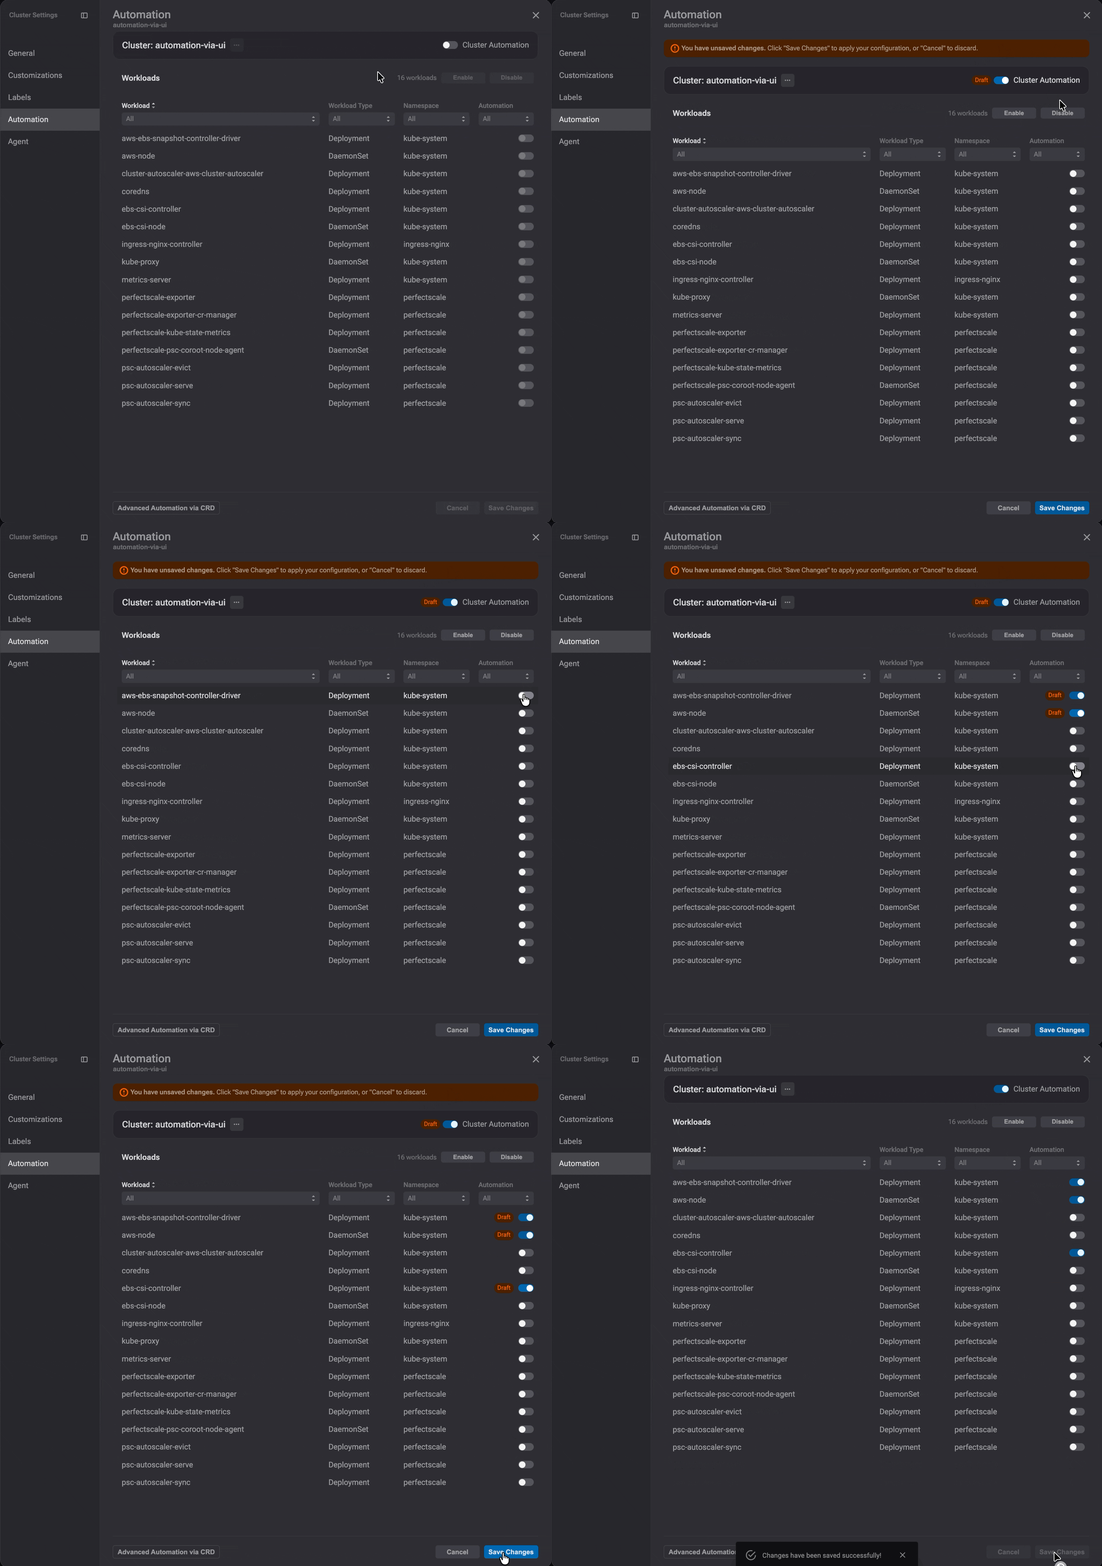
Automating workloads via UI
Alternatively, you can automate a workload directly from its zoom-in window. Click the workload to open the window, then toggle Automation on with a single click. Within a few minutes, PerfectScale will begin optimizing this workload autonomously.
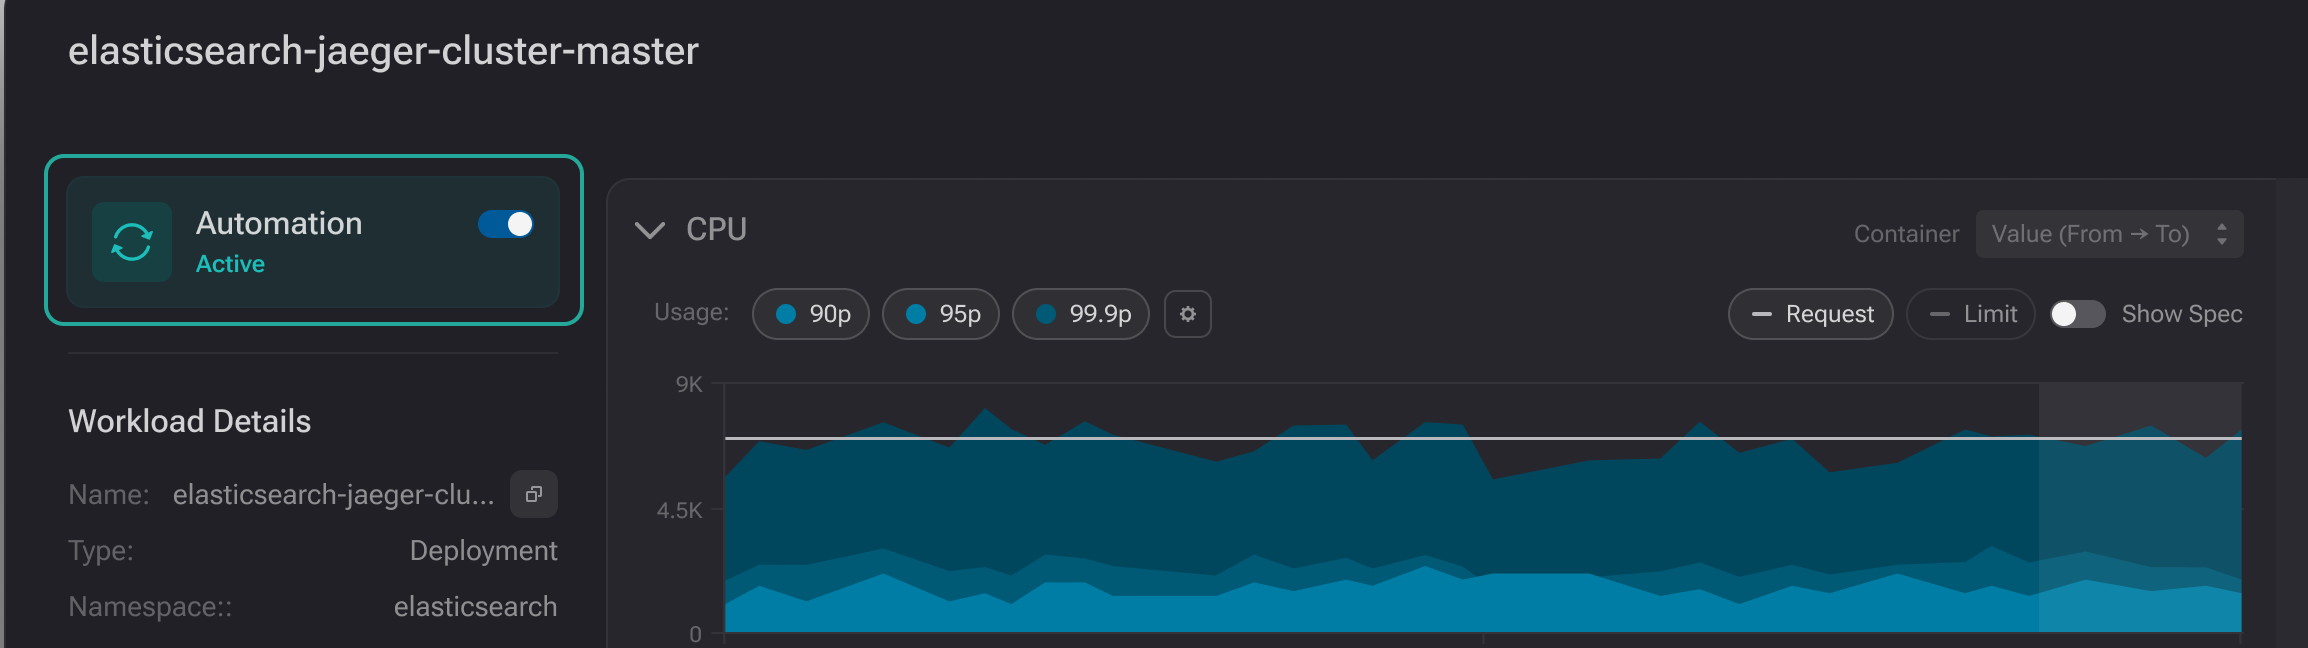
Automating a workload via UI
Automation is applied only to explicitly selected workloads. Newly created workloads are not automated by default. You need to select them in the UI and enable automation manually.
If any system or user-defined limitations prevent automation, or if you are trying to automate an unsupported workload type, a pop-up or automation status will be displayed to notify you. In this case, automation will not be applied.
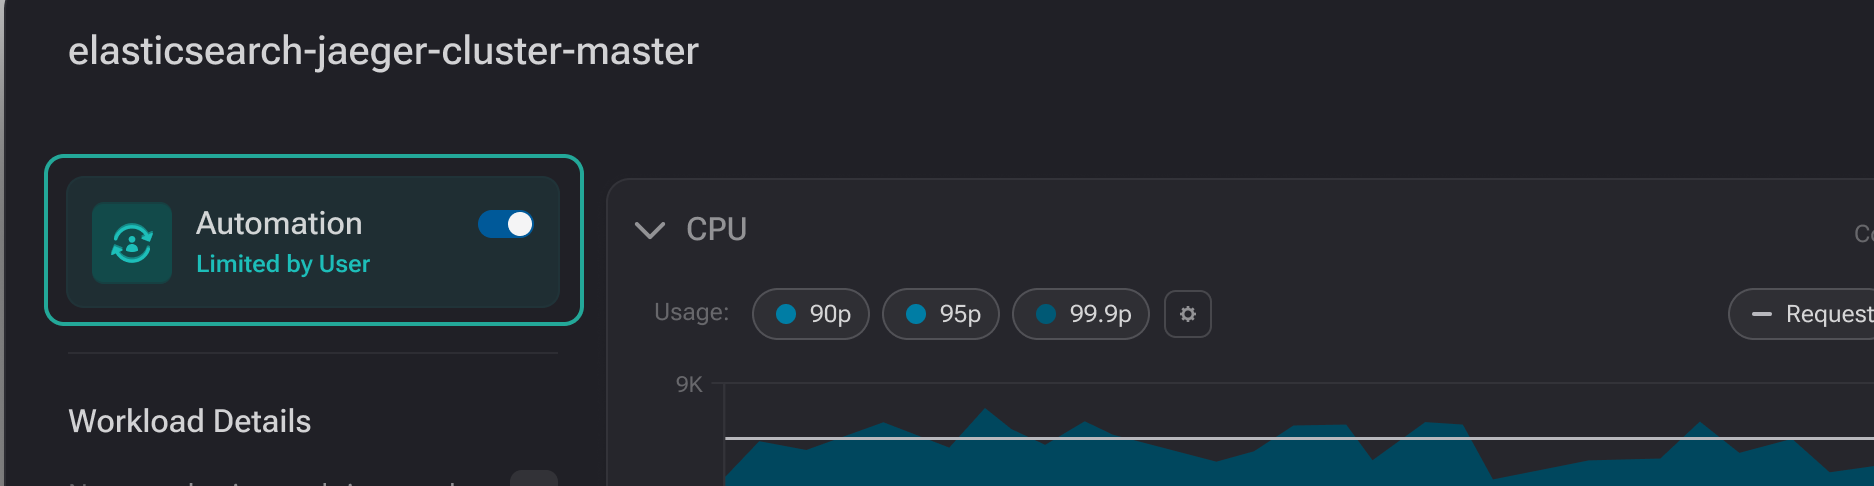
Additional configurations
Additionally, you can choose whether automation should respect your configured CPU limits. Generally, we recommend removing CPU limits to allow workloads to use available CPU resources more freely, improving performance and efficiency.
By default, PerfectScale respects your configured CPU limits.
In most cases, we recommend removing CPU limits so workloads can use available CPU resources more freely, which can improve both performance and efficiency.
To let PerfectScale override configured CPU limits, open the Automation tab in a Cluster Settings, click the three-dot menu next to the cluster name, and clear Keep CPU Limit.
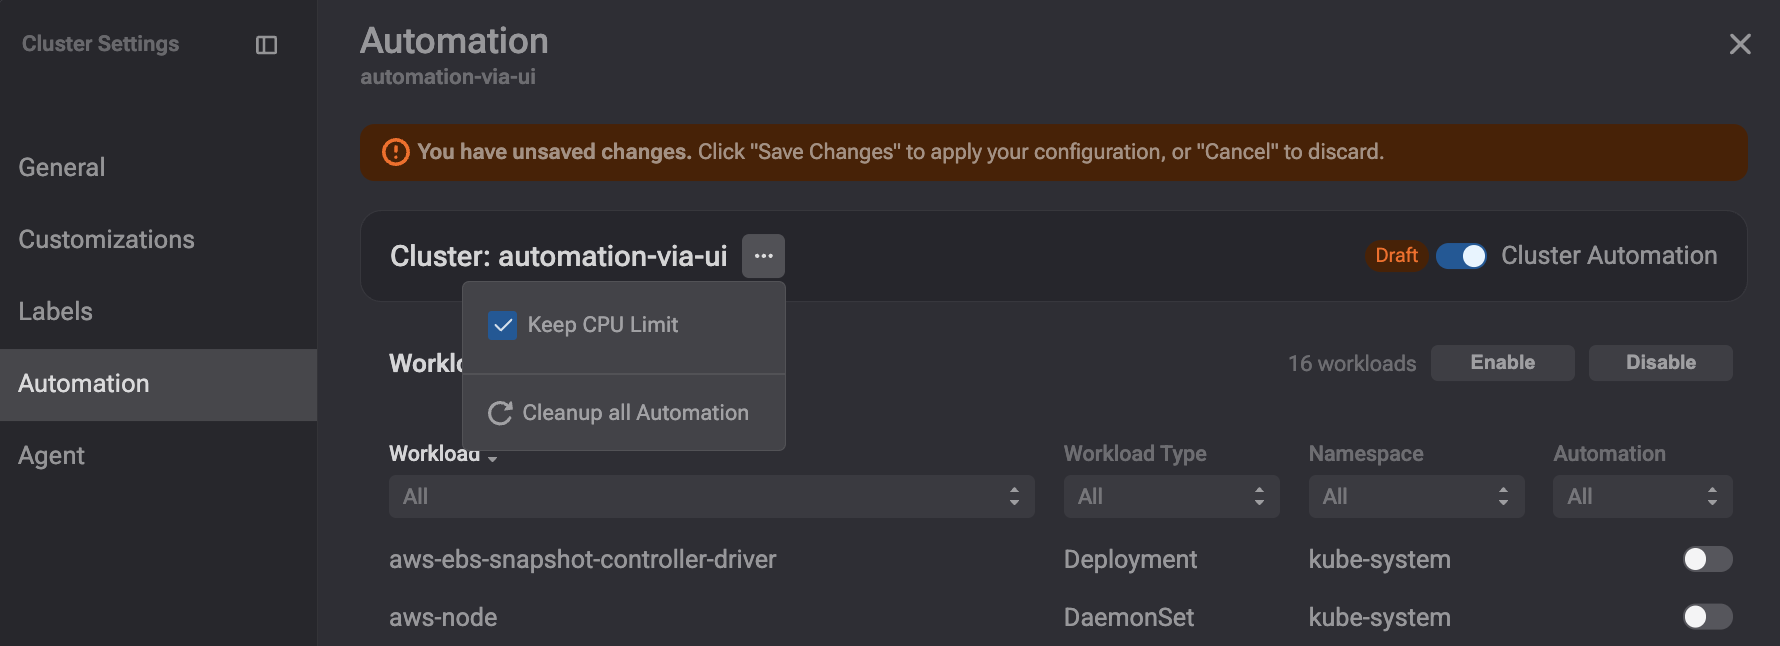
Additional configurations
To revert all automation changes and disable automation for the cluster, click the Cleanup All Automation button and confirm the action.
Keep CPU Limit and Cleanup All Automation are cluster-level settings.
Supported workload types
Automation via the UI supports the same workload types as CR-based automation, including Deployments, DaemonSets, StatefulSets, CronJobs, Jobs, Rollouts, and custom grouped workloads by label. If a workload type is not supported, a corresponding status will be displayed to indicate this.
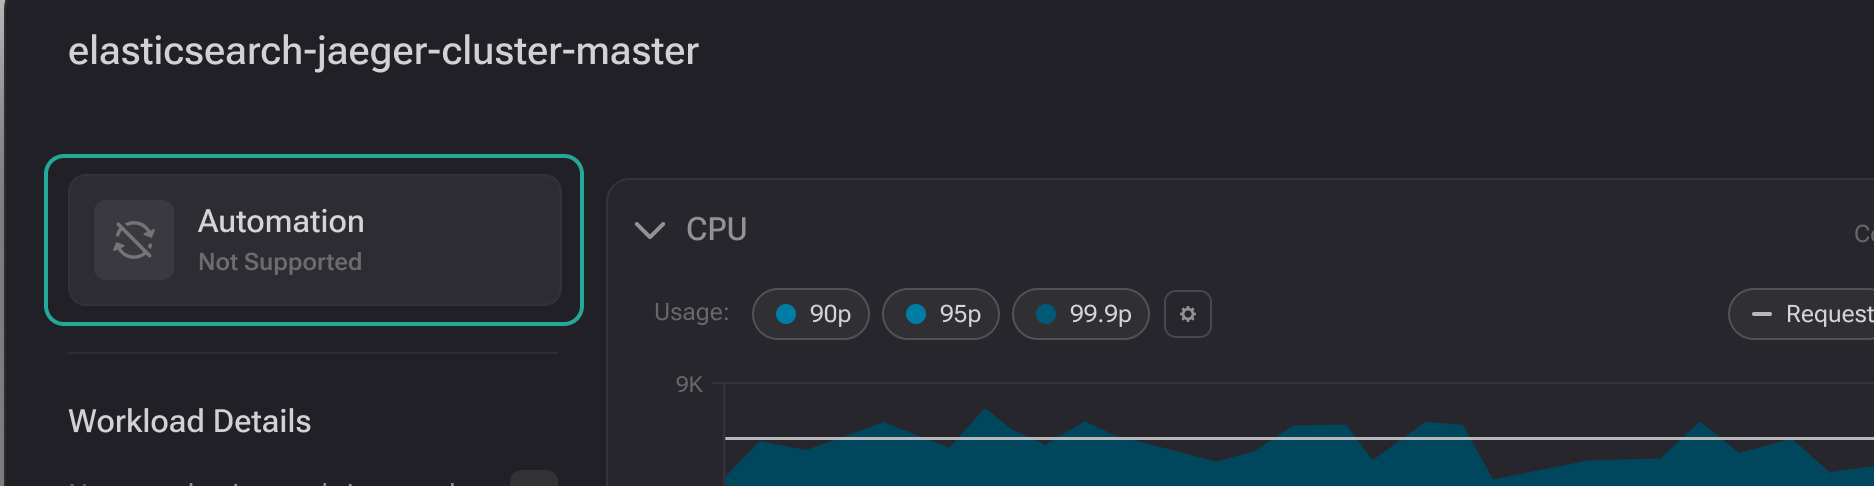
Not supported workload
Automation configuration defaults
| Config | Default |
|---|---|
| stopAllAutomation | false |
| cleanupAllAutomation | false |
| automationMode | Enabled |
| workloadLabelSelectors | nil |
| wasteMaxAutomationFrequency | Deployment: 30m Rollout: 30m CronJob: 30m Job: 30m DaemonSet: 4h StatefulSet: 24h |
| fixResiliencyMaxAutomationFrequency | 30m |
| maintenanceWindowIgnoredForResiliency | false |
| maintenanceWindowIgnoredMinResiliencyLevel | "" |
| maintenanceWindow | |
| workloadMinWasteUSDPerMonth | 5 |
| cpuManagement | request: IncreaseEnabled: false |
| memoryManagement | request: IncreaseEnabled: false |
Disabling automation via UI
You can disable automation in the UI only if it was originally configured through the UI. To do so, open the Automation window, click Disable, and save your changes.
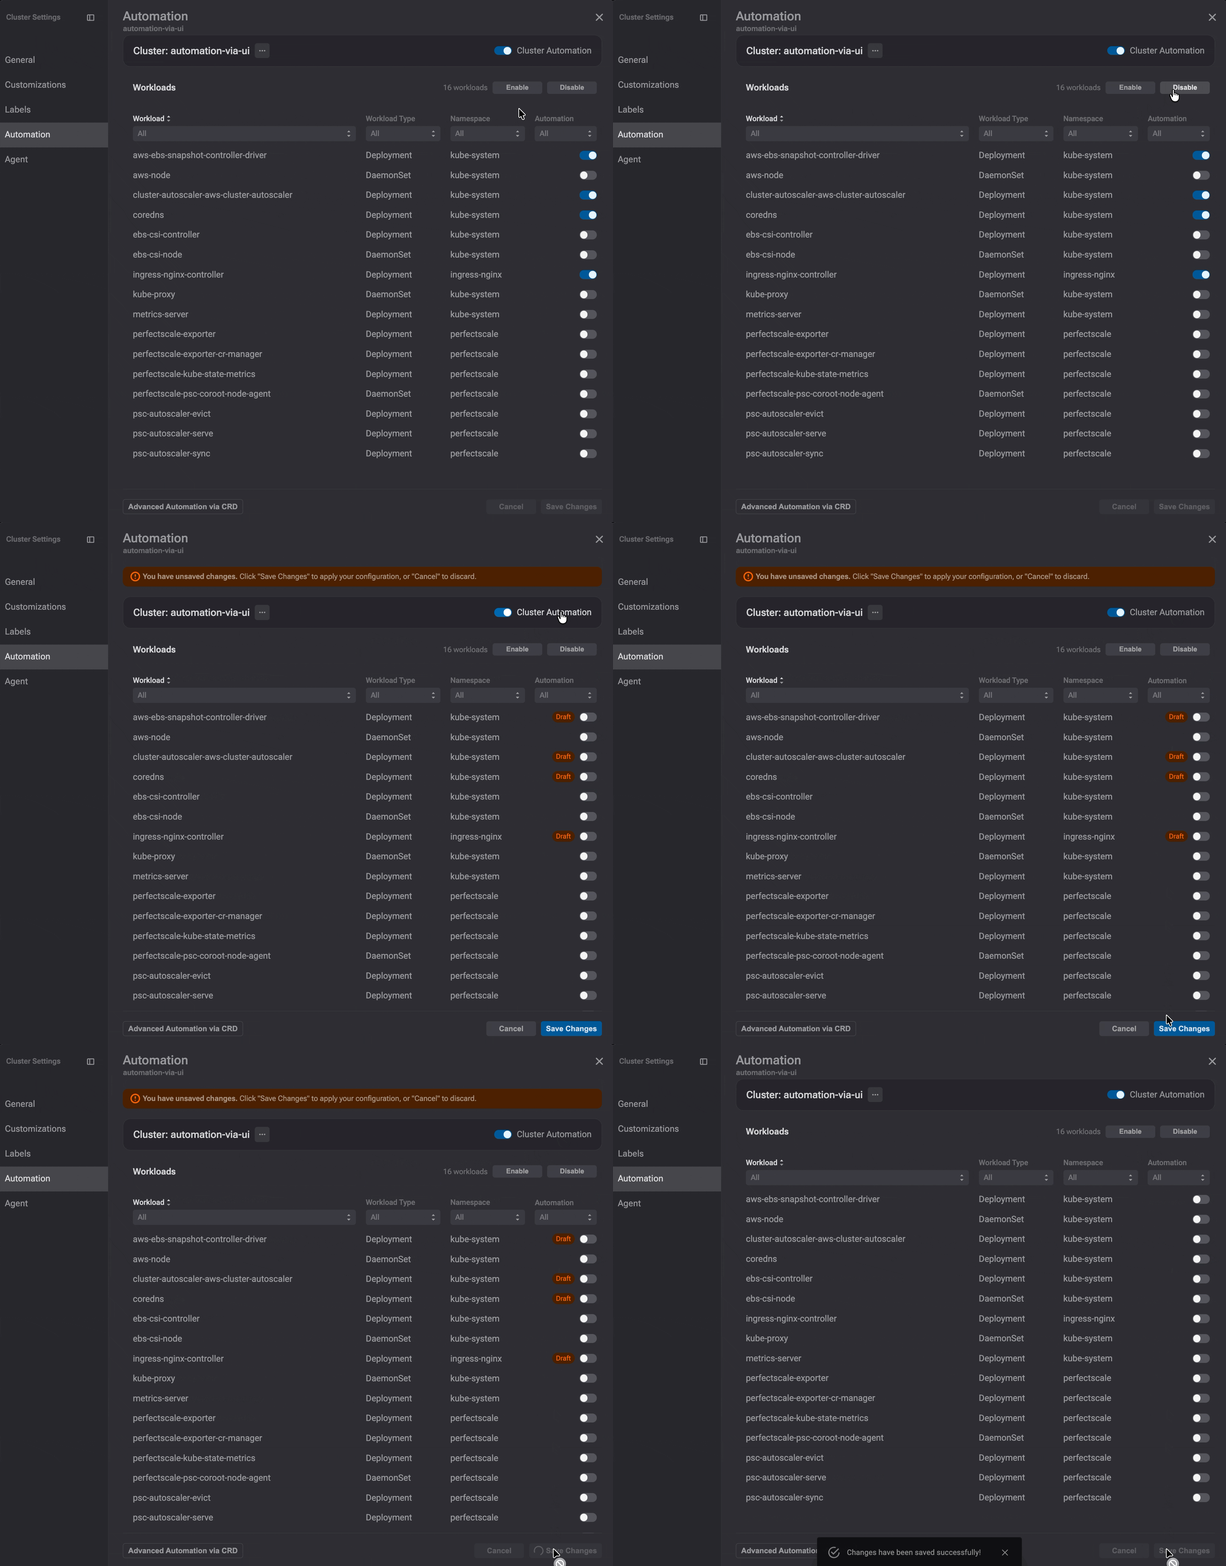
Disabling automation via UI