Customer groups
Customer groups allow you to organize downstream customers into defined sets and restrict user access strictly to their assigned group.
Access customer groups
To access customer groups, sign in to the DoiT console, select Settings (the gear icon
) from the top navigation bar, and then select Customer groups.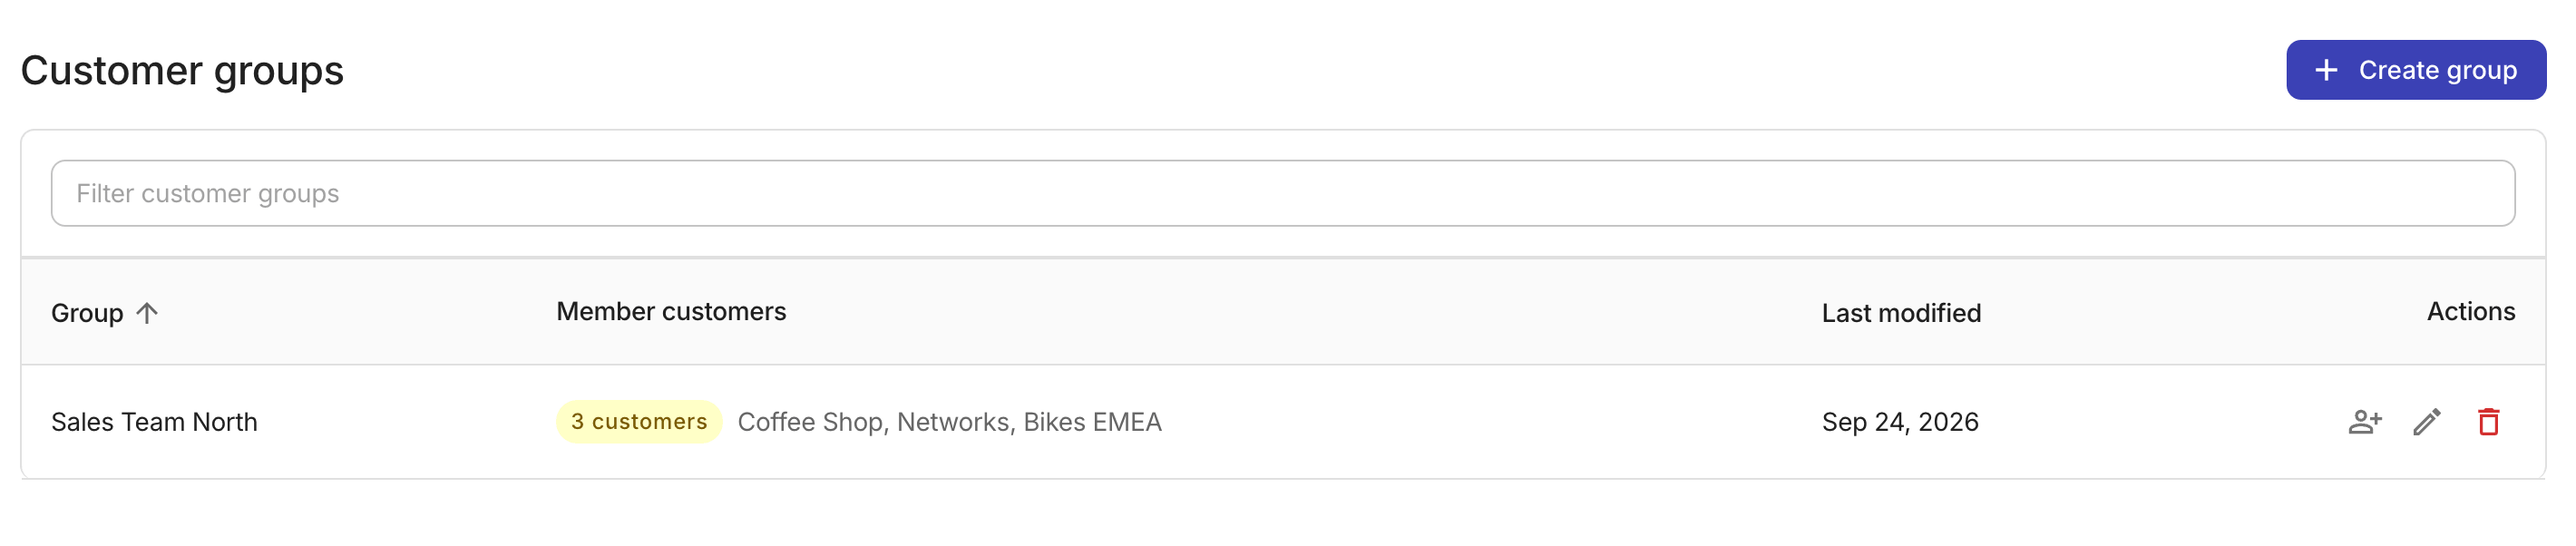
The Customer groups table displays the following information:
-
Group: The name of the customer group.
-
Member customers: The number of customers in the group and member names.
-
Last modified: The date and time the group was last updated.
-
Actions: Select the corresponding icon to manage users, edit the group, or delete the group.
Create a customer group
To create a new group:
-
On the Customer groups page, select Create group.
-
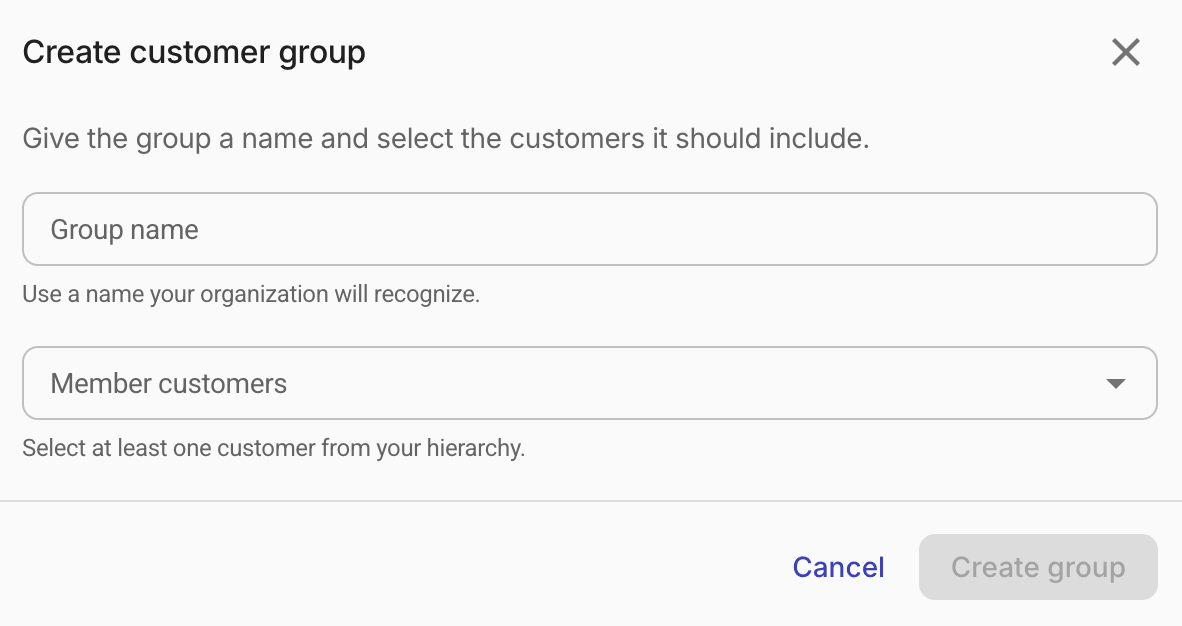
Configure the group.
-
Group name: Specify the group name.
-
Member customers: Select one or more customers from your hierarchy for the new group. Only customers who have already onboarded appear in the dropdown.
-
-
Select Create group to save.
Manage group users
To assign or remove users:
-
On the Customer groups page, locate the group of interest.
-
Select the user icon
to open the Manage users dialog.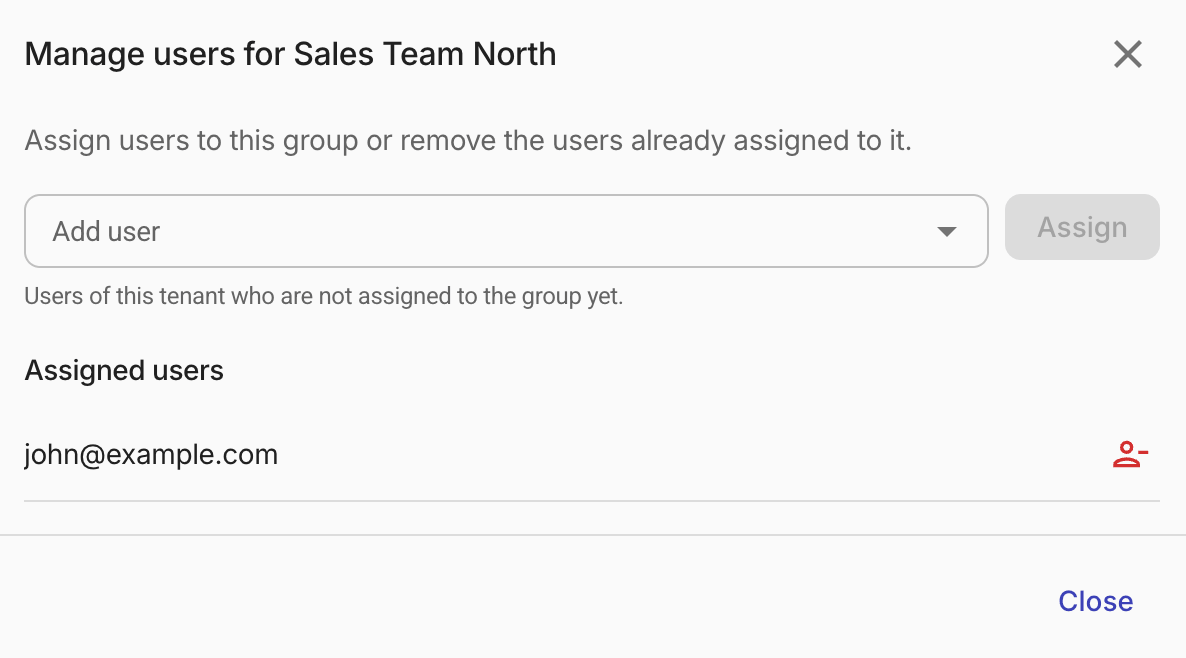
-
To add a user, select the user's email address from the Add user dropdown, and then select Assign.
Assigning a user to a customer group scopes the user's access to the group's member customers.
-
To remove a user, select the unassign icon
next to the email address.
-
Edit a customer group
To edit a group:
-
Select the Edit icon in the row's action column.
-
Update the group name or change the member customers.
-
Save your changes.
Delete a customer group
To delete a group:
-
On the Customer groups page, locate the group of interest.
A group that still has users assigned cannot be deleted.
-
Select the Delete icon in the row's action column.
-
Confirm the deletion.